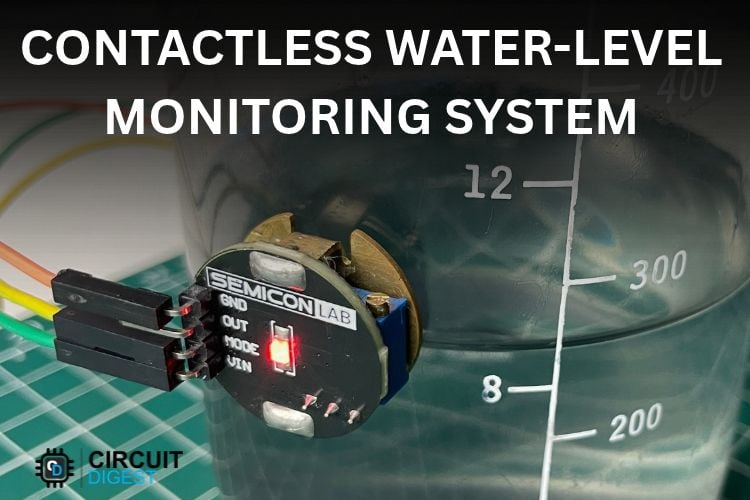
The SemLab Contactless Liquid Level Sense Module is an open-source, liquid level sensor designed for non-invasive fluid detection. By utilising capacitive sensing, the sensor detects the presence of liquid inside a container or pipeline without making direct contact with the fluid. This non-contact design prevents sensor corrosion, contamination, and degradation caused by harsh chemical agents, strong acids, or alkalis, making it ideal for chemical, agricultural, and consumer IoT applications. This sensor is also able to detect water through glass, plastic or even ceramic walls up to 20 mm thick, which makes it reliable for real-world applications. More about this sensor, its specifications, calibration, troubleshooting, etc., are clearly explained in the SemLab Contactless Liquid Level Sense Module Wiki Page. A water level monitoring system tells you whether a tank is full, low or empty without climbing onto the roof to look. In this project, we build a contactless water level monitoring system instead: a SemLab CLS-24BP capacitive sensor is stuck to the outside of the tank wall, and an ESP32 sends the result wirelessly to a second ESP32 using ESP-NOW.
Quick answer: how does this contactless water level sensor circuit work?
- An external capacitive sensor detects the height of water within a tank wall made of glass, plastic or acrylic (thickness less than or equal to 20 mm).
- The open-collector output of the sensor (power supply requirements: 5–24 V, with a response time of 800 ms or less) is connected to an ESP32 transmitter that relays the information over ESP-NOW every second.
- The signal is received on another ESP32 and displayed; it can also be substituted by a relay, buzzer, OLED display, or web-based dashboard.
- Because the OUT pin on the sensor outputs nearly 5 V, a voltage divider must be used before connecting to the ESP32 GPIO. This is further elaborated in the circuit section below.
- The sensor detects only one water height. To determine the full state, half state, and empty state, one sensor should be used at each water level.
Table of Contents
- SemLab Contactless Liquid Level Sense Module
- What Is a Contactless Water Level Monitoring System?
- SemLab-CLS-24BP SENSOR PINOUT
- Components Required
- Non-Contact Water Level Sensor Circuit Diagram
- How the Wireless Water Level Monitor Works
- Hardware Overview
- Results
- Live Video Demonstration
- Code Explanation
- Troubleshooting
- GitHub Repository
SemLab Contactless Liquid Level Sense Module
The sensor is shipped in a bare PCB style with pin headers attached, making it highly accessible for hobbyists to integrate into their own projects. Here in this project, we are going to use the same sensor to build a contactless wireless water level monitoring system. We are going to make use of ESP-NOW to transfer the data about water level from the transmitter to the receiver. Any kind of communication protocol or sensors can be used as per requirements; here, in this tutorial, we are going to demonstrate it with ESP-NOW. Also, there are a number of water level sensors available in the market these days, starting from a basic float switch. Here is a basic example from us using an immersible water level sensor that demonstrates how to interface an Immersible Water Level Sensor with an Arduino UNO.
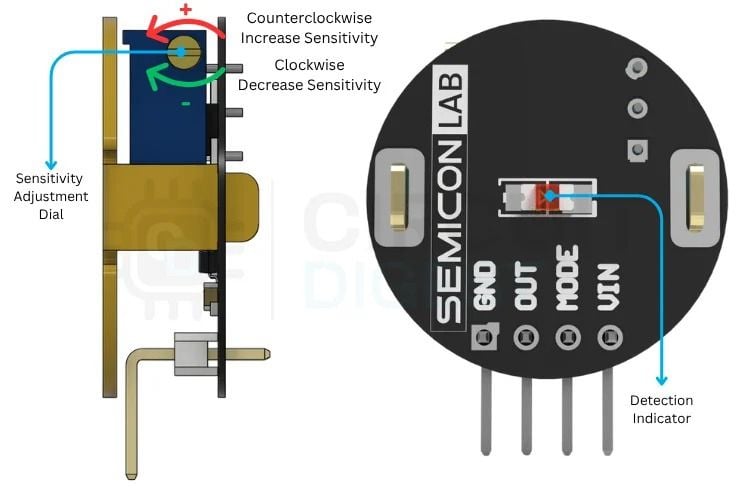
The sensor has 4 pins. VIN is for power input. The input can be between 5V and 24V. MODE pin is used to select the operational mode. If it's left floating, the sensor operates in NPN mode and grounding it will make the sensor operate in PNP mode.OUT is the signal output from the sensor. It will either be a digital high or digital low. Then we have GND, the ground pin. On the side, we have a trimpot that can be used to adjust the detection sensitivity. This project is also a perfect example of an IoT project.
What Is a Contactless Water Level Monitoring System?
A Contactless Water Level Monitoring System refers to a system which detects the water level from outside the tank, provides the data to a controller which indicates the water level or performs an action based on the water level data. A sensor in a basic form can be said to be a contactless water level indicator, as it indicates the presence of liquid at a particular height through its LED. By adding a microcontroller to this sensor, it can now turn into a remote water level monitoring system.
Since the sensor does not come in contact with water, it avoids issues related to corrosion, scaling, and contamination. This makes it ideal for use in tanks containing potable water, aquariums, agricultural tanks, and chemical tanks as long as the tank wall is not made of metal. A water level float switch is the usual first choice for a tank because it is simple and can switch a pump directly. A contactless sensor solves a different set of problems.
SemLab-CLS-24BP Sensor Pinout
The SemLab Contactless Liquid Level Sense Module is an open-source, capacitive water level sensor (contactless). Below are the pin specifications of the SemLab Contactless Liquid Level Sense Module (SemLab-CLS-24BP) explained in a table for reference.
| Header Pin | Silk Screen Name | Connection Destination |
| 1 | VIN | DC Power Supply Positive 5V to 24V supply rail |
| 2 | MODE | Output Mode Selection: Tie to GND for PNP Mode; Leave Floating for NPN Mode |
| 3 | OUT | Transistor Signal Output (Connect to PLC input, relay, or microcontroller) |
| 4 | GND | Power Supply Negative (GND) / System Ground (0V) |
Components Required for Contactless Water Level Monitoring System
Below is the list of components required to build this project.
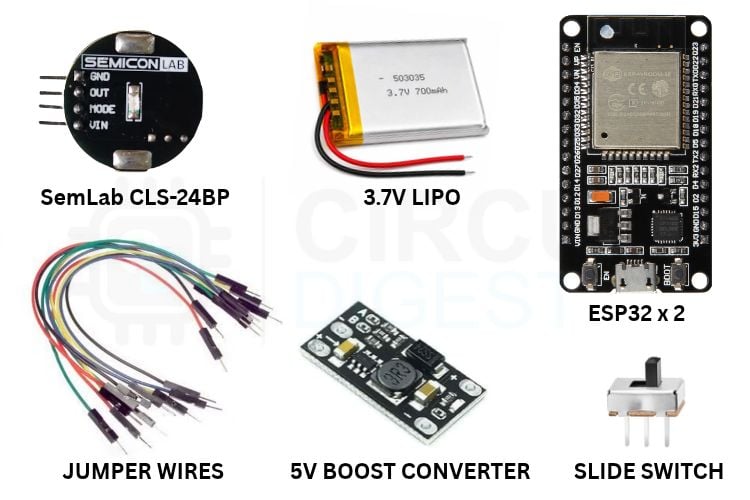
| S No | Component | Description | Quantity |
| 1 | SemLab CLS-24BP | Main sensor to detect Liquid | 1 |
| 2 | 3.7V LIPO | Powers up the TX circuit | 1 |
| 3 | ESP32 | Main controller for TX and RX | 2 |
| 4 | JUMPER WIRES | Connect the components | - |
| 5 | 5V BOOST CONVERTER | To boost the 3.7V DC to 5V DC | 1 |
| 6 | SLIDE SWITCH | Power switch | 1 |
We have the main SemLab CLS-24BP sensor to detect the liquid level or presence. We have used a 3.7V LIPO battery here as it was easy to integrate it into the 3D-printed enclosure. Two ESP32 dev modules are required, one for TX and the other for RX. Any 5V boost converters will work here. We have some jumper cables to connect the components as per the circuit diagram, and then we have a slide switch to power on/off the transmitter device. The receiver is the second ESP32 that will be plugged into the laptop to view the data sent by the TX.
Non-Contact Water Level Sensor Circuit Diagram
We are using ESP32-Dev Modules for the demonstration. Any ESP modules that have support for ESP-NOW can be used. Combinations of different ESP boards can also be used for this.
Basically, there are two circuits: one is for the transmitter, and the other is for the receiver. The SemLab-CLS-24BP OUT pin is connected to GPIO pin 13. For the demonstration, a single LIPO cell is used to power the whole transmitter circuit. We are using a 5V boost converter, the XL3608, to power the ESP32 as well as the SemLab contactless water level sensor as well. That is all about the transmitter circuit.

About the receiver circuit, we actually do not have a lot of components connected to it, as we are just plugging it into a laptop and displaying the received data in the serial monitor. Keeping this as a base for your project, this can be further expanded, like displaying the logs on an OLED screen or a web-based dashboard or something that suits your requirements. There was no noticeable TX-RX delay; the whole process was happening almost in real time. We have previously made an Overhead Water Level Monitoring System. If interested, do check it out.
How the Wireless Water Level Monitor Works
Here, we’re going to build a contactless wireless water level monitoring system. The working is easy. The SemLab Contactless Liquid Level Sense Module gives a digital high or low for water detected and water not detected. We don't want to make holes or insert any metal rods inside the water tank, but just mount this contactless water level sensor on the tank body. It can read the water level through glass, plastic or ceramic walls up to 20 mm thick.
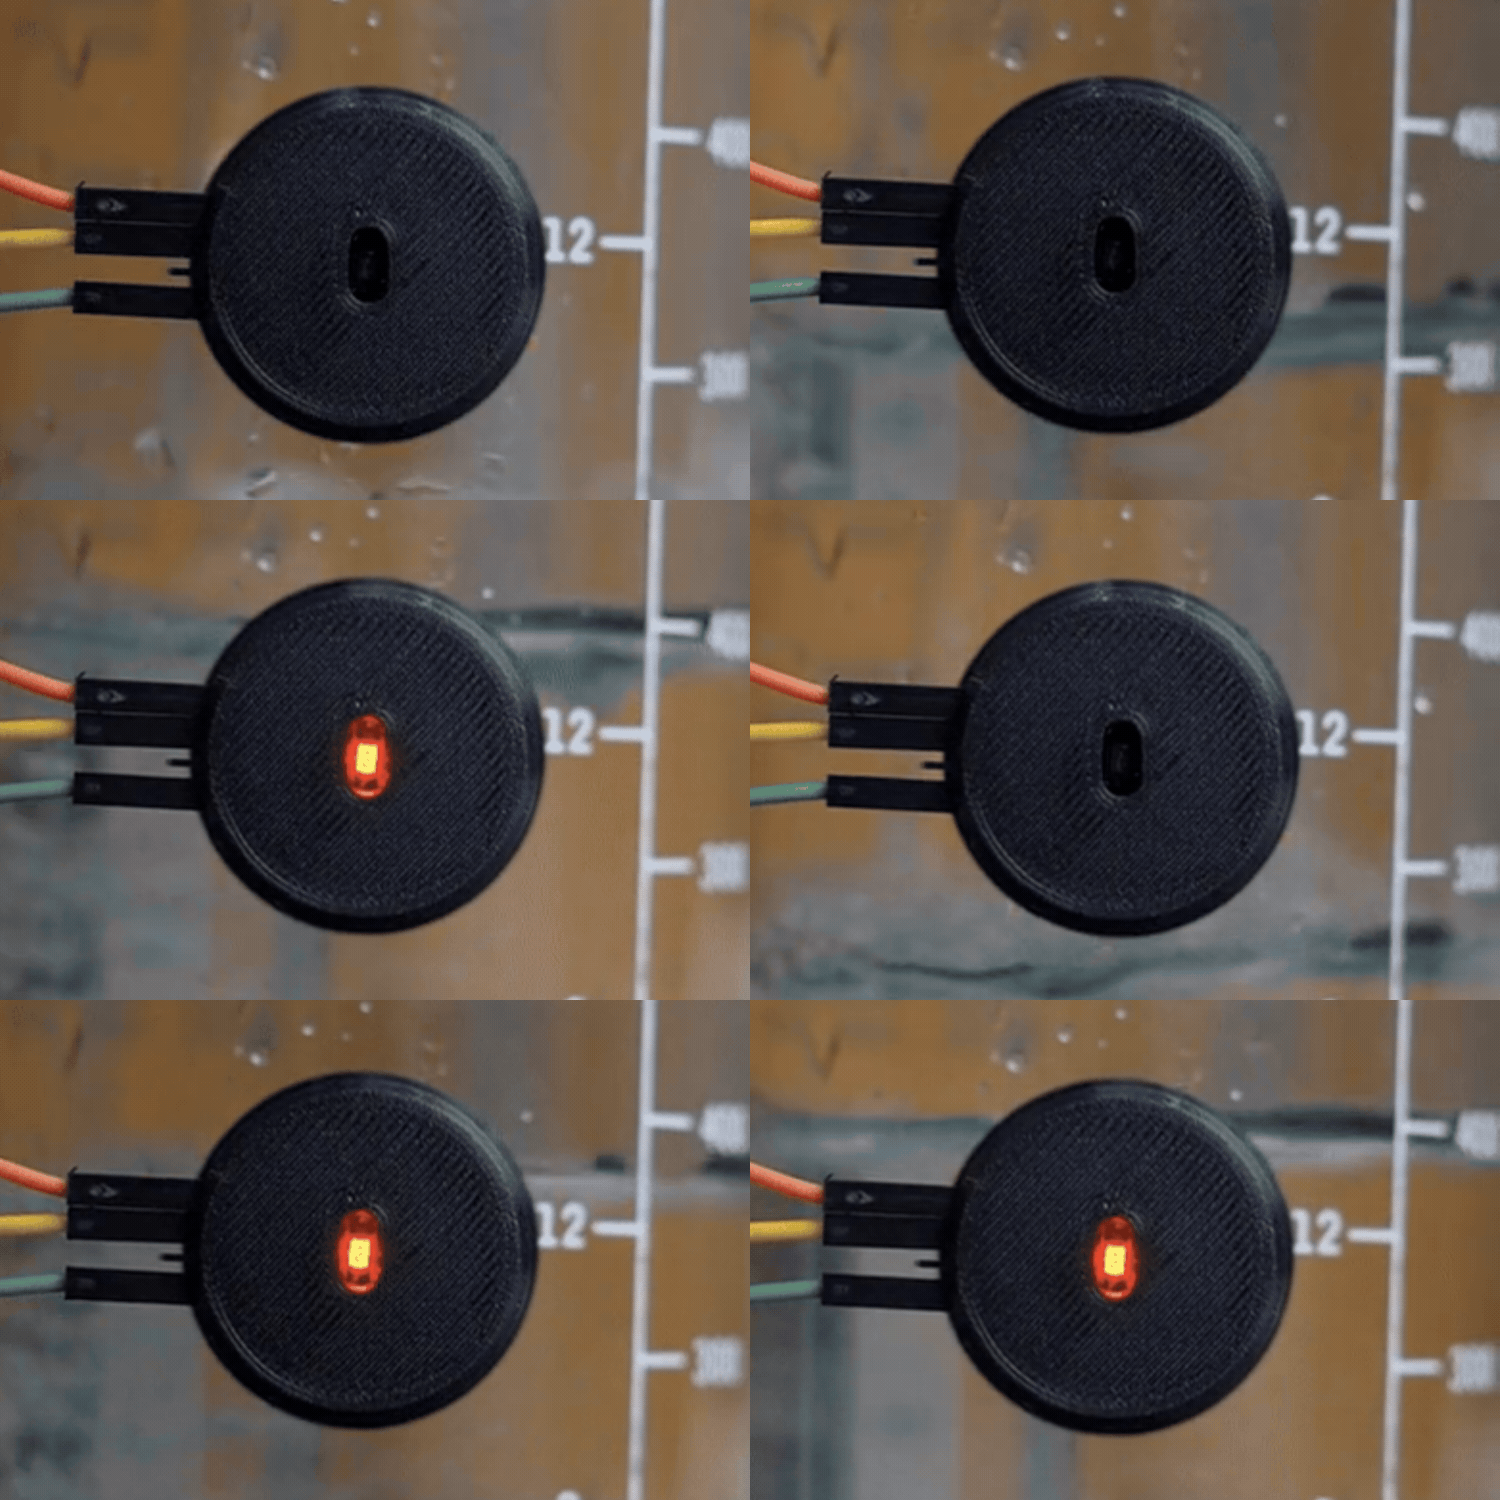
Here, when the water level rises and reaches the sensor level, the OUT pin provides a digital high to the ESP32. This transmitter ESP32 instantly delivers this data to the receiver ESP32 via ESP-NOW. The receiver is connected to our laptop. So, we can see the logs it receives in the Serial Monitor.
Hardware Overview
Below is the whole hardware setup of this project. The whole Transmitter part is kept inside a 3D-Printed enclosure and is provided with a battery so that it operates remotely. A toggle button toggles the power on and off to the 5V Boost converter. The transmitter ESP32 sits in the lower face of the enclosure. The Receiver is so easy; it has just an ESP32. Since we are reading the data from the serial monitor, it's not connected to any OLED display or other external devices.
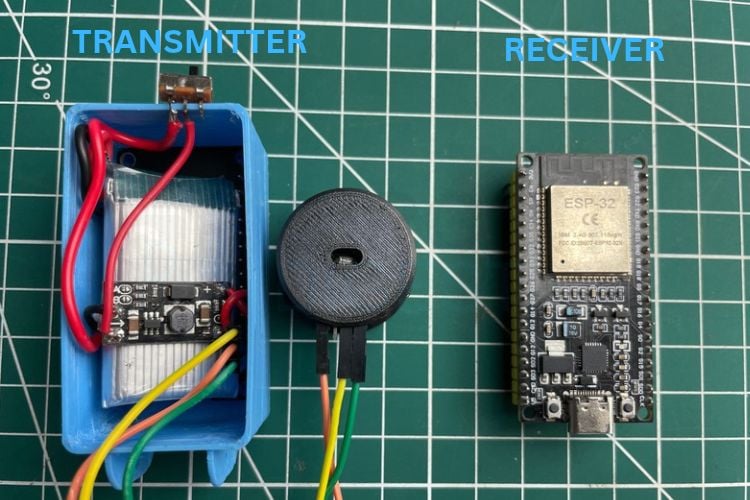
Below is how the sensor works indoors with a water bottle. Here, we have used it in the NPN configuration, so that it gives a high signal when water is detected. In this mode, the MODE pin is left floating. The onboard LED indication is clearly visible on the sensor as well.
Results: Testing the Contactless Water Level Sensor
Below is the log that can be seen in the serial monitor screen of the receiver ESP32. We can alter this to create some external indications as well. When Liquid is not detected, it shows Liquid not detected, and when Liquid is detected, it shows Liquid Detected. The response depends on the MODE pin configuration. If it's floating, it behaves like a PNP switch, meaning the output will be LOW when liquid is detected; if it's grounded, it behaves like an NPN switch, and the output will be HIGH when liquid is detected.
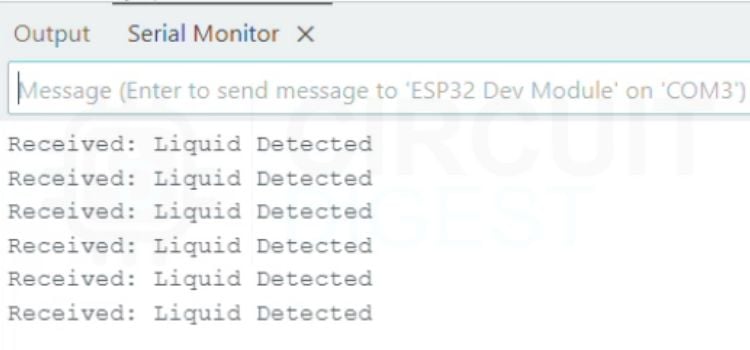
In place of these logs, we can make some actions like triggering a relay or something like that as well. This log displayed is just meant to demonstrate the sensor’s working and how it behaves in different configurations.
Live Video Demonstration
This is the video demonstration of the whole project. We have demonstrated it indoors as well as with a real outdoor water tank as well.
Code Explanation
Below is the code explanation for the whole project. The code for the transmitter and receiver is explained individually below.
Transmitter
Transmitter code for the contactless water level monitoring system.
uint8_t broadcastAddress[] = {0xFF, 0xFF, 0xFF, 0xFF, 0xFF, 0xFF};
typedef struct struct_message {
 bool liquidDetected;
} struct_message;
struct_message myData;
esp_now_peer_info_t peerInfo;
Stores the unique 6-byte MAC address of your Receiver ESP32 so the TX board knows where to send packets. Define a custom data structure holding a single boolean. Both TX and RX boards must use this exact structure to interpret the message properly.
void setup() {
Serial.begin(115200);
pinMode(SensePin, INPUT);
WiFi.mode(WIFI_STA);
if (esp_now_init() != ESP_OK) {
  Serial.println("Error initializing ESP-NOW");
  return;
}
esp_now_register_send_cb(OnDataSent);
memcpy(peerInfo.peer_addr, broadcastAddress, 6);
peerInfo.channel = 0;
peerInfo.encrypt = false;
if (esp_now_add_peer(&peerInfo) != ESP_OK) {
  Serial.println("Failed to add peer");
  return;
}
}
Sets GPIO 13 to read incoming voltage from the sensor. WiFi.mode() puts the ESP32 into Station mode, which is required for ESP-NOW operation. esp_now_init() starts the ESP-NOW protocol stack. memcpy & esp_now_add_peer() together copy the receiver's MAC address into peerInfo and register the receiver as a trusted peer board on channel 0 without encryption.
void loop() {
bool currentState = digitalRead(SensePin);
myData.liquidDetected = currentState;
if (currentState) {
  Serial.println("Liquid Detected - Sending state...");
} else {
  Serial.println("No Liquid Available - Sending state...");
}
esp_now_send(broadcastAddress, (uint8_t *) &myData, sizeof(myData));
delay(1000);
}
digitalRead(SensePin) checks if GPIO 13 receives HIGH (3.3V, water present) or LOW (0V, no water) and logs the reading locally on the Serial Monitor. esp_now_send() sends myData directly to broadcastAddress. It pauses for 1 second (delay(1000)) before repeating the cycle.
Receiver
Receiver code for the contactless water level monitoring system.
void OnDataRecv(const esp_now_recv_info *info, const uint8_t *data, int len) {
memcpy(&incomingData, data, sizeof(incomingData));
if (incomingData.liquidDetected) {
  Serial.println("Received: Liquid Detected");
} else {
  Serial.println("Received: No Liquid Available");
}
}
const esp_now_recv_info *info is the signature compatible with ESP32 Arduino Core v3.x, carrying metadata like the sender's MAC address and signal strength (RSSI). memcpy(&incomingData, data, sizeof(incomingData)) copies the raw byte buffer (data) straight into your incomingData structure. Then, check incomingData.liquidDetected. If true (1), it prints "Received: Liquid Detected". If false (0), it prints "Received: No Liquid Available".
void setup() {
Serial.begin(115200);
WiFi.mode(WIFI_STA);
if (esp_now_init() != ESP_OK) {
  Serial.println("Error initializing ESP-NOW");
  return;
}
esp_now_register_recv_cb(OnDataRecv);
}
Serial. begin(115200) initialises Serial Communication at 115200 baud for debugging. WiFi.mode(WIFI_STA) sets the ESP32 to Station Mode (required for ESP-NOW radio operation). esp_now_init() powers up the ESP-NOW radio stack. esp_now_register_recv_cb(OnDataRecv) attaches OnDataRecv as the official event handler for incoming wireless packets.
void loop() {
 // Callback handles data as it arrives
}
The loop() function is empty because the receiver operates asynchronously via hardware interrupts. The callback handles everything as soon as a packet hits the antenna.
Troubleshooting
| Symptom | Likely cause | Fix |
| LED never turns on | No power, reversed polarity, supply below 5V, or sensitivity too low | Check wiring and supply voltage |
| Output flickers | Air gap under the sensor, noisy supply, or turbulence at the sensor height | Re-stick the sensor tightly; keep supply ripple low; move it away from the inlet |
| Reading is inverted | MODE pin wired the opposite way | Floating = NPN (LOW on liquid); GND = PNP (HIGH on liquid); match your code |
| Receiver shows nothing | ESP-NOW not initialised or boards out of range | Check Serial output for "Error initialising ESP-NOW"; use WIFI_STA mode on both; move closer |
Conclusion
This open-source contactless water level monitor bridges the gap between high-cost commercial hardware and reliable DIY home automation. By pairing a ₹150 non-contact sensor with the zero-latency, router-free ESP-NOW protocol, you eliminate sensor corrosion, prevent water contamination, and solve the hassle of climbing onto the roof just to check your tank. It's not just for water level or tanks; this sensor can be used to measure water flow as well without making any contact with the water pipes. This way, we can replace traditional water flow sensors with the SemLab CLS-24BP Contactless Liquid Level Sense Module.
Whether integrated into home automation platforms, expanded with web UIs, or deployed with custom alarms, this modular setup in this project provides a cost-effective, scalable foundation for smart liquid monitoring. All open-source files, code, and schematics are ready for deployment and customisation.
GitHub Repository
Explore circuit diagrams, hardware setup, source code, and implementation details for smart water monitoring. Includes transmitter and receiver Arduino code, wiring details and calibration notes. Transmit real-time liquid detection data between ESP32 boards using the ESP-NOW wireless communication protocol.


Related Projects on Smart Water Management
Explore practical implementations of smart water management using Arduino, ESP32, and various sensing technologies. From detecting liquid levels to measuring water flow and automating irrigation, these projects offer insights into efficient and intelligent water control systems.

How Does a Contactless Liquid Level Sensor Work
In this article, we are going to look at a capacitive contactless liquid-level sensor XKC-Y26-V. We will go through its features, and we will also see how to interface it with an Arduino.

Arduino Smart Irrigation System Using ESP32 and Blynk App
In this project, we'll explore an IoT-based irrigation system using the ESP32 board and Blynk app. It's a project based on the Internet of Things (IoT), the smart irrigation system offers numerous possibilities to automate the entire irrigation process.
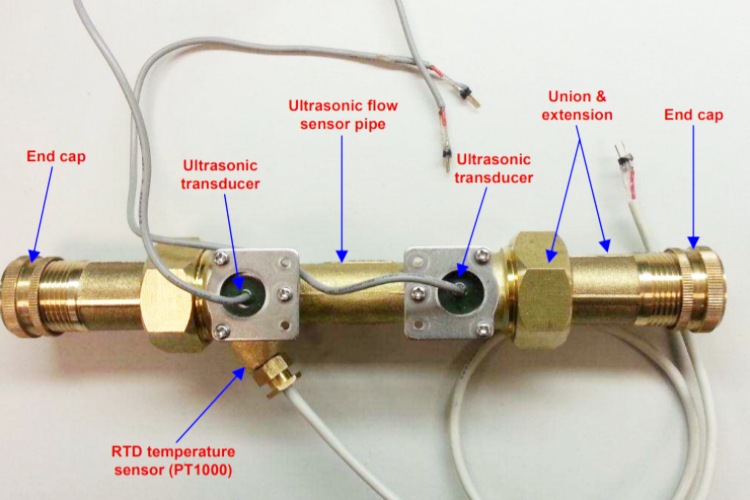
Understanding Ultrasonic Flow Meters and Their Working Principle in Water Flow Measurement
For this article, we will be looking at everything around the Ultrasonic Flow Meter, how they work, advantages, and disadvantages. Ultrasonic Flow meters provide a non-invasive, very reliable means of determining the amount of fluid flowing through a vessel.
Complete Project Code
#include <esp_now.h>
#include <WiFi.h>
const int SensePin = 13;
// Replace with your Receiver's MAC Address
uint8_t broadcastAddress[] = {0xFF, 0xFF, 0xFF, 0xFF, 0xFF, 0xFF};
typedef struct struct_message {
 bool liquidDetected;
} struct_message;
struct_message myData;
esp_now_peer_info_t peerInfo;
// Updated callback function signature for ESP32 Arduino Core v3.x
void OnDataSent(const wifi_tx_info_t *info, esp_now_send_status_t status) {
 Serial.print("Delivery Status: ");
 Serial.println(status == ESP_NOW_SEND_SUCCESS ? "Success" : "Fail");
}
void setup() {
 Serial.begin(115200);
 pinMode(SensePin, INPUT);
 WiFi.mode(WIFI_STA);
 if (esp_now_init() != ESP_OK) {
   Serial.println("Error initializing ESP-NOW");
   return;
 }
 esp_now_register_send_cb(OnDataSent);
 memcpy(peerInfo.peer_addr, broadcastAddress, 6);
 peerInfo.channel = 0;
 peerInfo.encrypt = false;
 if (esp_now_add_peer(&peerInfo) != ESP_OK) {
   Serial.println("Failed to add peer");
   return;
 }
}
void loop() {
 bool currentState = digitalRead(SensePin);
 myData.liquidDetected = currentState;
 if (currentState) {
   Serial.println("Liquid Detected - Sending state...");
 } else {
   Serial.println("No Liquid Available - Sending state...");
 }
 esp_now_send(broadcastAddress, (uint8_t *) &myData, sizeof(myData));
 delay(1000);
}