

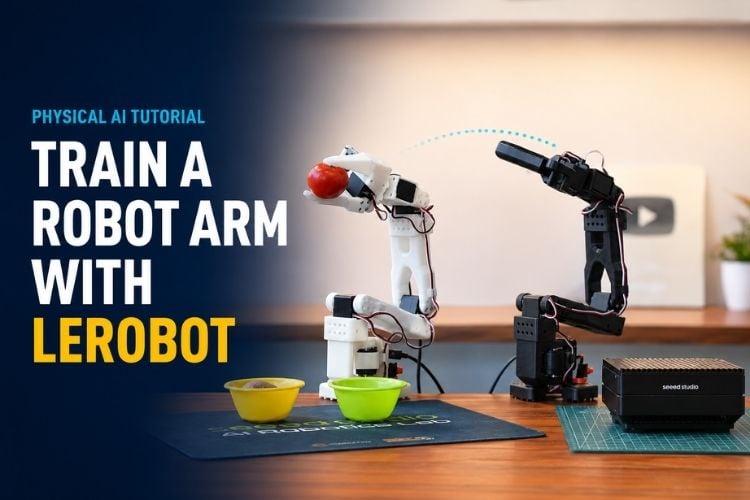
In this Physical AI tutorial, we will train a real robotic arm using Hugging Face LeRobot and imitation learning. The project uses the Seeed Studio SO-ARM101 leader–follower robotic arm and a reComputer J4012 powered by NVIDIA Jetson Orin NX.
We begin by configuring and calibrating the SO-ARM101, followed by teleoperation and dataset collection. We then record 150 human demonstrations, train an ACT policy using LeRobot and test whether the robotic arm can autonomously sort tomatoes and potatoes. This step-by-step LeRobot tutorial covers the complete workflow, including hardware setup, motor configuration, calibration, teleoperation, dataset recording, AI model training, troubleshooting and real-world evaluation. By the end, you will have everything needed to understand and reproduce the robotic learning pipeline used in this project. We have also worked on many projects related to robotics; you can check out our robotics projects for more ideas.
Both the SO-ARM101 robotic arm and the reComputer J4012 are Seeed Studio products. If you are planning to try a similar setup, you can use the links and promotional codes below:
Check out SO-ARM101 Robotic Arm and use the promotional code KGYFKTZT to get $15 OFF
Check out reComputer J4012 and use the promotional code 90QQKB6Q to get 2% OFF.
Components Required for the Physical AI Robotic Arm Project
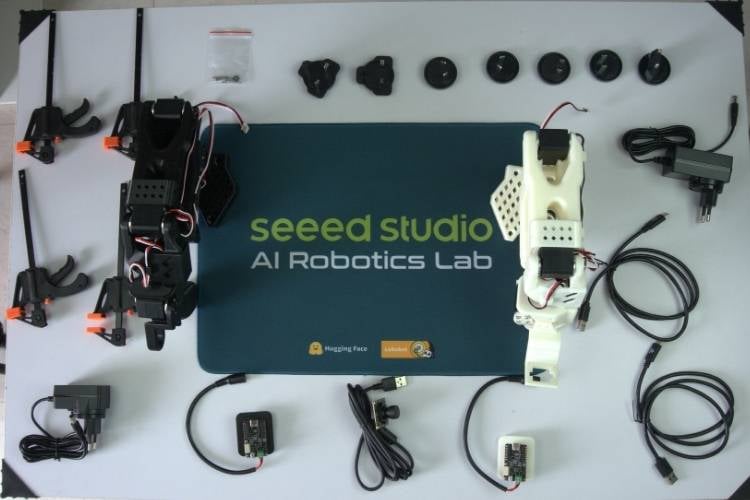
The following components are required to complete the robotic arm system. These include the mechanical, electronic, power, and communication components needed for operation.
| S.No | Component | Quantity | Purpose |
| 1. | Seeed Studio Leader Arm | 1 | Used by the human operator to teleoperate and demonstrate the required movements. |
| 2. | Seeed Studio Follower Arm | 1 | The actual working robotic arm that follows the leader arm and later runs the trained AI policy. |
| 3. | reComputer J4012-Edge AI Device with NVIDIA Jetson Orin NX | 1 | Main computing unit for training the AI model and running inference on the robot. |
| 4. | USB Camera | 1 | Captures visual observations of the workspace, objects, gripper, and bowls for vision-based learning and control. |
| 5. | 12V Adapter | 2 | Powers the Follower arm motors and the Jetson Orin. |
| 6. | 5V Adapter | 1 | Powers the Leader arm motors (7.4V / 5V motors). |
| 7. | Laptop | 1 | Used for initial setup, teleoperation, dataset recording, and development on Windows. |
| 8. | C-Type USB Cables | 2 | Connect the Leader arm, Follower arm, cameras, and Jetson to the Laptop. |
| 9. | Monitor, Mouse, and Keyboard | Optional | Provides a display and input interface for the reComputer with Jetson Orin NX. |
Hardware and Software Understanding
This section provides an overview of the main hardware and software components used in the project, along with the reason for choosing them.
SO-101 Robotic Arm
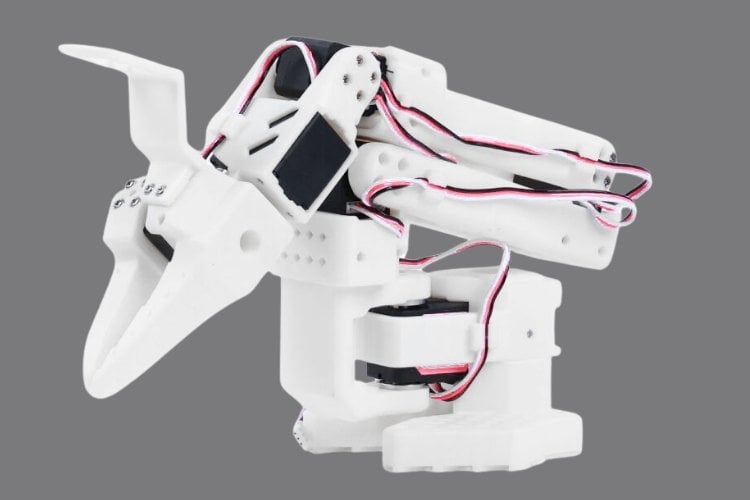
The SO-101 is a low-cost, open-source 6-DOF robotic arm designed for research and learning applications. It consists of two arms: the Leader arm and the Follower arm. The Leader arm is operated by a human to demonstrate the required movements, while the Follower arm mimics those movements during teleoperation and later executes the trained AI policy independently. This Leader–Follower setup makes it easy to collect high-quality demonstration data for imitation learning.
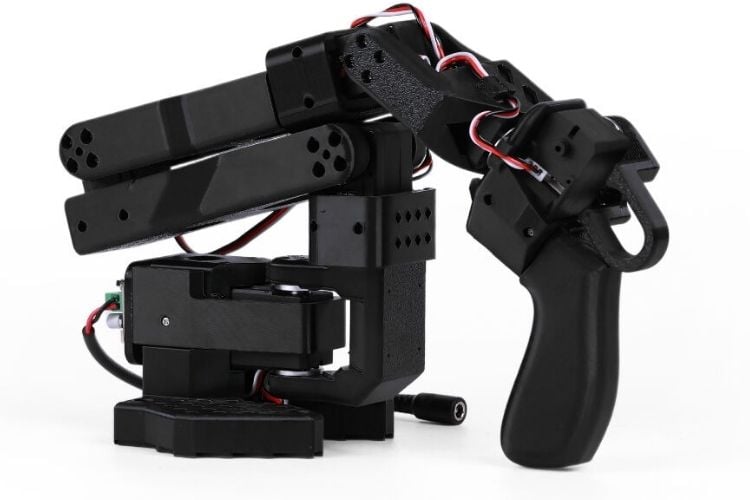
Unlike many industrial robotic arms, the SO-101 does not come with a separate external robot controller. Instead, it is supplied with two motor driver boards one for the Leader arm and one for the Follower arm and one for the Follower arm. These boards act mainly as a communication and power distribution interface between the computer and the motors.
Motors: Feetech STS3215 Smart Servos
The SO-101 uses Feetech STS3215 smart bus servo motors. These are not ordinary DC motors. Each STS3215 motor has a built-in motor controller inside the servo itself. This internal controller handles position control, speed control, torque control, and feedback of the current joint position.
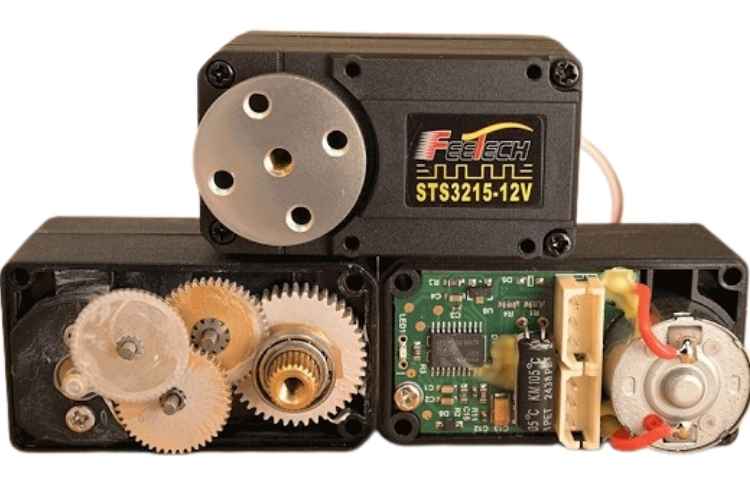
Because the intelligence is already inside the motor, the external driver board does not perform complex motion planning. It simply passes commands from the computer to the motors and supplies power. In simple terms, the motor contains the controller, the driver board acts as a communication bridge, and the computer (running LeRobot) sends the target positions.
Different gear ratios are used for different joints to balance torque and speed. The Leader arm typically uses lower-voltage (7.4V) motors so that it can be moved easily by hand, while the Follower arm is designed for actual task execution.
reComputer J4012 with NVIDIA Jetson Orin NX
The reComputer J4012 with NVIDIA Jetson Orin NX is a compact and powerful edge computing platform designed for AI workloads. In this project, it is used as the main system for training the imitation learning model and for running the trained policy on the robot.
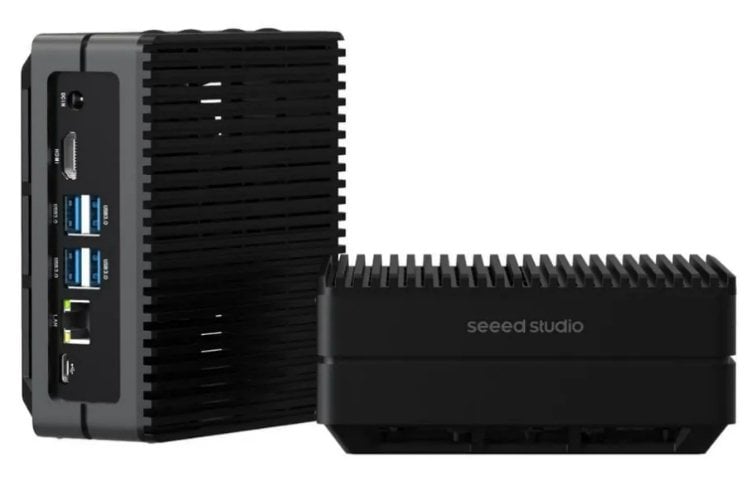
Its GPU acceleration makes it suitable for training models such as ACT (Action Chunking with Transformers), which would be very slow or impractical on a normal laptop without a dedicated NVIDIA GPU.
Hugging Face and the LeRobot Framework
Hugging Face provides the ecosystem around LeRobot, including the LeRobot framework, model architectures, datasets and tools for sharing and managing robotics projects.

In this project, the datasets and trained models were primarily stored locally during development, while the Hugging Face ecosystem provides the underlying framework and resources the project uses.
What is LeRobot?
LeRobot is an open-source robotics framework developed by Hugging Face. It provides a complete set of tools required for real-world robot learning, including hardware communication, teleoperation, dataset recording, model training, and policy evaluation. Without LeRobot, we would have to write most of this software pipeline from scratch.
Setting Up LeRobot on Windows
Installing Hugging Face LeRobot on Windows
In this project, we use the SO-ARM101 Low-Cost AI Arm Assembled Kit Pro (Leader + Follower) together with Hugging Face LeRobot. The goal of this phase on Windows is to complete motor setup and calibration, teleoperation, dataset recording, and dataset replay.
To begin the software setup, first install Miniconda. Visit the official Miniconda download page, download the Windows 64-bit installer, and run it. During installation, make sure to check the option “Add Miniconda3 to my PATH environment variable”. After the installation is complete, restart the computer. Next, open Command Prompt and create a dedicated environment for LeRobot by running the command below
conda --version
conda create -n lerobot python=3.10 -y
conda activate lerobot
If you get a Terms of Service error, run these commands first:
conda tos accept --override-channels --channel https://repo.anaconda.com/pkgs/main
conda tos accept --override-channels --channel https://repo.anaconda.com/pkgs/r
conda tos accept --override-channels --channel https://repo.anaconda.com/pkgs/msys2
After activating the environment, clone the official LeRobot repository and install it with Feetech motor support using the following commands:
git clone https://github.com/huggingface/lerobot.git
cd lerobot
pip install -e ".[feetech]"
Verify the Installation:
python -c "import lerobot; print(lerobot.__version__)"A version number (such as 0.4.x or higher) should appear if the installation was successful.
Hardware Connection and Motor Setup
Before configuring the motors, it is recommended to clearly label them. Use F1 to F6 for the joints of the Follower arm and L1 to L6 for the Leader arm. The power supply must be connected carefully. The Leader arm always uses 7.4V motors and should be powered with a 5V adapter, while the Follower arm may use 12V motors depending on the configuration. Both the power supply and the USB cable must be connected, as the USB connection alone does not provide power to the motors.
Connect the 12V power adapter to the Follower arm driver board first, then connect the 5V power adapter to the Leader arm. After that, connect the USB cables from both driver boards to the laptop. To identify the correct COM ports for each arm, run the command below:
lerobot-find-port Then follow the on-screen instructions. Note down the port numbers for both the Follower and Leader arms.
Expected results:
Follower → COM(any number)
Leader → COM(any number)
Configuring SO-ARM101 Servo Motor IDs
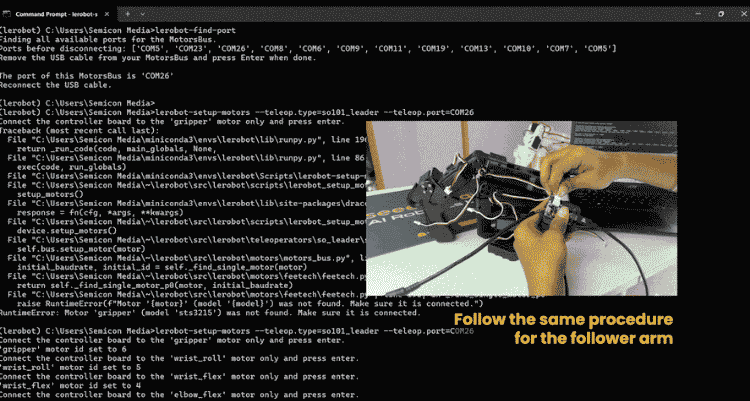
Once the ports are identified, the motor IDs need to be configured. It is important to remove the daisy-chain connection before setting the ID of each motor; otherwise, errors may occur. Start with the leader arm and run the following command (replace the COM port with your actual port):
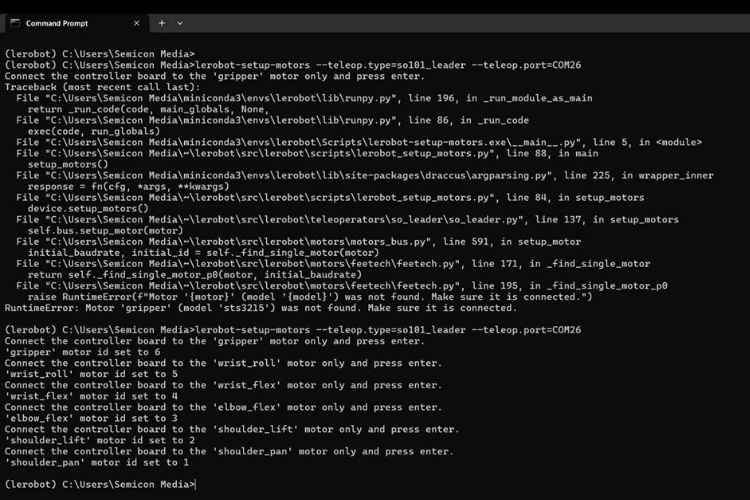
lerobot-setup-motors --teleop.type=so101_leader --teleop.port=COM26Follow the instructions carefully and connect one motor at a time. After completing the leader arm, repeat the same process for the follower arm using:
lerobot-setup-motors --robot.type=so101_follower --robot.port=COM23Each motor must be assigned a unique ID from 1 to 6 so that the software can communicate with them individually.
Calibrating the SO-ARM101 Robot Arm
After setting the motor IDs, connect all the motors properly and proceed with calibration. When instructed, gently move each joint front and back and then move it to its minimum and maximum positions. You can also see the joint values changing on the screen. Then Press Enter to save the calibration values. First, calibrate the leader arm using the command:
lerobot-calibrate --teleop.type=so101_leader --teleop.port=COM26 --teleop.id=my_leader_arm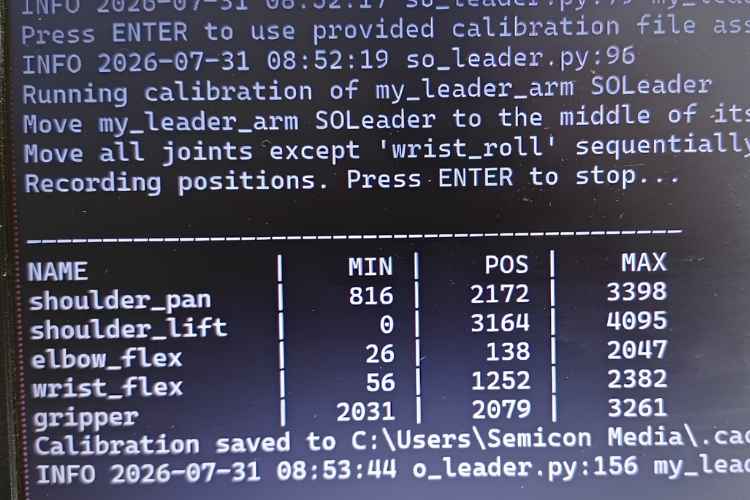
Repeat the same process for the follower arm with the following command:
lerobot-calibrate --robot.type=so101_follower --robot.port=COM23 --robot.id=my_follower_arm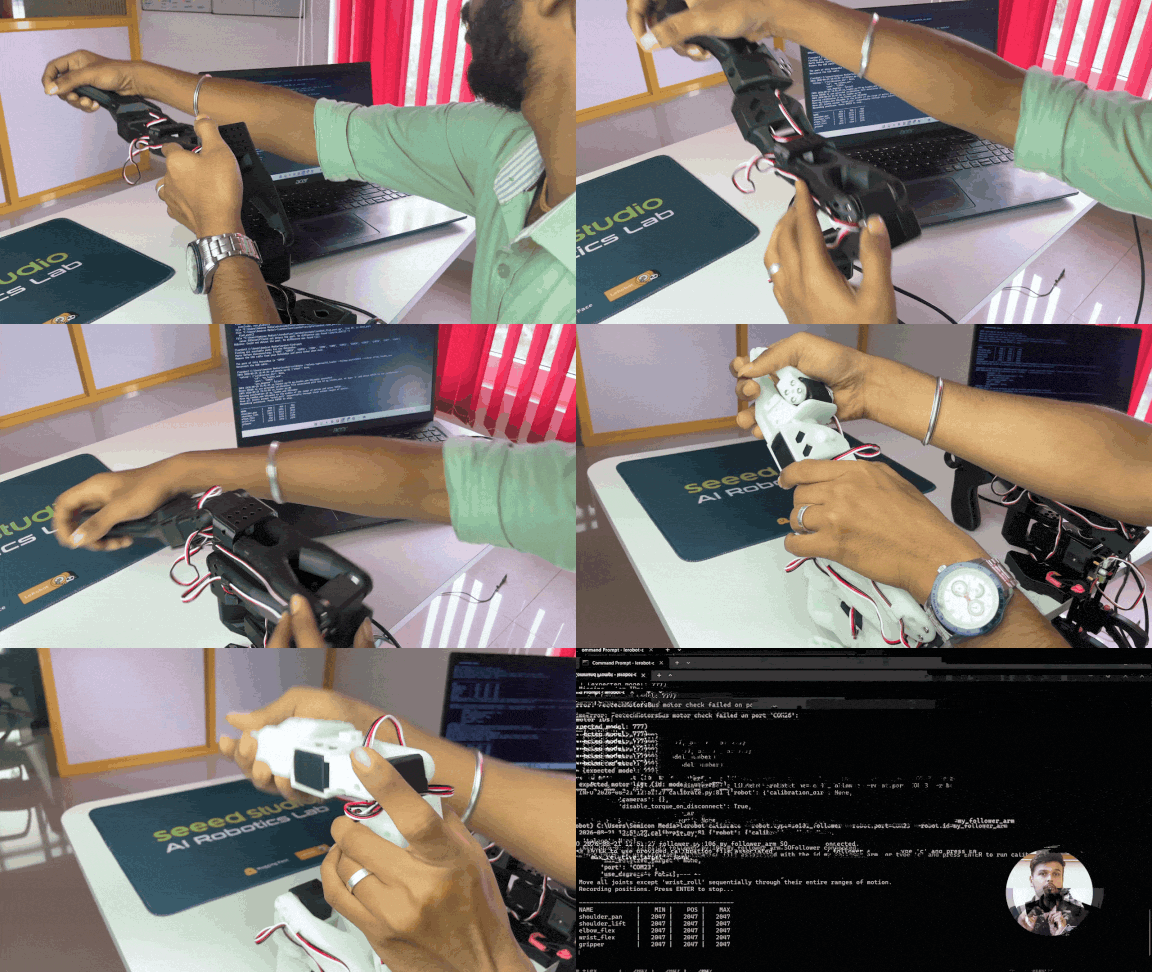
Calibration Tips
Move joints slowly.
Do not force the mechanical limits.
Make sure the correct motor IDs are assigned.
Ensure the arm is properly powered.
If calibration produces unexpected values, stop and verify the motor ID and joint mapping.
Save the calibration only after verifying the joint movement.
Teleoperating the Robot Arm with LeRobot
Once both arms are calibrated, teleoperation can be tested. Run the following command:
lerobot-teleoperate --robot.type=so101_follower --robot.port=COM23 --robot.id=my_follower_arm --teleop.type=so101_leader --teleop.port=COM26 --teleop.id=my_leader_armWhen the Leader arm is moved, the Follower arm will follow the same movements in real time. Press Ctrl + C to stop teleoperation
Recording an Imitation Learning Dataset (Without Camera)
To record a dataset without using cameras, use the following command:
lerobot-record --robot.type=so101_follower --robot.port=COM23 --robot.id=my_follower_arm --teleop.type=so101_leader --teleop.port=COM26 --teleop.id=my_leader_arm --dataset.repo_id=semicon/arm_only_v1 --dataset.root="D:/lerobot_datasets/arm_only_v1" --dataset.num_episodes=3 --dataset.single_task="Pick and place small object" --dataset.push_to_hub=false --dataset.fps=30 --display_data=falseMake sure to change the COM port numbers and the dataset root path according to your system. This recording was performed without cameras.
Replaying a Recorded Dataset
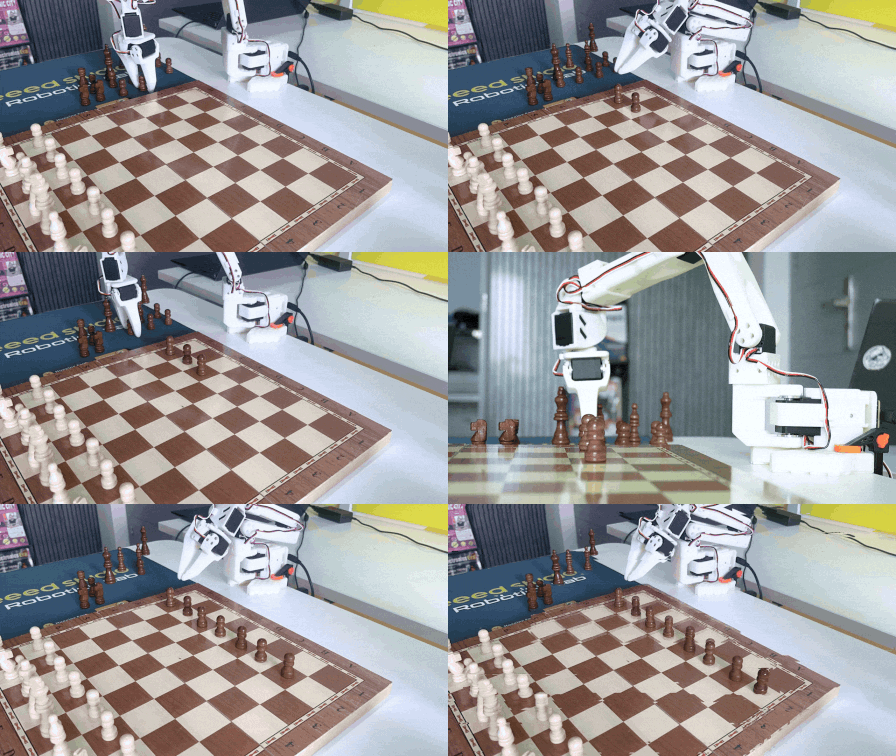
To replay a recorded episode, use the command below:
lerobot-replay --robot.type=so101_follower --robot.port=COM23 --robot.id=my_follower_arm --dataset.repo_id=semicon/arm_only_v1 --dataset.root="D:/lerobot_datasets/arm_only_v1" --dataset.episode=0This will make the Follower arm repeat the motion recorded in the selected episode.
Daily Startup Commands
Every time you start working, activate the environment and navigate to the LeRobot folder using:
conda activate lerobot
cd path\to\lerobot
After this, any of the above commands can be executed.
Why Move to Jetson Orin NX for Training?
Even though the robotic arm can perform basic operations such as teleoperation, recording, and replay on Windows, full model training is not practical on this platform. Dataset recording itself can still be done on Windows without major issues. However, training the AI model requires CUDA support for efficient GPU acceleration. If the computer does not have an NVIDIA GPU, or if it has limited RAM, the training process becomes extremely slow or may not run effectively at all. Considering these limitations, the model training process was moved to the reComputer J4012 with Jetson Orin NX. This is explained in more detail in the following section.
Setting Up LeRobot on NVIDIA Jetson Orin NX
Before starting the project on the reComputer J4012, it is important to understand a few key concepts related to AI model training and robot learning.
What is CUDA?
CUDA (Compute Unified Device Architecture) is a parallel computing platform developed by NVIDIA. It allows software to use the power of an NVIDIA GPU for general computing tasks, not just graphics.
A CPU usually processes tasks one after another, while a GPU can process thousands of smaller operations at the same time. CUDA is the technology that allows AI frameworks to use this GPU acceleration.

This is important because training a model like ACT involves a large number of mathematical calculations. These calculations are much faster on a GPU with CUDA. Since the Windows laptop used earlier did not have an NVIDIA GPU, training was impractical there. That is why the training process was moved to the reComputer J4012 with Jetson Orin NX
Different Types of Models Used in Robot Learning
In robot learning, different AI models can be used depending on the task:
ACT (Action Chunking with Transformers): This is the model used in this project. It learns from human demonstrations and predicts a sequence of robot actions. It is efficient and works well with smaller datasets.
Diffusion Policy: Generates actions step by step and is useful for complex or precise movements, but needs more computing power.
VLM (Vision-Language Model): Understands both images and text, useful when a robot must follow language instructions.
VLA (Vision-Language-Action Model): Combines vision, language, and actions for more general-purpose robot control. These models are larger and need more data.
For this project, ACT was selected because it is suitable for imitation-learning tasks based on demonstration data and is practical for the relatively focused pick-and-place task used here.
Initial Setup on Jetson Orin NX
First, the Jetson Orin NX should be flashed with JetPack 6.1 or above for proper software compatibility and performance. To flash the Jetson Orin, follow the official document.
After that, the basic robot setup is done in the same way as on Windows:
Setting motor IDs
Calibration
Teleoperation
Record and replay testing
These steps follow the official Seeed Studio documentation. Checkcheck the document to get the full idea to setup in the linux. Once this basic setup is complete, the next stage is collecting data for the vegetable sorting task.
Dataset Collection and Training for Vegetable Sorting
To make the robotic arm learn the vegetable sorting task, we need to collect demonstration data. This data is recorded in the form of episodes.
What is an Episode?
An episode is one complete demonstration of the task.
For example:
Picking a tomato and placing it in the left bowl = 1 episode
Picking a potato and placing it in the right bowl = 1 episode
The AI model learns by studying many such examples. That is why multiple episodes are required.
Why around 120 episodes?
A single demonstration is not enough for the model to learn reliably. By collecting many episodes, the model sees different small variations in movement, timing, and object handling. In this project, around 120 episodes were collected in three groups:
Tomato only
Potato only
Both objects together
(picture of tomato, potato with the robotic arm)
This helps the model learn both individual object handling and combined sorting behaviour.
Recording the Vegetable Sorting Dataset
The following command is used to record the dataset using only the wrist camera:
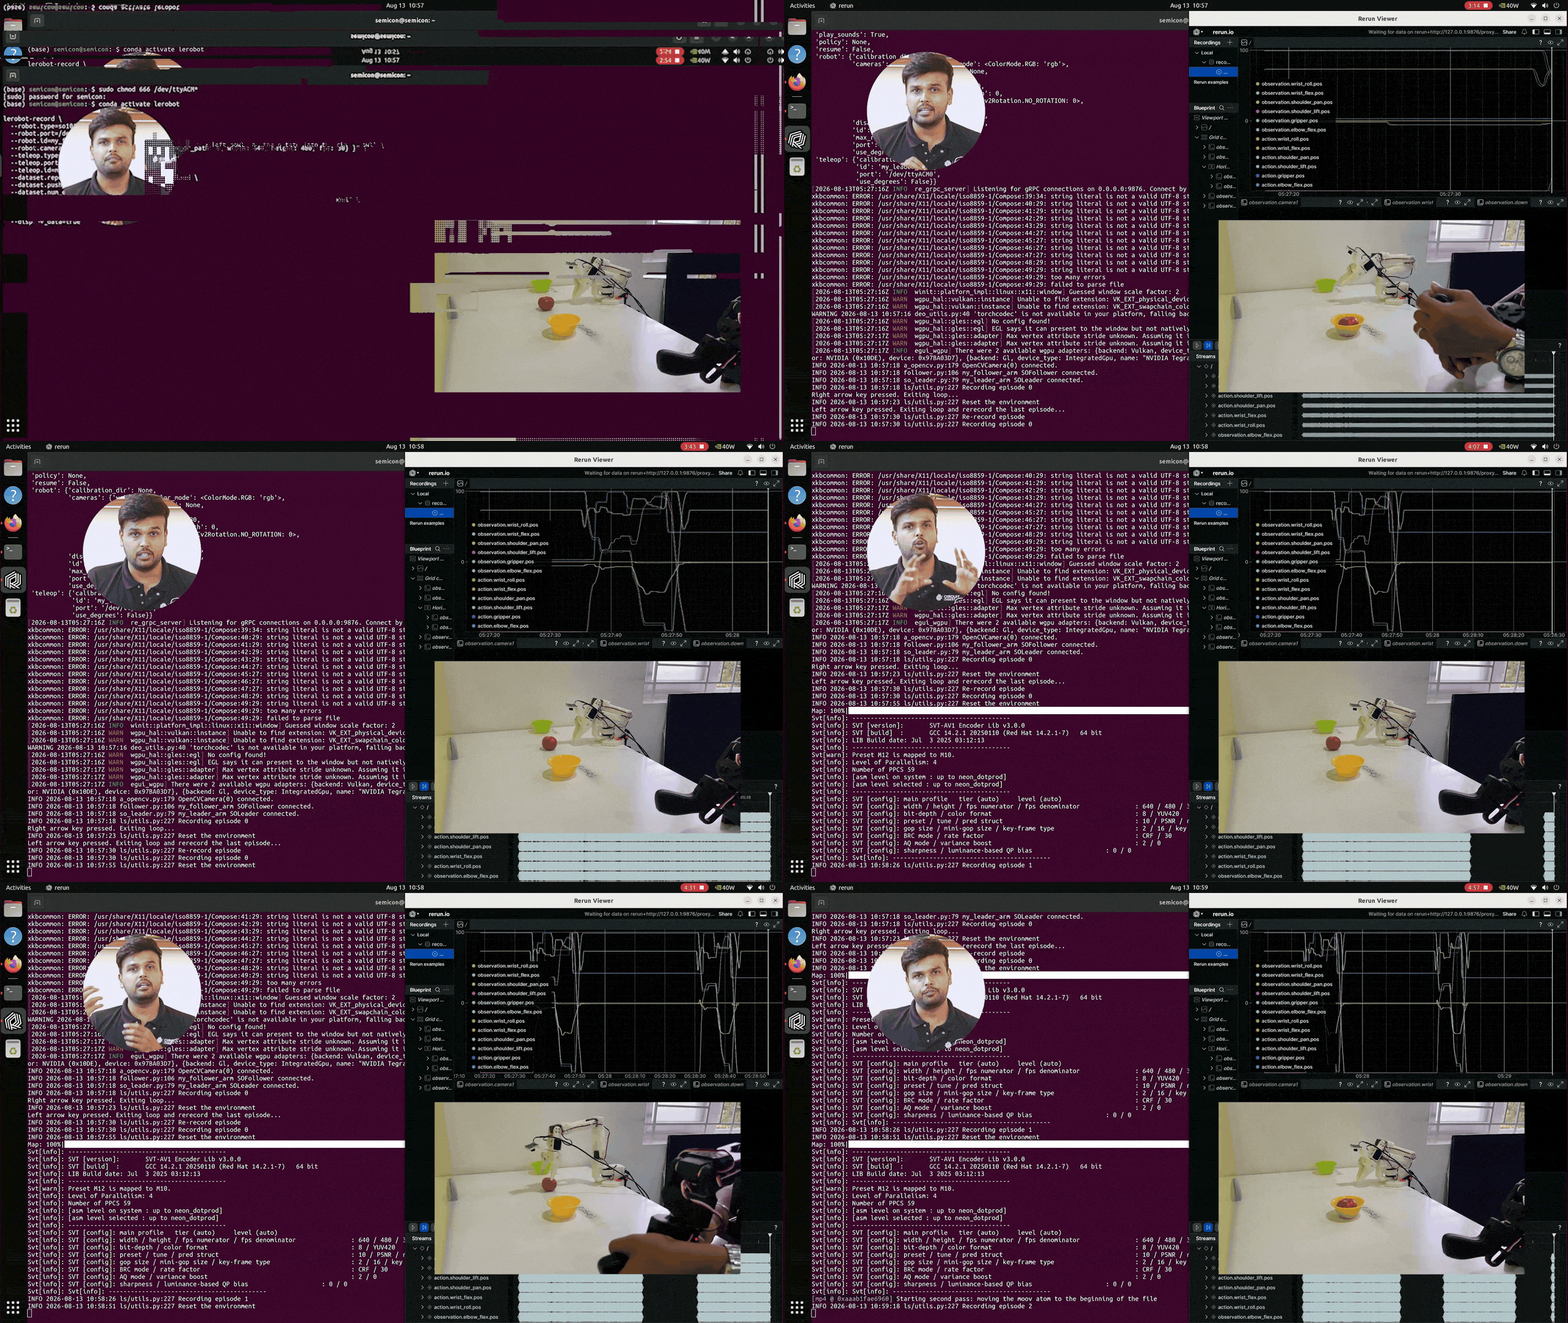
conda activate lerobot
lerobot-record \
 --robot.type=so101_follower \
 --robot.port=/dev/ttyACM1 \
 --robot.id=my_follower_arm \
 --robot.cameras="{ wrist: {type: opencv, index_or_path: 0, width: 640, height: 480, fps: 30} }" \
 --teleop.type=so101_leader \
 --teleop.port=/dev/ttyACM0 \
 --teleop.id=my_leader_arm \
 --dataset.repo_id=local/tomato_potato_wrist_fixed \
 --dataset.push_to_hub=false \
 --dataset.num_episodes=120 \
 --dataset.single_task="Sort the tomato into the left bowl and the potato into the right bowl" \
 --dataset.episode_time_s=45 \
 --dataset.reset_time_s=15 \
 --display_data=true
If you need to record all the episodes in one go, use the above command. Instead, if you need to collect the datasets in stages, like tomato only first, potato only, then both, follow the commands below:
Tomato only
conda activate lerobot
lerobot-record \
 --robot.type=so101_follower \
 --robot.port=/dev/ttyACM1 \
 --robot.id=my_follower_arm \
 --robot.cameras="{ wrist: {type: opencv, index_or_path: 0, width: 640, height: 480, fps: 30} }" \
 --teleop.type=so101_leader \
 --teleop.port=/dev/ttyACM0 \
 --teleop.id=my_leader_arm \
 --dataset.repo_id=local/tomato_potato_wrist_fixed \
 --dataset.push_to_hub=false \
 --dataset.num_episodes=40 \
 --dataset.single_task="Sort the tomato into the left bowl and the potato into the right bowl" \
 --dataset.episode_time_s=45 \
 --dataset.reset_time_s=15 \
 --display_data=true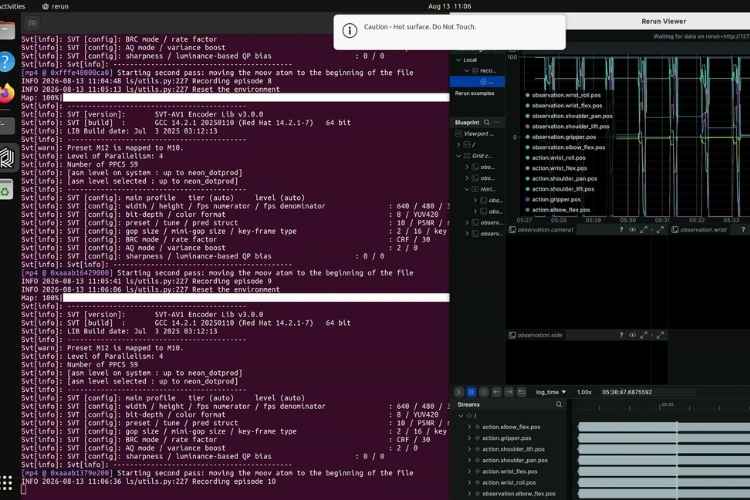
Potato Only
lerobot-record \
 --robot.type=so101_follower \
 --robot.port=/dev/ttyACM1 \
 --robot.id=my_follower_arm \
 --robot.cameras="{ wrist: {type: opencv, index_or_path: 0, width: 640, height: 480, fps: 30} }" \
 --teleop.type=so101_leader \
 --teleop.port=/dev/ttyACM0 \
 --teleop.id=my_leader_arm \
 --dataset.repo_id=local/tomato_potato_wrist_fixed \
 --dataset.push_to_hub=false \
 --dataset.num_episodes=40 \
 --dataset.single_task="Sort the tomato into the left bowl and the potato into the right bowl" \
 --dataset.episode_time_s=45 \
 --dataset.reset_time_s=15 \
 --display_data=true \
 --resume=true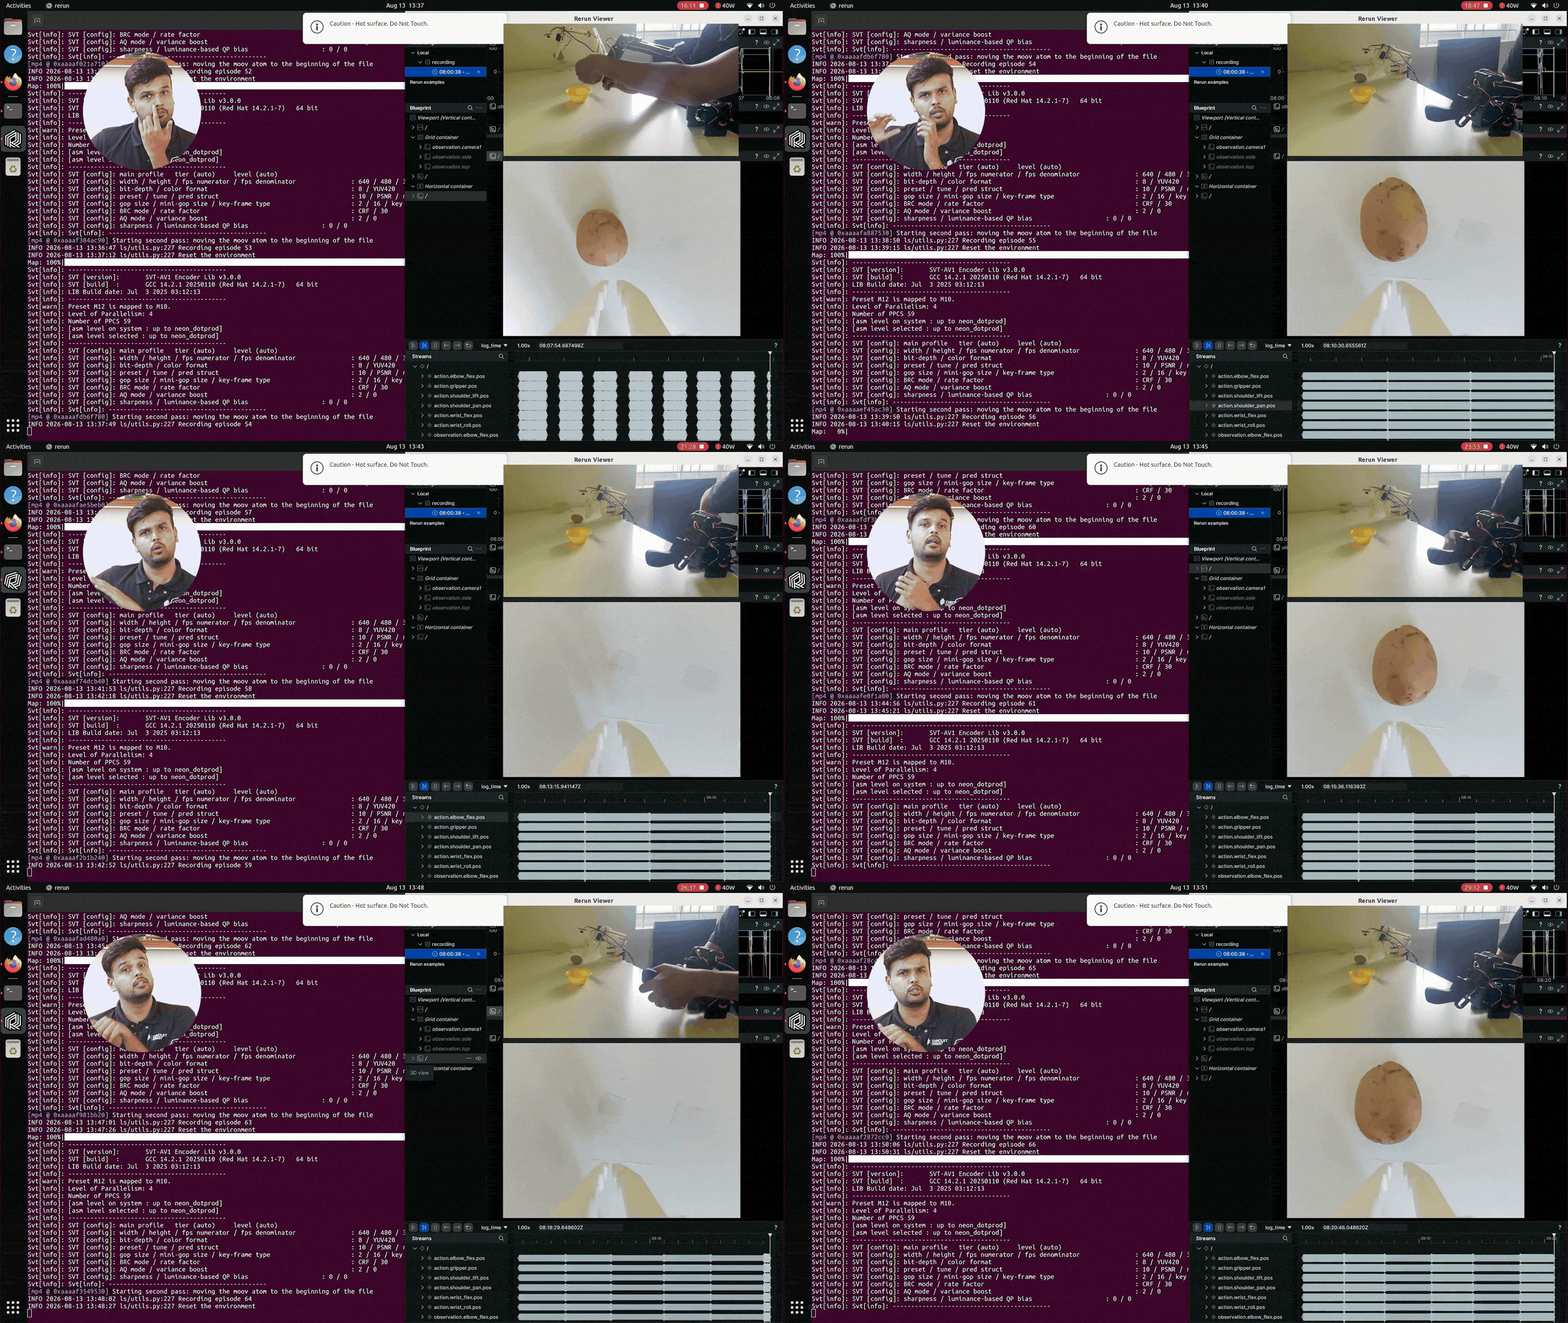
Both Objects Together(placing tomato and potato at the same time)
lerobot-record \
 --robot.type=so101_follower \
 --robot.port=/dev/ttyACM1 \
 --robot.id=my_follower_arm \
 --robot.cameras="{ wrist: {type: opencv, index_or_path: 0, width: 640, height: 480, fps: 30} }" \
 --teleop.type=so101_leader \
 --teleop.port=/dev/ttyACM0 \
 --teleop.id=my_leader_arm \
 --dataset.repo_id=local/tomato_potato_wrist_fixed \
 --dataset.push_to_hub=false \
 --dataset.num_episodes=40 \
 --dataset.single_task="Sort the tomato into the left bowl and the potato into the right bowl" \
 --dataset.episode_time_s=45 \
 --dataset.reset_time_s=15 \
 --display_data=true \
 --resume=true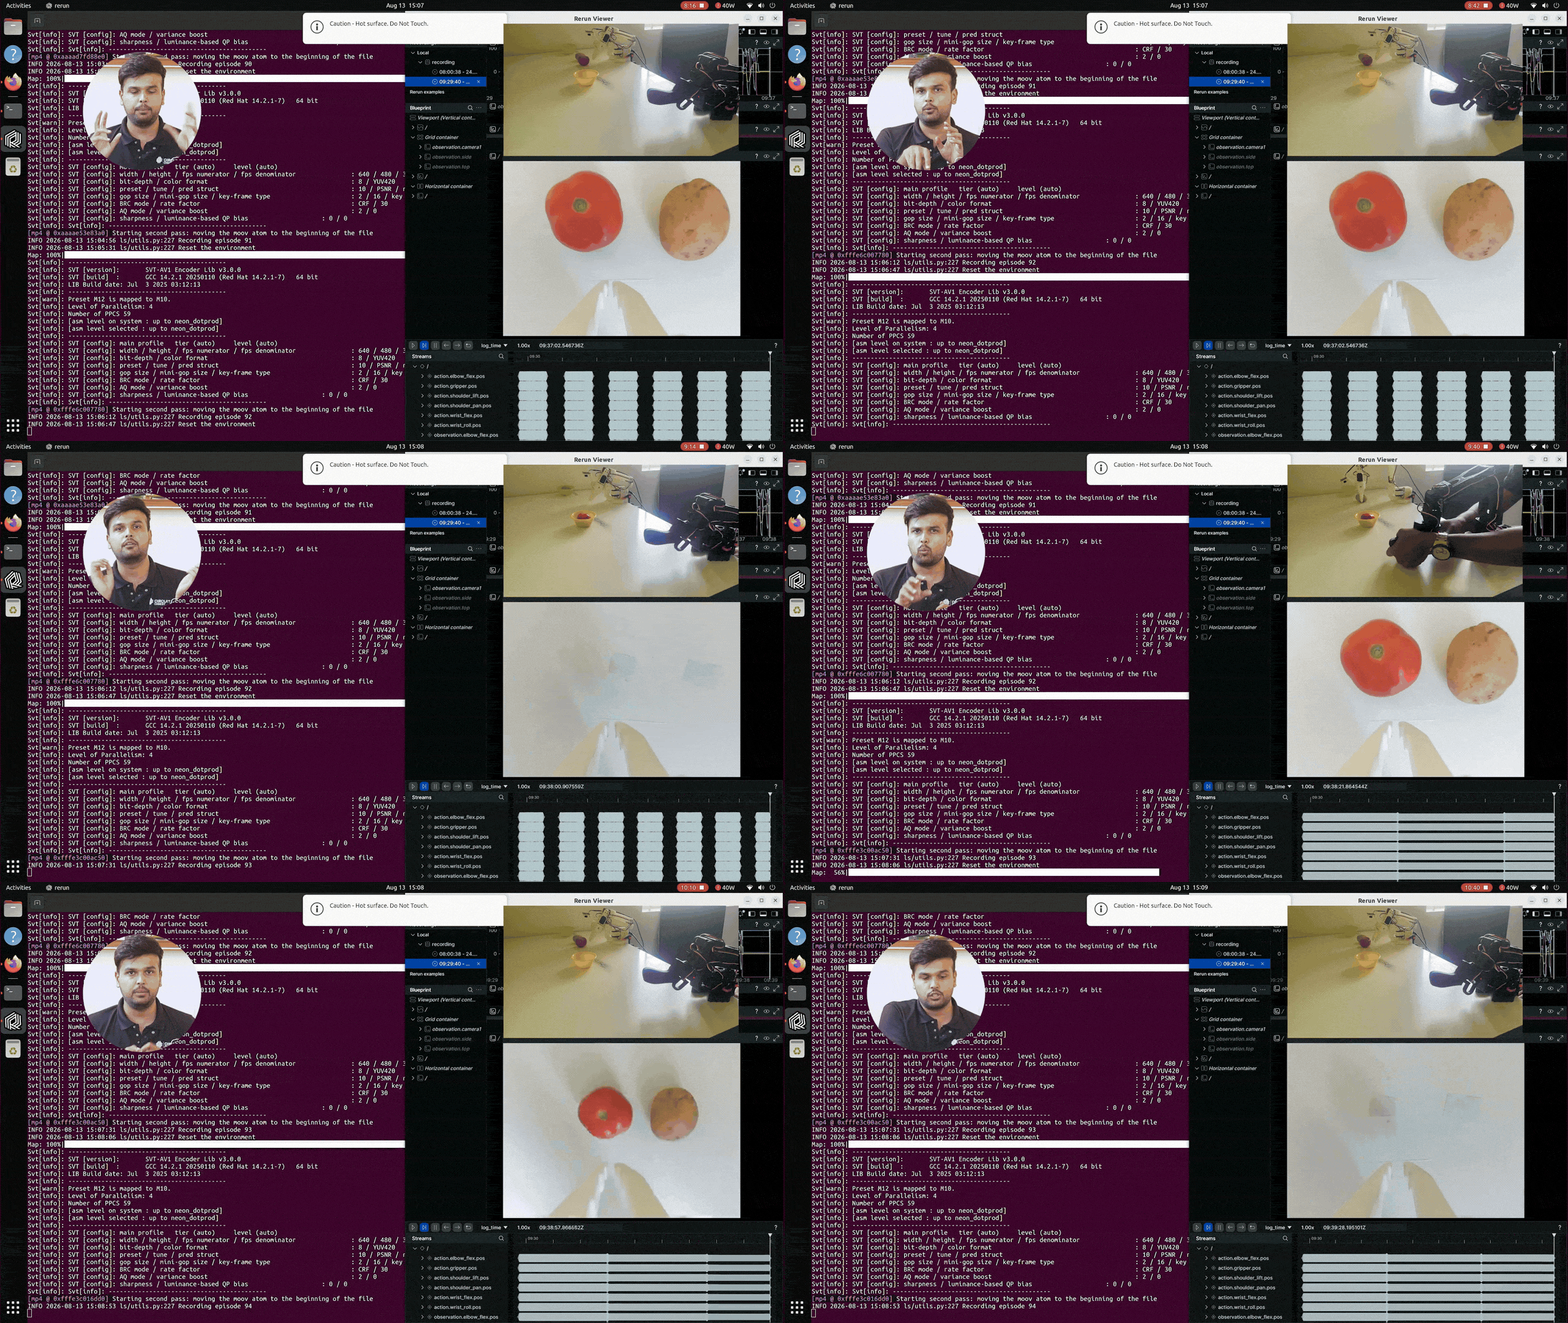
Training an ACT Policy with LeRobot:
After the dataset is collected, the ACT model is trained using the following command:
conda activate lerobot
lerobot-train \
 --dataset.repo_id=local/tomato_potato_wrist_fixed \
 --policy.type=act \
 --policy.repo_id=local/tomato_potato_wrist_fixed_act \
 --output_dir=outputs/train/tomato_potato_wrist_fixed_act \
 --job_name=tomato_potato_wrist_fixed_act \
 --policy.device=cuda \
 --batch_size=4 \
 --steps=100000 \
 --eval_freq=5000 \
 --save_freq=10000 \
 --log_freq=100 \
 --wandb.enable=false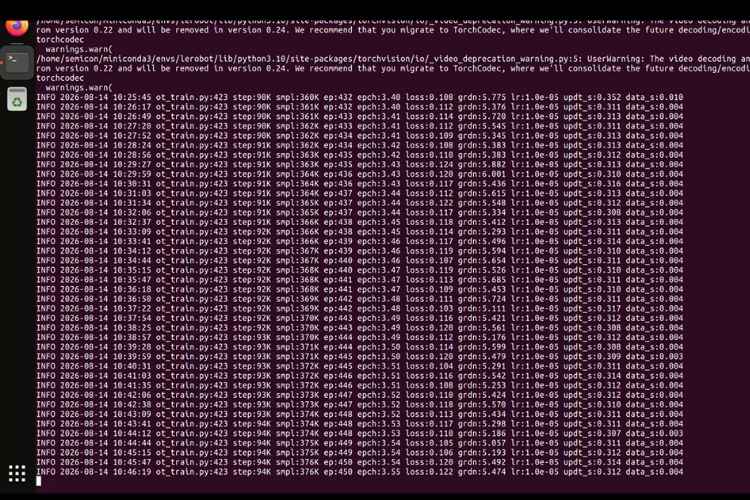
Why these settings are used:
--policy.type=act → selects the ACT model
--policy.device=cuda → uses GPU acceleration
--steps=100000 → number of training steps
--save_freq=10000 → saves checkpoints regularly
If training is interrupted, it can be resumed from the last checkpoint:
conda activate lerobot
lerobot-train \
config_path=outputs/train/tomato_potato_wrist_fixed_act/checkpoints/last/pretrained_model/train_config.json \
 --resume=true
Testing the Physical AI Robot Arm
After training, the model is tested on the real robot using:
conda activate lerobot
lerobot-record \
 --robot.type=so101_follower \
 --robot.port=/dev/ttyACM1 \
 --robot.id=my_follower_arm \
 --robot.cameras="{ wrist: {type: opencv, index_or_path: 0, width: 640, height: 480, fps: 30} }" \
 --dataset.repo_id=local/eval_wrist_fixed \
 --dataset.push_to_hub=false \
 --dataset.num_episodes=1 \
 --dataset.single_task="Sort the tomato into the left bowl and the potato into the right bowl" \
 --dataset.episode_time_s=600 \
 --dataset.reset_time_s=15 \
 --display_data=true \
 --policy.path=outputs/train/tomato_potato_wrist_fixed_act/checkpoints/last/pretrained_model
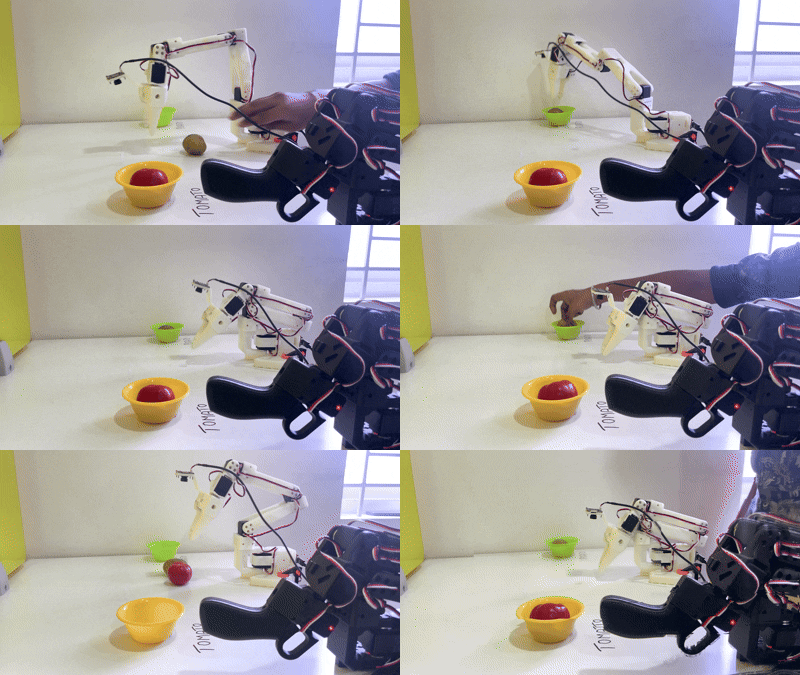
In this step, the robot is no longer controlled by the leader arm. Instead, the trained model controls the follower arm based on the camera input and the learned behaviour. You can check out the model by placing the tomato and potato one by one.
Common SO-ARM101 and LeRobot Errors and Fixes
This section provides solutions to the most common problems encountered during the project, along with their possible causes and recommended fixes. Use it as a quick reference whenever an error occurs during setup, operation, or training.
| S.No | Problem | Cause | Solution |
| 1. | Dataset already exists error while starting evaluation | LeRobot does not overwrite an existing dataset folder by default. A previous evaluation dataset with the same name was already present. | Deleted the existing dataset folder using rm -rf and then restarted the evaluation command. |
| 2. | Cameras disconnected during evaluation | USB bandwidth issues or an unstable camera connection caused the system to lose access to the camera devices mid-run. | Reconnected the cameras, verified the indexes using lerobot-find-cameras opencv, and restarted the evaluation. |
| 3. | The training process got interrupted before completion | Long training duration and system interruption stopped the process around intermediate checkpoints | Resumed training from the last saved checkpoint using the --resume=true option instead of restarting from zero. |
| 4. | Arm did not return to home position after evaluation episodes | During policy evaluation without the leader arm, the reset phase has no active control input, so the arm stays in its final position | Manually move the arm back to the starting/home position before each new episode |
| 5. | Magnitude/range error during calibration | Joint was not moved through its full range, or the motor moved too little / too much during calibration | Recalibrate the arm carefully by moving each joint slowly from minimum to maximum position as instructed |
| 6. | Motor ID setup failed / communication error | Motors were still connected in daisy-chain mode while assigning IDs | Disconnect the daisy-chain, connect one motor at a time, set the ID, then reconnect |
Future Improvements
While the current system successfully demonstrates imitation learning for tomato and potato sorting, there is still significant room for improvement. The present setup mainly relies on a wrist camera with fixed object positions, so introducing an additional external camera from the top or side can provide better visual understanding and help the robot handle objects placed in different locations more reliably. Beyond laboratory experiments, the same learning pipeline can be adapted for practical applications such as warehouse sorting, educational robotics platforms, and simple industrial pick-and-place tasks. The system can also be expanded to handle a wider range of objects by training it to sort multiple items like different fruits or colored blocks
Adding force or tactile sensing to the gripper would further improve grasp stability, especially when dealing with soft or irregular objects. In the longer term, mounting the arm on a mobile base could allow the robot to perform sorting tasks across different locations rather than remaining restricted to a fixed table setup, making the overall system more flexible and closer to real-world use.
Conclusion
This project showed how a low-cost robotic arm can learn a real task by watching human demonstrations. Using the SO-101 arm and LeRobot, we completed the full process from hardware setup and teleoperation to data recording, model training, and final testing. The robot was trained to sort a tomato and a potato into different bowls. During the project, we worked on both Windows and the Jetson Orin NX, and this helped us understand which steps are easy on a normal laptop and which steps need stronger computing power.
We also faced practical problems such as camera disconnection, training interruptions, and limited performance when both objects were present. By solving these issues step by step, the system became more stable and useful. Overall, this project gives a clear and simple example of how imitation learning can be used to build practical robotic systems with affordable hardware, and it can be extended further for more complex tasks in the future.

This looks like it'll take a lot of time to get done, right?
Add a comment
No account needed. Your comment appears once a moderator has reviewed it.