

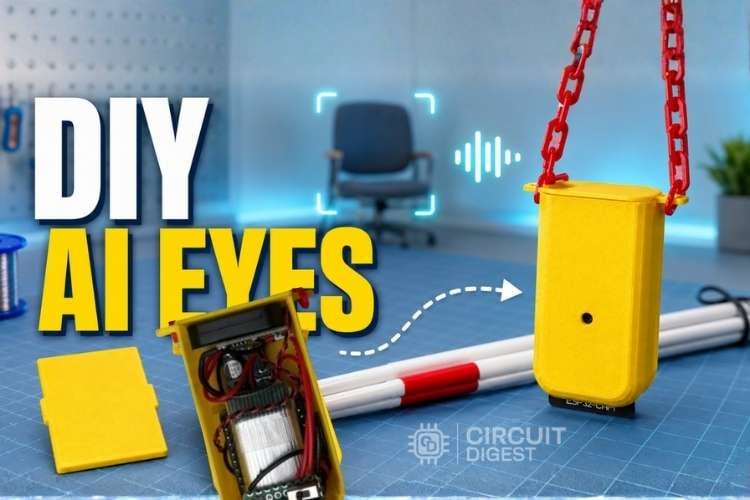
Moving through unfamiliar environments is a challenging thing for visually impaired people. We have a lot of solutions, from sticks to obstacle-avoidance handheld devices on the market, to solve their problem. In the DIY world, a lot of makers have built obstacle-avoidance sticks using Ultrasonic sensors, IR sensors or even a PIR sensor and different variations of blind assistant pendants as well. All of them either give a beep sound or tactile feedback.
The issue with the above solutions is that none of them is vision-based. Building an ESP32 Cam blind assistance pendant is one of the most practical ways to turn a microcontroller into a genuine assistive-technology device. A vision-based solution gives feedback based on the real surroundings and situations, which is more reliable than a proximity sensor-based solution. Here in this tutorial, we are going to explore an AI Vision Assistant for Visually Impaired People using an ESP32 CAM. In a nutshell, the ESP32 CAM captures an image of the surroundings upon a button click, uploads it to the CircuitDigest cloud, gets a detailed description of it, sends it to Sarvam AI for TTS conversion and plays the audio loudly so that the user can hear it.
Table of Contents
What Is an ESP32-CAM AI Vision Assistant Pendant?
ESP32-CAM AI Vision Assistant Pendant is not just another wearable device with a camera but a simple smart device that can talk to visually impaired people and describe what is happening around them. Compared to regular sensor-based canes and portable sensory devices, this intelligent pendant helps blind users with AI technology to answer “what do I see ahead of me?” rather than just asking “is there something in front of me?”
| Feature | Traditional Obstacle-Avoidance Stick | Traditional Obstacle-Avoidance Stick |
| Detection method | Ultrasonic / IR / PIR proximity | Camera + AI image description |
| Feedback type | Beep or vibration only | Full spoken sentence describing the scene |
| Identifies objects | No distance only | Yes: people, furniture, obstacles, text |
| Form factor | Handheld stick | Hands-free wearable pendant |
| Approximate build cost | Low | Low (ESP32 CAM + amplifier + boost converter) |
Block Diagram
Below is the block diagram for the whole project.
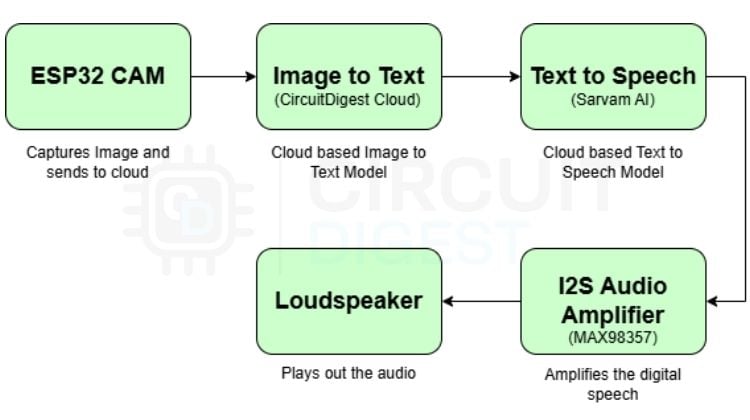
This is the high-level block diagram for our project. We have the ESP32 CAM that captures and sends an image to CircuitDigest Cloud, which returns text as a JSON payload describing the image. This text is sent to Sarvam AI to be converted into speech. ESP32 downloads, decodes and plays the converted Base64 audio file. The audio comes to our ears through the speaker after being amplified by the MAX98357 I2S amp.
You can see that we have used two specialised cloud services in this ESP32 CAM AI Vision Assistant Pendant project: CircuitDigest Cloud for Image to Text and Sarvam AI for Text to Speech. Both of them are specialized in their own ways. For additional information, these cloud services can be used in a number of different ways for different purposes. You can visit our collection of ESP32 based projects and these cloud services. Here is our latest project demonstrating how to use ESP32 CAM and Circuit DigestCloud to build a No Parking Alert System.
Image to Text
To convert an Image to Text - describing what is in the picture, the surroundings and all- we have a lot of options out there. But for our project, we are using CircuitDigest Cloud. Why CircuitDigest Cloud? Because it's beginner-friendly and has a lot of tutorials to follow as well.
You can easily get started with the Image Analyst API by uploading an image and seeing the results in the same window according to the prompt given.
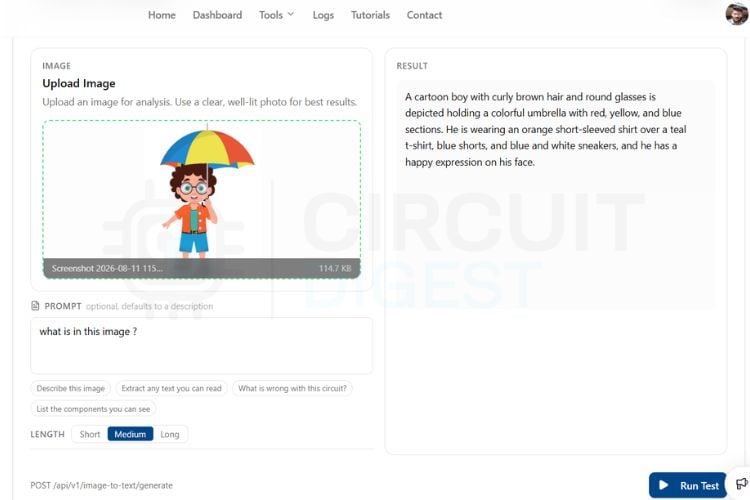
Above is CircuitDigest Cloud’s AI Vision Analyst, which lets us try out the Image to Text Service by uploading/dragging an image into that section without even coding. You can see in the above screenshot how the API accurately responded to my request. If we need to integrate this service into any projects, they provide example code snippets for ESP32, ESP32 CAM, XIAO, RPI, RPI PIO and many more. I copied the snippet for ESP32 CAM to make our own custom code. More of our AI based projects are listed on our website.
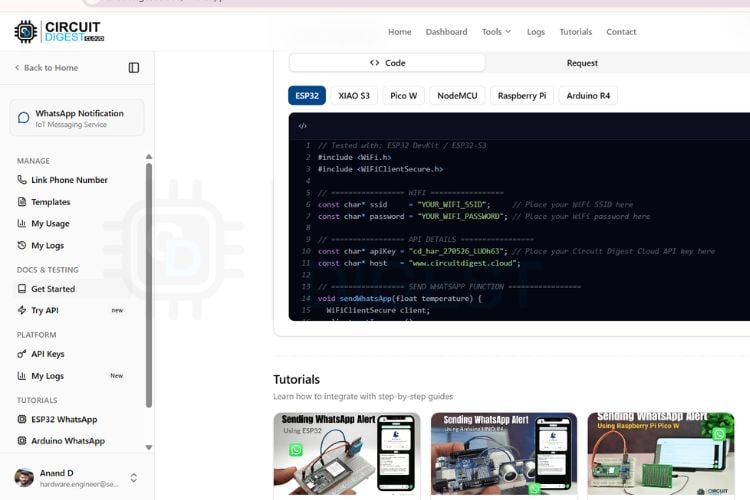
Above is a screenshot from CircuitDigest Cloud that shows the example snippets they provided for ESP32, XIAO S3, Pico W, NodeMCU, Raspberry Pi and Arduino UNO R4 boards. Below are the video tutorials on how to use the service and build a full project with that service. There are a total of around 13 such services provided by CircuitDigest Cloud.
Circuit Diagram
Below is the circuit diagram for the whole project.

Above is the full circuit diagram for the project. Starting from the battery, we can see that the battery is connected to the 5V Boost Converter with a switch in series. Any 5V Boost converter will work here. This 5v boost converter provides operating voltage for the ESP32 as well as the MAX98357 I2S Amplifier as well. The pin configurations are mentioned below in the table.
The gain pin is left free as we’re not using the physical gain adjustment. We’ll be adjusting the gain at the software level. You can see how to do that in the code explanation section.
There is no specific rule that you should use the same components shown in this circuit diagram. We have several 5V boost converters available in the market. You can use any of them which can deliver an average of 600mA. The MAX98357 also comes in some slight variations, but all should work. Instead of a limit switch to trigger the image capturing, you can use a wake word or something like that as well.
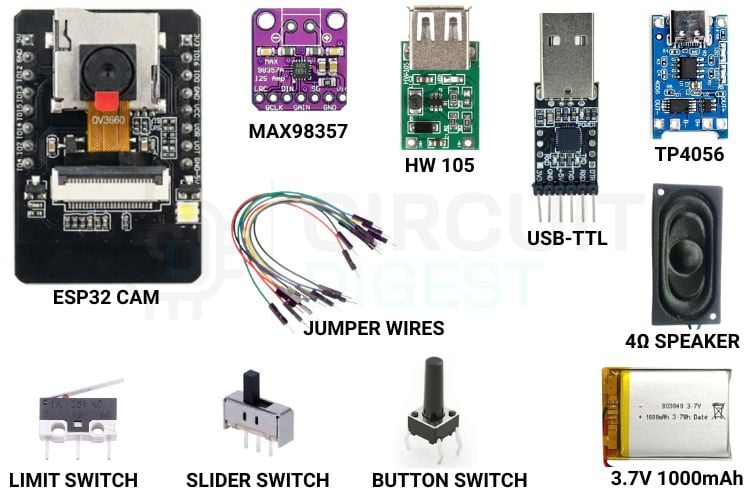
Components Required
| S No | Name | Description | Qty |
| 1 | ESP32 CAM | Main microcontroller | 1 |
| 2 | MAX98357 I2S Amplifier | To amplify the audio | 1 |
| 3 | HW-105 5V Boost Converter | To supply 5V to ESP32 CAM and MAX98357 | 1 |
| 4 | Limit Switch | Trigger for capturing an image | 1 |
| 5 | Button Switch | Changing language | 1 |
| 6 | Toggle Button | Turn on/off the device | 1 |
| 7 | USB - TTL Converter | To program the ESP32-CAM | 1 |
| 8 | Jumper wires | To connect the components | - |
Text-to-Speech: Wit.ai vs Google TTS vs Sarvam AI
The right selection of a text-to-speech engine plays an equal role as the vision model for a smart pendant for visually impaired users built with AI. We evaluated three alternatives before finally picking the one we needed.
| TTS Engine | Character Limit | Indic Language Support | Best For |
| Wit.ai (Meta) | 280 characters/request | Limited | Short English-only alerts |
| Google TTS | 5000 characters/request | Good, but generic | Reliable, general-purpose speech |
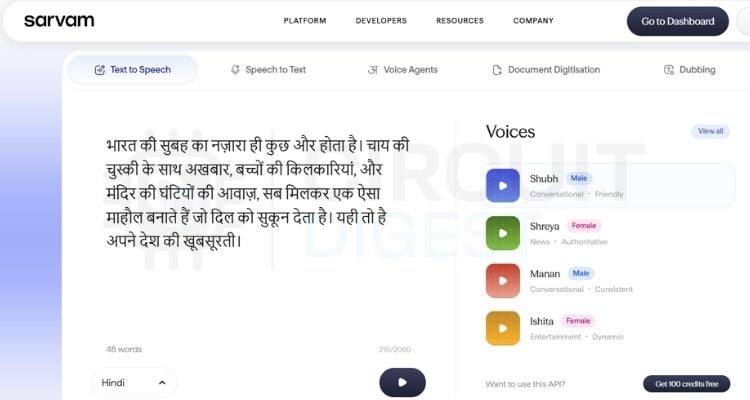
| Sarvam AI (Bulbul v3) | 2500 characters/request | Strong - built for Indic languages | Natural multilingual speech (Hindi, English, Tamil, Malayalam) |
For converting text to Speech, we have a lot of options out there. First of all, we tried out Wit.ai, a service from Meta. We have a detailed article that teaches you how to do Text-to-Speech using Wit, which you can check out. After some trials with Wit, we jumped to a different option, as Wit has a character limit of 280 characters per API request. The second try was with Google’s TTS. It was nice and worked flawlessly, but we wanted something more interesting. It was at this time that we found Sarvam AI. They are headquartered in Bengaluru and specialise in Indic languages. If you are more interested in Text-to-Speech in offline mode, we have a dedicated tutorial for the ESP32 Text-to-Speech Offline System.
Full Assembly
Here is the final assembled hardware with its chain.
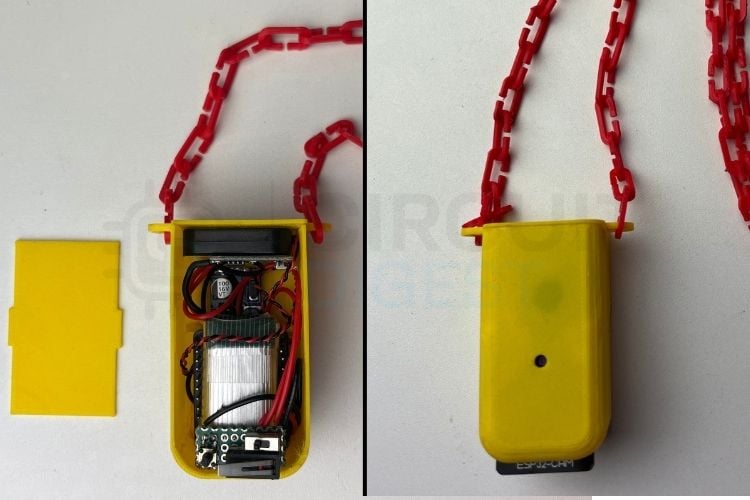
Let’s take a look at the full assembly of the project. If we take a close look at the 3D-printed enclosure, we can see that there is a slit that lets the PCB antenna protrude so that we are not consuming any internal enclosure space to accommodate the antenna, and the pendant looks compact because of this. All the components are carefully organised inside. The on/off toggle button, language-changing button switch and a small limit switch are mounted so that they are accessible from the backside of the device. The chain is also 3D printed using red colour PLA. The LID snaps into the two slits provided on either side of the body. The STL files for this can be found below.
Code Explanation
Now let's take a look at the final code for the project. Basically, 4 values need to be modified to make this work: the SSID name, Password, CircuitDigest Cloud AI Vision Analyst API key, and Sarvaam API Key.
#define BOARD_HAS_PSRAM
#include "esp_camera.h"
#include <WiFi.h>
#include <WiFiClientSecure.h>
#include <HTTPClient.h>
#include <ArduinoJson.h>
#include "driver/i2s.h"
#include "mbedtls/base64.h"
#include "soc/soc.h"
#include "soc/rtc_cntl_reg.h"
#ifndef RTC_CNTL_BROWNOUT_REG
 #define RTC_CNTL_BROWNOUT_REG RTC_CNTL_BROWN_OUT_REG
#endif
// =========================================================================
//  CONFIGURATIONS & API KEYS
// =========================================================================
const char* ssid        = "YOUR_SSID";
const char* password    = "YOUR_PASSWORD";
const char* visionApiKey = "YOUR_CIRCUITDIGEST_CLOUD_API_KEY";
const char* sarvamKey    = "YOUR_SARVAM_API_KEY";
const float AUDIO_GAIN_FACTOR = 2.5f;
// --- PINS ---
#define CAPTURE_BTN_PIN 13
#define LANG_BTN_PIN    2
#define FLASH_LED_PIN   4
// --- MAX98357A I2S PINS (Shared with Camera Data Lines) ---
#define I2S_BCLK       14
#define I2S_LRC        12
#define I2S_DOUT       15
#define I2S_NUM        I2S_NUM_0
At the very beginning, we have the library initialization, followed by the WIFI network and API credentials section and the pin mapping part. GPIO pin 13 is used for image capturing, pin 2 for changing languages and pin 4 for flashing the built-in Flash LED. GPIO pins 14, 12 and 15 are being used for the I2S amplifier.
Language Configuration Array
// --- LANGUAGE CONFIGURATIONS ---
struct LanguageConfig {
 const char* code;
 const char* voice;
 const char* name;
 const char* prompt;
 const char* notifyText;
 const char* wifiConnectedText;
};
// Optimized prompts under 12 words
LanguageConfig languages[] = {
 { "hi-IN", "shubh",   "Hindi"},
 { "en-IN", "shubh",   "English"},
 { "ta-IN", "kavitha", "Tamil"},
 { "ml-IN", "gokul",   "Malayalam"}
};
Stores settings for 4 languages: Hindi (hi-IN), English (en-IN), Tamil (ta-IN), and Malayalam (ml-IN). Details about Sarvam AI’s models, language models and all can be found in their official documentation. Each entry contains the target language code, speaker voice profile name, custom prompt, and pre-translated status messages for system alerts. We are creating an array using these values.
initI2S() - Initialising the Audio Amplifier
void initI2S(uint32_t sampleRate) {
 if (i2sInitialized) {
   i2s_driver_uninstall(I2S_NUM);
   i2sInitialized = false;
 }
 i2s_config_t i2s_config = {
   .mode = (i2s_mode_t)(I2S_MODE_MASTER | I2S_MODE_TX),
   .sample_rate = sampleRate,
   .bits_per_sample = I2S_BITS_PER_SAMPLE_16BIT,
   .channel_format = I2S_CHANNEL_FMT_RIGHT_LEFT,
   .communication_format = I2S_COMM_FORMAT_STAND_I2S,
   .intr_alloc_flags = ESP_INTR_FLAG_LEVEL1,
   .dma_buf_count = 8,
   .dma_buf_len = 512,
   .use_apll = false,
   .tx_desc_auto_clear = true,
   .fixed_mclk = 0
 };
 i2s_pin_config_t pin_config = {
   .bck_io_num = I2S_BCLK,
   .ws_io_num = I2S_LRC,
   .data_out_num = I2S_DOUT,
   .data_in_num = I2S_PIN_NO_CHANGE
 };
 if (i2s_driver_install(I2S_NUM, &i2s_config, 0, NULL) == ESP_OK) {
   i2s_set_pin(I2S_NUM, &pin_config);
   i2s_zero_dma_buffer(I2S_NUM);
   i2sInitialized = true;
 }
}
This function initializes the MAX98357A I2S amplifier at a specified sampling rate of 16,000 Hz.
Checks if I2S is already running; if so, uninstalls the driver first. Why do we have to do these initialization, deinitialization? Because the ESP32 CAM has a limited number of GPIOs available for use, and out of them most of them are internally used for the camera sensor and the onboard memory card reader.
stopI2S() and initCameraHardware()
void stopI2S() {
 if (i2sInitialized) {
   i2s_zero_dma_buffer(I2S_NUM);
   delay(50);
   i2s_driver_uninstall(I2S_NUM);
   i2sInitialized = false;
 }
}
Safely shuts down the I2S driver to release shared GPIO pins back to the camera module.
bool initCameraHardware() {
}
Configures and initializes the OV2640 camera sensor. Calls stopI2S() to release GPIOs 12, 14, and 15. Sets up the camera pin configurations. Configures image buffer storage location in PSRAM if detected, or standard DRAM if PSRAM is absent. Initializes the camera with esp_camera_init(). Returns true if successful.
extractBase64Audio() -Parsing the TTS Response
String extractBase64Audio(const String& jsonResponse) {
 int keyIndex = jsonResponse.indexOf("\"audios\":[\"");
 if (keyIndex == -1) keyIndex = jsonResponse.indexOf("\"audios\": [\"");
 if (keyIndex != -1) {
   int start = jsonResponse.indexOf("\"", keyIndex + 10) + 1;
   int end   = jsonResponse.indexOf("\"", start);
   if (start > 0 && end > start) {
     return jsonResponse.substring(start, end);
   }
 }
 return "";
}
This function parses the incoming JSON payload from the Sarvam TTS API to isolate the Base64 audio string without overloading internal memory with heavy JSON parsing trees.
playWAVBuffer() and speakWithSarvam()
unsigned long playWAVBuffer(uint8_t* wavData, size_t wavLen) {
}
Reads raw PCM/WAV byte stream data, applies audio amplification, and streams it to the speaker via I2S.
bool speakWithSarvam(String text, const char* langCode, const char* voiceModel, TTSTiming &timing) {Initializes WiFiClientSecure with setInsecure() and converts input text into spoken audio by sending an HTTP POST request to the Sarvam AI BulBul v3 TTS endpoint.
setup() - Boot Sequence
void setup() {
 WRITE_PERI_REG(RTC_CNTL_BROWNOUT_REG, 0);
 Serial.begin(115200);
 pinMode(CAPTURE_BTN_PIN, INPUT_PULLUP);
 pinMode(LANG_BTN_PIN, INPUT_PULLUP);
 pinMode(FLASH_LED_PIN, OUTPUT);
 digitalWrite(FLASH_LED_PIN, LOW);
 Serial.println("\n========================================");
 Serial.println("  ESP32-CAM Multi-Language Vision TTS  ");
 Serial.println("========================================\n");
 WiFi.begin(ssid, password);
 WiFi.setSleep(false);
 Serial.print("[WIFI] Connecting");
 while (WiFi.status() != WL_CONNECTED) {
   delay(500);
   Serial.print(".");
 }
 Serial.println("\n[WIFI OK] Connected!");
 TTSTiming dummyTiming = {0};
 LanguageConfig current = languages[currentLangIndex];
 speakWithSarvam(current.wifiConnectedText, current.code, current.voice, dummyTiming);
 Serial.printf("\n>>> System Ready! Current Language: %s <<<\n", current.name);
 Serial.println(">>> Capture Photo: GPIO 13 | Language Select: GPIO 2 <<<");
}
This disables the internal brownout detector to prevent unwanted power resets when the onboard Wi-Fi chip or Flash LED draws sudden current spikes. Configures button pins with internal pull-up resistors and the LED pin as OUTPUT. Connects to the configured SSID and turns off Wi-Fi sleep mode to minimise network latency. Calls speakWithSarvam() using the default language index (Hindi) to play "Wi-Fi connected successfully".
loop() - Capture and Language Switching
void loop() {
 if (millis() - lastBtnPressTime < 500) return;
 // Button 13: Capture Image & Process
 if (digitalRead(CAPTURE_BTN_PIN) == LOW) {
   lastBtnPressTime = millis();
   captureAndAnalyze();
 }
 // Button 2: Toggle Language
 if (digitalRead(LANG_BTN_PIN) == LOW) {
   lastBtnPressTime = millis();

   currentLangIndex = (currentLangIndex + 1) % TOTAL_LANGUAGES;
   LanguageConfig current = languages[currentLangIndex];
   Serial.printf("\n[LANG] Switched to: %s\n", current.name);
   TTSTiming dummyTiming = {0};
   speakWithSarvam(current.notifyText, current.code, current.voice, dummyTiming);
 }
}
Implements software debouncing by ensuring at least 500 milliseconds pass between successive button presses. Capture Button (GPIO 13) - Calls captureAndAnalyze() when pressed. Language Toggle Button (GPIO 2) - Increments currentLangIndex sequentially, toggling between Hindi, English, Tamil, and Malayalam and plays the corresponding language confirmation announcement (e.g., "Malayalam language selected").
Troubleshooting
» Code not getting uploaded to ESP32 CAM.
The ESP32 CAM needs to be in programming mode to flash the code. Make sure GPIO 0 is grounded so that it's in programming mode.
» All connections are done properly, but it's not turning on.
This device consumes a decent amount of power. So, ensure your battery has enough power.
Conclusion
What we built in this tutorial is just the starting point, and this can be further expanded to solve real-life problems. We learned how to share the same GPIO pins between multiple devices, as the ESP32-CAM has a limited number of GPIOs available for use and turned the same ESP32 CAM into an instant ESP32-CAM wearable AI vision assistant. This project proves that accessible technology doesn't have to cost thousands of dollars. If you want to build your own, the full open-source code, 3D print files, and circuit diagram are free at the link below.
With future upgrades like capacitive touch sensors, proximity sensor-based triggering, and custom wearable enclosures, this architecture lays a solid foundation for lightweight, hands-free navigation aids. We learned how to time-share limited GPIOs between the camera and audio subsystems, and turned a basic ESP32 CAM into a functional ESP32 CAM wearable assistant for visually impaired users.
GitHub Repository
The complete source code and project files are available in the GitHub repository. It includes the ESP32-CAM implementation, AI vision logic, and supporting resources required to build the project. Explore the repository to understand the implementation, modify the code, and extend the system with new features.


AI-Powered ESP32-CAM Vision and Object Detection Applications
These projects demonstrate how the ESP32-CAM can be combined with AI and computer vision for real-world detection tasks. From parking-space detection and object recognition to helmet detection, the system enables intelligent image-based decision-making.
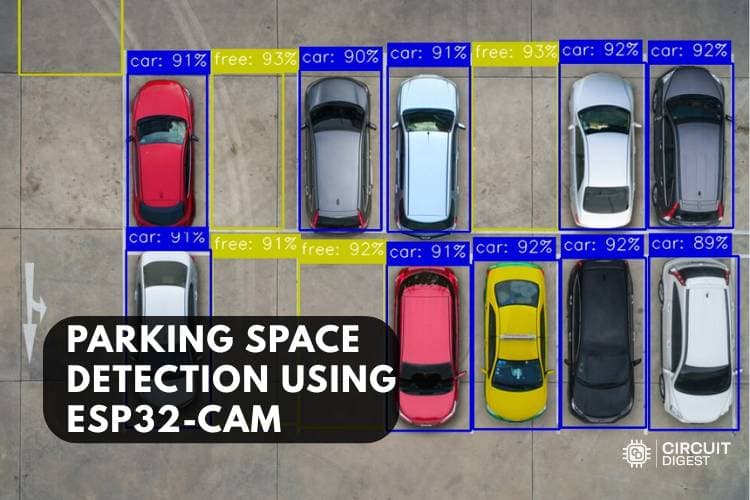
How to Build a Parking Space Detection System Using ESP32-CAM with CircuitDigest Cloud
This project solves exactly that problem by building a smart, automatic parking space detection system using the ESP32-CAM and the CircuitDigest Cloud API.
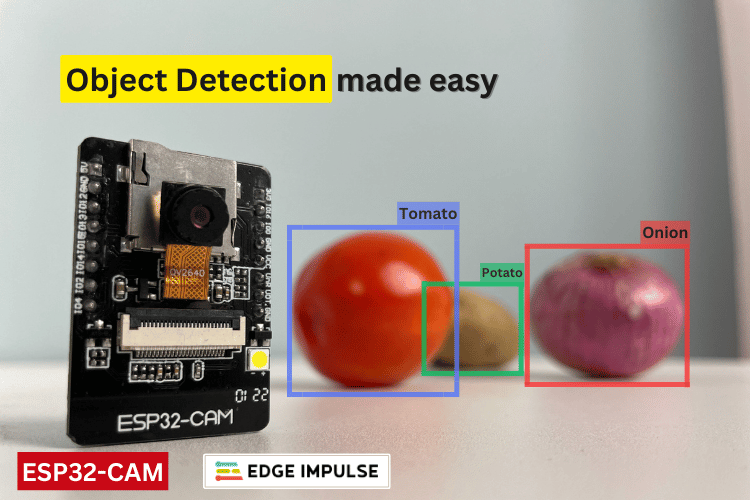
Object Detection using ESP32-CAM and Edge Impulse
In this project, we have used the popular ESP32-CAM module to build an Image recognition system that can identify various vegetables. We have used the Edge Impulse platform to train our model and deployed it on the ESP32cam module; the results of the model are displayed on the OLED screen as output.
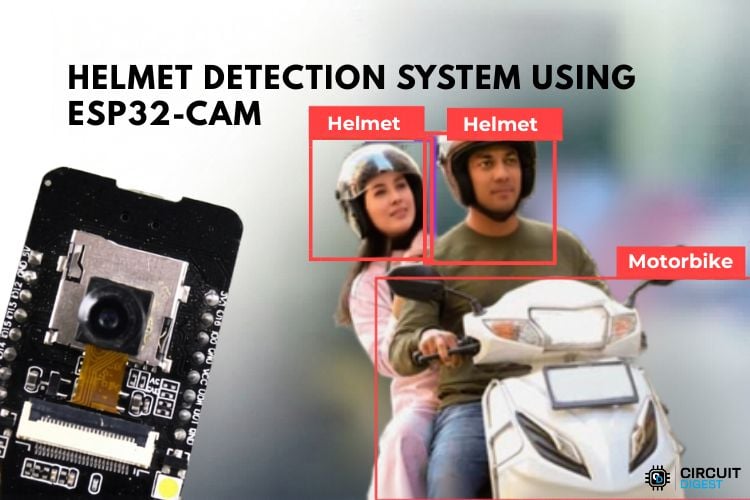
How to Do Helmet Detection with ESP32-CAM Using CircuitDigest Cloud
A compact ESP32-CAM captures the image and sends it securely to the CircuitDigest Cloud, where powerful AI models do the real work, analysing the image and detecting helmet usage within seconds.
Complete Project Code
#define BOARD_HAS_PSRAM
#include "esp_camera.h"
#include <WiFi.h>
#include <WiFiClientSecure.h>
#include <HTTPClient.h>
#include <ArduinoJson.h>
#include "driver/i2s.h"
#include "mbedtls/base64.h"
#include "soc/soc.h"
#include "soc/rtc_cntl_reg.h"
#ifndef RTC_CNTL_BROWNOUT_REG
 #define RTC_CNTL_BROWNOUT_REG RTC_CNTL_BROWN_OUT_REG
#endif
// =========================================================================
//  CONFIGURATIONS & API KEYS
// =========================================================================
const char* ssid        = "your_ssid";
const char* password    = "your_password";
const char* visionApiKey = "your_circuitdigest_API_key";
const char* sarvamKey    = "your_sarvam_API_key";
// Audio gain multiplier for digital volume boost (Range: 0.0f = Mute, 1.0f = Original, 2.5f = Loud/Clear, >3.5f = Distortion)
const float AUDIO_GAIN_FACTOR = 2.5f;
// --- PINS ---
#define CAPTURE_BTN_PIN 13
#define LANG_BTN_PIN    2
#define FLASH_LED_PIN   4
// --- MAX98357A I2S PINS (Shared with Camera Data Lines) ---
#define I2S_BCLK       14
#define I2S_LRC        12
#define I2S_DOUT       15
#define I2S_NUM        I2S_NUM_0
// --- LANGUAGE CONFIGURATIONS ---
struct LanguageConfig {
 const char* code;
 const char* voice;
 const char* name;
 const char* prompt;
 const char* notifyText;
 const char* wifiConnectedText;
};
// Optimized prompts under 12 words
LanguageConfig languages[] = {
 { "hi-IN", "shubh",   "Hindi",     "Describe obstacles directly ahead for a blind user in Hindi in under 15 words. State if path is clear or blocked.", "हिंदी भाषा चुनी गई है",                 "वाई-फाई कनेक्ट हो गया है" },
 { "en-IN", "shubh",   "English",   "Describe obstacles directly ahead for a blind user in English in under 15 words. State if path is clear or blocked.", "English language selected",            "Wi-Fi connected successfully" },
 { "ta-IN", "kavitha", "Tamil",     "Describe obstacles directly ahead for a blind user in Tamil in under 15 words. State if path is clear or blocked.", "தமிழ் மொழி தேர்ந்தெடுக்கப்பட்டது",     "வைஃபை இணைக்கப்பட்டது" },
 { "ml-IN", "gokul",   "Malayalam", "Describe obstacles directly ahead for a blind user in Malayalam in under 15 words. State if path is clear or blocked.", "മലയാളം ഭാഷ തിരഞ്ഞെടുത്തു",         "വൈഫൈ കണക്റ്റായി" }
};
const int TOTAL_LANGUAGES = 4;
int currentLangIndex = 0;
const float speechPace = 0.90;
unsigned long lastBtnPressTime = 0;
bool i2sInitialized = false;
// --- CAMERA PINOUT ---
#define PWDN_GPIO_NUM  32
#define RESET_GPIO_NUM -1
#define XCLK_GPIO_NUM   0
#define SIOD_GPIO_NUM  26
#define SIOC_GPIO_NUM  27
#define Y9_GPIO_NUM    35
#define Y8_GPIO_NUM    34
#define Y7_GPIO_NUM    39
#define Y6_GPIO_NUM    36
#define Y5_GPIO_NUM    21
#define Y4_GPIO_NUM    19
#define Y3_GPIO_NUM    18
#define Y2_GPIO_NUM     5
#define VSYNC_GPIO_NUM 25
#define HREF_GPIO_NUM  23
#define PCLK_GPIO_NUM  22
// Struct for benchmark timing calculations
struct TTSTiming {
 unsigned long tts_connect;
 unsigned long tts_post;
 unsigned long tts_download;
 unsigned long tts_extract;
 unsigned long tts_decode;
 unsigned long tts_playback;
};
void captureAndAnalyze();
bool speakWithSarvam(String text, const char* langCode, const char* voiceModel, TTSTiming &timing);
// --- DYNAMIC BUS SWITCHING (I2S ROUTINES) ---
void initI2S(uint32_t sampleRate) {
 if (i2sInitialized) {
   i2s_driver_uninstall(I2S_NUM);
   i2sInitialized = false;
 }
 i2s_config_t i2s_config = {
   .mode = (i2s_mode_t)(I2S_MODE_MASTER | I2S_MODE_TX),
   .sample_rate = sampleRate,
   .bits_per_sample = I2S_BITS_PER_SAMPLE_16BIT,
   .channel_format = I2S_CHANNEL_FMT_RIGHT_LEFT,
   .communication_format = I2S_COMM_FORMAT_STAND_I2S,
   .intr_alloc_flags = ESP_INTR_FLAG_LEVEL1,
   .dma_buf_count = 8,
   .dma_buf_len = 512,
   .use_apll = false,
   .tx_desc_auto_clear = true,
   .fixed_mclk = 0
 };
 i2s_pin_config_t pin_config = {
   .bck_io_num = I2S_BCLK,
   .ws_io_num = I2S_LRC,
   .data_out_num = I2S_DOUT,
   .data_in_num = I2S_PIN_NO_CHANGE
 };
 if (i2s_driver_install(I2S_NUM, &i2s_config, 0, NULL) == ESP_OK) {
   i2s_set_pin(I2S_NUM, &pin_config);
   i2s_zero_dma_buffer(I2S_NUM);
   i2sInitialized = true;
 }
}
void stopI2S() {
 if (i2sInitialized) {
   i2s_zero_dma_buffer(I2S_NUM);
   delay(50);
   i2s_driver_uninstall(I2S_NUM);
   i2sInitialized = false;
 }
}
bool initCameraHardware() {
 stopI2S(); // Always stop I2S before grabbing GPIO 12, 14, 15 for camera
 camera_config_t config;
 config.ledc_channel = LEDC_CHANNEL_0;
 config.ledc_timer   = LEDC_TIMER_0;
 config.pin_d0       = Y2_GPIO_NUM;
 config.pin_d1       = Y3_GPIO_NUM;
 config.pin_d2       = Y4_GPIO_NUM;
 config.pin_d3       = Y5_GPIO_NUM;
 config.pin_d4       = Y6_GPIO_NUM;
 config.pin_d5       = Y7_GPIO_NUM;
 config.pin_d6       = Y8_GPIO_NUM;
 config.pin_d7       = Y9_GPIO_NUM;
 config.pin_xclk     = XCLK_GPIO_NUM;
 config.pin_pclk     = PCLK_GPIO_NUM;
 config.pin_vsync    = VSYNC_GPIO_NUM;
 config.pin_href     = HREF_GPIO_NUM;
 config.pin_sccb_sda = SIOD_GPIO_NUM;
 config.pin_sccb_scl = SIOC_GPIO_NUM;
 config.pin_pwdn     = PWDN_GPIO_NUM;
 config.pin_reset    = RESET_GPIO_NUM;
 config.xclk_freq_hz = 20000000;
 config.pixel_format = PIXFORMAT_JPEG;
 if (psramFound()) {
   config.frame_size   = FRAMESIZE_QVGA;
   config.jpeg_quality = 12;
   config.fb_count     = 1;
   config.fb_location  = CAMERA_FB_IN_PSRAM;
 } else {
   config.frame_size   = FRAMESIZE_QVGA;
   config.jpeg_quality = 15;
   config.fb_count     = 1;
   config.fb_location  = CAMERA_FB_IN_DRAM;
 }
 config.grab_mode = CAMERA_GRAB_LATEST;
 esp_err_t err = esp_camera_init(&config);
 return (err == ESP_OK);
}
String extractBase64Audio(const String& jsonResponse) {
 int keyIndex = jsonResponse.indexOf("\"audios\":[\"");
 if (keyIndex == -1) keyIndex = jsonResponse.indexOf("\"audios\": [\"");
 if (keyIndex != -1) {
   int start = jsonResponse.indexOf("\"", keyIndex + 10) + 1;
   int end   = jsonResponse.indexOf("\"", start);
   if (start > 0 && end > start) {
     return jsonResponse.substring(start, end);
   }
 }
 return "";
}
unsigned long playWAVBuffer(uint8_t* wavData, size_t wavLen) {
 unsigned long startAudioPlay = millis();
 if (!wavData || wavLen <= 44) return 0;
 uint32_t sampleRate = 16000;
 uint16_t numChannels = 1;
 size_t headerOffset = 0;
 if (wavData[0] == 'R' && wavData[1] == 'I' && wavData[2] == 'F' && wavData[3] == 'F') {
   headerOffset = 44;
   numChannels = wavData[22] | (wavData[23] << 8);
   sampleRate = wavData[24] | (wavData[25] << 8) | ((uint32_t)wavData[26] << 16) | ((uint32_t)wavData[27] << 24);
 }
 initI2S(sampleRate);
 size_t bytesWritten = 0;
 uint8_t* payload = wavData + headerOffset;
 size_t payloadLen = wavLen - headerOffset;
 if (numChannels == 1) {
   int16_t* monoSamples = (int16_t*)payload;
   size_t monoCount = payloadLen / 2;
   int16_t stereoChunk[512 * 2];
   for (size_t i = 0; i < monoCount; i += 512) {
     size_t framesToProcess = (monoCount - i < 512) ? (monoCount - i) : 512;

     for (size_t j = 0; j < framesToProcess; j++) {
       int32_t boostedSample = (int32_t)(monoSamples[i + j] * AUDIO_GAIN_FACTOR);
       if (boostedSample > 32767)  boostedSample = 32767;
       if (boostedSample < -32768) boostedSample = -32768;
       int16_t cleanSample = (int16_t)boostedSample;
       stereoChunk[j * 2]     = cleanSample;
       stereoChunk[j * 2 + 1] = cleanSample;
     }
     i2s_write(I2S_NUM, stereoChunk, framesToProcess * 4, &bytesWritten, portMAX_DELAY);
   }
 } else {
   int16_t* stereoSamples = (int16_t*)payload;
   size_t stereoCount = payloadLen / 2;
   int16_t chunk[512 * 2];
   for (size_t i = 0; i < stereoCount; i += 1024) {
     size_t samplesToProcess = (stereoCount - i < 1024) ? (stereoCount - i) : 1024;

     for (size_t j = 0; j < samplesToProcess; j++) {
       int32_t boosted = (int32_t)(stereoSamples[i + j] * AUDIO_GAIN_FACTOR);
       if (boosted > 32767)  boosted = 32767;
       if (boosted < -32768) boosted = -32768;
       chunk[j] = (int16_t)boosted;
     }
     i2s_write(I2S_NUM, chunk, samplesToProcess * 2, &bytesWritten, portMAX_DELAY);
   }
 }
 int16_t silence[256] = {0};
 i2s_write(I2S_NUM, silence, sizeof(silence), &bytesWritten, portMAX_DELAY);
 delay(50);
 stopI2S();
 return millis() - startAudioPlay;
}
bool speakWithSarvam(String text, const char* langCode, const char* voiceModel, TTSTiming &timing) {
 if (WiFi.status() != WL_CONNECTED) return false;
 WiFiClientSecure client;
 client.setInsecure();
 HTTPClient http;
 String url = "https://api.sarvam.ai/text-to-speech";
 unsigned long t0 = millis();
 if (!http.begin(client, url)) return false;
 timing.tts_connect = millis() - t0;
 http.setTimeout(12000);
 http.addHeader("api-subscription-key", sarvamKey);
 http.addHeader("Content-Type", "application/json");
 String jsonBody = "{";
 jsonBody += "\"inputs\":[\"" + text + "\"],";
 jsonBody += "\"target_language_code\":\"" + String(langCode) + "\",";
 jsonBody += "\"speaker\":\"" + String(voiceModel) + "\",";
 jsonBody += "\"pace\":" + String(speechPace, 2) + ",";
 jsonBody += "\"speech_sample_rate\":16000,";
 jsonBody += "\"enable_preprocessing\":true,";
 jsonBody += "\"model\":\"bulbul:v3\"";
 jsonBody += "}";
 t0 = millis();
 int httpCode = http.POST(jsonBody);
 timing.tts_post = millis() - t0;
 if (httpCode == HTTP_CODE_OK) {
   t0 = millis();
   String payload = http.getString();
   http.end();
   timing.tts_download = millis() - t0;
   t0 = millis();
   String b64Audio = extractBase64Audio(payload);
   timing.tts_extract = millis() - t0;
   if (b64Audio.length() == 0) return false;
   size_t b64Len = b64Audio.length();
   size_t maxOutLen = (b64Len * 3 / 4) + 256;
   uint8_t* rawBuffer = (uint8_t*)heap_caps_malloc(maxOutLen, MALLOC_CAP_SPIRAM | MALLOC_CAP_8BIT);
   if (!rawBuffer) rawBuffer = (uint8_t*)malloc(maxOutLen);
   if (!rawBuffer) {
     Serial.println("[ERROR] Memory Allocation Failed!");
     return false;
   }
   t0 = millis();
   size_t outLen = 0;
   int ret = mbedtls_base64_decode(rawBuffer, maxOutLen, &outLen,
                                  (const unsigned char*)b64Audio.c_str(), b64Len);
   timing.tts_decode = millis() - t0;
   if (ret == 0 && outLen > 0) {
     timing.tts_playback = playWAVBuffer(rawBuffer, outLen);
   }

   free(rawBuffer);
   return true;
 }
 http.end();
 return false;
}
void setup() {
 WRITE_PERI_REG(RTC_CNTL_BROWNOUT_REG, 0);
 Serial.begin(115200);
 pinMode(CAPTURE_BTN_PIN, INPUT_PULLUP);
 pinMode(LANG_BTN_PIN, INPUT_PULLUP);
 pinMode(FLASH_LED_PIN, OUTPUT);
 digitalWrite(FLASH_LED_PIN, LOW);
 Serial.println("\n========================================");
 Serial.println("  ESP32-CAM Multi-Language Vision TTS  ");
 Serial.println("========================================\n");
 WiFi.begin(ssid, password);
 WiFi.setSleep(false);
 Serial.print("[WIFI] Connecting");
 while (WiFi.status() != WL_CONNECTED) {
   delay(500);
   Serial.print(".");
 }
 Serial.println("\n[WIFI OK] Connected!");
 TTSTiming dummyTiming = {0};
 LanguageConfig current = languages[currentLangIndex];
 speakWithSarvam(current.wifiConnectedText, current.code, current.voice, dummyTiming);
 Serial.printf("\n>>> System Ready! Current Language: %s <<<\n", current.name);
 Serial.println(">>> Capture Photo: GPIO 13 | Language Select: GPIO 2 <<<");
}
void loop() {
 if (millis() - lastBtnPressTime < 500) return;
 // Button 13: Capture Image & Process
 if (digitalRead(CAPTURE_BTN_PIN) == LOW) {
   lastBtnPressTime = millis();
   captureAndAnalyze();
 }
 // Button 2: Toggle Language
 if (digitalRead(LANG_BTN_PIN) == LOW) {
   lastBtnPressTime = millis();

   currentLangIndex = (currentLangIndex + 1) % TOTAL_LANGUAGES;
   LanguageConfig current = languages[currentLangIndex];
   Serial.printf("\n[LANG] Switched to: %s\n", current.name);
   TTSTiming dummyTiming = {0};
   speakWithSarvam(current.notifyText, current.code, current.voice, dummyTiming);
 }
}
void captureAndAnalyze() {
 unsigned long t_total_start = millis();

 unsigned long t_cam_init = 0;
 unsigned long t_cam_snap = 0;
 unsigned long t_cam_deinit = 0;
 unsigned long t_ssl_connect = 0;
 unsigned long t_img_upload = 0;
 unsigned long t_vision_proc = 0;
 unsigned long t_json_parse = 0;
 TTSTiming tts = {0};
 LanguageConfig current = languages[currentLangIndex];
 Serial.println("\n==================================================");
 Serial.printf("   STARTING IMAGE ANALYSIS (%s Mode)\n", current.name);
 Serial.println("==================================================");
 // 1. Initialize Camera Hardware
 unsigned long t0 = millis();
 if (!initCameraHardware()) {
   Serial.println("[CAMERA ERROR] Failed hardware initialization!");
   return;
 }
 t_cam_init = millis() - t0;
 // 2. Snap Frame
 digitalWrite(FLASH_LED_PIN, HIGH);
 t0 = millis();
 camera_fb_t * fb = esp_camera_fb_get();
 digitalWrite(FLASH_LED_PIN, LOW);
 t_cam_snap = millis() - t0;
 if (!fb) {
   Serial.println("[CAMERA ERROR] Frame buffer capture failed!");
   esp_camera_deinit();
   return;
 }
 // 3. Immediately De-initialize Camera to free GPIO 12, 14, 15
 t0 = millis();
 esp_camera_deinit();
 t_cam_deinit = millis() - t0;
 // 4. Connect SSL Client
 t0 = millis();
 WiFiClientSecure client;
 client.setInsecure();
 client.setTimeout(10000);
 const char* host = "www.circuitdigest.cloud";
 if (!client.connect(host, 443)) {
   Serial.println("[CLOUD ERROR] Could not connect to Vision Cloud!");
   esp_camera_fb_return(fb);
   return;
 }
 t_ssl_connect = millis() - t0;
 // 5. Construct Multipart Upload Header
 String boundary = "----ESP32Boundary12345";
 String headPrompt = "--" + boundary + "\r\n" +
                     "Content-Disposition: form-data; name=\"prompt\"\r\n\r\n" +
                     String(current.prompt) + "\r\n";
 String headImage = "--" + boundary + "\r\n" +
                    "Content-Disposition: form-data; name=\"imageFile\"; filename=\"photo.jpg\"\r\n" +
                    "Content-Type: image/jpeg\r\n\r\n";
 String tail = "\r\n--" + boundary + "--\r\n";
 size_t contentLength = headPrompt.length() + headImage.length() + fb->len + tail.length();
 // Stream POST Request Header & Body Chunks
 t0 = millis();
 client.println("POST /api/v1/image-to-text/generate HTTP/1.1");
 client.println("Host: www.circuitdigest.cloud");
 client.println("X-API-Key: " + String(visionApiKey));
 client.println("Content-Type: multipart/form-data; boundary=" + boundary);
 client.printf("Content-Length: %d\r\n", contentLength);
 client.println("Connection: close");
 client.println();
 client.print(headPrompt);
 client.print(headImage);
 uint8_t *fbBuf = fb->buf;
 size_t fbLen = fb->len;
 size_t chunkSize = 1024;
 for (size_t i = 0; i < fbLen; i += chunkSize) {
   size_t len = (fbLen - i < chunkSize) ? (fbLen - i) : chunkSize;
   client.write(fbBuf + i, len);
 }
 client.print(tail);
 client.flush();
 t_img_upload = millis() - t0;

 esp_camera_fb_return(fb);
 // 6. Fast Response Parsing directly from Socket Stream (No 15-second hang!)
 t0 = millis();
 while (client.connected() && !client.available()) {
   if (millis() - t0 > 10000) {
     Serial.println("[CLOUD ERROR] Response Timeout!");
     client.stop();
     return;
   }
   delay(5);
 }
 // Skip HTTP Headers efficiently
 while (client.connected()) {
   String line = client.readStringUntil('\n');
   if (line == "\r" || line.length() == 0) break;
 }
 t_vision_proc = millis() - t0;
 // 7. Directly Deserialize JSON Stream
 t0 = millis();
 JsonDocument doc;
 DeserializationError error = deserializeJson(doc, client);
 client.stop();
 t_json_parse = millis() - t0;
 if (!error) {
   String generatedText = "";
   if (doc.containsKey("generated_text")) {
     generatedText = doc["generated_text"].as<String>();
   } else if (doc.containsKey("text")) {
     generatedText = doc["text"].as<String>();
   }
   generatedText.replace("\"", "");
   generatedText.replace("\'", "");
   generatedText.replace("\\", "");
   generatedText.replace("\r", "");
   generatedText.replace("\n", " ");
   generatedText.trim();
   if (generatedText.length() > 0) {
     Serial.printf("\n[VISION RESULT (%s)] %s\n", current.name, generatedText.c_str());
     // 8. Execute Sarvam Text-to-Speech
     speakWithSarvam(generatedText, current.code, current.voice, tts);
     unsigned long t_total_elapsed = millis() - t_total_start;
     // Print Accurate Speed Benchmarks
     Serial.println("\n--------------------------------------------------");
     Serial.println("          REAL-TIME SPEED BENCHMARK               ");
     Serial.println("--------------------------------------------------");
     Serial.printf("  1. Camera Hardware Init : %lu ms\n", t_cam_init);
     Serial.printf("  2. Image Snap Frame     : %lu ms\n", t_cam_snap);
     Serial.printf("  3. Camera Deinit        : %lu ms\n", t_cam_deinit);
     Serial.printf("  4. Vision SSL Connect   : %lu ms\n", t_ssl_connect);
     Serial.printf("  5. Image Upload Stream  : %lu ms\n", t_img_upload);
     Serial.printf("  6. Vision AI Response   : %lu ms (FAST FIX!)\n", t_vision_proc);
     Serial.printf("  7. Vision JSON Parse    : %lu ms\n", t_json_parse);
     Serial.println("--------------------------------------------------");
     Serial.printf("  8. Sarvam SSL Connect   : %lu ms\n", tts.tts_connect);
     Serial.printf("  9. Sarvam POST Request  : %lu ms\n", tts.tts_post);
     Serial.printf(" 10. Download Audio B64   : %lu ms\n", tts.tts_download);
     Serial.printf(" 11. Extract Base64 Str   : %lu ms\n", tts.tts_extract);
     Serial.printf(" 12. Base64 Audio Decode  : %lu ms\n", tts.tts_decode);
     Serial.printf(" 13. Speaker Audio Output : %lu ms\n", tts.tts_playback);
     Serial.println("--------------------------------------------------");
     Serial.printf(" TOTAL END-TO-END DELAY   : %lu ms (%.2f sec)\n", t_total_elapsed, t_total_elapsed / 1000.0f);
     Serial.println("--------------------------------------------------\n");
   }
 } else {
   Serial.print("[JSON ERROR] Deserialization failed: ");
   Serial.println(error.c_str());
 }
}

Add a comment
No account needed. Your comment appears once a moderator has reviewed it.