
The Raspberry Pi Pico is a microcontroller development board powered by the custom RP2040 chip. With its dual-core ARM Cortex-M0+ processor, extensive GPIO pins, and built-in programmable I/O (PIO), the Pico is used in robotics, home automation, and IoT projects where precise timing and low power consumption are crucial.
This comprehensive collection features Raspberry Pi Pico projects ranging from beginner-friendly tutorials to advanced embedded systems, each complete with detailed circuit diagrams, step-by-step instructions, and downloadable MicroPython or C++ code. Whether you're learning microcontroller programming or developing commercial prototypes, these projects cover everything from basic LED control to complex sensor networks and wireless communication systems.
If you are looking for projects from other development boards of Raspberry Pi, you can check out our: Raspberry Pi Projects and Raspberry Pi Zero Projects
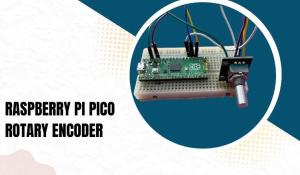
In this blog post, we will explore how to interface a rotary encoder with the Raspberry Pi Pico microcontroller. Rotary encoders are popular input devices that can be used to measure and control the position and rotation of a shaft. The Raspberry Pi Pico, with its GPIO pins and capabilities, provides an excellent platform for integrating a…

In 2012, Raspberry Pi Foundation introduced us to a single board computer i.e. Raspberry Pi, which was mainly promoted for teaching the basics of computer science to kids and 9 years later, a microcontroller board, Raspberry Pi Pico was introduced. Raspberry Pi Pico comes with the Raspberry Pi Foundation's own silicon chip RP2040. It is a low-cost microcontroller,…

The distance meter is used for accurately determining the distance of an object without contact by the medium of ultrasonic sound waves(20,000 Hz above sound frequency). This raspberry pi pico based project will become a very important instrument in practical if it is used perfectly. In case we use a laser range finder it will not be efficient enough since…

With temperature monitoring, you can easily monitor, track and generate graphs to understand the daily temperature trends. Data monitoring and generating trends is one of the major applications in the field of the Internet of Things. Internet of Things is the capability to connect any device over the internet. Each device can be programmed for one or more…

This Robot can follow any line and can reach its destination automatically, by tracking any line. This can be used to move to places in factories and industries to move anything without any control of a user or computer. This moves based on the sensor data that the IR Sensor gives as …

Hey everyone welcome back to the another tutorial of the Raspberry Pi Pico tutorial series. In this tutorial we are going to control an LED with an android app using Bluetooth and Micro Python. The HC-06 Bluetooth module is very cheap and easy to interface with the microcontrollers and it is generally implemented by using the UART communication. So, our task is to…

Hey everyone, I hope you are enjoying the Raspberry Pi Pico tutorial series. In this tutorial, we are going to control two LEDs by multithreading with dual-core programming on the Raspberry Pi Pico using MicroPython. So far we have seen how to interface an OLED, a LCD, a Servo, an Ultrasonic Sensor and we have implemented the I2C, ADC, Bluetooth communication with…

We know that ESP-01 is the best and cheaper module available in the market. As the title suggest, in this tutorial, we are going to interface a separate Wi-Fi module with the Raspberry Pi Pico. We will learn how to connect and program the ESP01 module with Raspberry Pi Pico using Micropython and ESP8266 library.
The ESP8266-01 module comes…

With the hope that you are enjoying our Raspberry Pi Pico tutorial series, we are here with another interesting tutorial. In this tutorial, we are going to control a servo motor with Raspberry Pi Pico using Pulse Width Modulation in MicroPython. So far, we have learnt how to interface an OLED and LCD. Along with that, we also got to learn how to implement the…

We are here with yet another tutorial of the Raspberry Pi Pico. If you are following our Raspberry Pi Pico tutorial series, then you already know the basic setup and how to interface an OLED display module with the Raspberry Pi Pico. In this tutorial, we will use the Pico board to perform an ADC conversion. The Raspberry Pi Pico has four 12-bit ADC channels, but one of them…

If you are following our Raspberry Pi Pico tutorial series, then you must have read the tutorial on how to interface an OLED display module with a pico board in which we measured the ADC value from the ADC channel of the pico board. In this tutorial, we will interface an ultrasonic sensor with the pico board and we are going to measure the…

In this tutorial, we are going to interface an OLED display module with the Pico board. You will be able to perform an I2C communication on Raspberry Pi Pico at the end of this tutorial. Here, we are going to display some strings on an OLED display by using Micropython. We already have some articles and projects on the Interfacing of the OLED display. You can refer to those…