
Since the coronavirus outbreak, building a contactless body temperature monitoring system has become essential for identifying those affected by the virus. To solve this issue, temperature devices are often used to measure body temperature. These devices have non-contact IR temperature sensors that can measure the body temperature without any physical contact.
There are many temperature guns available in the market, but none of them give any alert or email notification to higher authorities to take appropriate action when the temperature exceeds a particular limit. In this project, we will interface an IR temperature sensor and send the email alerts with the image of the person if the temperature of any particular person exceeds the set value.
In today’s world, the Internet of Things is revolutionizing our lives by developing several systems that can be monitored and controlled remotely. In this project, we will leverage the power of IoT and we will build a Temperature Monitoring device with Email alerts using Raspberry Pi, MLX90614, and PiCamera.
Previously, we have also built other similar thermometers for body temperature measurement, you can find them here.
- Arduino based digital thermometer using MAX30205
- Contactless Body Temperature screening using RFID and Arduino with MLX90614
- Non-Contact Infrared Thermometer Gun using Arduino
- Wall Mount Non-Contact Thermometer using Arduino
- Smart Thermometer using Arduino with Android Application
Table of Contents
- Components Required for Contactless Temperature Sensor Raspberry Pi
- What Makes MLX90614 Different from Other Temperature Sensors?
- └ Features of MLX90614:
- Interfacing MLX90614 with Raspberry Pi
- Pi Camera Interfacing with Raspberry Pi
- Setting up SMTP Email with Raspberry Pi
- Python Code for Pi to Read Temperature from MLX90614 and Send E-mail with Picture
- Measuring Temperature and Sending Mail Alert with PI
- Technical Specification: Contactless Body Temperature Monitoring System
- Frequently Asked Questions
- Project Summary and GitHub Repository
- Related Projects Using Body Temperature Monitoring
Components Required for Contactless Temperature Sensor Raspberry Pi
Here we are using Raspberry Pi 3 Raspbian OS. All the basic Hardware and Software requirements have been previously discussed; you can look it up in the Raspberry Pi Introduction and Raspberry PI LED Blinking for getting started. Other than that, we need:
- Raspberry Pi 3 (any version would be fine).
- Pi Camera.
- MLX90614 - IR temperature sensor.
- Connecting wires.
- Breadboard.
- Power Supply (5V,2A/3A)
This contactless monitoring of body temperature by using a Raspberry Pi project becomes simple when divided into these key parts:
- Understanding & Interfacing MLX90614 with Raspberry pi.
- Getting started with Pi Camera.
- Setting up SMTP Email with Raspberry pi.
- Final code development and understanding.
Raspberry Pi: Raspberry Pi is a credit card-sized computer that was designed for educational purposes. Due to its price and amazing specifications like onboard wifi, Bluetooth, and programmable GPIO header, and the number of possible options to create an application, it was adopted by developers and electronics hobbyists. You can look it up in the Raspberry Pi Introduction and Raspberry PI LED Blinking for getting started with the booting process.
What Makes MLX90614 Different from Other Temperature Sensors?
MLX90614 IR Temperature Sensor: There are many sensors available in the market that can give us temperature and humidity. What makes this sensor different from all other sensors is that it can give us object temperature, and other sensors give ambient temperature. We have used DHT11 Sensor and LM35 extensively for many applications where atmospheric humidity or temperature has to be measured. Modern contactless temperature sensors with a Raspberry Pi solution can measure body temperature without any physical contact using sophisticated non-contact IR temperature sensors.
But here for making a temperature gun which doesn't need physical contact and can measure the object temperature instead of ambient temperature, we use IR IR-based MLX90614. To learn more about Infrared and IR sensor circuits, follow the link.
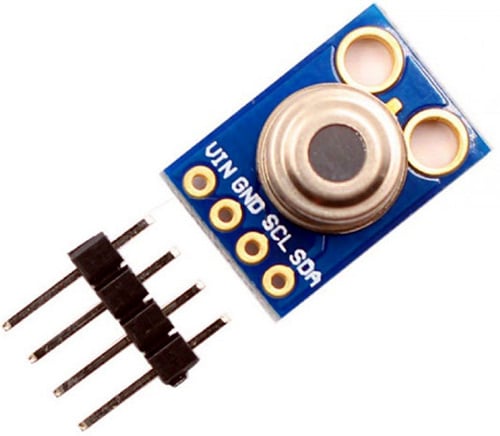
MLX90614 sensor is manufactured by Melexis Microelectronics Integrated Systems. It works on the principle of an InfraRed thermopile sensor for temperature measurement. These sensors consist of two units embedded internally to give the temperature output. The first unit is the sensing unit, which has an infrared detector, followed by the second unit, which performs the computation of the data with Digital signal processing (DSP). This sensor works on the Stefan-Boltzmann law, which explains the power radiated by a black body in terms of its temperature. In simple terms, any object emits IR energy, and the intensity of that will be directly proportional to the temperature of that object. MLX90614 sensor converts the computational value into a 17-bit ADC and which can be accessed using the I2C communication protocol. These sensors measure the ambient temperature as well as object temperature with a resolution calibration of 0.02°C. To know more about the features of the MLX90614 sensor, refer to the MLX90614 Datasheet.
Features of MLX90614:
- Operating Voltage: 3.6V to 5V
- Ambient Temperature Range: -40°C to 125°C
- Object Temperature Range: -70°C to -382.2°C
- Resolution/Calibration: 0.02°C
- 17-bit ADC.
- I2C communication.
Interfacing MLX90614 with Raspberry Pi
First, we will download the library and packages required to successfully interface the MLX90614.
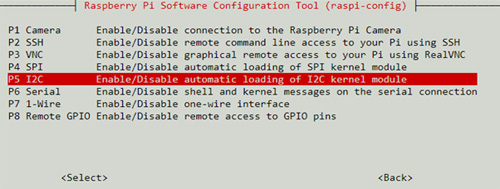
Step 1⇒ Enabling the I2C from the Raspberry Pi settings.
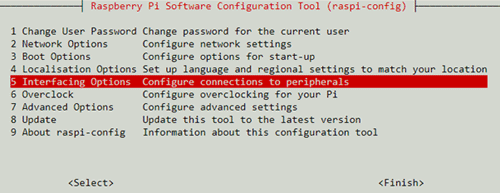
Type sudo raspi-config and then go to interfacing options.
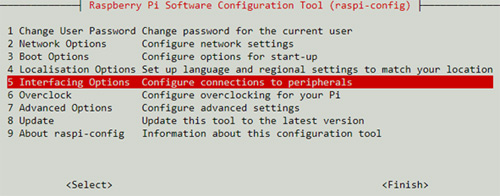
Go to the I2C option and enable it.
Step 2⇒ Download the package/library of MLX90614 by going to https://pypi.org/project/PyMLX90614/#files, then right click and copy the link address.
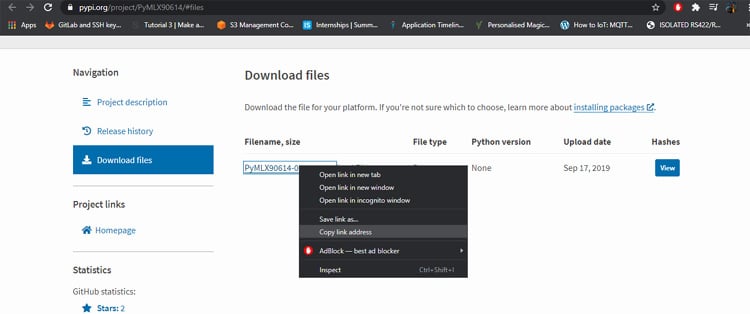
Go to the RPI terminal and type wget and paste the link copied like below.
It will download the library in the zip file name ‘PyMLX90614-0.0.3.tar.gz’. then extract the folder with the extension of tar -xf file name, or use the below command to do the same.
tar -xf PyMLX90614-0.0.3.tar.gz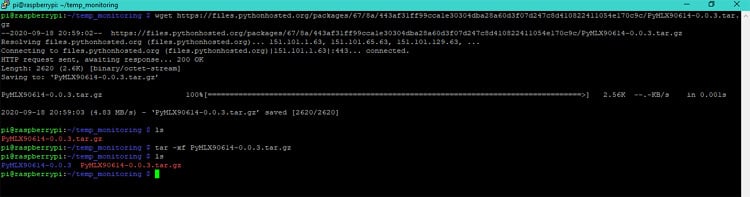
Then we need to install some required packages using the below commands.
sudo apt-get install python-setuptools
sudo apt-get install -y i2c-tools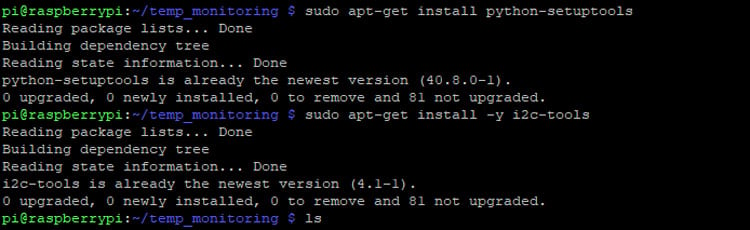
Then go to the extracted folder using cd PyMLX90614-0.0.3/ and run the command.
sudo python setup.py install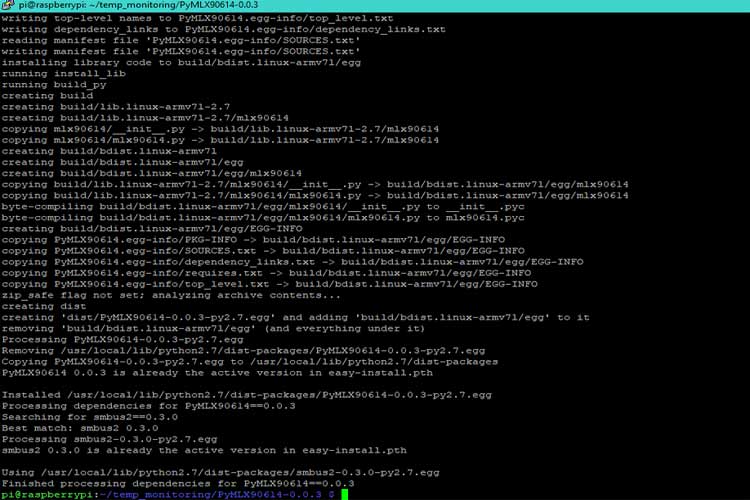
Once you are done following the steps, just interface the MLX90614 sensor with the Raspberry Pi using the circuit given below. The circuit below Raspberry Pi MLX90614 circuit, was designed using Fritzing.

If the connections and the installation are done properly, we can check if we get the sensor address value on the I2C bus using the command i2cdetect -y 1.
If everything works as expected, we can see the following output on our terminal.
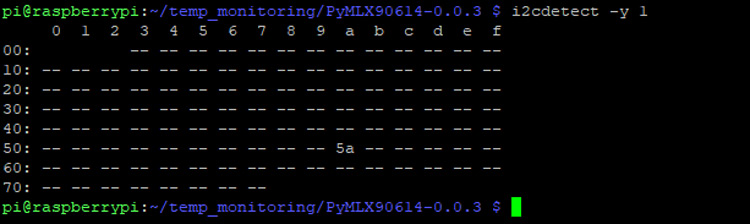
0x5A represents the address of the sensor as mentioned by the datasheet. The datasheet snippet showing the same is given below.

Now, we will run make a new file name mlxread.py and write a sample program to check the data from the sensor. The code for the same is given below.
from smbus2 import SMBus
from mlx90614 import MLX90614
bus = SMBus(1)
sensor = MLX90614(bus, address=0x5A)
print "Ambient Temperature :", sensor.get_ambient()
print "Object Temperature :", sensor.get_object_1()
bus.close()
Once the file is created, we will run it with Python extension python mlxread.py. The output I received is shown below. I ran the program multiple times to check if the values change as I move my hand over it.
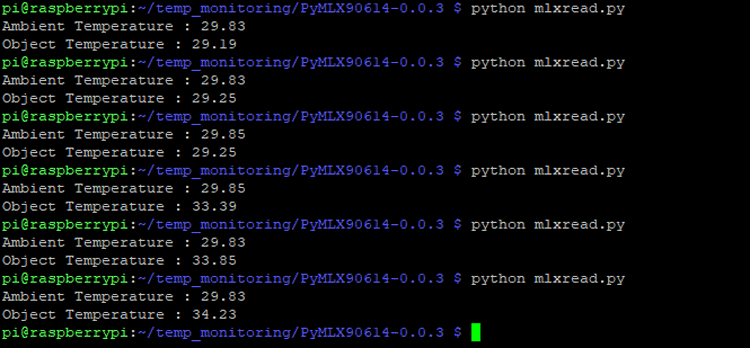
Woah, we have successfully interfaced MLX90614 with our Raspberry Pi as you can confirm from the above image.
Pi Camera Interfacing with Raspberry Pi
Step1⇒ Enabling the Camera from Raspberry Pi setting.
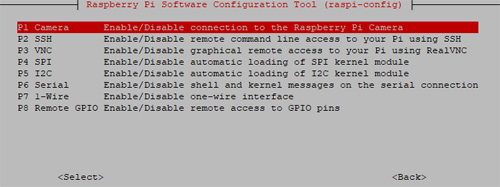
Type sudo raspi-config and then go to interfacing options.
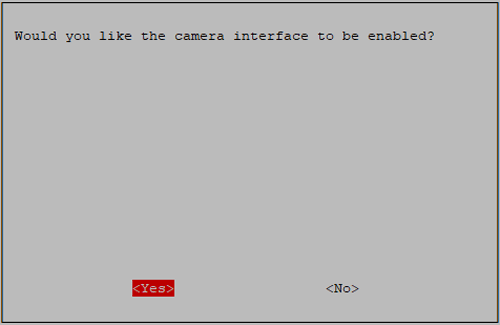
Go to the Camera and enable the camera.
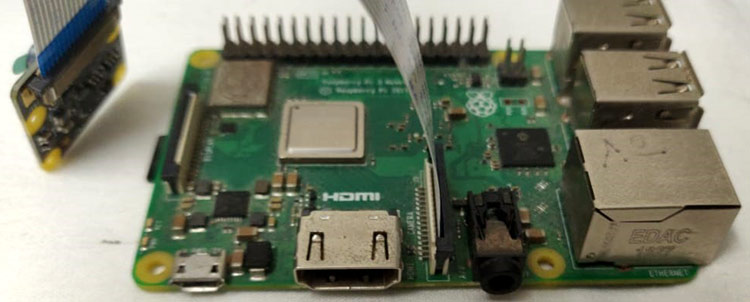
Now, connect the camera module as shown below.
Step2⇒ To check if the camera is connected properly, we take a test image and save that in our Desktop (we are using Full GUI Raspbian OS version)
raspistill -o Desktop/image.jpgThis will enable your camera to click a picture with the name image and store that on your Desktop.
Setting up SMTP Email with Raspberry Pi
In this section, we will understand how we can set our GMAIL account to send alert emails once the temperature exceeds the predefined set value.
SMTP is a Simple Mail Transfer Protocol, which is an application layer protocol responsible for email service using TCP/IP. It provides the ability to send and receive e-mail messages and is managed by the Internet Engineering Task Force(IETF).
This tutorial only works with GMAIL accounts, and to avoid any possible errors, it would be recommended if you use a fresh Gmail account.
By default, Google doesn’t allow users to send email using a Python script. To make this work, we have to enable some less secure apps by going into account settings.
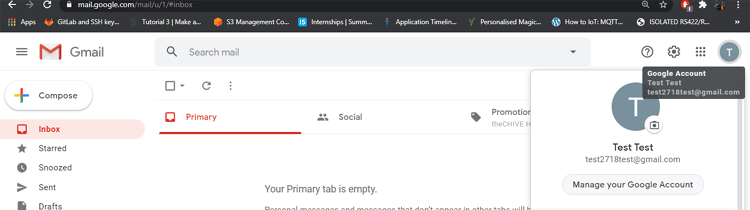
Step1⇒ Go to the right corner and click on my Manage your Google Account.
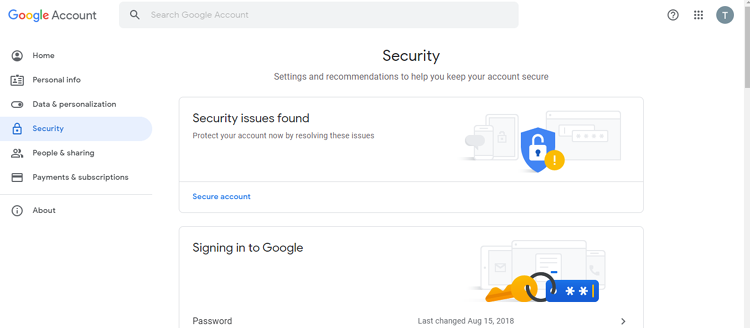
Step 2⇒ Click on Security and scroll down to “Less Secure App Access”.
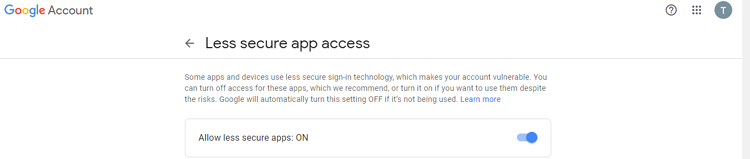
Step3⇒ Enable the less secure app.
Step 4⇒ Repeat with the other email ID as well to send/receive the email from the Python script.
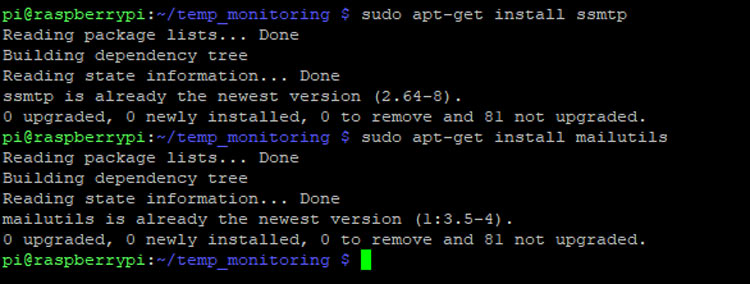
Step 5⇒ Download the required packages.
sudo apt-get install ssmtp
sudo apt-get install mailutilsIf you are getting an error in running the command by copy-pasting, then manually type it.
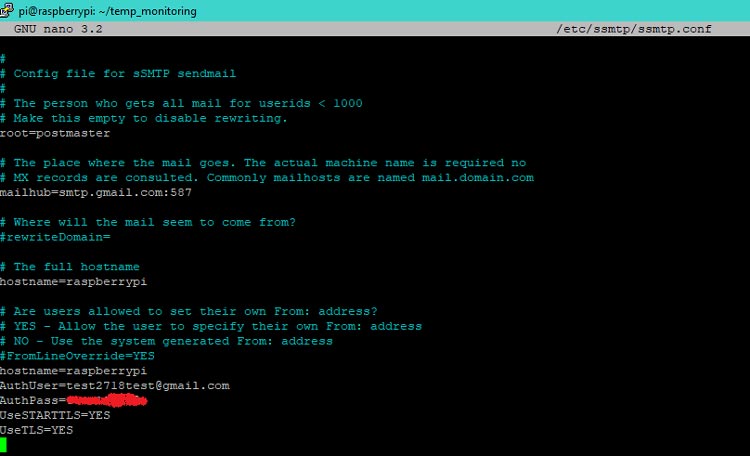
Step 6 ⇒ After the installation of all the libraries is done, we need to make changes to the ssmtp.conf file where we have to enter the sender’s email details
Go to sudo nano /etc/ssmtp/ssmtp.conf
Scroll down to the end and paste this,
mailhub=smtp.gmail.com:587
AuthUser=YourEmailAddress
AuthPass=YourEmailPassword
UseSTARTTLS=YES
UseTLS=YES
I have also shared a screenshot of my terminals for your reference.
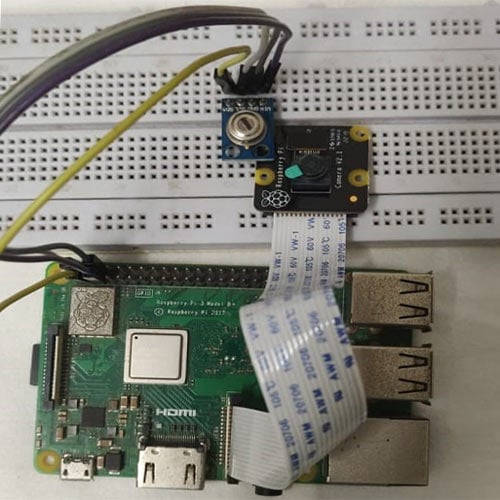
I just used a breadboard to make my connection, my hardware setup looks like his when the MLX90614 and camera are connected.
Python Code for Pi to Read Temperature from MLX90614 and Send E-mail with Picture
The Python program does all the necessary operations to read the sensor data, compare it with the threshold value, authorize the email, and then send the email with the image attached. At first, we will require libraries, sender, and receiver email declaration. Email can be sent by smtplib, but we just want the email to be organized with a subject, body, and other attachment, this is done with the help of Multipurpose Internet Mail Extensions (MIME). The complete code can be found at the bottom of this page.
import RPi.GPIO as gpio
import picamera
import time
import smtplib
from email.MIMEMultipart import MIMEMultipart
from email.MIMEText import MIMEText
from email.MIMEBase import MIMEBase
from email import encoders
from email.mime.image import MIMEImage
from smbus2 import SMBus
from mlx90614 import MLX90614
After that, we define the sender email address, receiver email address, subject of the email, body, and the attachment message.
fromaddr = "[email protected]" # change the email address accordingly
toaddr = "[email protected]"
mail = MIMEMultipart()
mail['From'] = fromaddr
mail['To'] = toaddr
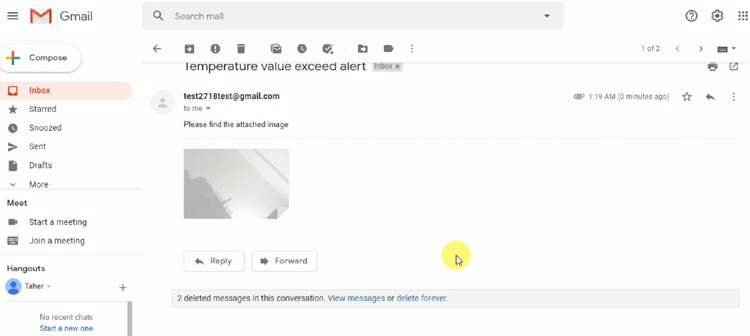
mail['Subject'] = "Temperature value exceed alert"
body = "Please find the attached image"Then, we create a function using which we can send an E-mail.
def sendMail(data):
    mail.attach(MIMEText(body, 'plain'))
    print data
    dat='%s.jpg'%data
    print dat
    attachment = open(dat, 'rb')
    image=MIMEImage(attachment.read())
    attachment.close()
    mail.attach(image)
    server = smtplib.SMTP('smtp.gmail.com', 587)
    server.starttls()
    server.login(fromaddr, "test12345@")
    text = mail.as_string()
    server.sendmail(fromaddr, toaddr, text)
    server.quit()
Then, we create a function to capture the image that is sent via email and also stores the image with data and time.
def capture_image():
    data= time.strftime("%d_%b_%Y|%H:%M:%S")
    camera.start_preview()
    time.sleep(5)
    print data
    camera.capture('%s.jpg'%data)
    camera.stop_preview()
    time.sleep(1)
    sendMail(data)
Then, we make some settings with PiCamera.
camera = picamera.PiCamera()
camera.rotation=0
camera.awb_mode= 'auto'
camera.brightness=55
And at last, we have a while(1) loop which will run infinitely. It will read the data from the MLX90614 temperature sensor and if the temperature exceeds the set value, then the capture_image() function is called which then calls the sendMail(data) function to send the image capture via email.
Measuring Temperature and Sending Mail Alert with PI
When the hardware and software are ready, just run the python code (give below) on your pi. It will print the value of temperature read from the sensor as shown below.
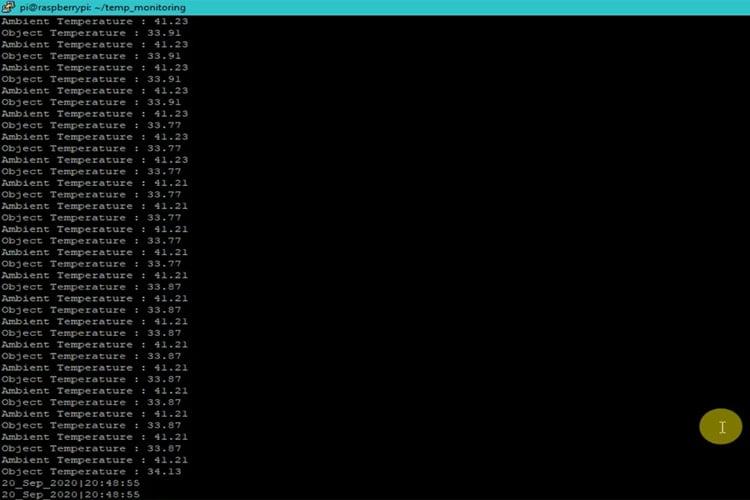
If the object temperature exceeds the threshold temperature, then our Python program will take an image from the camera, save it on Raspberry Pi, and also share it via email. A sample email sent from Raspberry Pi is shown below.
Technical Specification: Contactless Body Temperature Monitoring System
Component | Specification | Purpose in System |
|---|---|---|
| MLX90614 IR Sensor | -70°C to 382.2°C range, 0.02°C resolution | Contactless temperature measurement |
| Raspberry Pi 3/4 | ARM Cortex-A72, WiFi, Bluetooth, GPIO | Main processing unit and IoT connectivity |
| Pi Camera Module | 5MP, 1080p video recording | Image capture for email alerts |
| Detection Range | 5-10 cm optimal distance | Accurate body temperature reading |
Frequently Asked Questions
⇥ Why Choose Raspberry Pi for Contactless Temperature Monitoring?
The Raspberry Pi's strong processing capabilities, multitasking support, and integrated interfaces like HDMI, USB, and Wi-Fi make it perfect for contactless temperature monitoring. Furthermore, Python is supported by the Raspberry Pi to build a contactless body temperature sensor.
⇥ What is the Optimal Distance for Contactless Body Temperature Monitoring Using Raspberry Pi?
The optimal distance for the majority of Raspberry Pi projects that use the MLX90614 sensor is 5 to 10 cm (2 to 4 inches).
⇥ When to Consider Contactless Body Temperature Sensor Projects?
Contactless temperature monitoring projects based on sensor work best in low-power and affordable applications. It is perfect for handheld devices, small-scale automation systems, and prototypes or embedded solutions in healthcare kiosks.
Project Summary and GitHub Repository
This comprehensive study demonstrates the integration of IoT technologies for automated health screening applications. Access the complete source code, circuit diagrams, and documentation through our GitHub repository for easy implementation and customisation.


The complete working of the project can also be found in the video linked below. Hope you enjoyed the article. If you have any questions, please leave them in the comments below, or you can also use our forums to post your questions and get in touch with the community.
Related Projects Using Body Temperature Monitoring
Our engineering team has successfully implemented the MLX90614 sensor in various contactless body temperature monitoring projects. Discover alternative approaches and advanced implementations through these comprehensive tutorials.

FID based Contactless Body Temperature Screening using Arduino and MLX90614 IR Temperature Sensor
In this tutorial, we are going to build an RFID-based Contactless Temperature Monitoring System using a contactless temperature sensor with Arduino.

Arduino-Based Digital Thermometer Using MAX30205 Human Body Temperature Sensor
In this project, we will interface a MAX30205 human body temperature sensor that can be easily interfaced with a fitness band or can be used for medical purposes. We will use Arduino Nano as the main microcontroller unit and also use 7-Segment displays to show the sensed temperature in Fahrenheit.

CWD Innovations’ SmartTemp+ is a safe alternative to infrared, digital, and mercury-based thermometers for use in healthcare, government, and home environments. It wirelessly sends body temperature data to a smartphone app or gateway.
Complete Project Code
import RPi.GPIO as gpio
import picamera
import time

import smtplib
from email.MIMEMultipart import MIMEMultipart
from email.MIMEText import MIMEText
from email.MIMEBase import MIMEBase
from email import encoders
from email.mime.image import MIMEImage

from smbus2 import SMBus
from mlx90614 import MLX90614

fromaddr = "[email protected]"    # change the email address accordingly
toaddr = "[email protected]"

mail = MIMEMultipart()

mail['From'] = fromaddr
mail['To'] = toaddr
mail['Subject'] = "Temperature value exceed alert"
body = "Please find the attached image"

data=""

def sendMail(data):
    mail.attach(MIMEText(body, 'plain'))
    print data
    dat='%s.jpg'%data
    print dat
    attachment = open(dat, 'rb')
    image=MIMEImage(attachment.read())
    attachment.close()
    mail.attach(image)
    server = smtplib.SMTP('smtp.gmail.com', 587)
    server.starttls()
    server.login(fromaddr, "test12345@")
    text = mail.as_string()
    server.sendmail(fromaddr, toaddr, text)
    server.quit()

def capture_image():
    data= time.strftime("%d_%b_%Y|%H:%M:%S")
    camera.start_preview()
    time.sleep(5)
    print data
    camera.capture('%s.jpg'%data)
    camera.stop_preview()
    time.sleep(1)
    sendMail(data)

camera = picamera.PiCamera()
camera.rotation=0
camera.awb_mode= 'auto'
camera.brightness=55

while 1:
    bus = SMBus(1)
    sensor = MLX90614(bus, address=0x5A)
    print "Ambient Temperature :", sensor.get_ambient()
    print "Object Temperature :", sensor.get_object_1()
    temp = sensor.get_object_1()
    bus.close()
    if temp>34:
        capture_image()
        time.sleep(0.1)
    else:
        time.sleep(0.01)

Code cannot be used