Are you tired of searching for keys whenever you need to open a door? How about building a smart locking system where you can simply swipe a card to open the door? In this article, we will learn how to build an RFID door lock system using Arduino. It’s a fun and secure way to unlock the door.
Table of Contents
- └ How do Arduino based RFID Door Lock Work?
- Components Required
- RFID Door Lock System using Arduino Circuit Diagram
- └ Connection Between Arduino and RFID Reader
- └ Connection Between Arduino and I2C LCD Display
- └ Connection Between Arduino and Relay Module
- Arduino Code to Read RFID Card UID
- Upload the UID Scan Code
- Code for RFID Door Lock System using Arduino
- Upload the code of the RFID Door Locking System
- Final Testing of our RFID Door Lock System
- Projects Using RFID for Security and Automation
Radio Frequency Identification is widely used in contactless payment cards, National Highway Tollgate systems, and in security passes. By integrating an RFID reader with an Arduino, you will be able to create a system that automatically opens the door when an authorized RFID card or tag is scanned. This project is perfect for anyone who wants to make their home or office a little smarter. You can also check out our other Arduino Projects and Home Automation Projects if you want to explore more DIY Arduino projects.
How do Arduino based RFID Door Lock Work?
This Arduino RFID Door lock system consists of an Arduino Development Board (Arduino UNO, Arduino Nano or other), an RFID reader module and an actuator, such as a servo motor or solenoid lock, to lock and unlock the door. All we need to do is swipe or place an authorised RFID card in front of the RFID reader. Here, Arduino handles data processing activities to decide whether the RFID card is valid or not. If the card gets recognised, the Arduino sends a signal to the relay to unlock the solenoid door lock for 10 seconds. Later, it locks the door automatically.
To make it more user-friendly, I decided to use a 16x2 I2C-based LCD display to show door status and to provide important feedback messages to the door opener, like Access Granted or Access Denied.
Components Required
To build an RFID Door lock system, we will need a few essential components. Here is a simple list of what you will need to start.
Arduino UNO R3 Development Board
RC522 RFID Reader
RFID Cards or Tags
Solenoid Door Lock
Single Channel Relay Module
16x2 LCD Display along with I2C Expansion Module
Jumper Wires
Power Supply Adaptor

In the next section, we will see the circuit diagram for the Arduino-based RFID Door Lock System. Build smarter with electronic projects that include clear explanations and working designs.
RFID Door Lock System using Arduino Circuit Diagram
The below RFID Door Lock System circuit diagram represents how an Arduino, RFID Module, Relay module, Solenoid Lock, and LCD display are connected to create a secure and automated door lock system.

This setup makes our Door to unlock only when an authorized RFID tag or RFID card is scanned. Below you can find our actual hardware setup of the Arduino RFID Door Lock System developed by using Circuit Diagram and Pin Connection Details as a reference. We have built a lot of RFID based projects previously, if you are completely new to RFID and would like to understand the basics of RFID and how it works with Arduino, you can read our Arduino RFID tutorial before proceeding with this project.

As you can see, the hardware connections are pretty easy. We have the Arduino UNO board, which acts as the main brain of this project. The RC522 RFID reader module is used to read the RFID cards, and the 16x2 LCD is used to display the status information. The 12V solenoid lock is connected through a relay module to our Arduino UNO board. The setup is powered by a 12V lithium battery pack, making the project portable and easy to install. You can also usea 12V adapter with Arduino UNO if you do not have a battery.
To make the hardware connection easy to understadn we have given a table below which explains the connection between your Arduino board and the RFID, LCD and Relay modules.
Connection Between Arduino and RFID Reader
Connection Between Arduino and I2C LCD Display
Connection Between Arduino and Relay Module
Now that the hardware is ready lets move on to the programming section of our rfid door locking system. But before we do that its important to understand that the Arduino code for this project is split into two sections. This is because each RFID card or Tag will have a unique ID number, and it is important to know this unique ID of your RFID card to be able to grant access to it. So in the first section of code, we will place your RFID card on a reader and read this unique ID, and in the second section of code, we will use this unique ID to build our RFID door locking system.
Arduino Code to Read RFID Card UID
To know your Authorised RFID card UID, just compile and dump the code in Arduino. Note, for this, you can keep your hardware setup as it is without any modifications.
Header files download links:
MFRC522.h
LiquidCrystal_I2C.h
After downloading, you can install it through the Arduino IDE, by going to Sketch -> Include Library -> Add ZIP Library and selecting the downloaded .ZIP file.
#include <LiquidCrystal_I2C.h>
#include <MFRC522.h>
// Define RC522 RFID module pins
#define RST_PIN 9   // Reset pin
#define SS_PIN 10   // Slave Select pin
// Initialize MFRC522 instance
MFRC522 rfid(SS_PIN, RST_PIN);
// Initialize the I2C LCD (set the I2C address, usually 0x27 or 0x3F)
LiquidCrystal_I2C lcd(0x27, 16, 2);
void setup() {
 // Initialize SPI and RC522 module
 Serial.begin(9600);
 SPI.begin();
 rfid.PCD_Init();
 // Initialize the LCD
 lcd.init();
 lcd.backlight();
 lcd.setCursor(0, 0);
 lcd.print("Scan RFID Card");
 Serial.println("Scan RFID Card");
}
void loop() {
 // Check if a new RFID card is present
 if (!rfid.PICC_IsNewCardPresent()) {
   return;
 }
 // Check if the RFID card can be read
 if (!rfid.PICC_ReadCardSerial()) {
   return;
 }
 // Clear LCD and display the UID
 lcd.clear();
 lcd.setCursor(0, 0);
 lcd.print("Card UID:");
 Serial.print("Card UID: ");
 // Print the UID on the LCD
 lcd.setCursor(0, 1);
 for (byte i = 0; i < rfid.uid.size; i++) {
   if (rfid.uid.uidByte[i] < 0x10) {
     lcd.print("0"); // Add leading 0 for single-digit hex
     Serial.print("0x0");
   }
   lcd.print(rfid.uid.uidByte[i], HEX); // Print UID byte in HEX format
   Serial.print("0x");
   Serial.print(rfid.uid.uidByte[i], HEX);
   if (i < rfid.uid.size - 1) {
     lcd.print(" "); // Add space between bytes
     Serial.print(", ");
   }
   delay(1000);
 }
 // Halt communication with the card
 rfid.PICC_HaltA();
 // Wait for 10 seconds before clearing the LCD
 delay(10000);
 lcd.clear();
 lcd.setCursor(0, 0);
 lcd.print("Scan RFID Card");
 Serial.println("\n");
 Serial.println("Scan RFID Card");
}
Upload the UID Scan Code

After dumping the code into Arduino, it will ask you to scan the RFID Card.

After scanning, you can able to see the scanned RFID card UID details in the serial monitor at the baud rate of 9600, as shown in the image.

At the same time, you can also able to see the UID on the display as well.

Note down the RFID card UID, which later gets used in the code of the RFID Door lock system.
Code for RFID Door Lock System using Arduino
This code is for an RFID door lock system using an Arduino. It reads the UID of the RFID card and compares it to a predefined authorized UID. If the RFID card UID matches the predefined UID details, then it unlocks the door for 10 seconds with the help of a relay and solenoid door lock; meanwhile, it displays the door status on the LCD display.
#include <MFRC522.h>
#include <LiquidCrystal_I2C.h>
// Define RC522 pins
#define RST_PIN 9
#define SS_PIN 10
// Relay pin
#define RELAY_PIN 8
// Initialize MFRC522 instance
MFRC522 rfid(SS_PIN, RST_PIN);
// Initialize LCD (address 0x27 may vary)
LiquidCrystal_I2C lcd(0x27, 16, 2);
// Authorized UID (replace with your tag's UID)
byte authorizedUID[] = {0x69, 0xA9, 0x81, 0x5A};
// Door status
bool doorLocked = true;
void setup() {
 // Initialize SPI and RC522
 SPI.begin();
 rfid.PCD_Init();
 // Initialize LCD
 lcd.init();
 lcd.backlight();
 // Set up relay pin
 pinMode(RELAY_PIN, OUTPUT);
 // Display startup message
 lcd.setCursor(0, 0);
 lcd.print("RFID Door Lock");
 delay(2000);
 lcd.clear();
 lockDoor(); // Start with door locked
}
void loop() {
 // Check if a new RFID card is present
 if (!rfid.PICC_IsNewCardPresent()) {
   return;
 }
 // Check if the RFID card can be read
 if (!rfid.PICC_ReadCardSerial()) {
   return;
 }
 // Display scanned UID
 lcd.clear();
 lcd.setCursor(0, 0);
 lcd.print("Scanning...");
 delay(2000);
 // Compare scanned UID with authorized UID
 if (isAuthorized(rfid.uid.uidByte, rfid.uid.size)) {
   lcd.setCursor(0, 1);
   lcd.print("Access Granted!");
   delay(2000);
   unlockDoor(); // Lock or unlock the door
 } else {
   lcd.setCursor(0, 1);
   lcd.print("Access Denied!");
   delay(2000);
   lockDoor();
 }
 // Halt communication with the card
 rfid.PICC_HaltA();
}
// Function to check if UID matches authorized UID
bool isAuthorized(byte *uid, byte size) {
 if (size != sizeof(authorizedUID)) {
   return false;
 }
 for (byte i = 0; i < size; i++) {
   if (uid[i] != authorizedUID[i]) {
     return false;
   }
 }
 return true;
}
// Function to lock the door
void lockDoor() {
 digitalWrite(RELAY_PIN, LOW); // Turn OFF relay (lock engaged)
 doorLocked = true;
 lcd.clear();
 lcd.setCursor(0, 0);
 lcd.print("Door Locked");
 delay(2000);
}
// Function to unlock the door
void unlockDoor() {
 digitalWrite(RELAY_PIN, HIGH); // Turn ON relay (unlock door)
 doorLocked = false;
 lcd.clear();
 lcd.setCursor(0, 0);
 lcd.print("Door Unlocked");
 delay(10000); // Keep door unlocked for 5 seconds
 lockDoor();  // Auto-lock after 5 seconds
}
Here,
MFRC522.h - it is used for interfacing with the RC522 RFID reader module.
LiquidCrystal_I2C.h - used for controlling the I2C-based LCD display.
You can easily get this library by clicking the appropriate header file name.
After downloading the ZIP file from the GitHub repo, you can install it either through the Arduino IDE, by going to Sketch -> Include Library -> Add ZIP Library and selecting the downloaded .ZIP file, or by just simply extracting the Zip file into the Arduino library folder.
Defining Macros for Pins
#define RST_PIN 9
#define SS_PIN 10
#define RELAY_PIN 8
Here, I am defining the macros of the Reset pin and Slave Select pin for the RFID module and Relay signal pin for the relay module.
Creating the Objects for RFID and Display Module
MFRC522 rfid(SS_PIN, RST_PIN);
LiquidCrystal_I2C lcd(0x27, 16, 2);
In the above code, I am creating the objects for the RC522 RFID and the I2C LCD module for proper initialization purposes.
Storing the Authorized RFID card UID
byte authorizedUID[] = {0x69, 0xA9, 0x81, 0x5A};
This array holds the unique UID of the authorized RFID card. Replace these values with your authorized RFID tag’s UID.

Tracking Doorlock status
bool doorLocked = true;Here, the doorLocked variable is used as the status flag to know whether the door is locked or open.
Setup() Function
void setup() {
 Serial.begin(9600);
 // Initialize SPI and RC522
 SPI.begin();
 rfid.PCD_Init();
 // Initialize LCD
 lcd.init();
 lcd.backlight();
 // Set up relay pin
 pinMode(RELAY_PIN, OUTPUT);
 // Display startup message
 lcd.setCursor(0, 0);
 lcd.print("RFID Door Lock");
 delay(2000);
 lcd.clear();
 lockDoor(); // Start with door locked
}
This setup() function is essential for setting up the hardware configurations. In this setup, I use the SPI.begin() function to initialise the SPI communication for the RFID reader module. Then I make a call rfid.PCD_Init() function to configure the RFID reader.
Later, I used the LCD predefined function to initialise the I2C lcd module. Finally, I make a call on the lockDoor() function to make sure the door is locked initially.
Loop() Function
void loop() {
// Check if a new RFID card is present
 if (!rfid.PICC_IsNewCardPresent()) {
   return;
 }
 // Check if the RFID card can be read
 if (!rfid.PICC_ReadCardSerial()) {
   return;
 }
 // Display scanned UID
 lcd.clear();
 lcd.setCursor(0, 0);
 lcd.print("Scanning...");
 delay(2000);
 // Compare scanned UID with authorized UID
 if (isAuthorized(rfid.uid.uidByte, rfid.uid.size)) {
   lcd.setCursor(0, 1);
   lcd.print("Access Granted!");
   delay(2000);
   unlockDoor(); // Lock or unlock the door
 } else {
   lcd.setCursor(0, 1);
   lcd.print("Access Denied!");
   delay(2000);
   lockDoor();
 }
 // Halt communication with the card
 rfid.PICC_HaltA();
}
This loop() function keeps on checking for new cards using rfid.PICC_IsNewCardPresent() and read its UID using rfid.PICC_ReadCardSerial() function. After reading the UID card, it compares that UID with the predefined authorized UID using the isAuthorized() function.
If the UID matches, it prints Access Granted on the LCD display and makes a call to UnlockDoor() to unlock the door; otherwise, it prints Access Denied on the LCD display and makes a call to the lockDoor() to lock the door.
Finally, it makes a call on rfid.PICC_HaltA() to halt communication with the currently scanned RFID card.
Look for Authorized RFID card UID
bool isAuthorized(byte *uid, byte size) {
 if (size != sizeof(authorizedUID)) {
   return false;
 }
 for (byte i = 0; i < size; i++) {
   if (uid[i] != authorizedUID[i]) {
     return false;
   }
 }
 return true;
}
The above isAuthorized() is used to check whether the scanned RFID card UID matches the predefined authorized UID value. If it matches the UID, it returns true; else it returns false.
Locking and Unlocking the Door
Locks the Door:
void lockDoor() {
 digitalWrite(RELAY_PIN, LOW); // Turn OFF relay (lock engaged)
 doorLocked = true;
 lcd.clear();
 lcd.setCursor(0, 0);
 lcd.print("Door Locked");
 delay(2000);
}
This lockDoor() function is used to lock the solenoid door lock by providing a low signal to the relay module. After that, it prints “Door Locked” on the LCD display.
Unlocks the Door
void unlockDoor() {
 digitalWrite(RELAY_PIN, HIGH); // Turn ON relay (unlock door)
 doorLocked = false;
 lcd.clear();
 lcd.setCursor(0, 0);
 lcd.print("Door Unlocked");
 delay(5000); // Keep door unlocked for 5 seconds
 lockDoor();  // Auto-lock after 5 seconds
}
This unlocksDoor() function is used to unlock the solenoid door lock by providing a high signal to the relay module for 5 seconds, after that, it again locks the door by calling lockDoor() function. It also prints door status like “Door Unlocked” on the lcd display.
Upload the code of the RFID Door Locking System
Before uploading the code, make sure the board is selected properly; in our case, it is Arduino Uno.

After selecting the board, select the USB port of our Arduino UNO board. Through that USB port, only the program file gets flashed into Arduino UNO.

Then, finally, click the upload button to dump the RFID Door lock system code into an Arduino.

Final Testing of our RFID Door Lock System
At last, we've entered the most exciting phase, i.e final testing of our RFID Door Lock System using Arduino! For every electronics hobbyist, the most priceless moment is seeing their project work as expected. This phase ensures that our system reliably authenticates RFID tags to open the Door. It’s time to witness our hard work.

You can see that, after scanning the Authorised RFID Tag, it granted access and unlocked the Solenoid Door to get Unlocked.

With this, we have come to a conclusion of our RFID door lock system using the Arduino project. Hope you have learned something useful and have enjoyed building the project on your own. If you have any questions or need help, you can reach us through the comment section below or through our forum.
Build smarter with power electronics projects that include clear explanations and working designs.
Projects Using RFID for Security and Automation
RFID technology is widely used in security and automation projects for access control, authentication, and tracking systems. We have previously used RFID in various projects. If you want to explore more on these topics, check out the links below.
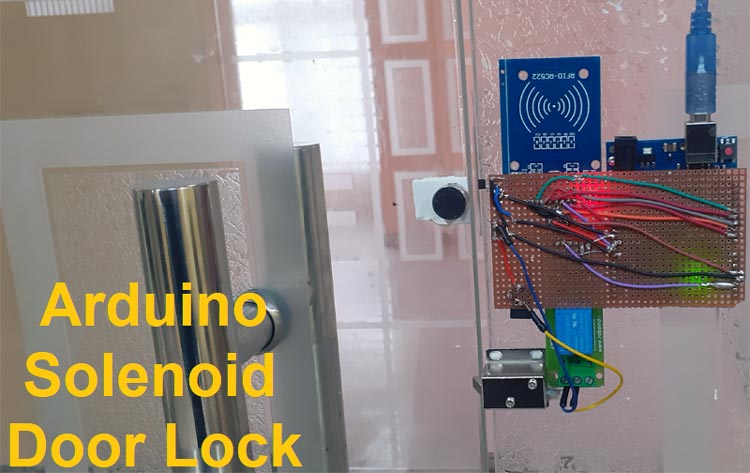
Arduino Solenoid Door Lock using RFID
This project involves creating an RFID-based door lock system using an Arduino. It provides detailed instructions on setting up the hardware and software components to control access via RFID tags.
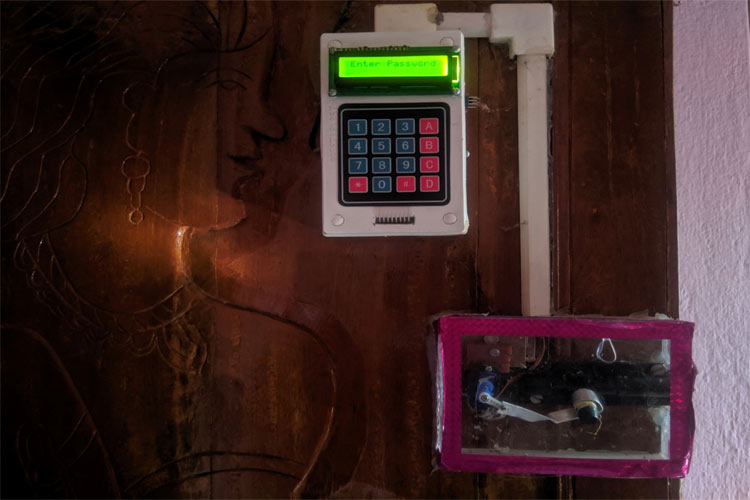
Digital Keypad Security Door Lock using Arduino
This project demonstrates how to build a password-protected door lock system using a digital keypad and Arduino. It provides a step-by-step guide to setting up the hardware and programming the Arduino to control a servo motor for locking and unlocking.
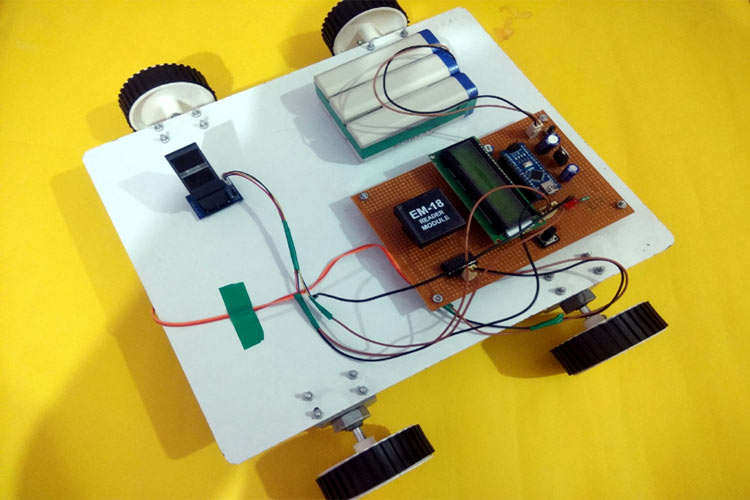
Fingerprint-based Car Ignition System using Arduino and RFID
Demonstrates a Fingerprint-Based Car Ignition System using Arduino and RFID, ensuring only authorised users can start the vehicle. Learn how to integrate a fingerprint sensor and an RFID module with Arduino to create a secure ignition system.
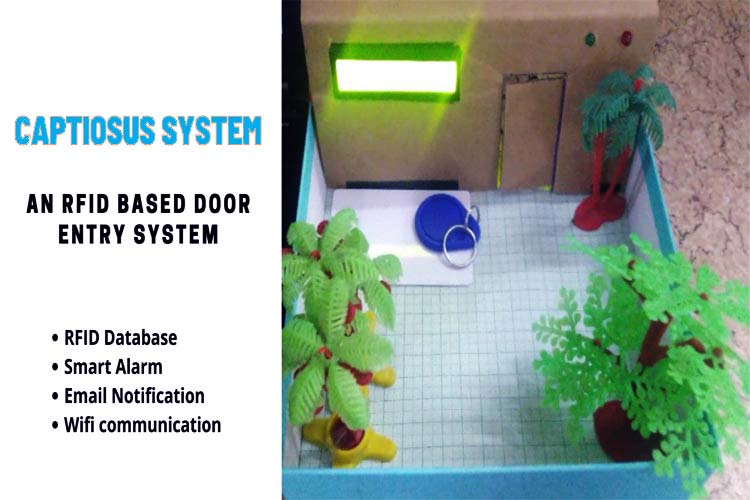
RFID-Based Door Lock System using Raspberry Pi
Learn how to build an RFID-Based Door Lock System using Raspberry Pi and an RC522 RFID module for secure access control. It allows entry only to registered RFID tags while triggering an alarm and sending email notifications for unauthorised attempts.
Complete Project Code
#include <LiquidCrystal_I2C.h>
#include <MFRC522.h>
// Define RC522 RFID module pins
#define RST_PIN 9   // Reset pin
#define SS_PIN 10   // Slave Select pin
// Initialize MFRC522 instance
MFRC522 rfid(SS_PIN, RST_PIN);
// Initialize the I2C LCD (set the I2C address, usually 0x27 or 0x3F)
LiquidCrystal_I2C lcd(0x27, 16, 2);
void setup() {
 // Initialize SPI and RC522 module
 Serial.begin(9600);
 SPI.begin();
 rfid.PCD_Init();
 // Initialize the LCD
 lcd.init();
 lcd.backlight();
 lcd.setCursor(0, 0);
 lcd.print("Scan RFID Card");
 Serial.println("Scan RFID Card");
}
void loop() {
 // Check if a new RFID card is present
 if (!rfid.PICC_IsNewCardPresent()) {
   return;
 }
 // Check if the RFID card can be read
 if (!rfid.PICC_ReadCardSerial()) {
   return;
 }
 // Clear LCD and display the UID
 lcd.clear();
 lcd.setCursor(0, 0);
 lcd.print("Card UID:");
 Serial.print("Card UID: ");
 // Print the UID on the LCD
 lcd.setCursor(0, 1);
 for (byte i = 0; i < rfid.uid.size; i++) {
   if (rfid.uid.uidByte[i] < 0x10) {
     lcd.print("0"); // Add leading 0 for single-digit hex
     Serial.print("0x0");
   }
   lcd.print(rfid.uid.uidByte[i], HEX); // Print UID byte in HEX format
   Serial.print("0x");
   Serial.print(rfid.uid.uidByte[i], HEX);
   if (i < rfid.uid.size - 1) {
     lcd.print(" "); // Add space between bytes
     Serial.print(", ");
   }
   delay(1000);
 }
 // Halt communication with the card
 rfid.PICC_HaltA();
 // Wait for 10 seconds before clearing the LCD
 delay(10000);
 lcd.clear();
 lcd.setCursor(0, 0);
 lcd.print("Scan RFID Card");
 Serial.println("\n");
 Serial.println("Scan RFID Card");
}
#include <MFRC522.h>
#include <LiquidCrystal_I2C.h>
// Define RC522 pins
#define RST_PIN 9
#define SS_PIN 10
// Relay pin
#define RELAY_PIN 8
// Initialize MFRC522 instance
MFRC522 rfid(SS_PIN, RST_PIN);
// Initialize LCD (address 0x27 may vary)
LiquidCrystal_I2C lcd(0x27, 16, 2);

// Authorized UID (replace with your tag's UID)
byte authorizedUID[] = {0x69, 0xA9, 0x81, 0x5A};
// Door status
bool doorLocked = true;
void setup() {
 // Initialize SPI and RC522
 SPI.begin();
 rfid.PCD_Init();
 // Initialize LCD
 lcd.init();
 lcd.backlight();
 // Set up relay pin
 pinMode(RELAY_PIN, OUTPUT);
 // Display startup message
 lcd.setCursor(0, 0);
 lcd.print("RFID Door Lock");
 delay(2000);
 lcd.clear();
 lockDoor(); // Start with door locked
}
void loop() {
 // Check if a new RFID card is present
 if (!rfid.PICC_IsNewCardPresent()) {
   return;
 }
 // Check if the RFID card can be read
 if (!rfid.PICC_ReadCardSerial()) {
   return;
 }
 // Display scanned UID
 lcd.clear();
 lcd.setCursor(0, 0);
 lcd.print("Scanning...");
 delay(2000);
 // Compare scanned UID with authorized UID
 if (isAuthorized(rfid.uid.uidByte, rfid.uid.size)) {
   lcd.setCursor(0, 1);
   lcd.print("Access Granted!");
   delay(2000);
   unlockDoor(); // Lock or unlock the door
 } else {
   lcd.setCursor(0, 1);
   lcd.print("Access Denied!");
   delay(2000);
   lockDoor();
 }
 // Halt communication with the card
 rfid.PICC_HaltA();
}
// Function to check if UID matches authorized UID
bool isAuthorized(byte *uid, byte size) {
 if (size != sizeof(authorizedUID)) {
   return false;
 }
 for (byte i = 0; i < size; i++) {
   if (uid[i] != authorizedUID[i]) {
     return false;
   }
 }
 return true;
}
// Function to lock the door
void lockDoor() {
 digitalWrite(RELAY_PIN, LOW); // Turn OFF relay (lock engaged)
 doorLocked = true;
 lcd.clear();
 lcd.setCursor(0, 0);
 lcd.print("Door Locked");
 delay(2000);
}
// Function to unlock the door
void unlockDoor() {
 digitalWrite(RELAY_PIN, HIGH); // Turn ON relay (unlock door)
 doorLocked = false;
 lcd.clear();
 lcd.setCursor(0, 0);
 lcd.print("Door Unlocked");
 delay(10000); // Keep door unlocked for 5 seconds
 lockDoor();  // Auto-lock after 5 seconds
}


