
Nowadays most of the car comes with keyless entry and push-button ignition system, in which you only need to carry the key in your pocket and just need to put your finger on the capacitive sensor on the door handle to open the car door. Here in this project, we are adding a few more security features to this system by using RFID and Fingerprint sensor. RFID sensor will validate the license of the user and the fingerprint sensor will only allow an authorized person in the vehicle.
For this Fingerprint Based Car Ignition System, we are using Arduino with an R305 Fingerprint sensor and an EM18 RFID reader.
Materials Used
- Arduino Nano
- R305 Fingerprint sensor
- EM18 RFID reader
- 16*2 Alphanumeric LCD
- DC motors
- L293D Motor driver IC
- Veroboard or Breadboard (Whichever is available)
- Connecting wires
- 12V DC Battery
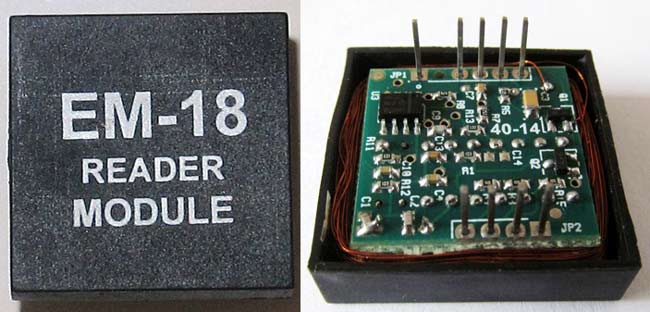
EM18 RFID Reader Module
RFID stands for Radio frequency identification. It refers to a technology, where digital data is encoded in RFID tags and they can be decoded by an RFID reader using radio waves. RFID is similar to barcoding in which data from a tag is decoded by a device. RFID technology is used in various applications like Security system, Employee attendance system, RFID Door Lock, RFID Based Voting Machine, Toll Collection System, etc.
EM18 Reader is a module that can read the ID information stored in the RFID tags. The RFID tags stores a 12 digit unique number which can be decoded by an EM18 reader module, when the tag comes in range with the Reader. This module operates at a frequency of 125 kHz, which is having an inbuilt antenna, and it is operated using a 5 volt DC power supply.
It gives a serial data output, and it has a range of 8-12 cm. The serial communication parameters are 8 data bits, 1 stop bit, and 9600 baud rate.

EM18 Features:
- Operating voltage: +4.5V to +5.5V DC
- Current consumption: 50mA
- Operating frequency: 125KHZ
- Operating temperature: 0-80 degree C
- Communication Baud Rate: 9600
- Reading distance: 8-12 cm
- Antenna: Inbuilt
EM18 Pinout:
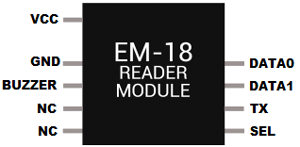
Pin description:
VCC: 4.5- 5V DC voltage input
GND: Ground pin
Buzzer: Buzzer or LED pin
TX: Serial data Transmitter pin of EM18 for RS232 (Output)
SEL: This must be HIGH for using RS232 (LOW if using WEIGAND)
Data 0: WEIGAND data 0
Data 1: WEIGAND data 1
To learn more about RFID and tags, check our previous RFID based projects.
Find out RFID Tag Unique 12 digit Code using Arduino
Before programming the Arduino for Arduino car ignition system, first, we need to find out the 12 digit RFID tag unique code. As we discussed before, RFID tags contain a 12 digit unique code and it can be decoded by using an RFID reader. When we swipe the RFID tag near the Reader, the Reader will give the unique codes via the output serial port. First, connect the Arduino to the RFID reader as per circuit diagram and then upload below given code to Arduino.
int count = 0;
char card_no[12];
void setup()
{
   Serial.begin(9600);
}
void loop()
{
   if(Serial.available())
   {
      count = 0;
      while(Serial.available() && count < 12)
      {
         card_no[count] = Serial.read();
         count++;
         delay(5);
      }
      Serial.print(card_no);
   }
}
After successfully uploading the code, open the serial monitor, and set the baud rate to 9600. Then swipe the card near the Reader. Then the 12 digit code will start to display on the serial monitor. Do this process for all the used RFID tags and note it down for future references.
Circuit Diagram
Circuit diagram for this Fingerprint based Ignition System is given below:

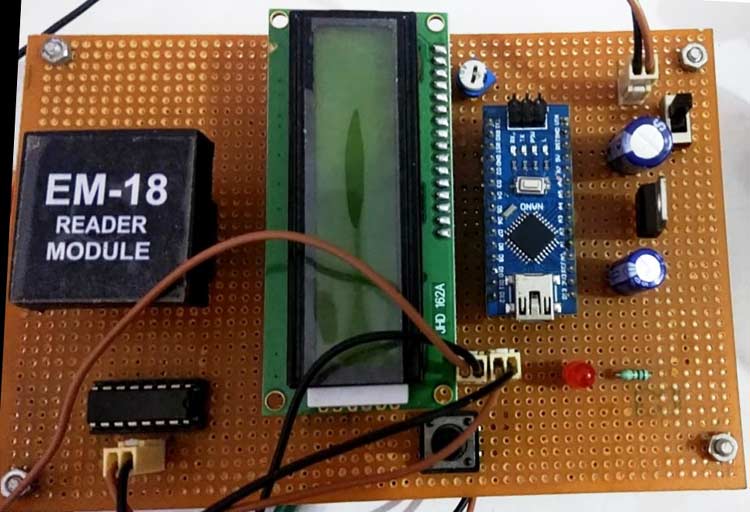
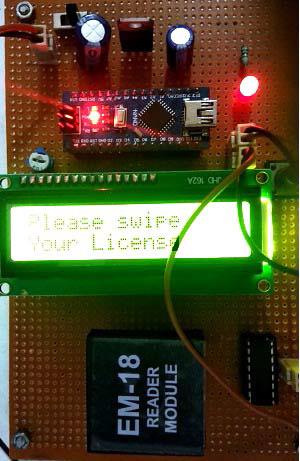
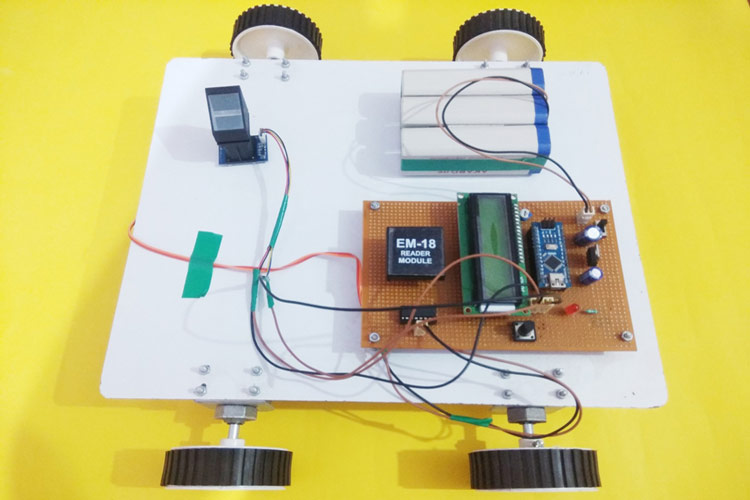
In my case, I have soldered the complete circuit on perf board like shown below:
Finger Print Sensor Module
Finger Print Sensor Module or Finger Print Scanner is a module that captures finger’s print image and then converts it into the equivalent template and saves them into its memory on selected ID (location) by Arduino. Here all the process is commanded by Arduino like taking an image of a fingerprint, convert it into templates, and storing location, etc.

We previously used the same R305 sensor to build a voting machine, attendance system, security system, etc. You can check all the finger print based projects here.
Enrolling Fingerprints to Sensor:
Before proceeding with the program, we need to install the required libraries for the fingerprint sensor. Here we have used “Adafruit_Fingerprint.h” for using the R305 fingerprint sensor. So first of all download the library using the link given below:
After successful download, In the Arduino IDE, go to File > Tools > Include library > Add .zip library and then select the zip file location to install the library.
After successful library installation, follow the steps given below to enroll a new fingerprint in the sensor memory.
1. In the Arduino IDE, go to File > Examples > Adafruit Fingerprint Sensor Library > Enroll.
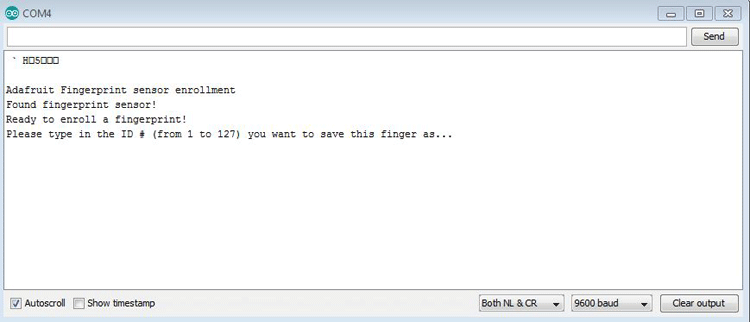
2. Upload the code to the Arduino, and open the Serial monitor at a baud rate of 9600.
Important: Change the Software serial pin in the program to SoftwareSerial mySerial(12, 11).
3. You should enter an ID for the fingerprint in which you want to store your fingerprint. As this is my first fingerprint, I typed 1 in the top left corner, and then, click the Send button.
4. Then the light on the fingerprint sensor will blink which indicates that you should place your finger on the sensor and after that follow the steps showing on serial monitor till it acknowledges you for successful enrolment.
Programming for RFID Keyless Ignition
Complete code for this Biometric Ignition System is given at the end of the tutorial. Here we are explaining a few important parts of the code.
The first thing is to include all the required libraries. Here in my case, I have included “Adafruit_Fingerprint.h” for using R305 fingerprint sensor. Then configure the serial port in which the fingerprint sensor will be connected. In my case, I have declared 12 as RX Pin and 11 as a TX pin.
#include <Adafruit_Fingerprint.h>
#include <LiquidCrystal.h>
SoftwareSerial mySerial(12,11);
Adafruit_Fingerprint finger = Adafruit_Fingerprint(&mySerial);
In the next step, declare all the variables, which will be used throughout the code. Then define the LCD connection pins with Arduino followed by the declaration of an object of LiquidCrystal class.
char input[12];
int count = 0;
int a = 0;
const int rs = 6, en = 7, d4 = 2, d5 = 3, d6 = 4, d7 = 5;
LiquidCrystal lcd(rs, en, d4, d5, d6, d7);
Next, inside the loop(), code is written to get the unique 12 digit codes of the RFID tags and they are stored in an array. Here the elements of the array will be matched with the stored unique codes in the memory, to get the authenticated person details.
count = 0;
    while (Serial.available() && count < 12)
    {
      input[count] = Serial.read();
      count++;
      delay(5);
    }
Then, the received array is compared with the stored tag codes. If the code is matched, then the license is considered as valid, which allows the user to put valid fingerprint. Otherwise, it will show an invalid license.
if ((strncmp(input, "3F009590566C", 12) == 0) && (a == 0))
      {
        lcd.setCursor(0, 0);
        lcd.print("License Valid         ");
        lcd.setCursor(0, 1);
        lcd.print("Welcome               ");
        delay(1000);
        a = 1;
        fingerprint();
      }
In the next step, a function getFingerprintID is written which will return a valid fingerprint ID for an already enrolled fingerprint.
int getFingerprintID()
{
  uint8_t p = finger.getImage();
  if (p != FINGERPRINT_OK)  return -1;
  p = finger.image2Tz();
  if (p != FINGERPRINT_OK)  return -1;
  p = finger.fingerFastSearch();
  if (p != FINGERPRINT_OK)  return -1;
  return finger.fingerID;
}
Inside function fingerprint(), which is called after successful RFID match, getFingerprintID function is called to get a valid fingerprint ID. Then it is compared using the if-else loop to get the information regarding authenticated person data and if data is matched, then the vehicle is ignited, otherwise, it will prompt for the wrong Fingerprint.
int fingerprintID = getFingerprintID();
        delay(50);
        if (fingerprintID == 1)
        {
          lcd.setCursor(0, 0);
          lcd.print("Access Granted        ");
          lcd.setCursor(0, 1);
          lcd.print("Vehicle Started       ");
          digitalWrite(9,HIGH);
          digitalWrite(10,LOW);
          while(1);
        }
So this is how this RFID Car Ignition System works which adds two layers of security to your car.
Complete Code and demonstration video are given below.
Complete Project Code
#include <Adafruit_Fingerprint.h>
#include <LiquidCrystal.h>
char input[12];
int count = 0;
int a = 0;
const int rs = 6, en = 7, d4 = 2, d5 = 3, d6 = 4, d7 = 5;
LiquidCrystal lcd(rs, en, d4, d5, d6, d7);
SoftwareSerial mySerial(12,11);
Adafruit_Fingerprint finger = Adafruit_Fingerprint(&mySerial);
void setup()
{
  pinMode(9,OUTPUT);
  pinMode(10,OUTPUT);
  digitalWrite(9,LOW);
  digitalWrite(10,LOW);
  Serial.begin(9600);
  lcd.begin(16, 2);
  lcd.setCursor(0, 0);
  lcd.print("   WELCOME TO       ");
  lcd.setCursor(0, 1);
  lcd.print("  CIRCUIT DIGEST       ");
  delay(2000);
  lcd.clear();
  lcd.setCursor(0, 0);
  lcd.print("Please swipe           ");
  lcd.setCursor(0, 1);
  lcd.print("Your License          ");
}
void loop()
{
  if (Serial.available())
  {
    count = 0;
    while (Serial.available() && count < 12)
    {
      input[count] = Serial.read();
      count++;
      delay(5);
    }
    if (count == 12)
    {
      if ((strncmp(input, "3F009590566C", 12) == 0) && (a == 0))
      {
        lcd.setCursor(0, 0);
        lcd.print("License Valid         ");
        lcd.setCursor(0, 1);
        lcd.print("Welcome               ");
        delay(1000);
        a = 1;
        fingerprint();
      }
      else if ((strncmp(input, "0B0028883E95", 12) == 0) && (a == 0))
      {
        lcd.setCursor(0, 0);
        lcd.print("License Valid         ");
        lcd.setCursor(0, 1);
        lcd.print("Welcome                ");
        delay(1000);
        a = 1;
        fingerprint();
      }
      else
      {
        if (a != 1)
        {
          lcd.setCursor(0, 0);
          lcd.print("License Invalid         ");
          lcd.setCursor(0, 1);
          lcd.print("Try Again!!!            ");
          delay(2000);
          lcd.clear();
          lcd.setCursor(0, 0);
          lcd.print("Please swipe           ");
          lcd.setCursor(0, 1);
          lcd.print("Your License          ");
        }
      }
    }
  }
}
int getFingerprintID()
{
  uint8_t p = finger.getImage();
  if (p != FINGERPRINT_OK)  return -1;
  p = finger.image2Tz();
  if (p != FINGERPRINT_OK)  return -1;
  p = finger.fingerFastSearch();
  if (p != FINGERPRINT_OK)  return -1;
  return finger.fingerID;
}
void fingerprint()
{
  finger.begin(57600);
        while(a==1)
        {
        int fingerprintID = getFingerprintID();
        delay(50);
        if (fingerprintID == 1)
        {
          lcd.setCursor(0, 0);
          lcd.print("Access Granted        ");
          lcd.setCursor(0, 1);
          lcd.print("Vehicle Started       ");
          digitalWrite(9,HIGH);
          digitalWrite(10,LOW);
          while(1);
        }
        else if (fingerprintID == 2)
        {
          lcd.setCursor(0, 0);
          lcd.print("Access Granted        ");
          lcd.setCursor(0, 1);
          lcd.print("Vehicle Started       ");
          digitalWrite(9,HIGH);
          digitalWrite(10,LOW);
          while(1);
        }
        else
        {
          lcd.setCursor(0, 0);
          lcd.print("Pls Place a        ");
          lcd.setCursor(0, 1);
          lcd.print("Valid Finger       ");
        }
        }
}