

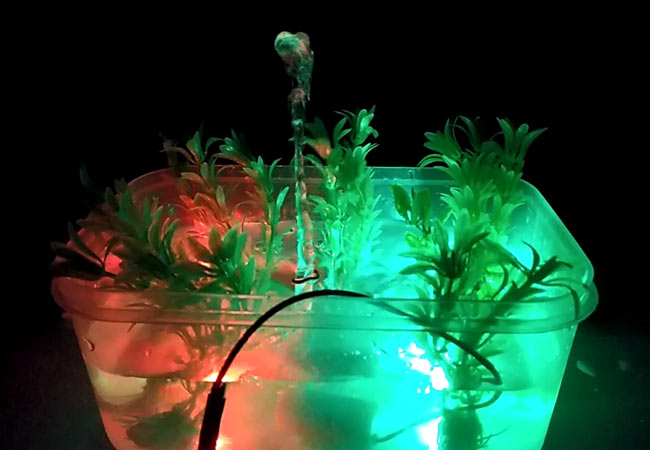
There are several water fountains which unconditionally sprinkle water with some interesting lighting effects. So I wandered about designing an innovative water fountain which can respond to external music and sprinkle water depending on the music beats. Isn’t it sound interesting?
The basic idea of this Arduino Water Fountain is to take an input from any external sound source like mobile, iPod, PC etc., sample the sound and break it down to different voltage ranges, then use the output to turn on various Relay. We first used a condenser mic based sound sensor module to perform on the sound source to split the sounds into different voltage ranges. Then the voltage will be fed to op-amp to compare sound level with a particular limit. The higher voltage range will correspond to a relay switch ON which comprises a musical water fountain operating to the beats and rhythms of the song. So here we are building this Musical Fountain using Arduino and sound sensor.
Material required
- Arduino Nano
- Sound sensor Module
- 12V Relay Module
- DC Pump
- LEDs
- Connecting wires
- Vero board or Breadboard
Working of a Sound sensor

The Sound sensor module is a simple electret microphone based electronic board used to sense external sound from the environment. It is based on the LM393 power amplifier and an electret microphone, it can be used to detect whether there is any sound beyond the set threshold limit. The module output is a digital signal which indicates that the sound is greater or lesser than the threshold.
The potentiometer can be used to adjust the sensitivity of the sensor module. The module output is HIGH/LOW when the sound source is Lower/higher than the threshold set by the potentiometer. Same sound sensor module can also be used for measuring the sound level in decibel.
Sound Sensor Circuit Diagram
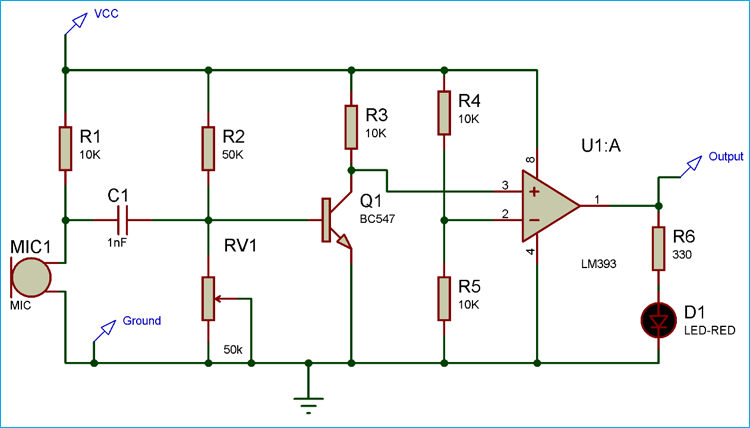
As we know that in a sound sensor module, the basic input device is the microphone which converts the sound signals to electrical signals. But as the electrical signal output of the sound sensor is so small in magnitude which is very difficult to analyse, so we have used a NPN transistor amplifier circuit which will amplify it and feed the output signal to the non-inverting input of the Op-amp. Here LM393 OPAMP is used as a comparator which compares the electrical signal from the microphone and the reference signal coming from the voltage divider circuit. If the input signal is greater than the reference signal then the output of the OPAMP will be high and vice versa.
You can follow Op-amp circuits sections to learn more about its working.
Musical Water Fountain Circuit Diagram

As shown in the above musical fountain circuit diagram, the sound sensor is powered with 3.3V supply of Arduino Nano and the output pin of the sound sensor module is connected to the analog input pin (A6) of Nano. You can use any of the analog pin, but make sure to change that in the program. The relay module and DC pump is powered by an external 12VDC power supply as shown in the figure. The input signal of relay module is connected to digital output pin D10 of Nano. For lighting effect I chose two different colours of LED and connected them to two digital output pins (D12, D11) of Nano.
Here the Pump is connected in such a way that when a HIGH pulse is given to the input of Relay module, the COM contact of the relay is get connected to the NO contact and the current gets a closed circuit path to flow across the pump to activate the water flow. Otherwise the pump will remain OFF. The HIGH/LOW pulses are generated from Arduino Nano depending on the sound input.
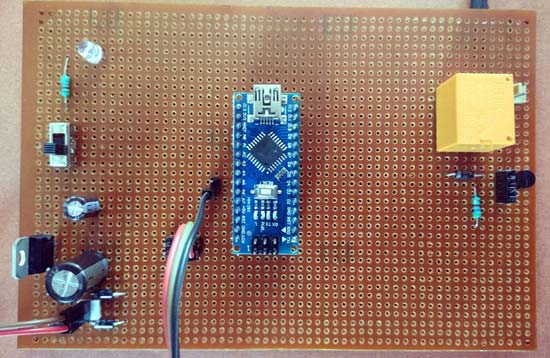
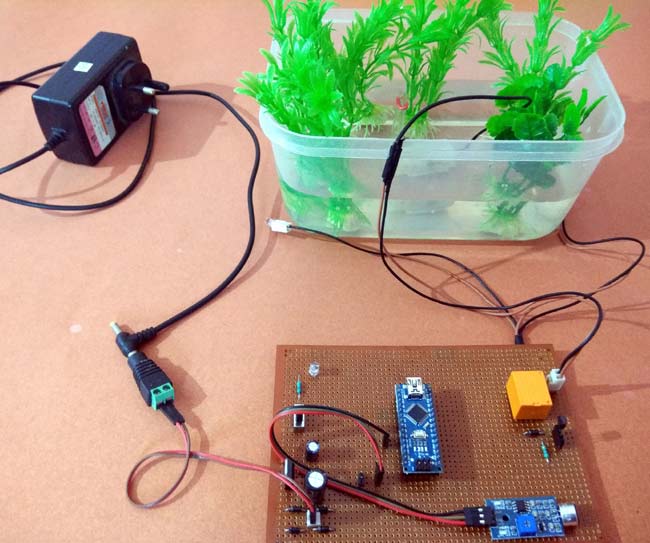
After soldering the complete circuit on perfboard, it will look like below:
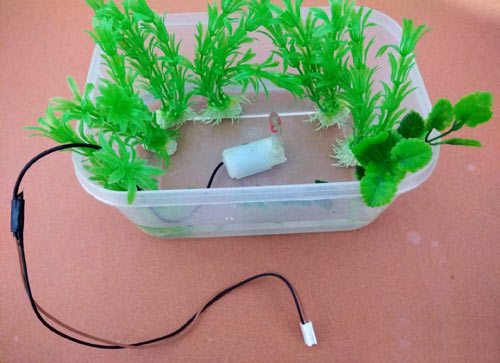
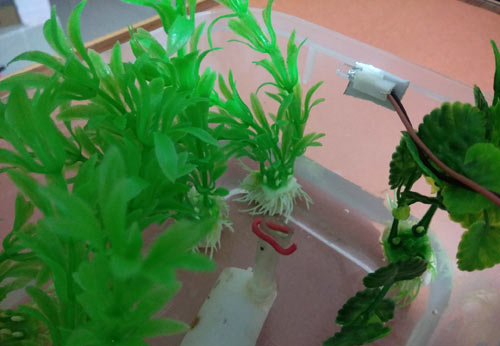
Here we used a plastic box as fountain container and mini 5v pump to act as a fountain, we used this pump previously in fire-fighting robot:
Programming Arduino Nano for Dancing Fountain
The complete program of this Arduino water fountain project is given at the bottom of the page. But here I am just explaining that by parts for better understanding:
The first part of the program is to declare the necessary variables for assigning pin numbers that we are going to use in the next blocks of program. Then define a constant REF with a value which is the reference value of for the sound sensor module. The assigned value 700 is the bytes equivalent value of the output electrical signal of the sound sensor.
int sensor = A6;
int redled = 12;
int greenled = 11;
int pump = 10;

#define REF 700
In void setup function we have used pinMode function to assign the INPUT/OUTPUT data direction of the pins. Here sensor is taken as INPUT and all other devices are used as OUTPUT.
void setup()
{
  pinMode(sensor,INPUT);
  pinMode(redled,OUTPUT);
  pinMode(greenled,OUTPUT);
  pinMode(pump,OUTPUT);
}
Inside the infinite loop, analogRead function is called which readout the analog value input from the sensor pin and stores it in a variable sensor_value.
int sensor_value = analogRead (sensor);
In the final part an if-else loop is used to compare the input analog signal with the Reference value. If it is greater than the reference, then all the output pins are given HIGH output so that all the LEDs and Pump are activated, else everything remains OFF. Here we have also given a delay of 70 Milliseconds to distinct the ON/OFF time of the Relay.
if (sensor_value>REF)
  {
    digitalWrite(greenled,HIGH);
    digitalWrite(redled,HIGH);
    digitalWrite(pump,HIGH);
    delay(70);
   }
   else
   {
    digitalWrite(greenled,LOW);
    digitalWrite(redled,LOW);
    digitalWrite(pump,LOW);
    delay(70);
   }
This is how this Arduino controlled Water Fountain works, complete code with a working video is given below.
Complete Project Code
int sensor = A6;

int redled = 12;

int greenled = 11;

int pump = 10;
#define REF 700
void setup()

{

  pinMode(sensor,INPUT);

  pinMode(redled,OUTPUT);

  pinMode(greenled,OUTPUT);

  pinMode(pump,OUTPUT);


}

void loop()

{


  int sensor_value = analogRead (sensor);


  if (sensor_value>REF)

  {

    digitalWrite(greenled,HIGH);

    digitalWrite(redled,HIGH);

    digitalWrite(pump,HIGH);

    delay(70);

   }

   else

   {

    digitalWrite(greenled,LOW);

    digitalWrite(redled,LOW);

    digitalWrite(pump,LOW);

    delay(70);

   }

}
Comments
I would like to also try this one, but I am only at the beginner's lvl. I understand how to Arduino is programed, well the code, but I dont rly understand how does the circuit works. Can you explain a little bit more, or make a complete diagram of your entire circuit ,with the relay and how everything is connected, like you have for the sound sensor.
Hi Dan, apart from sound sensor the only thing which you can design is the relay circuit. You can avail a single channel relay module for this or else refer a relay circuit design from circuit digest to make of your own. Apart from these, the connections of individual modules are given in the circuit diagram. Hope this helps!!!

Seems like an excellent way to quickly destroy your relay.
They are not designed to switch this fast / this often.
Wouldn't a MOS-FET be better suited for this application?