

Want to boot your Raspberry Pi from USB instead of unreliable SD cards? If you've used a Raspberry Pi long enough, you've probably faced the dreaded SD card failure. Maybe it corrupted right after a power outage, or maybe it just wore out from thousands of log writes. That's when I finally decided no more SD cards. They're great for getting started with Raspberry Pi, but when you want reliability and speed, it’s best to boot Raspberry Pi from USB.
And with the newer Raspberry Pi models, boot Raspberry Pi from USB is not only just possible, it's surprisingly easy once you know which Pi you're dealing with. I went through the process for multiple models – Pi 3B, 3B+, 4B, and even the new Pi 5. So if you're wondering whether your Pi can ditch the microSD and run from USB alone, this guide is for you.
Quick Overview
Duration: 1-2 hours | Type: Tutorial | Difficulty: Beginner-Intermediate
Technical Scope:
USB boot configuration for Raspberry Pi
Use Cases:
Server deployments, continuous monitoring systems, performance-critical applications
Table of Contents
Why Boot Raspberry Pi from USB Instead of SD Card?
By default, Raspberry Pi boots from a microSD card. It's cheap and works fine, until it doesn't. Performance aside, SD cards wear out over time, especially with heavy I/O. If you're running anything that involves a lot of reads and writes, such as databases or frequent logging, this can become a real issue.
But there's also a speed factor. I found out that the Raspberry Pi 4's SD interface maxes out at around 50 MB/s. Older models like the 3B and 3B+ are even slower, topping out at roughly 25 MB/s. And in reality, even the best SD cards only deliver around 38 MB/s write speeds. That's just not ideal for running an operating system or doing any kind of heavy disk activity.
Now compare that to a USB 3.0 SSD. In real-world tests, it was able to hit read speeds of 208 MB/s and write speeds of 140 MB/s. That's over five times faster than the best SD cards.
The difference is noticeable. Booting, installing packages, file operations, and even just browsing the Raspberry Pi OS desktop all feel significantly snappier with USB boot. If you’re moving beyond basic projects, configuring your setup to Raspberry pi boot from SSD can significantly boost performance.
Advantages of USB Boot
Real-world file operations show dramatic improvements when you boot Raspberry Pi from USB. The speed factor is significant when you boot the Raspberry Pi from a USB. Here's what I discovered through real-world testing:
| Storage Type | Read Speed | Write Speed | Interface Limit |
| SD Card (Class 10) | 38 MB/s | 25 MB/s | 50 MB/s (Pi 4) |
| USB 3.0 SSD | 208 MB/s | 140 MB/s | 480 MB/s |
| Performance Improvement | 5.5x faster | 5.6x faster | 9.6x higher |
- 5-10x faster performance than SD cards.
- More reliable and fewer storage failures.
- Performance advantages for application load times and overall system responsiveness.
- Better for server deployments and continuous use.
- Professionally deployed & production-ready.
How to Boot Raspberry Pi from USB?
I quickly learned that not all Raspberry Pi models behave the same when figuring out how to boot Raspberry Pi from USB without SD card. I discovered that how to boot Raspberry Pi from USB without SD card varies significantly across models. Let me walk you through each method:
Raspberry Pi 3B: The One-Time USB Unlock
This one took a bit of digging. The Pi 3B doesn't support USB booting out of the box; you need to flip a hidden internal switch. More specifically, you need to set a flag in the Pi's OTP (One-Time Programmable) memory. It's permanent, but once set, you can boot from USB Raspberry Pi 3 forever, even without a microSD card present.
⇒ Step 1: Boot from an SD Card with Raspberry Pi OS
To get started, I flashed the standard Raspberry Pi OS onto a microSD card and booted the Pi 3B from it. You can use Raspberry Pi Imager to do this. Once the OS is running, open up a Terminal window; you'll need it for the next steps.
⇒ Step 2: Enable USB Boot Mode via config.txt
Here's the command I ran:
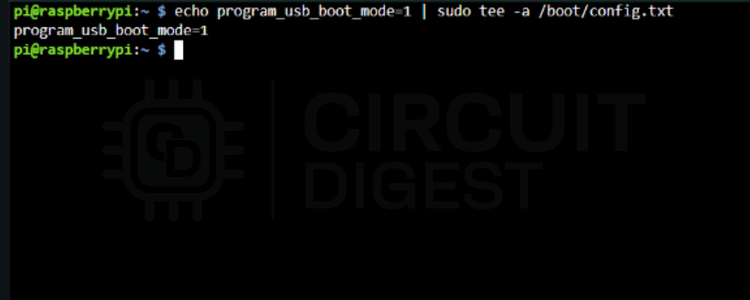
| echo program_usb_boot_mode=1 | sudo tee -a /boot/config.txt |
What this does:
By adding program_usb_boot_mode=1 to the config file, the Pi knows to write a flag to its OTP memory on the next reboot. This only needs to be done once in the Pi's lifetime; it won't harm the Pi or prevent future SD card boots.
⇒ Step 3: Reboot to Apply the Change
After modifying config.txt, I ran:
| sudo reboot |
This reboots the Pi and triggers the bootloader to read that new config option. If it sees program_usb_boot_mode=1, it writes the USB boot flag to the Pi's OTP memory.
⇒ Step 4: Verify OTP Flag is Set
Once the Pi restarted, I wanted to make sure the USB boot flag had been written correctly. So I ran:
| vcgencmd otp_dump | grep 17: |
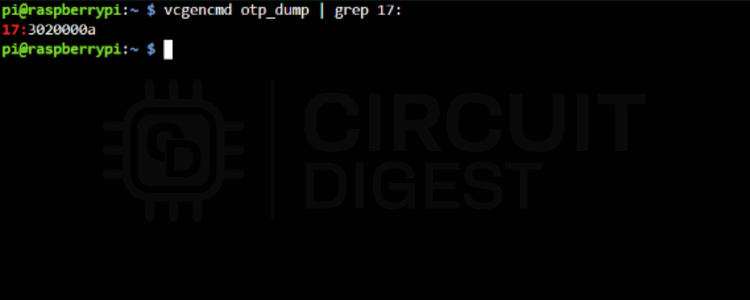
Here's what that does:
If the command returns something like:
| 17:3020000a |
That's your confirmation, to boot Raspberry Pi from USB is now permanently enabled on your Pi 3 B.
⇒ Step 5: Boot from USB (No SD Card!)
I flashed Raspberry Pi OS to a USB stick (just like I would with an SD card), plugged it into the Pi 3B's USB port, and removed the SD card. When I powered the Pi back on, it booted straight from USB. No more SD cards needed!
Raspberry Pi 3B+: Native USB Boot Support
If you're using a Raspberry Pi 3B+, you're in luck. USB boot is already enabled from the factory. That means you don't need to tweak any config files or run terminal commands. You just flash the OS to a USB drive and can boot from USB Raspberry Pi 3 immediately. The Pi 3B+ includes factory-enabled USB boot support, making Raspberry Pi 3 boot from USB without SD card.
Here's exactly what I did using Raspberry Pi Imager:
⇒ Step 1: Open Raspberry Pi Imager: I started by opening the Raspberry Pi Imager on my PC. It's the official tool for flashing OS images onto SD cards or USB drives.
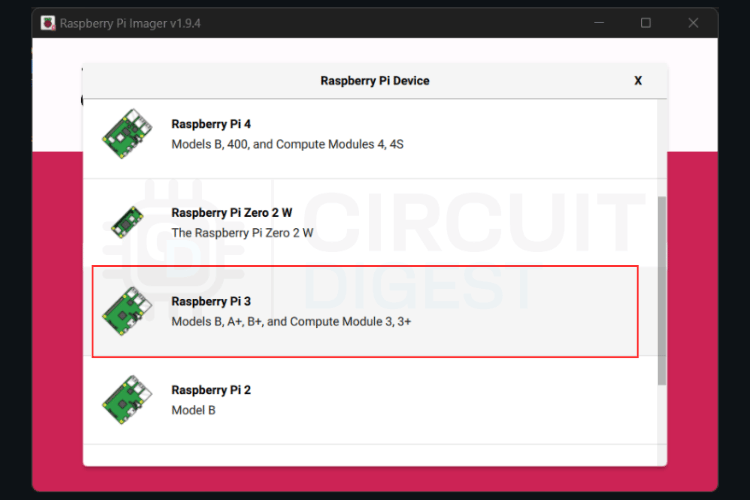
⇒ Step 2: Choose Your Pi Model: On Raspberry Pi Imager lets you can specify the target board. I clicked the "Choose Device", and I selected Raspberry Pi 3B+. This helps the tool optimise the OS for your model.

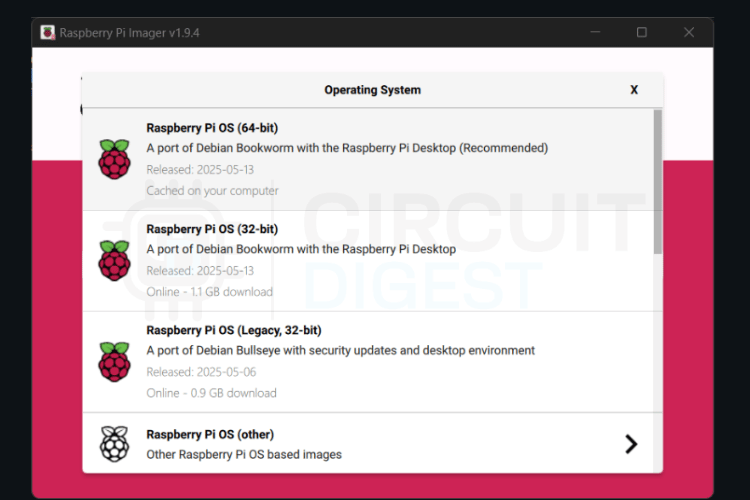
⇒ Step 3: Choose Your Raspberry Pi OS: I clicked "Choose OS" and selected Raspberry Pi OS (32-bit) from the list. You can also use Raspberry Pi OS Lite if you're setting up a headless Pi (no monitor).
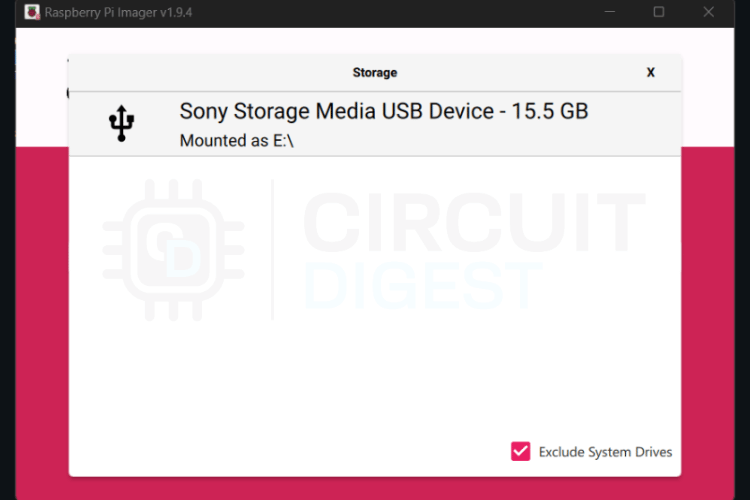
⇒ Step 4: Select the USB Drive: Next, I clicked "Choose Storage" and selected my USB stick from the list. Make sure you're selecting the correct drive; it will be erased during flashing.
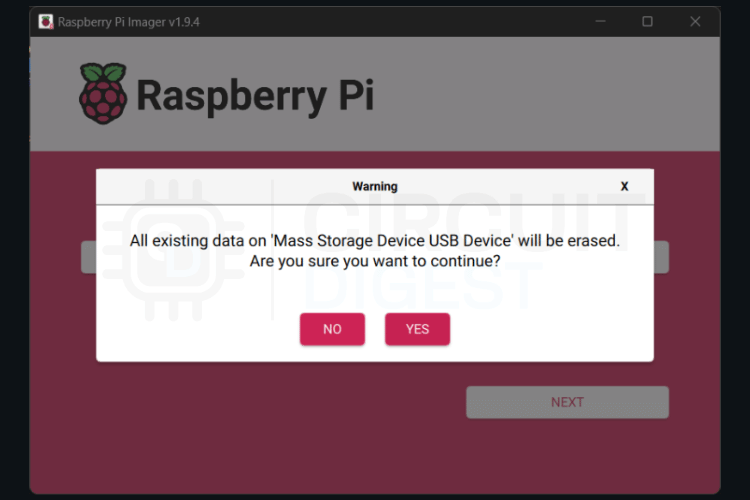
⇒ Step 5: Write the OS: I clicked "Write", confirmed the warning, and let it flash the OS to my USB stick. This part took about 5-10 minutes.
⇒ Step 6: Boot the Pi 3B+ from USB: With the USB stick ready, I unplugged the SD card from the Pi (if there was one), inserted the USB stick into one of the Pi's USB ports, and powered it on.
And that was it. The Pi 3B+ booted from USB without any extra setup. No config files, no flashing bootloaders, just plug and go.
Raspberry Pi 4: Bootloader with EEPROM
The Raspberry Pi 4 is a major step forward. Instead of hard-coded boot logic, it uses a dedicated EEPROM chip to store its bootloader, enabling flexible boot configurations for Raspberry Pi 4 boot from USB without SD card. That means you can update it and change how the Pi boots. By default, older Pi 4 boards may still prioritise microSD boot, but this can be reconfigured to allow a Raspberry Pi 4 boot from USB without SD card.
Option 1: CLI Method
⇒ Step 1: Boot from SD and Open Terminal
As before, I booted from an SD card loaded with Raspberry Pi OS and opened Terminal
⇒ Step 2: Update Everything
I ran the following to make sure my system and bootloader were fully up to date:
| sudo apt update |
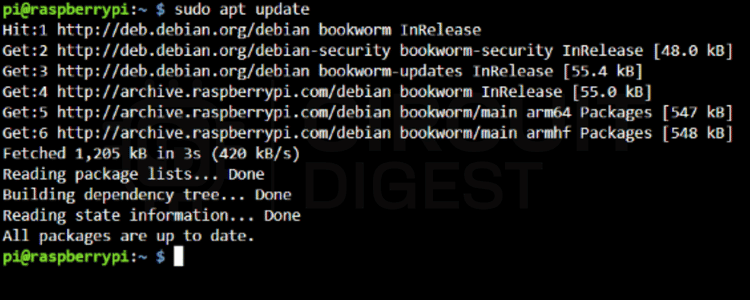
sudo apt update: Fetches the latest package info from the repositories.
| sudo apt full-upgrade -y |
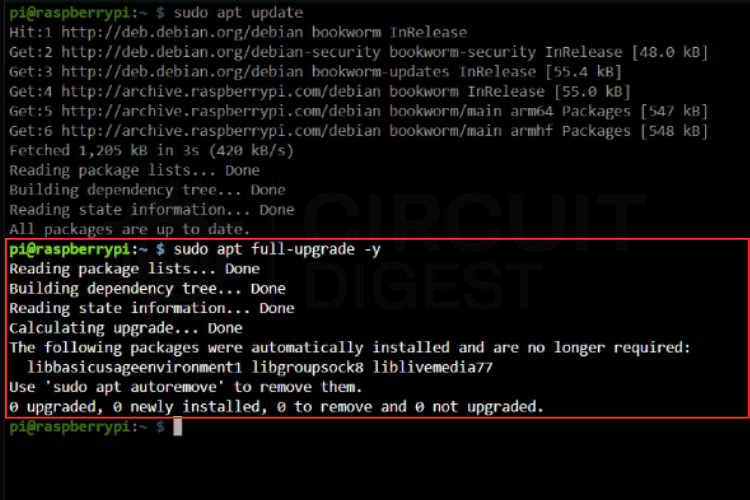
sudo apt full-upgrade: Installs updates for everything, including firmware and kernel.
Then I ran:
| sudo rpi-eeprom-update -a |
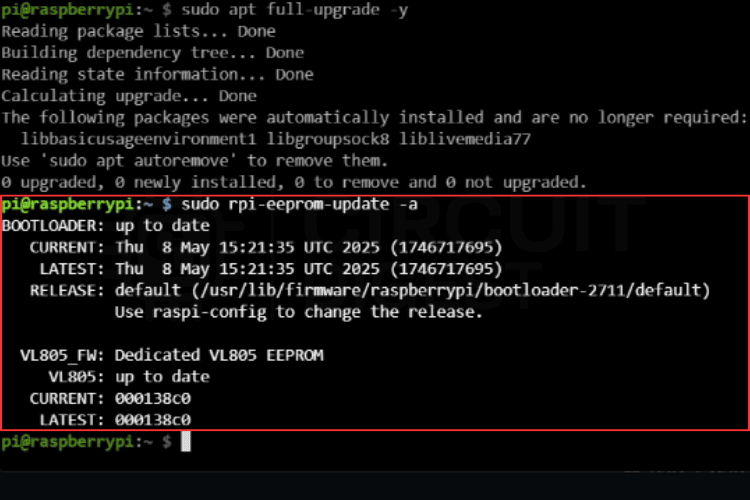
This command checks for the latest bootloader update and installs it if necessary. The -a flag means "apply any available updates automatically."
⇒ Step 3: Set Boot Order to USB
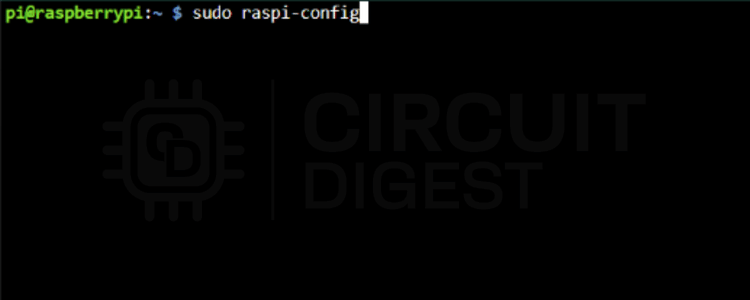
Next, I opened the Raspberry Pi configuration tool:
| sudo raspi-config |
Then navigated to: "Advanced Options → Boot Order → USB Boot"
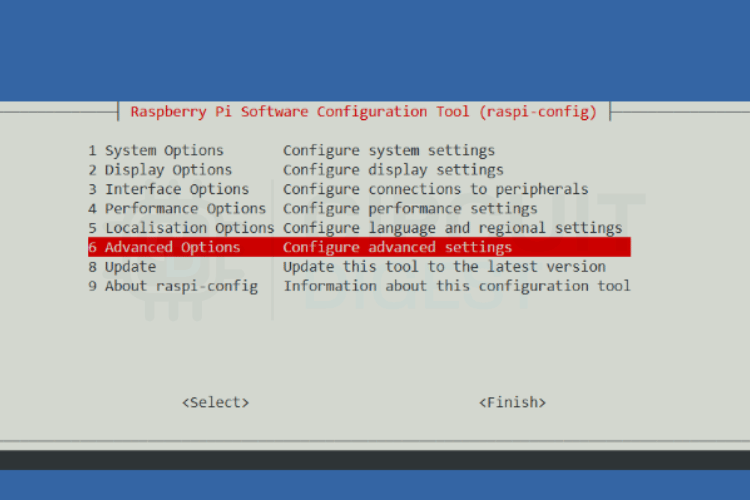
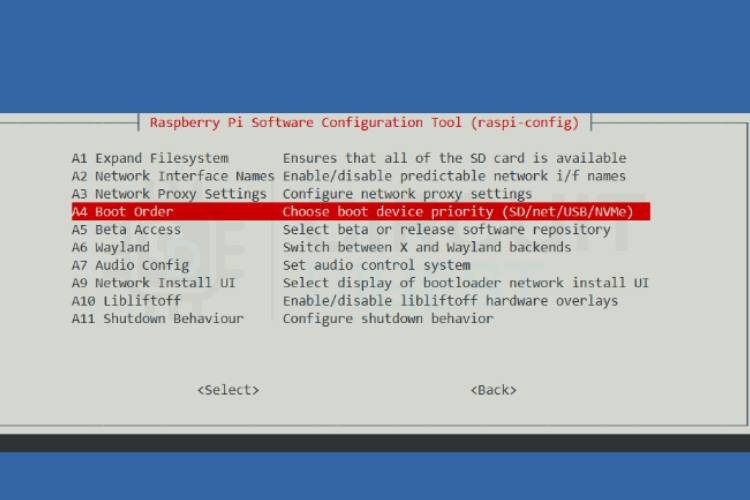
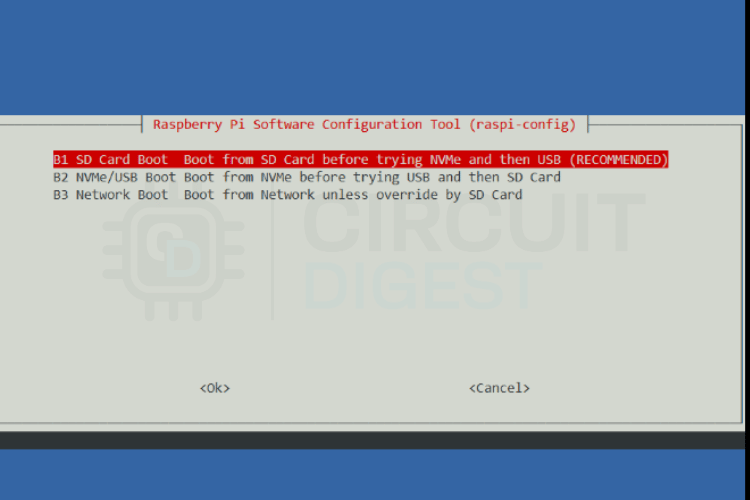
This sets the EEPROM bootloader to look for a USB drive first, before falling back to microSD.
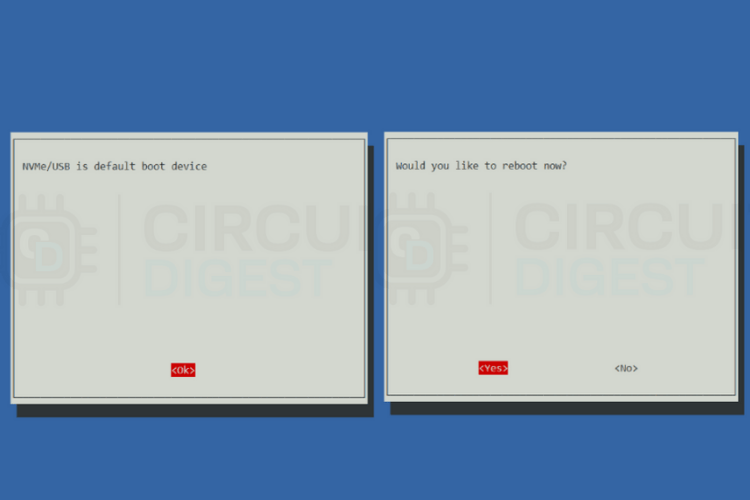
⇒ Step 4: Reboot and Remove SD Card
Once the boot order was set, I rebooted, powered down the Pi, removed the SD card, and plugged in my USB SSD with Raspberry Pi OS installed. On the next power-up, you can now boot Raspberry Pi 4 from USB, faster than ever.
Option 2: Raspberry Pi Imager Bootloader Update
If you want to know how to boot a Raspberry Pi from USB without an SD card and avoid the terminal, Raspberry Pi Imager offers a user-friendly solution. Here is how.
→ Open Raspberry Pi Imager on your PC and choose the Board.
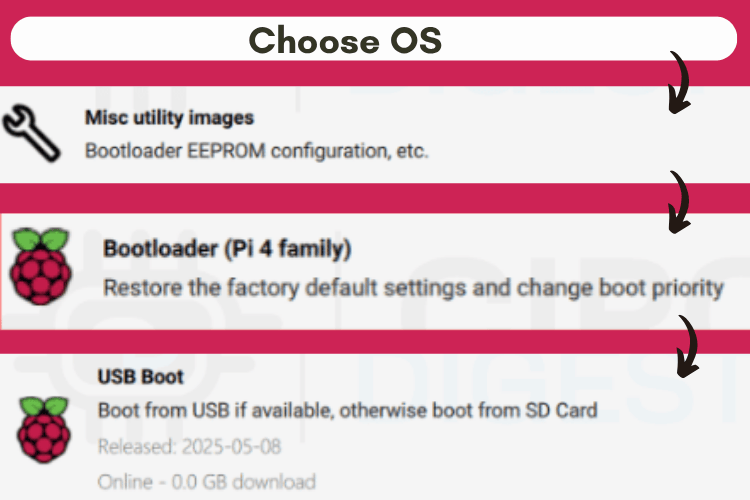
→ Click "Choose OS" → scroll down to Misc Utility Images → Bootloader → select USB Boot.
→ Click "Choose Storage" and select an SD card.

→ Click Write and wait for it to finish.
→ Insert the SD card into your Pi and power it on.
In about 10 seconds, the green LED will blink rapidly, or the screen may turn green; this means the bootloader update succeeded. Power off, remove the SD card, and you're now USB-boot ready.
Raspberry Pi 5 with Native USB and NVMe Boot
The Pi 5 is the most powerful Raspberry Pi yet, and it comes with native support for USB 3.0 and PCIe booting right out of the box. No updates, no flags, no EEPROM tweaks required. The Pi 5 provides the most comprehensive boot support, including Raspberry pi boot from SSD via multiple interfaces.
Here's All I Did:
- Used Raspberry Pi Imager to flash Raspberry Pi OS to a USB SSD.
- Plugged the SSD into one of the blue USB 3.0 ports.
- Powered on the Pi 5 (with no SD card).
For insane performance on a Pi 5, use its PCIe port with a compatible NVMe adapter to make your Raspberry Pi boot from SSD just like a mini PC.
Troubleshooting USB Boot Issues
| Issue | Symptoms | Solution |
| Power insufficient | Drive not detected | Use powered USB hub or high-quality power supply |
| Boot partition corrupted | Boot loops or failures | Reflash drive with fresh OS image |
| Incompatible USB drive | Won't boot despite setup | Test with different USB drive brands |
| Outdated bootloader | USB not recognized | Update EEPROM bootloader to latest version |
| Wrong USB port | Slow performance | Use USB 3.0 ports (blue) on Pi 4/5 |
Should You Boot Raspberry Pi From USB?
If you're tired of SD card failures, want faster performance, or just want your Pi to feel more like a real computer, yes, the reliability you gain when you learn how to boot Raspberry Pi from USB without SD card is 100% worth it.
For casual hobby projects, SD cards remain adequate, but for serious applications requiring reliability and performance, boot from USB Raspberry Pi 3 and newer models offer compelling advantages. A good USB SSD is worth the cost in terms of better system responsiveness, reliability and even less work from SD card failure and maintenance delays.
If you want help flashing Raspberry Pi OS to a USB SSD, choosing the best drives, or even trying out NVMe booting on the Pi 5, especially for Raspberry Pi 4 boot from USB without SD card setups, I'd be happy to walk you through that next.
FAQs: Raspberry Pi USB Boot
⇥ Q1. How do I know if my Raspberry Pi 4 supports USB boot?
All Pi 4 models support USB boot, but units manufactured before mid-2020 may need a bootloader update. Check your bootloader version with vcgencmd bootloader_version - you need version 2020-04-16 or later for stable USB boot support.
⇥ Q2. Is booting Raspberry Pi from a USB faster than an SD card?
Yes, but the speed improvement depends on your storage and Pi model. USB 3.0 SSDs can achieve significantly faster data transfer rates than SD cards. However, the Pi 4's USB controller shares bandwidth with Ethernet, and actual performance varies by workload.
⇥ Q3. How do I troubleshoot USB boot failures?
Check systematically: verify bootloader version (vcgencmd bootloader_version), ensure USB drive has proper boot partition structure, test with known-good USB device, try different USB ports, check power supply adequacy (especially for SSDs), and verify boot order in raspi-config for Pi 4.
⇥ Q4. Do all Raspberry Pi models support booting from USB?
No, only the Pi 3B (with config), 3B+, 4 and 5 support USB booting. All other boards need an SD card for booting.
⇥ Q5. What is the best USB drive for booting a Raspberry Pi?
USB 3.0 SSD drives are easily our best choice if you are on the high end. Another option is USB memory sticks (the better quality they are, the better), but you may want to stay away from a cheap flash unit that may not last if you are continuously running them.
⇥ Q6. If I enable USB booting, can I still use an SD card?
Yes, in most situations, enabling USB boot will also enable you to still use an SD card. If you have both, the Raspberry Pi will boot from USB.
⇥ Q7.Can the Pi 5 derive power from NVMe drives?
Yes, the Pi 5 powers NVMe boot, as long as you take advantage of the M.2 adapters, you will achieve maximum storage performance.
⇥ Q8.How do I undo the USB boot configuration?
The Pi 3B's OTP changes are permanent, but you can still boot from the SD. On the Pi 4/5, the boot order can be changed using raspi-config
Raspberry Pi Setup Tutorials
Basic Raspberry Pi setup and configuration tutorials for beginners. If your goal is a seamless Raspberry Pi boot from SSD, start by solidifying your foundation with these basic configuration steps.

Getting Started with Raspberry Pi - Introduction
New to Raspberry Pi? This beginner-friendly guide takes you through the setup, OS installation, and basic usage of Raspberry Pi boards with practical tips.

How to install Android on Raspberry Pi
In this tutorial, we will convert the Raspberry Pi into an Android device using a popular platform - emteria. OS.

How to set up DietPi on Raspberry Pi
Learn how to install DietPi on Raspberry Pi with this step-by-step guide. Set up a lightweight, optimised OS for your Pi with better speed and control.
I haven’t tested this with Raspberry Pi B boards yet, but I assume the procedure is more or less the same as on the 3B. If you run into any issues, feel free to post them here and I’ll be happy to help!

Very useful info - is it possible to boot the older model (Raspberry Pi B from 2011, for example) from the USB stick?