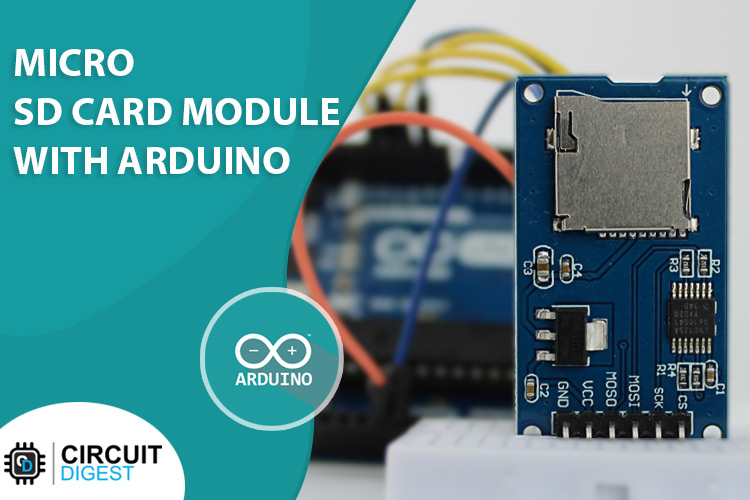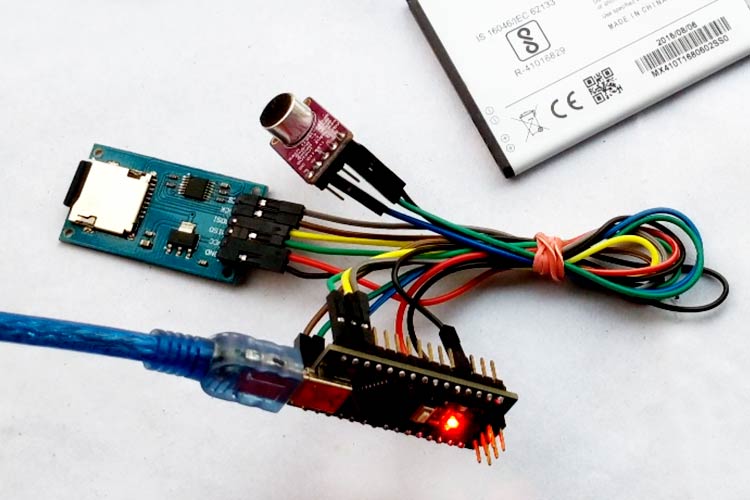
Connecting an SD card module to Arduino is way easier than you think. In this guide, we’ll break down the module’s pins and components, show you how to wire it to your Arduino, and get you reading and writing data in no time. Think of it as turning your Arduino into a reliable data logger. We have covered many other interfacing tutorials before that might interest you, such as this 16x2 LCD with Arduino interfacing guide, Arduino 7-segment display tutorial, and more.
Micro SD Card Module with Arduino - Quick Overview
Build Time: 1-2 hours | Cost: $10-20 | Difficulty: Beginner
What You'll Learn: SPI communication, SD card file handling, Arduino programming, Data logging basics
Applications: Temperature logging, GPS tracking, Battery monitoring, Sensor data storage
Table of Contents
Why You Need an SD Card Module for Arduino Projects
So here’s the thing: Arduino’s built-in memory is tiny. If you’re just blinking LEDs, no problem. But the moment you try to log data, say battery usage, temperature over time, or GPS coordinates, you’ll run out of space almost instantly.
The usual fix is to add an SD card. Those little microSD cards can hold gigabytes, and they’re physically smaller than a rupee coin. Perfect for storing logs. In this tutorial, I’ll show you how to connect an SD card to Arduino and get it to save your data. Let’s jump in.
Micro SD Card Module Pinout
The module has 6 pins; those are GND, VCC, MISO, MOSI, SCK, and CS. All the pins of this sensor module are digital, except VCC and Ground. The pinout of the module is displayed below:

Quick Reference: Micro SD Card Module Pin Connections to Arduino
| SD Card Module Pin | Arduino UNO Pin | Function | Signal Type |
| GND | GND | Ground connection | Power |
| VCC | 5V or 3.3V | Power supply | Power |
| MISO | Digital Pin 12 | Master In Slave Out (SPI data) | Digital Output |
| MOSI | Digital Pin 11 | Master Out Slave In (SPI data) | Digital Input |
| SCK | Digital Pin 13 | Serial Clock (SPI synchronization) | Digital Clock |
| CS | Digital Pin 10 | Chip Select (configurable) | Digital Control |
Module Components
This is a cheap and easy-to-use sensor that can be used for many different applications. This sensor can be used to read SD card data with a microcontroller. The part marking of the module is shown below.

If you take a close look at the micro module, there is not much on the PCB itself. There are only three components that are significant: the first is the micro SD card holder itself. This holder makes it easy for us to swap between different modules. The second most important thing is the level shifter IC, as the module runs only on 3.3V, and it has a maximum operating voltage of 3.6V, so if we directly connect the SD card to 5V, it will definitely kill the SD card. Also, the module has an onboard ultra-low dropout regulator that will convert the voltage from 5V to 3.3V. That is also why this module can operate on 3.3V power.
Module FAQ
1. What’s the best way to format an SD card?
If you want your SD card to play nicely with Arduino and other devices, go with exFAT. It’s designed for flash memory and handles large cards without fuss.
2. Do SD cards have firmware?
Yep. SD cards come with firmware baked in. Firmware ensures that the SD card stores data and retrieves it when required
3. Does formatting an SD card shorten its lifespan?
It does. Formatting basically clears the whole card and marks every block as free. Since SD cards only have a limited number of read/write cycles, doing it over and over can wear them out faster.
4. What is an exFAT SD card?
exFAT (Extensible File Allocation Table) is a file system made by Microsoft in 2006 for flash drives and SD cards. It stayed proprietary until 2019, and some parts are still patented, but it’s the go-to for large-capacity cards and works great with Arduino projects.
Module Circuit Diagram
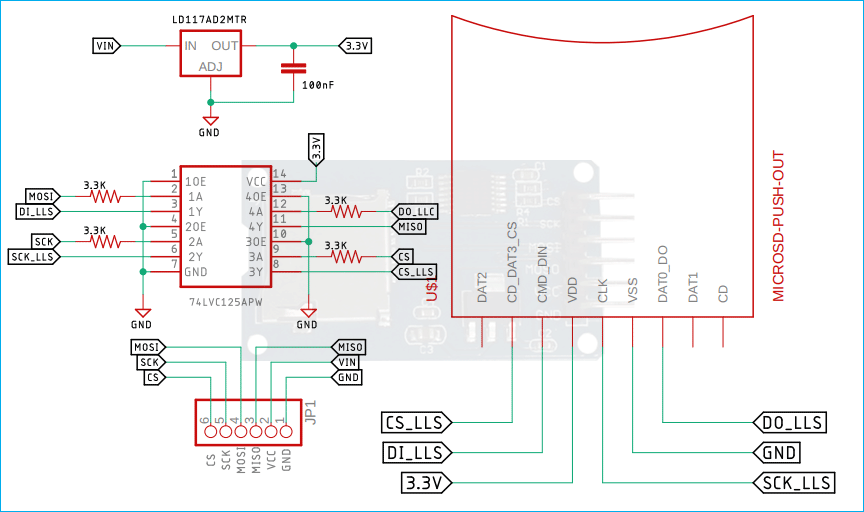
The module is made with very generic and readily available components. The schematic of the micro SD card module is shown below.
As you can see, we have the micro SD card connector, which is a push-out type connector, and the connector is connected to a logic level shifter IC. The maximum operating voltage of the module is 3.6V, so the logic level shifter IC becomes very important. To power the SD card and the logic level converter, we are using an LM1117 LDO, which is why this module can work with both 3.3V and 5V logic levels. The connector JP1 at the bottom of the schematic represents the connector at the bottom of the module.
Arduino with SD Card Module Circuit Diagram
Now that we've completely understood how the module works, we can connect all the required wires to the Arduino and write the code to get all the data out from the sensor. The Connection Diagram of the module with Arduino is shown below-

Connecting the micro SD card module to an Arduino UNO is very simple. We just need to connect the SPI lines SCK, MISO, and MOSI to the Arduino’s SPI pins: SCK to D13, MOSI to D11, and MISO to D12. If there are multiple devices connected on the SPI bus, then we also need to connect the CS line, commonly to D10, on the Arduino. Other than that, the VCC and GND pins are used to power the device.

Module Preparation
Before inserting the SD Card into the SD card reader module, you need to properly format the card before you can actually work with it; otherwise, you would have problems because the SD card reader module can only read FAT16 or FAT32 file systems. If your SD card is new, then chances are that the card is factory formatted, which may also not work because a pre-formatted card comes with a FAT file system. Either way, it's better to format the old card to reduce issues during operation.
Code Implementation
The Arduino code to read and write data from the SD card module is given below. The code is very simple and easy to understand. The code checks if there exists a file named “data_log.txt”. If the file exists, then it proceeds to write the given information onto the SD card, and if not, the code will create the file in the SD card and then write the data onto the SD card. We can later open the file and check the contents to see if it's written or not.
We start our code by defining the SD library, and we also declare the chipSelect pin of the module. Then we define a file type variable and name that myFile.
#include <SD.h>
const int chipSelect = 10;
File myFile;
Next, we have our setup function; in the setup function, we initialize the serial for debugging. We also check if the SD card is connected properly to the SPI pins of the Arduino.
  // Open serial communications and wait for port to open:
  Serial.begin(9600);
  // wait for Serial Monitor to connect. Needed for native USB port boards only:
  while (!Serial);
Next, we have made a function named “check_and_create_file()”. In that function, we check if the data_log.txt file exists on the SD card or not. If the file exists, we will proceed with our code, and if not, then we will create the file. To create a file on the SD card, you just need to open and close it very rapidly without a delay, and the file will be created.
void check_and_create_file()
{
  Serial.print("Initializing SD card...");
  /*Check if the SD card exist or not*/
  if (!SD.begin(chipSelect)) {
    Serial.println("initialization failed!");
    while (1);
  }
  Serial.println("initialization done.");
  if (SD.exists("data_log.txt"))
    Serial.println("data_log.txt exists.");
  else
  {
    Serial.println("data_log.txt doesn't exist.");
    /* open a new file and immediately close it:
      this will create a new file */
    Serial.println("Creating data_log.txt...");
    myFile = SD.open("data_log.txt", FILE_WRITE);
    myFile.close();
    /* Now Check again if the file exists in
      the SD card or not */
    if (SD.exists("data_log.txt"))
      Serial.println("data_log.txt exists.");
    else
      Serial.println("data_log.txt doesn't exist.");
  }
}
Next, we will write some text to the SD card, and we will also read that text back into the serial monitor window. This way, we will know that the text was written successfully on the SD card. We have made a function named read_write_sd_text() which does this automatically. Just call this function, and you are done.
Inside the function, we open a
void read_write_sd_text()
{
  myFile = SD.open("data_log.txt", FILE_WRITE);
  // if the file opened okay, write to it:
  if (myFile) {
    Serial.print("Writing to data_log.txt...");
    myFile.println("Testing Data Write 1, 2, 3.");
    // close the file:
    myFile.close();
    Serial.println("done.");
  } else {
    // if the file didn't open, print an error:
    Serial.println("error opening data_log.txt");
  }
  // re-open the file for reading:
  myFile = SD.open("data_log.txt");
  if (myFile) {
    Serial.println("data_log.txt:");
    // read from the file until there's nothing else in it:
    while (myFile.available()) {
      Serial.write(myFile.read());
    }
    // close the file:
    myFile.close();
  } else {
    // if the file didn't open, print an error:
    Serial.println("error opening data_log.txt");
  }
}
This marks the end of our code section, and we can move to another section of the article.
Working Demo
The GIF below shows how the SD Card module works. We wrote the Arduino code so that after the Arduino initializes, the code will check if it can find an SD card or not. If it finds an SD card, it will check if the text file exists or not. If the file exists, the code will continue; if not, the code will simply create a new text file, and once that is done, it will write testing 1, 2, 3. Inside the text file. Next, the code will read the text file and print the data inside the text into the serial monitor window.
Troubleshooting
Check if the power supply to the module is working properly or not. Check whether the onboard LM1117-3.3V voltage regulator is working properly or not.
Format the Micro SD card before inserting the card into the SD card module.
Sometimes, quick format in Windows systems does not work, so you need to format the card using the regular format method, or you can use the Windows CMD to format the micro SD card.
If you are using an old micro SD card, make sure the SD card contacts are clean.
GitHub Repository
Arduino SD Card Module FAQ
1. How do I connect an SD card to Arduino?
Super simple. Grab a micro SD card module, then hook up the SPI pins: SCK → D13, MOSI → D11, MISO → D12, CS → D10. Don’t forget VCC and GND for power. Once it’s wired up, you can use the Arduino SD library to read and write files. Easy peasy.
2. What’s the best format for an SD card for Arduino projects?
FAT16 or FAT32 is your go-to. They just work with Arduino and the module. For really big cards, exFAT can work too, but FAT32 is the safer bet most of the time.
3. Can I use a 5V Arduino with a 3.3V SD card module?
Yep! Most modules have a built-in logic level shifter and voltage regulator. They take care of converting 5V from the Arduino down to 3.3V for the SD card, so your card won’t get fried.
4. How do I write and read files on an SD card with Arduino?
Use the SD library. First, do SD.begin(chipSelect) to get things rolling. Then open a file with SD.open(), write with println(), and read back with read() or readString(). Always close the file when you’re done. Arduino likes it neat.
5. Why isn’t my Arduino seeing the SD card?
Usually, it’s one of a few things: the card isn’t formatted right, the contacts are dirty, or it’s not getting enough juice. Double-check the format (FAT16/FAT32), clean the card, and check your connections.
6. Does formatting an SD card too often wear it out?
It does. SD cards have a limited number of read/write cycles, and formatting wipes everything. So don’t go formatting every day unless you really have to.
7. Can I use big SD cards with Arduino?
Most modules handle up to 32GB with FAT32 without a problem. If you go bigger, you might need exFAT, but check your module and library first.
Explore More Arduino SD Card Projects
Take on these fascinating Arduino projects that leverage micro SD cards in innovative ways — from logging temperature without contact to building a compact voice recorder. Each project demonstrates unique data storage applications and provides inspiration for your own smart, data-driven gadgets.
Wall Mount Digital IR Thermometer using Arduino
This project designs a wall-mounted IR thermometer using Arduino. It can be fixed on a wall and left powered on, allowing individuals to scan their temperature as they step forward. The temperature is measured and displayed on an LCD, while data is logged to an SD card.
Arduino Voice Recorder for Spy Bug Voice Recording
This project builds an Arduino-based voice recorder that can function as a small spy device. A microphone captures audio, which is then stored directly onto an SD card for later playback or analysis.
OBD-II Data Logger with IoT Dashboard and Dashcam
This all-in-one car accessory combines a dashcam, OBD-II data logger, GNSS tracker, and IoT connectivity. It records video, monitors vehicle health, tracks location, stores data on an SD card, and allows remote access via an IoT dashboard, simplifying automotive data management.
Complete Project Code
#include <SD.h>
const int chipSelect = 10;
File myFile;
void setup() {
  // Open serial communications and wait for port to open:
  Serial.begin(9600);
  // wait for Serial Monitor to connect. Needed for native USB port boards only:
  while (!Serial);
  check_and_create_file();
  write_text();
}
void loop() {
  // nothing happens after setup finishes.
}
void check_and_create_file()
{
  Serial.print("Initializing SD card...");

  /*Check if the SD card exist or not*/
  if (!SD.begin(chipSelect)) {
    Serial.println("initialization failed!");
    while (1);
  }
  Serial.println("initialization done.");
  if (SD.exists("data_log.txt"))
    Serial.println("data_log.txt exists.");
  else
  {
    Serial.println("data_log.txt doesn't exist.");
    /* open a new file and immediately close it:
      this will create a new file */
    Serial.println("Creating data_log.txt...");
    myFile = SD.open("data_log.txt", FILE_WRITE);

    myFile.close();

    /* Now Chec agin if the file exists in
      the SD card or not */

    if (SD.exists("data_log.txt"))
      Serial.println("data_log.txt exists.");

    else
      Serial.println("data_log.txt doesn't exist.");
  }
}


void write_text()
{
  myFile = SD.open("data_log.txt", FILE_WRITE);

  // if the file opened okay, write to it:
  if (myFile) {
    Serial.print("Writing to data_log.txt...");
    myFile.println("testing 1, 2, 3.");
    // close the file:
    myFile.close();
    Serial.println("done.");
  } else {
    // if the file didn't open, print an error:
    Serial.println("error opening data_log.txt");
  }

  // re-open the file for reading:
  myFile = SD.open("data_log.txt");
  if (myFile) {
    Serial.println("data_log.txt:");

    // read from the file until there's nothing else in it:
    while (myFile.available()) {
      Serial.write(myFile.read());
    }
    // close the file:
    myFile.close();
  } else {
    // if the file didn't open, print an error:
    Serial.println("error opening data_log.txt");
  }
}
Comments
Those are filter capacitors. Not mandatory, when using a clean DC power source.
Link to the schematic seem to be taking to the wrong webpage.
turns out it is because i was not signed in. :)


why does the image of the module have 3 capacitors and your squemtaic only haves 1