
Despite having multiple messaging apps like WhatsApp, WeChat, Facebook Messenger, etc., we can't ignore the fact that the most effective and professional way for an IoT device to communicate with its users is through plain, simple text messages, a.k.a. SMS messages. By learning how to send SMS from NodeMCU, we can build interesting IoT projects, where we can easily monitor our sensors and also get device-critical SMS like battery low, device tampering alert, etc.
Basically, to send SMS from NodeMCU or ESP8266 we have two options:
The first option is using an external GSM module with an active SMS plan availed SIM card. We have already developed the project, Interfacing SIM800L GSM module with Arduino to Send SMS in our previous article. But it is not practical because of having to maintain an active SIM card for each of your IoT devices, and it's a pain to find 2G SIM cards that are supported by the SIM800L modules. The second option is using free SMS API providers like Twilio, infobip, etc. While there are many such service providers, we found that they are not scalable for hobbyists, and that is why we are going to learn in this tutorial on how to really send free SMS from NodeMCU using our very own CircuitDigest SMS API service.
Note: The CircuitDigest SMS API is a free service designed to support the electronics and maker community. It enables hobbyists, students, and developers to easily send SMS alerts from their projects—perfect for prototyping and testing IoT devices. While this guide focuses on Arduino UNO R4, the API is fully compatible with NodeMCU, Arduino UNO R4, ESP32, Raspberry Pi, and virtually any SoC or SoM module capable of connecting to the internet.
Components Required to Send SMS Using NodeMCU:
Here we are only going to demonstrate how to send SMS from NodeMCU without using GSM, so the hardware setup of our project is much simpler, and the required components are listed below.
NodeMCU Microcontroller
USB to Micro USB-B data cable
Arduino IDE software
What Hardware Do You Need to Send SMS From NodeMCU?
Since we are using the Circuit Digest SMS API, we do not need any additional hardware; the NodeMCU board itself is enough. The hardware setup is also simple, just connect the NodeMCU to the PC through the USB to Micro USB-B cable, as I have shown in the below image.

If you compare it with a GSM-based SMS Alert System the hardware setup looks simple. Here we don’t need any external power supply circuit; we can power it directly from the PC USB port.
For practical implementation, we can use an external USB power adapter to power up the NodeMCU with additional circuits like the Sensor Module and Actuator Module for home automation purposes. Ok, let's move on to the necessary software setup.
Software Setup for Programming NodeMCU:
Before we learn how to send SMS using NodeMCU, we want to do some preliminary steps like setting up the software development environment; in our case, it’s an Arduino IDE. As I previously said, we want to install an Arduino IDE on our PC. After that, we want to download the NodeMCU ESP8266 board support package from the board manager by following the below images.

After clicking the board manager, we need to search for ESP8266 in the search field.

If it is installed correctly, you should be able to select the board as shown in the image below.

After that, we want to ensure that the connected hardware is detected or not by looking at the port option, If the port option is greyed out, as shown in the image below. It means our NodeMCU is not detected by our PC. This means we want to Install the necessary USB driver on our PC.

In my case, I am using NodeMCU V3, and for that, I want to install a CH340G driver from the internet, which is printed on the bottom side of the controller board. You need to install the required driver based on the NodeMCU board version that you are using.

While installing the driver, we want to ensure that the driver is compatible with the OS present on the PC.
Generating API Key
Before moving on to the coding part, we first want to generate a valid SMS API from the Circuit Digest Cloud SMS service provider, so that we can make our ESP32 send SMS by utilizing the power of the internet.
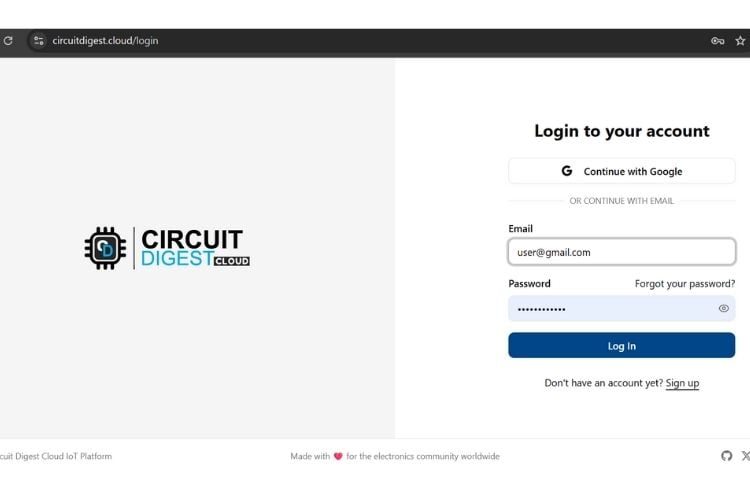
STEP 1: Visit our Circuit Digest Cloud website “https://www.circuitdigest.cloud/”. Then click on the login button. It will redirect you to the login page, there you just enter your login credentials. If you don’t have an account, create a new one using the Register Page.
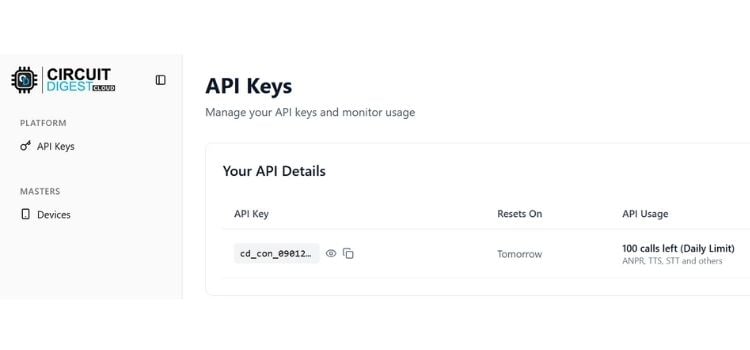
STEP 2: After logging in, you will find the “Account” button in the top-right corner. Click on it to view a dropdown menu with options such as Profile, API Key, and Logout. Select API Key, and you will be redirected to the API key generation page.

STEP 3: On the API Key generating page, a new API key will be generated with a limit of 100 SMS per month. Even after Expiry, you can renew it for free of cost.
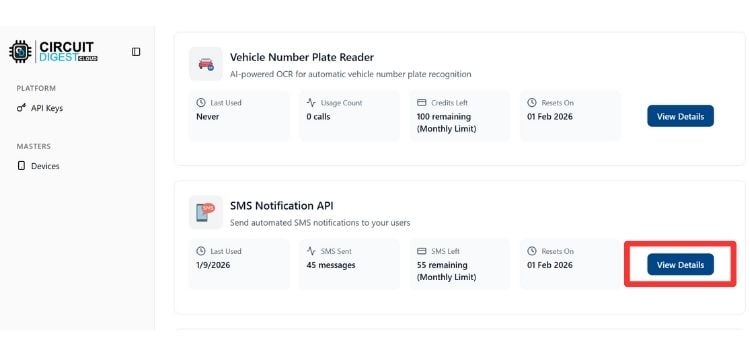
STEP 4: After that, scroll down the webpage until you find the SMS Notification API section. Click on "View Details" to proceed.
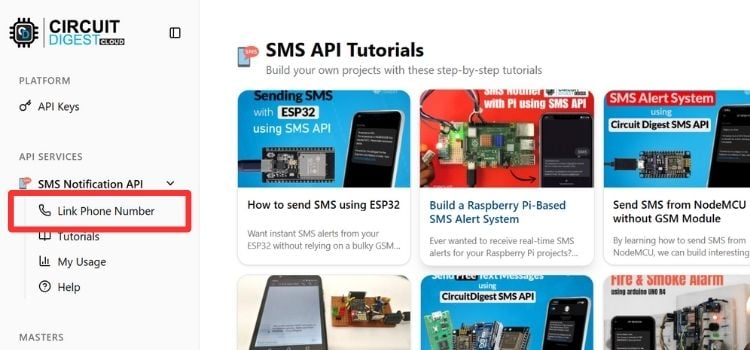
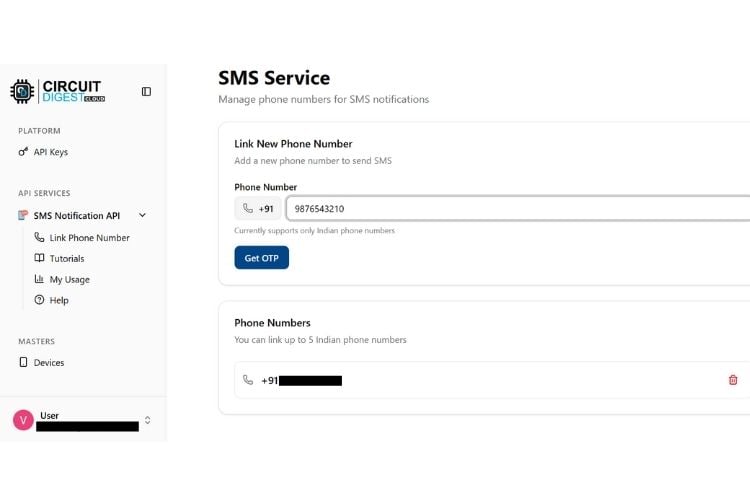
Step 5: In the SMS Notification API tab, you will find the "Link Phone Number" option. Click on it to link a phone number for sending SMS notifications.
STEP 6: Enter the phone number you want to link and click the "Get OTP" button. You will receive an OTP on the entered number enter the OTP to verify the phone number. Once verified, you can also view the list of linked phone numbers here.
Prebuilt SMS Template of Circuit Digest Cloud
I decided to use the battery low alert SMS template, whose template ID is 104. So I noted the template ID number and decided to assign “GPS TRACKER” and “20” to the #var# variables.
So the incoming SMS will look like this
The battery level of GPS TRACKER is critically low at 20%. Recharge immediately. Makers of India. Visit www.circuitdigest.com. |
NodeMCU Arduino Code to Send SMS
Here we going to discuss the code step by step, which configures the NodeMCU to do a specific task. In our case, it will send an SMS through the free API provided by the Circuit Digest Cloud. But before moving on to the code walkthrough, I am going to teach you about the core logic of this code. So that it makes sense. Let’s move on.
We already know that this code’s core logic is to send SMS API, do you know how it does that? I will teach you. First of all this code makes the microcontroller connected to the network, So that it can establish a connection to the SMS API server through HTTP Protocol. Later it sends a POST request for sending an SMS. That’s all, now I going to explain the code in detail.
In the below, You can find the three header files, which are essential for making the NodeMCU connect to the WiFi network and also for establishing a connection with the Server through HTTP protocol. Here we use ESP8266-based header files because NodeMCU is actually an ESP8266-based microcontroller.
#include <ESP8266WiFi.h>
#include <ESP8266HTTPClient.h>
#include <WiFiClientSecure.h>
Next, we are going to discuss the constants that we used in our Code. Where we can find two constant strings namely ssid and password, which is generally a WiFi network name and its password. Using these credentials only the microcontroller gets connected to this network.
const char* ssid = "Semicon Media";
const char* password = "crxxxxxxxx05";
You can find the apiKey constant string in the following code, it is a place where we want to put our free SMS API key that we generated previously. After that, you can find the four constant strings namely templateID, mobileNumber, var1 and var2. In templateId,
const char* apiKey = "xxxxxxxxxxx";
const char* templateID = "104";
const char* mobileNumber = "xxxxxxxxxxxxx";
const char* var1 = "GPS TRACKER";
const char* var2 = "20";
Here I assign the templateId string to 104, which means it is utilizing the below SMS template, which I discussed previously during SMS API key generation, and I decided to assign “GPS TRACKER” to var1 and “20” to var2.
Ok, in the below lines, you can find the sendSMS() function, which is specifically designed to send a single SMS to the linked mobile number while calling it.
void sendSMS() {
 if (WiFi.status() == WL_CONNECTED) {
   WiFiClientSecure client; // Use WiFiClientSecure for HTTPS connections
   client.setInsecure();    // Skip certificate validation (not secure but works for development)
   HTTPClient http;
   // Build the API URL with the template ID
   String apiUrl = "https://www.circuitdigest.cloud/api/v1/send_sms?ID=" + String(templateID);
   // Start the HTTPS connection with WiFiClientSecure
   http.begin(client, apiUrl);
   http.addHeader("Authorization", apiKey);
   http.addHeader("Content-Type", "application/json");
   // Create the JSON payload with SMS details
   String payload = "{\"mobiles\":\"" + String(mobileNumber) + "\",\"var1\":\"" + String(var1) + "\",\"var2\":\"" + String(var2) + "\"}";
   // Send POST request
   int httpResponseCode = http.POST(payload);
   // Check response
   if (httpResponseCode == 200) {
     Serial.println("SMS sent successfully!");
     Serial.println(http.getString());
   } else {
     Serial.print("Failed to send SMS. Error code: ");
     Serial.println(httpResponseCode);
     Serial.println("Response: " + http.getString());
   }
   http.end(); // End connection
 } else {
   Serial.println("WiFi not connected!");
 }
}
Inside that setup function, you can find if (WiFi.status() == WL_CONNECTED) { Here this line checks whether Wi-Fi is connected or not. Then only it allows the microcontroller to do further operations. In the 21st line, you can find the String apiUrl, which is used to build the API URL with the template ID.
After that it uses http.begin(), http.addHeader(), http.addHeader() function to start the HTTPS connection and create a header frame for data transmission. Later it uses String payload to hold the actual data, like phone number, var1, and var2, that we need to send to the Circuit Digest cloud server for sending SMS to that number.
It then sends the payload using the http.POST(payload) function. After sending the payload to the Circuit Digest cloud server, we get a response from it whether the SMS is sent or not. After that, it closes the HTTPS connection between the microcontroller and the cloud server using the http.end() function.
Here the setup() function is considered an entry point of the program. Here we use Serial.begin(9600) to enable the serial monitor and WiFi.begin() to establish a Wi-Fi connection to a microcontroller. Later it checks for WiFi connection status and then finally calls sendSMS() to send an SMS to the linked number.
void setup() {
 Serial.begin(9600);
 WiFi.begin(ssid,password);
 Serial.print("Connecting to wifi");
 while(WiFi.status() != WL_CONNECTED){
   delay(500);
   Serial.print(".");
 }
 Serial.println("\nConnected!");
 sendSMS();
}
Below you can find the empty loop() function because we don’t need to use it for our demonstration purpose. But if you like to uplift the project for practical implementation, like home automation, we can utilize this function for performing those logics.
void loop() {
 // Put your main code here to run repeatedly:
}
Sending SMS on NodeMCU without GSM Module:
Ok, now I hope you understand the code very well. Let's feed this code to NodeMCU. If it all goes well. You are able to receive that battery alert SMS to your linked phone number as I displayed in the below image.

Ok, if you get the above SMS alert to your phone, you have learned how to send SMS from NodeMCU using SMS API. You may even be able to improve this project further by integrating this NodeMCU with sensor modules and actuator modules for specific home automation projects with slight changes in code. With this, we have come to the end of our NodeMCU SMS alert system tutorial, if you have any questions you can leave them in the comment section below or use our forums.
Projects using NodeMCU
Previously we have used this NodeMCU board to build many NodeMCU ESP8266 projects, here are few projects which we think you will be interested in.

NodeMCU Data Logger to save Temperature and Pressure on Thinger.io Cloud Platform
Explore how to create a data logger using NodeMCU to save temperature and pressure data on the Thinger.io cloud platform. It details the hardware setup, coding, and integration with Thinger.io for real-time data visualization. The project is ideal for IoT enthusiasts looking to build a cloud-connected sensor system.

Getting Started with NodeMCU ESP-12 using Arduino IDE: Blinking an LED
A beginner’s guide for using the NodeMCU ESP12, covering setup, software installation, and sample code for IoT projects. It simplifies microcontroller programming and Wi-Fi integration for newcomers.

DIY Battery Powered NodeMCU Motor Driver Shield for Robotic Applications
Learn how to build a DIY battery-powered NodeMCU motor driver shield for robotics applications. Explore the hardware setup and step-by-step instructions for creating a compact, efficient motor driver. Ideal for robotics enthusiasts.
Discover how to build an IoT-based GPS location tracker using NodeMCU, which tracks and saves GPS coordinates on Google Maps. Learn the hardware setup, coding, and integration with the Google Maps API for real-time location tracking. A great project for those interested in GPS and IoT applications.
Complete Project Code
#include <ESP8266WiFi.h>
#include <ESP8266HTTPClient.h>
#include <WiFiClientSecure.h>
const char* ssid = "Semicon Media";
const char* password = "craxxxxxx05";
const char* apiKey = "xxxxxxxxxxx";
const char* templateID = "104";
const char* mobileNumber = "xxxxxxxxxxxxx";
const char* var1 = "GPS TRACKER";
const char* var2 = "20";
void sendSMS() {
 if (WiFi.status() == WL_CONNECTED) {
   WiFiClientSecure client; // Use WiFiClientSecure for HTTPS connections
   client.setInsecure();    // Skip certificate validation (not secure but works for development)
   HTTPClient http;
   // Build the API URL with the template ID
   String apiUrl = "https://www.circuitdigest.cloud/api/v1/send_sms?ID=" + String(templateID);
   // Start the HTTPS connection with WiFiClientSecure
   http.begin(client, apiUrl);
   http.addHeader("Authorization", apiKey);
   http.addHeader("Content-Type", "application/json");
   // Create the JSON payload with SMS details
   String payload = "{\"mobiles\":\"" + String(mobileNumber) + "\",\"var1\":\"" + String(var1) + "\",\"var2\":\"" + String(var2) + "\"}";
   // Send POST request
   int httpResponseCode = http.POST(payload);
   // Check response
   if (httpResponseCode == 200) {
     Serial.println("SMS sent successfully!");
     Serial.println(http.getString());
   } else {
     Serial.print("Failed to send SMS. Error code: ");
     Serial.println(httpResponseCode);
     Serial.println("Response: " + http.getString());
   }
   http.end(); // End connection
 } else {
   Serial.println("WiFi not connected!");
 }
}
void setup() {
 Serial.begin(9600);
 WiFi.begin(ssid,password);
 Serial.print("Connecting to wifi");
 while(WiFi.status() != WL_CONNECTED){
   delay(500);
   Serial.print(".");
 }
 Serial.println("\nConnected!");
 sendSMS();
}
void loop() {
 // put your main code here, to run repeatedly:
}
