
In this article, we are going to Control the Robot Car through the G sensor of our mobile phone and you will be able to move the Robot just by tilting the Phone. We will also use Arduino and RemoteXY app for this G-Sensor Controlled Robot. RemoteXY app is used to create the interface in the Smart Phone for controlling the Robot. We will add the joystick in the interface so that Robot can also be controlled by Joystick as well as by tilting the phone.
G-Sensor or Gravity sensor is basically Accelerometer in Smart phone which is used to control the screen orientation of the phone. Accelerometer senses the X,Y, Z directions of the Gravitational force and rotate the Screen according to alignment of the Phone. Now days, more sensitive and accurate Gyroscope sensor is used in mobiles for deciding the orientation of the Screen. In our Project, Robot car will move, according to the direction in which phone is being tilted, like when we tilt the phone forward, then car will move forward and we tilt it down then car will move backward. This is same like when we play some car games in Mobile, they also use G sensor to move the car accordingly. Check the Video at the end, also check our other Robotics Projects here.
Required Components:
- Two wheel robot car chassis
- Arduino UNO
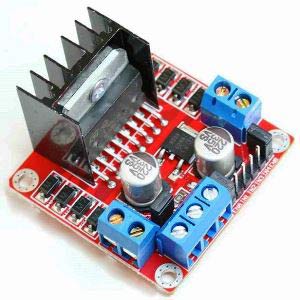
- L298N Motor Controller
- HC-06 Bluetooth module (HC-05 will work too)
- Power supply or Cells
- Connecting wires
Creating Interface for Robot using RemoteXY app:
For creating the interface to control the Robot Car using RemoteXY app, you will have to go to following link
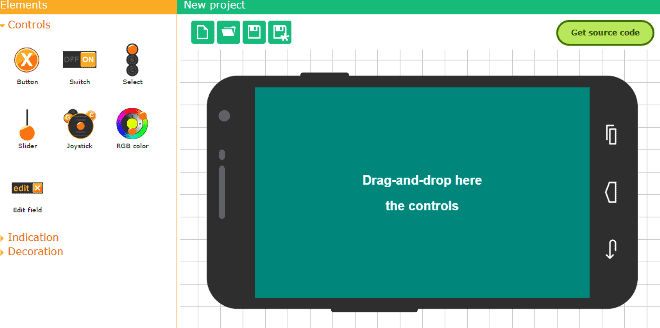
https://remotexy.com/en/editor/ The webpage will look like this
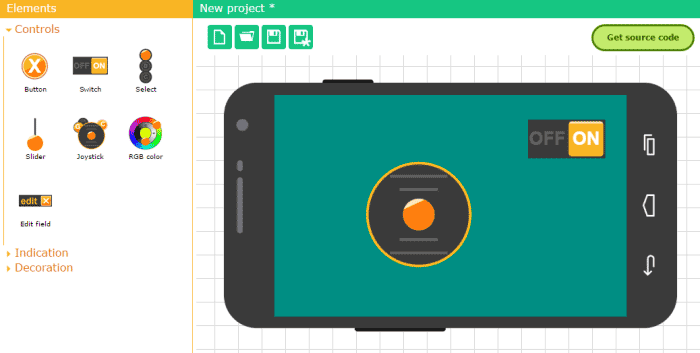
Then from the left side of screen, pick up the switch button and the joystick and place it in the mobile interface. The button will turn on the light at pin 13 which is connected internally in the Arduino and the joystick will move the robot car. The webpage after placing the switch and the joystick will look like this.
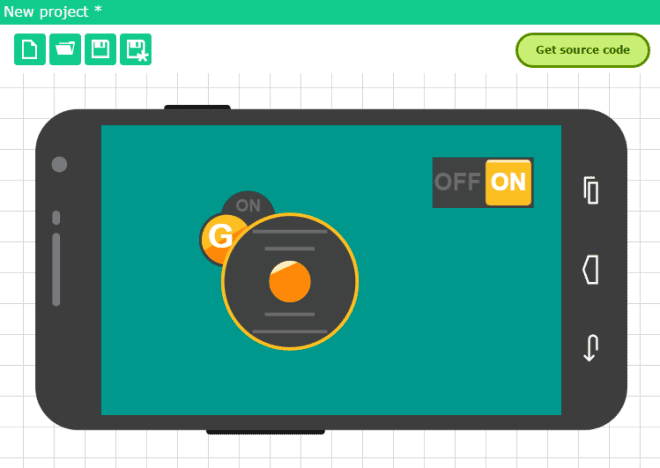
Then we will have to place the enable the G sensor enable/disable button along with the joystick, so that we can move the Robot Car by tilting the phone in left, right, up and down direction. Using that button we can enable and disable G sensor, when G sensor is disabled Car can be controlled by moving the Joystick. So to place the G sensor enable/disable button, click on the joystick you placed in the interface and on the left side there will be a properties section, there will be a option in the end for placing the G sensor button near the joystick, so place the G sensor button where ever you will like. The webpage after this will look like this.
After that, click on the button “Get source code” and save it onto your computer. Download the library from here and save it into the Arduino library folder. Compile the downloaded code to check that there are no errors. This is not the code that will run the Robot but it will help in using the App with the Arduino. Download the app from here or go to the Play Store and download RemoteXY app from there for you Android Smart Phone.
Circuit Diagram and Explanation:
First of all, we will interface the L298N motor controller with the Arduino. Connect the ENA and ENB pin of the motor controller to the Arduino pin 12 and 11 respectively. These two pins are for the PWM control of the motor. Using theses pins, we can increase or decrease the speed of car. Then connect the IN1, IN2, IN3 and IN4 to the Arduino pins 10, 9, 8 and 7 respectively. These pins will rotate the motors in both directions (clockwise and anti-clockwise).
To power the motor, connect the positive and negative of the battery to the 12V and the ground of the motor controller. Then connect the 5V and the ground from the motor controller to the Arduino Vin and the ground.
Then we will connect the Bluetooth module HC-06 with the arduino. If you have HC-05, then it will work too. Connect the VCC and the ground of the Bluetooth module to the 5V and the ground of the Arduino. Then connect the TX pin of Bluetooth Module to the pin 2 of Arduino and the RX pin to the pin 3 of Arduino. Also check Bluetooth Controlled Toy Car using Arduino to learn more about using Bluetooth with Arduino.

Code Explanation:
Full Arduino code for this Mobile Controlled Robot Car is given below in Code section, here we will understand how this code is working.
First of all, we have included the libraries for Software Serial and RemoteXY. The RemoteXY library will help us in setting the app with Arduino, through which we will control the robot car. After that, we have defined the pins for the Bluetooth module, TX from the Bluetooth module is connected to the pin 2 of Arduino which is the RX pin of Arduino and the RX from the Bluetooth module is connected to the pin 3 of the Arduino which is the TX pin of Arduino and set the baud rate of the Bluetooth module at 9600.
#define REMOTEXY_MODE__SOFTWARESERIAL
#include <SoftwareSerial.h>             //Including the software serial library
#include <RemoteXY.h>                   //Including the remotexy library
/* RemoteXY connection settings */
#define REMOTEXY_SERIAL_RX 2            //defining the pin 2 as RX pin
#define REMOTEXY_SERIAL_TX 3            //defining the pin 3 as TX pin
#define REMOTEXY_SERIAL_SPEED 9600      //setting baudrate at 9600
The following code will increase or decrease the motor speed. When the joystick will be at the center, the speed will be zero and when it will be in the forward direction then the speed will increase from zero to 100. The speed will be decrease from 0 to -100 when the car will move in the reverse direction. The car can also be moved specific speed, this can be done by giving the PWM signal. The pwm signal will be given to the motors according to the rotation of the joystick.
  if (motor_speed>100) motor_speed=100;
  if (motor_speed<-100) motor_speed=-100;
  if (motor_speed>0) {
    digitalWrite(pointer[0], HIGH);
    digitalWrite(pointer[1], LOW);
    analogWrite(pointer[2], motor_speed*2.55);
  }
  else if (motor_speed<0) {
    digitalWrite(pointer[0], LOW);
    digitalWrite(pointer[1], HIGH);
    analogWrite(pointer[2], (-motor_speed)*2.55);
  }
  else {
    digitalWrite(pointer[0], LOW);
    digitalWrite(pointer[1], LOW);
    analogWrite(pointer[2], 0);
  }
In the following code, we have defined the function which will be called whenever we will move the joystick in the app. When we will turn on the switch in the app then the logic 1 will be given to the pin 13 of the Arduino which turns On the LED pin. While moving the robot car in the forward and backward direction, the Speed function will be called.
void loop()
{
  RemoteXY_Handler ();
  digitalWrite (ledpin, (RemoteXY.switch_1==0)?LOW:HIGH);
  Speed (first_motor, RemoteXY.joystick_1_y - RemoteXY.joystick_1_x);
  Speed (second_motor, RemoteXY.joystick_1_y + RemoteXY.joystick_1_x);
}
How to run it:
Add the library of the RemoteXY to the Arduino libraries and upload the code in the Arduino IDE. Then download the app in your mobile phone and then turn on the Bluetooth. The interface of the app will look like this
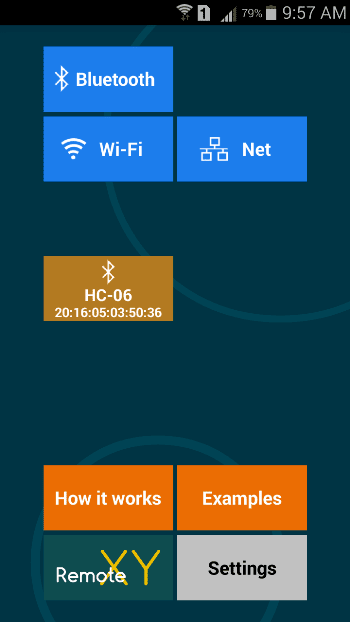
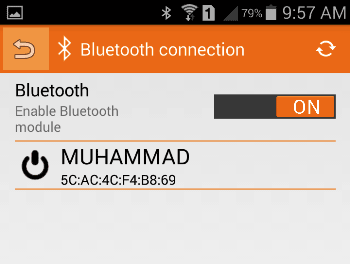
Then go to Bluetooth and turn on the Bluetooth there. After turning it on, it will show you the Bluetooth devices. Select your HC-06 Bluetooth module from there, it will take you to the interface, from where you can control the Robot Car.
This is how we can use the Gravity Sensor inside our Mobile phone to move the Robot. You can further experiment and find more interesting use of G sensor to control the outside things by interfacing a Microcontorller in between (like Arduino).
Complete Project Code
#define REMOTEXY_MODE__SOFTWARESERIAL
#include <SoftwareSerial.h>             //Including the software serial library
#include <RemoteXY.h>                   //Including the remotexy library
/* RemoteXY connection settings */
#define REMOTEXY_SERIAL_RX 2            //defining the pin 2 as RX pin
#define REMOTEXY_SERIAL_TX 3            //defining the pin 3 as TX pin
#define REMOTEXY_SERIAL_SPEED 9600      //setting baudrate at 9600
unsigned char RemoteXY_CONF[] =       //remotexy configuration
  { 3,0,23,0,1,5,5,15,41,11
  ,43,43,1,2,0,6,5,27,11,5
  ,79,78,0,79,70,70,0 };

struct {                            //Function for declaring the variables
  signed char joystick_1_x;         //joystick x-axis
  signed char joystick_1_y;         //joystick y-axis
  unsigned char switch_1;           //variables for switch
  unsigned char connect_flag;
} RemoteXY;
//defining the pins for first motor
#define IN1 10
#define IN2 9
#define ENA 12
//defining the pins for second motor
#define IN3 8
#define IN4 7
#define ENB 11
//defining the LED pin
#define ledpin 13

unsigned char first_motor[3] =
  {IN1, IN2, ENA};
unsigned char second_motor[3] =
  {IN3, IN4, ENB};
void Speed (unsigned char * pointer, int motor_speed)
{
  if (motor_speed>100) motor_speed=100;
  if (motor_speed<-100) motor_speed=-100;
  if (motor_speed>0) {
    digitalWrite(pointer[0], HIGH);
    digitalWrite(pointer[1], LOW);
    analogWrite(pointer[2], motor_speed*2.55);
  }
  else if (motor_speed<0) {
    digitalWrite(pointer[0], LOW);
    digitalWrite(pointer[1], HIGH);
    analogWrite(pointer[2], (-motor_speed)*2.55);
  }
  else {
    digitalWrite(pointer[0], LOW);
    digitalWrite(pointer[1], LOW);
    analogWrite(pointer[2], 0);
  }
}
void setup()
{
  //defining the motor pins as the output pins
  pinMode (IN1, OUTPUT);
  pinMode (IN2, OUTPUT);
  pinMode (IN3, OUTPUT);
  pinMode (IN4, OUTPUT);
  pinMode (ledpin, OUTPUT);
  RemoteXY_Init ();
}
void loop()
{
  RemoteXY_Handler ();
  digitalWrite (ledpin, (RemoteXY.switch_1==0)?LOW:HIGH);
  Speed (first_motor, RemoteXY.joystick_1_y - RemoteXY.joystick_1_x);
  Speed (second_motor, RemoteXY.joystick_1_y + RemoteXY.joystick_1_x);
}
Comments
This motor controller can control only two motors. To control four motors, you will have to use some other motor controller.
salam brother,
i am using hc-06 blueooth module here but it is not working ...
Every time i try to pair it with my android phone it displays timeout or no reply error ...
can you please tell me how to fix it ???
Bhai same problem , Did Your Resolved ??? Please help Tommorow is presentation
Nice project
Can L293D Motor Shield for Arduino work in place of L298N Motor Controller?
i am using hc-06 blueooth module here but it is not working ...
Every time i try to pair it with my android phone it displays timeout or no reply error ...
can you please tell me how to fix it ???
Can you control both DC motor individually by joystick by y axis for forward and backward x axis for left and right
Brother salaam ... do you use mobile? Motors are synchronous or asyncronus?
How to HC-06 Paired ?
I not connect HC-06.
Before you use the application you should pair your HC-06 module. This can be done from your phones bluetooth's settings. Click on HC-06 and select connect the password by default will be "0000" or "1234" enter it and you will be paired.
I have uploaded same programing of line follower robot which you have given but problem is Aurdino software showing error .According to my point of you please once check hole programing and find where is error so that we can easily use it.
I m using l293d in place of l298n bt its not working
Using L293d in place of L298n is completly fine. IT should work.Check your connections
using l293d motor drive
I have done all over the hardware side, have completed all over the circuitary of above project now i don't underdstand how to connect with app, i downloaded the Remote XY app before programming of arduini UNO, i was trying to connect bluetooth with phone first then with application but again it shows error of device time out, am i doing it right? should i need to program first?

Can i control 4 motors here?