

Most of the workplace and commercial buildings today have a CCTV surveillance system installed to monitored the activities. But often times it is hard for the concerned authority or security personals to monitor the live feed of all the cameras continuously to look for suspicious activity. With computer vision and machine learning advancing at a fast phase, it's about time that we make our CCTV systems smarter. In this article, we will discuss how to get the video feed from an existing DVR (like Hikvision DVR) through RTSP streaming with Raspberry pi using Python and OpenCV. Once we get this, we will be able to leverage the power of OpenCV on these video feeds to detect for a particular object, read the vehicle number plate, face recognition, and what not!
For the sake of this tutorial, I will be using a Hikvision 4 channel CCTV DVR that is already installed in the building. We will be streaming all the 4 camera screens to the Raspberry and display it on a 5-inch touch screen display where the user can shift between each channel as required. I know this not much, considering the power of OpenCV and I do have plans to scale it up with motion detection, bugler video alert, person tracking, etc. but let’s leave all that for another tutorial.
Preparing the DVR for RTSP Streaming
Before we dive into the raspberry pi hardware and python code, it is important to check if the DVR supports RTSP and how to access it. I spent the majority of my time stuck here because the procedure seems to differ for each type of DVR and you have to do and a lot of hits and try. But once you figure this out, it works like a charm every time.
First thing first, make sure you know the username and password of your DVR system, and it is connected to the internet. Also in this tutorial, I will be streaming the RTSP only from a local network, if you have a static IP, you can do port forwarding and follow the same for other networks. But as for as this tutorial is concerned, we will be doing everything inside the local network.
Step 1: Find the IP address of your DVR. Once the DVR is connected to the Internet, it will be assigned its own IP address. You can find this IP address either from your router configuration page or from your DVR screen itself (assuming you have a monitor connected to DVR). The IP address of my router was http://192.168.11.110/ (changed for safety reasons)
Step 2: Open any web browser of your choice and enter the IP address and hit on enter. You will be taken to the DVR login page. Where you have to enter the username (mine is changed) and password for your DVR. The default username will be admin, but the password you have to know. My login screen for DVR is shown below, your might differ in appearance.

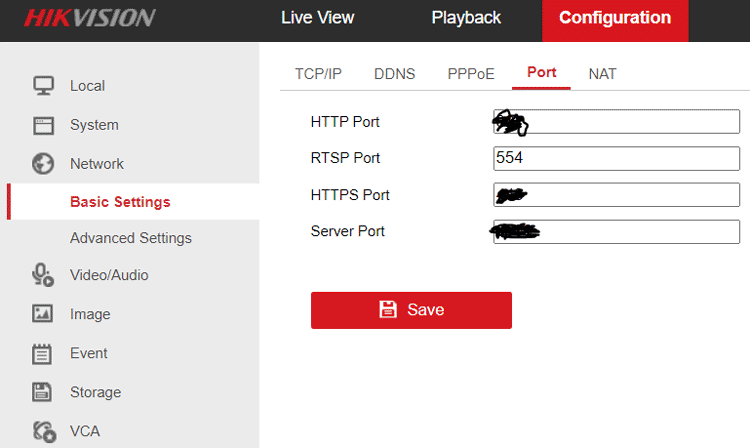
Step 3: After a successful login, look for the RTSP port number on your DVR, most times, the default value will be 554 but it might change. While you are here play with the configuration settings to check if there is an option to enable RTSP, if not you can skip it. You have to spend some time here as the procedure is different based on DVR.
Step 4: Prepare your RTSP link, the basic RTSP link will be in the following format-
rtsp://<username>:<password>@<ip>:<port>/cam/realmonitor?channel=<channelNo>&subtype=<typeNo>
Again, it depends on the type of DVR, you can use google to find the one that will work for you. The one that worked for had the below format, you can also try with this-
rtsp://<username>:<password>@<address>:<port>/Streaming/Channels/<id>/
Where <username> and <password> is the same as we used to login earlier in step 2 and the <address> is the IP address that we found in step 1. The <port> number is 554, or what you found in step 3. The <id> number will be different for each channel. For example, an id number “201” means that we are using the second (indicated by 2) camera on the mainstream. If the id number ends with 1, it means we are using the mainstream and if it ends with 2 it means we will be using sub-stream. The sub-stream will be of low quality compared to the mainstream and it works best in low power devices like our Raspberry pi. A link RTSP link to video second camera on sub stream is shown below.
rtsp://admin:[email protected]:554/Streaming/Channels/202/
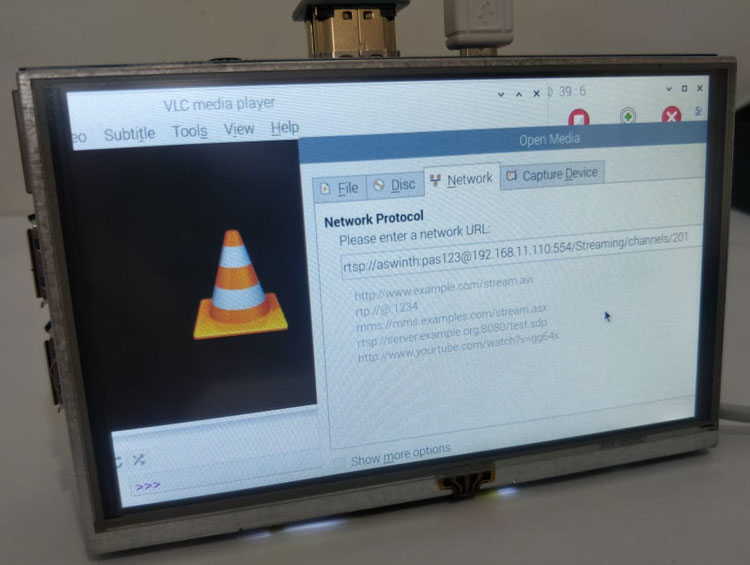
Step 5: Play the stream on VLC to make sure your RTSP connection is working. Install VLC on a computer that is connected to the same network as DVR, launch it, and press Ctrl+N for network streaming. Enter the URL as shown below and press okay.

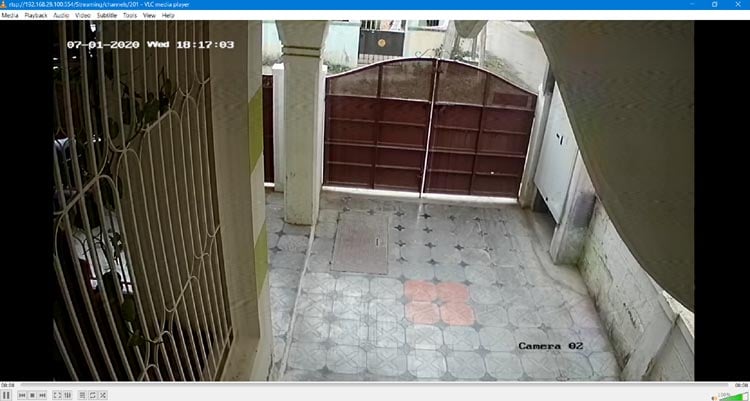
If the RTSP link is working in the way it should, you should see a live stream of your CCTV on the VLC player as shown below. If it throws an error then you have to figure out the correct link.
With this done, we no longer need to talk about our DVR lets get on with our Raspberry pi.
Preparing your Raspberry Pi
Next, we need to set-up our raspberry pi with the 5-inch Display. I am not going to get into the details of that since we have already covered that many times. You can read the following articles for guidance-
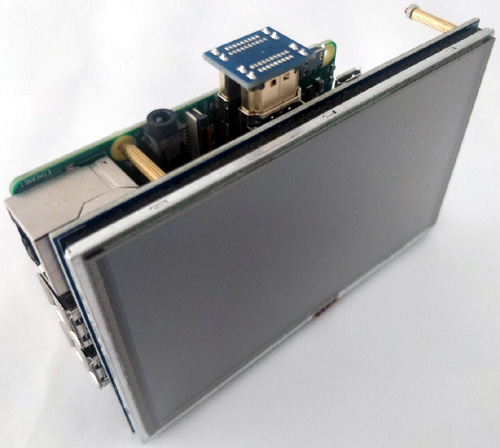
We are using a Raspberry Pi 3 B+ with Debian Buster OS running in it. It might also be a good idea to use Pi 4 if you can and also add in some cooling options like a heatsink or Fan because I noticed the temperature reaching almost 70*C. I did not follow any cooling procedure as of now, and my set-up looks like this-
Installing OpenCV and Other Libraries on Raspberry Pi
Next step is to install OpenCV on Raspberry Pi. We have previously discussed how to compile OpenCV on Raspberry pi.
You can either follow the above link and compile OpenCV using Cmake or just install it with an apt-get method. I would recommend the later if you are not into very serious OpenCV programming. I used the following commands to install OpenCV.
sudo apt update
sudo apt install python3-opencv
In our program, we will also be making use of the “cvui” library to create a basic UI with two buttons that allow us to navigate between the four screens. To install cvui follow the below command.
Python3 pip install cvui
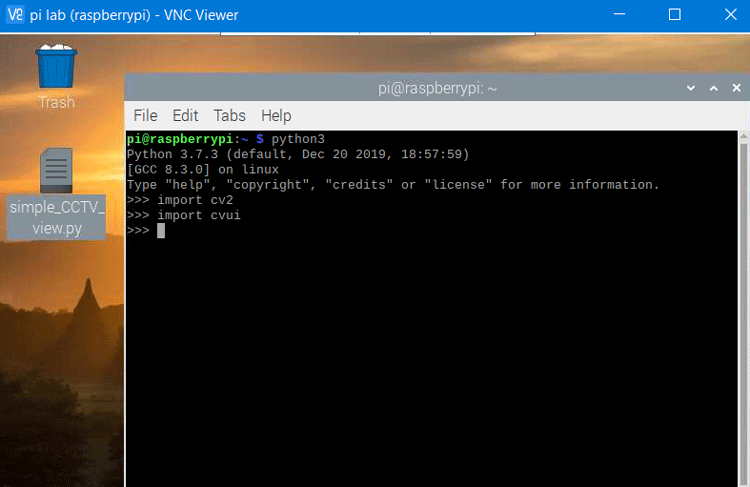
With both the packages installed, we can get into the main program. Make sure both the installed packages are working buy trying to import them from the command terminal of Pi.
Programming Raspberry Pi for Streaming RTSP Video from CCTV
The complete program for this project can be found at the end of this page. The explanation of the same is as follows. We begin the program by including the required header files.
import cv2
import cvui
Next part of the program requires some editing. You have to enter the username and password of your DVR. For a 5inch display, the width and height are 800 and 480 respectively, so we have entered the same.
rtsp_username = "admin"
rtsp_password = "aswinth347653"
width = 800
height = 480
cam_no = 1
Moving on, we have a function called create a camera that will be used every time we change the camera number that has to be viewed.
def create_camera (channel):
    rtsp = "rtsp://" + rtsp_username + ":" + rtsp_password + "@192.168.29.100:554/Streaming/channels/" + channel + "02"
    cap = cv2.VideoCapture()
    cap.open(rtsp)
    cap.set(3, 640)  # ID number for width is 3
    cap.set(4, 480)  # ID number for height is 480
    cap.set(10, 100)  # ID number for brightness is 10qq
    return cap
Inside the main while loop, we have our program to read a frame from the capture device and convert it to full screen. The display window in our program will be called as a screen.
success, current_cam = cam.read()
dim = (width, height)
Full_frame = cv2.resize(current_cam, dim, interpolation=cv2.INTER_AREA)
cv2.namedWindow('screen', cv2.WINDOW_NORMAL)
cv2.setWindowProperty('screen', cv2.WND_PROP_FULLSCREEN, cv2.WINDOW_FULLSCREEN)
Followed by that we have the code for two buttons that will be placed on the screen. The command cvui.button is used to place the button at a required place and the command cvui.mouse is used to detect the mouse click. We have two if statements for two buttons if the button is clicked, the respective if statement will be executed.
if (cvui.button(Full_frame, width - 100, height - 40, "Next") and cvui.mouse(cvui.CLICK)):
    print("Next Button Pressed")
    cvui.init('screen')
    cam_no = cam_no+1
    if (cam_no>4):
        cam_no=1
    del cam
    cam = create_camera(str(cam_no))
if (cvui.button(Full_frame, width - 200, height - 40, "Previous") and cvui.mouse(cvui.CLICK)):
    print("Previous Button Pressed")
    cvui.init('screen')
    cam_no = cam_no - 1
    if (cam_no<1):
        cam_no=4
    del cam
    cam = create_camera(str(cam_no))
Inside the if statement, based on the button we either increase or decrease cam_no count and then delete the existing cam and create a new cam using the function we discussed above. Also, note that cvui.init has to call every time to refresh the UI screen.
Final part of the code is to display the frame as output and for exiting from the output screen when q is pressed. We just wait for a keystroke and if the key is ‘q’, we will destroy all windows.
cv2.imshow('screen', Full_frame)
if cv2.waitKey(1) & 0xFF == ord('q'):
    cv2.destroyAllWindows()
    break
Testing the Raspberry Pi CCTV Viewer
Testing the code is pretty straight forward, power up the pi, and launch the python code given at the bottom of this page. Make sure you have entered the right credentials for the RTSP link to work. If you want to be on the safe side, you can also try using the VLC player on Pi which comes pre-installed on buster OS.
If it works on VLC, then we can be sure that our pi connected to the same network and the RTSP link is working as it should. Then open the program given at the bottom of this page and launch it using any python IDE. If the credentials are entered correctly, you will see the following screen. Which shows the live camera feed with two buttons in the bottom.
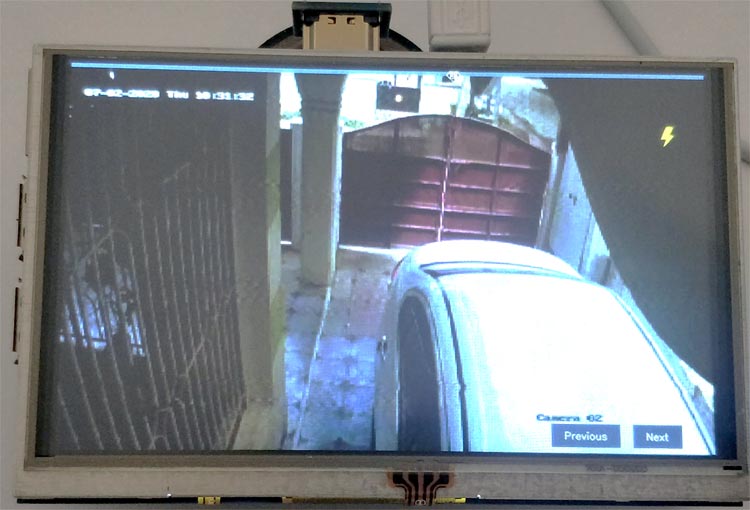
Since the screen has a TFT touch screen, you can simply touch on the “previous” and “next” buttons to move to the next camera. The program is written to loop between the first four cameras, you can easily modify it if there are more than 4 cameras connected to your DVR.
The complete working of this project can be found in the video linked below. Hope you enjoyed the tutorial and learned something useful if you have any questions, leave them in the comment section or you can also use our forums to post your other quires. Also, I am planning to add motion detection and video saving feature to this setup, so stay tuned for that as well.
Complete Project Code
import cv2
import cvui
rtsp_username = "enter_username"
rtsp_password = "enter_password"
width = 800
height = 480
cam_no = 1
def create_camera (channel):
    rtsp = "rtsp://" + rtsp_username + ":" + rtsp_password + "@192.168.11.110:554/Streaming/channels/" + channel + "02" #change the IP to suit yours
    cap = cv2.VideoCapture()
    cap.open(rtsp)
    cap.set(3, 640)  # ID number for width is 3
    cap.set(4, 480)  # ID number for height is 480
    cap.set(10, 100)  # ID number for brightness is 10qq
    return cap
cam = create_camera(str(cam_no))
cvui.init('screen')
while True:
    success, current_cam = cam.read()
    dim = (width, height)
    Full_frame = cv2.resize(current_cam, dim, interpolation=cv2.INTER_AREA)
    cv2.namedWindow('screen', cv2.WINDOW_NORMAL)
    cv2.setWindowProperty('screen', cv2.WND_PROP_FULLSCREEN, cv2.WINDOW_FULLSCREEN)
    if (cvui.button(Full_frame, width - 100, height - 40, "Next") and cvui.mouse(cvui.CLICK)):
        print("Next Button Pressed")
        cvui.init('screen')
        cam_no = cam_no+1
        if (cam_no>4):
            cam_no=1
        del cam
        cam = create_camera(str(cam_no))
    if (cvui.button(Full_frame, width - 200, height - 40, "Previous") and cvui.mouse(cvui.CLICK)):
        print("Previous Button Pressed")
        cvui.init('screen')
        cam_no = cam_no - 1
        if (cam_no<1):
            cam_no=4
        del cam
        cam = create_camera(str(cam_no))
    cv2.imshow('screen', Full_frame)
    if cv2.waitKey(1) & 0xFF == ord('q'):
        cv2.destroyAllWindows()
        break