

Security has always been a major concern for mankind. Today we have video surveillance cameras in schools, hospitals and every other public place to make us feel secured. According to a survey by HIS it is estimated that there were around 245 million security cameras installed and functioning back on 2014, which is like having one security camera for every 30 people on this planet. With the advancement in technology especially in Image processing and Machine Learning, it is possible to make these cameras smarter by training them to process information from the Video feed.
The video feed from these cameras can be used to perform face recognition, pattern analysis, emotion analysis and much more which would really get it close to something like the “God’s Eye” shown in the FF7 movie. In fact, surveillance companies like Hikvision and many others have already started implementing these features in their products. We previously used MATLAB Image processing to read the number plate, today in this article we will learn how to recognize and read License Plate Number from Automobiles using Raspberry Pi and OpenCV. We will use some random vehicle images from Google and write a program to recognize the number plate using OpenCV Contour Detection and then read the number from the plate using Tesseract OCR. Sounds interesting right!, so Let’s get started.
Pre-requisites
As told earlier we will be using the OpenCV Library to detect and recognize faces. So make sure to install OpenCV Library on Raspberry Pi before proceeding with this tutorial. Also Power your Pi with a 2A adapter and connect it to a display monitor for easier debugging.
This tutorial will not explain how exactly OpenCV works, if you are interested in learning Image processing then check out this OpenCV basics and advanced Image processing tutorials. You can also learn about contours, Blob Detection etc in this Image Segmentation tutorial using OpenCV. We will be doing something similar to this to detect the license plate of the car from the image.
Steps involved in License Plate Recognition using Raspberry Pi
License Plate Recognition or LPR for short, involves three major steps. The steps are as follows
1. License Plate Detection: The first step is to detect the License plate from the car. We will use the contour option in OpenCV to detect for rectangular objects to find the number plate. The accuracy can be improved if we know the exact size, color and approximate location of the number plate. Normally the detection algorithm is trained based on the position of camera and type of number plate used in that particular country. This gets trickier if the image does not even have a car, in this case we will an additional step to detect the car and then the license plate.
2. Character Segmentation: Once we have detected the License Plate we have to crop it out and save it as a new image. Again this can be done easily using OpenCV.
3. Character Recognition: Now, the new image that we obtained in the previous step is sure to have some characters (Numbers/Alphabets) written on it. So, we can perform OCR (Optical Character Recognition) on it to detect the number. We already explained Optical Character Recognition (OCR) using Raspberry Pi.
1. License Plate Detection
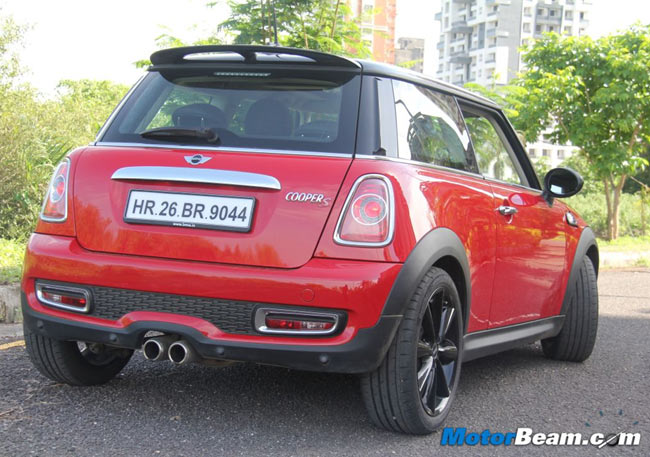
The first step in this Raspberry Pi License Plate Reader is to detect the License Plate. Let’s take a sample image of a car and start with detecting the License Plate on that car. We will then use the same image for Character Segmentation and Character Recognition as well. If you want to jump straight into the code without explanation then you can scroll down to the bottom of this page, where the complete code is provided. The test image that I am using for this tutorial is shown below.
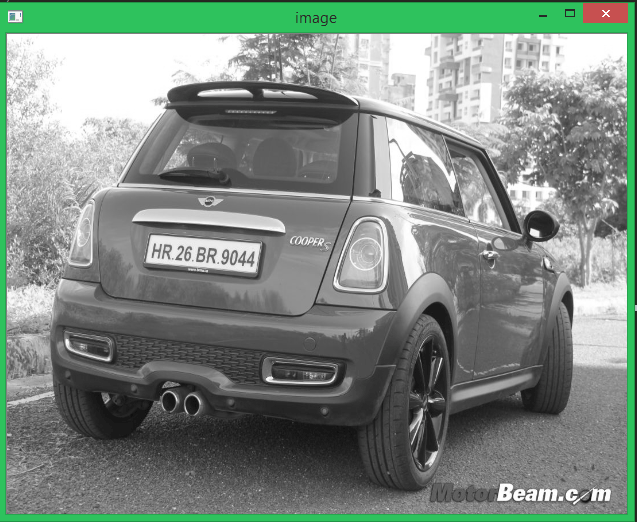
Step 1: Resize the image to the required size and then grayscale it. The code for the same is given below
img = cv2.resize(img, (620,480) )
gray = cv2.cvtColor(img, cv2.COLOR_BGR2GRAY) #convert to grey scale
Resizing we help us to avoid any problems with bigger resolution images, make sure the number plate still remains in the frame after resizing. Gray scaling is common in all image processing steps. This speeds up other following process sine we no longer have to deal with the color details when processing an image. The image would be transformed something like this when this step is done
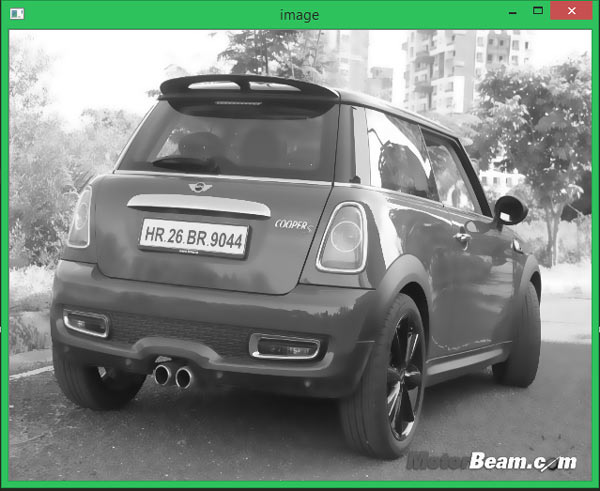
Step 2: Every image will have useful and useless information, in this case for us only the license plate is the useful information the rest are pretty much useless for our program. This useless information is called noise. Normally using a bilateral filter (Bluring) will remove the unwanted details from an image. The code for the same is
gray = cv2.bilateralFilter(gray, 11, 17, 17)
Syntax is destination_image = cv2.bilateralFilter(source_image, diameter of pixel, sigmaColor, sigmaSpace). You can increase the sigma color and sigma space from 17 to higher values to blur out more background information, but be careful that the useful part does not get blurred. The output image is shown below, as you can see the background details (tree and building) are blurred in this image. This way we can avoid the program from concentrating on these regions later.
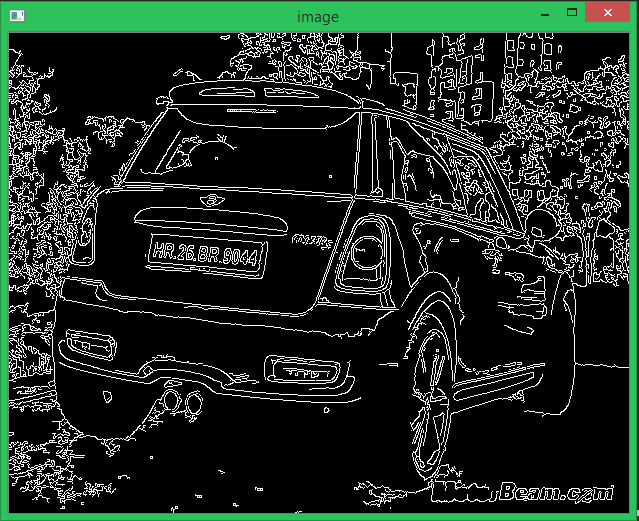
Step 3: The next step is interesting where we perform edge detection. There are many ways to do it, the most easy and popular way is to use the canny edge method from OpenCV. The line to do the same is shown below
edged = cv2.Canny(gray, 30, 200) #Perform Edge detection
The syntax will be destination_image = cv2.Canny(source_image, thresholdValue 1, thresholdValue 2). The Threshold Vale 1 and Threshold Value 2 are the minimum and maximum threshold values. Only the edges that have an intensity gradient more than the minimum threshold value and less than the maximum threshold value will be displayed. The resulting image is shown below
Step 4: Now we can start looking for contours on our image, we have already learned about how to find contours using OpenCV in our previous tutorial so we just proceed like the same.
nts = cv2.findContours(edged.copy(), cv2.RETR_TREE, cv2.CHAIN_APPROX_SIMPLE)
cnts = imutils.grab_contours(cnts)
cnts = sorted(cnts, key = cv2.contourArea, reverse = True)[:10]
screenCnt = None
Once the counters have been detected we sort them from big to small and consider only the first 10 results ignoring the others. In our image the counter could be anything that has a closed surface but of all the obtained results the license plate number will also be there since it is also a closed surface.
To filter the license plate image among the obtained results, we will loop though all the results and check which has a rectangle shape contour with four sides and closed figure. Since a license plate would definitely be a rectangle four sided figure.
# loop over our contours
for c in cnts:
                # approximate the contour
                peri = cv2.arcLength(c, True)
                approx = cv2.approxPolyDP(c, 0.018 * peri, True)
                # if our approximated contour has four points, then
                # we can assume that we have found our screen
                if len(approx) == 4:
                      screenCnt = approx
                      break
The value 0.018 is an experimental value; you can play around it to check which works best for you. Or take it to next level by using machine learning to train based on car images and then use the right value there. Once we have found the right counter we save it in a variable called screenCnt and then draw a rectangle box around it to make sure we have detected the license plate correctly.

Step 5: Now that we know where the number plate is, the remaining information is pretty much useless for us. So we can proceed with masking the entire picture except for the place where the number plate is. The code to do the same is shown below
# Masking the part other than the number plate
mask = np.zeros(gray.shape,np.uint8)
new_image = cv2.drawContours(mask,[screenCnt],0,255,-1,)
new_image = cv2.bitwise_and(img,img,mask=mask)
The masked new image will appear something like below
2. Character Segmentation
The next step in Raspberry Pi Number Plate Recognition is to segment the license plate out of the image by cropping it and saving it as a new image. We can then use this image to detect the character in it. The code to crop the roi (Region of interest) image form the main image is shown below
# Now crop
(x, y) = np.where(mask == 255)
(topx, topy) = (np.min(x), np.min(y))
(bottomx, bottomy) = (np.max(x), np.max(y))
Cropped = gray[topx:bottomx+1, topy:bottomy+1]
The resulting image is shown below. Normally added to cropping the image, we can also gray it and edge it if required. This is done to improve the character recognition in next step. However I found that it works fine even with the original image.
3. Character Recognition
The Final step in this Raspberry Pi Number Plate Recognition is to actually read the number plate information from the segmented image. We will use the pytesseract package to read characters from image, just like we did in previous tutorial. The code for the same is given below
#Read the number plate
text = pytesseract.image_to_string(Cropped, config='--psm 11')
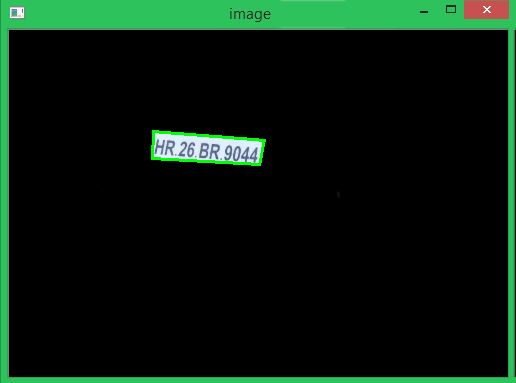
print("Detected Number is:",text)We have already explained how to configure a Tesseract engine, so here again if needed we can configure the Tesseract OCR to obtain better results if required. The detected character is then printed on the console. When compiled the result is shown as below

As you can see the original image had the number “HR 25 BR9044” on it and our program has detected it printed the same value on screen.
Fail Cases in Number Plate Recognition
The complete project file this Raspberry Pi License Plate Recognition can be downloaded from here, it contains the program and the test images that we used to check our program. Without being said, it is to be remembered that the results from this method will not be accurate. The accuracy depends on the clarity of image, orientation, light exposure etc. To get better results you can try implementing Machine learning algorithms along with this.
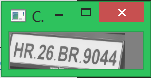
To get an idea, let’s look at another example where the car is not facing the camera directly.
As you can see, our program was able to detect the license plate correctly and crop it. But the Tesseract library has failed to recognize the characters properly. Instead of the actual “TS 08 UE 3396” the OCR has recognized it to be “1508 ye 3396”. Problems like this can be corrected by either using better orientation images or by configuring the Tesseract engine.
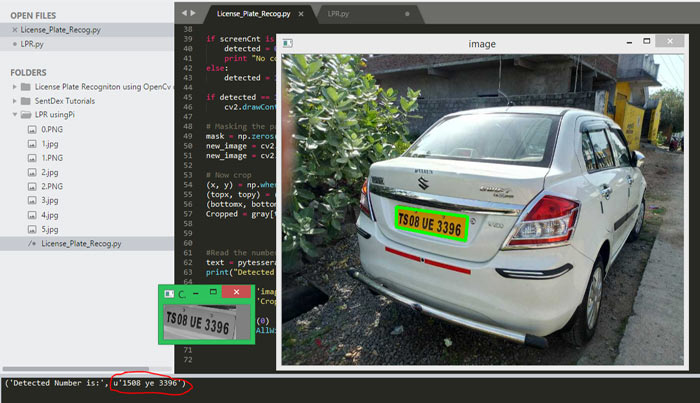
Another worst case scenario is where the contour fails to detect the license plate correctly. The below image has too much background information and bad lighting that the program has even failed to identify the license plate from the number. In this case we have to again relay on Machine learning or improve the quality of the picture.
Other Successful Examples
Most of the times of the image quality and orientation is correct, the program was able to identify the license plate and read the number from it. The below snap shots show few of the successful results obtained. Again all the test images and the code used here will be available in the ZIP file provided here.


Hope you understood Automatic Number Plate Recognition using Raspberry Pi and enjoyed building something cool on your own. What else do you think can be done with OpenCV and Tesseract?, let me know your thoughts in the comment section. If you have any questions regarding this article please feel free to leave them in the comment section below or use the forums for other technical queries.
Complete Project Code
import cv2
import imutils
import numpy as np
import pytesseract
from PIL import Image

img = cv2.imread('4.jpg',cv2.IMREAD_COLOR)
img = cv2.resize(img, (620,480) )

gray = cv2.cvtColor(img, cv2.COLOR_BGR2GRAY) #convert to grey scale
gray = cv2.bilateralFilter(gray, 11, 17, 17) #Blur to reduce noise
edged = cv2.Canny(gray, 30, 200) #Perform Edge detection
# find contours in the edged image, keep only the largest
# ones, and initialize our screen contour
cnts = cv2.findContours(edged.copy(), cv2.RETR_TREE, cv2.CHAIN_APPROX_SIMPLE)
cnts = imutils.grab_contours(cnts)
cnts = sorted(cnts, key = cv2.contourArea, reverse = True)[:10]
screenCnt = None
# loop over our contours
for c in cnts:
 # approximate the contour
 peri = cv2.arcLength(c, True)
 approx = cv2.approxPolyDP(c, 0.018 * peri, True)

 # if our approximated contour has four points, then
 # we can assume that we have found our screen
 if len(approx) == 4:
  screenCnt = approx
  break

if screenCnt is None:
 detected = 0
 print "No contour detected"
else:
 detected = 1
if detected == 1:
 cv2.drawContours(img, [screenCnt], -1, (0, 255, 0), 3)
# Masking the part other than the number plate
mask = np.zeros(gray.shape,np.uint8)
new_image = cv2.drawContours(mask,[screenCnt],0,255,-1,)
new_image = cv2.bitwise_and(img,img,mask=mask)
# Now crop
(x, y) = np.where(mask == 255)
(topx, topy) = (np.min(x), np.min(y))
(bottomx, bottomy) = (np.max(x), np.max(y))
Cropped = gray[topx:bottomx+1, topy:bottomy+1]

#Read the number plate
text = pytesseract.image_to_string(Cropped, config='--psm 11')
print("Detected Number is:",text)
cv2.imshow('image',img)
cv2.imshow('Cropped',Cropped)
cv2.waitKey(0)
cv2.destroyAllWindows()
Comments
The code in the .py file is already provided at the bottom of the article in the grey box
Hello,
Firstly thanks for the article. Does this code work on a computer camera? (I tried, it doesn't work.) Do I need to add new things if it works?
Thank you..
Can u give me ur whatsapp number.if i have any doughts i will message u.
I got an error in the program.that "break is out of the loop".can u clear this problem.
Give me reply please.
can u please give reply to my post.its been so many days since i have posted
No need to interface camera to the raspberry pi right.
How do I resolve this error??
File "C:\Users\HP\Anaconda3\lib\subprocess.py", line 1178, in _execute_child
startupinfo)
OSError: [WinError 740] The requested operation requires elevation
run as sudo user and
You could try using:
subprocess.call(["abcd.exe"], shell=True)
run as sudo user and
You could try using:
subprocess.call(["abcd.exe"], shell=True)
Hello,
I am getting below error,
No module named 'imutils'
Could you please the util code.
Hi, thanks for the awesome tutorial.
When I try to install pytesseract on my Pi4B I get an error like this:
"python setup.py egg_info" failed with error code 1 in /tmp/pip-install-ixAGfz/pytesseract/

Can u share the .py file for the code . Having some problem . Your help will be highly appreciable .