
Wireless communication between Electronic devices and modules is very important, to make them ‘Fit’ in the World of Internet of Things. HTTP protocol and HTML language have made it possible to transfer the Data anywhere in the world, over the web. We have already covered some projects which use Wi-Fi with Arduino, have a look at them to Getting started :
- Sending Email using Arduino and ESP8266 WiFi Module
- WiFi Controlled Robot using Arduino
- Controlling RGB LED using Arduino and Wi-Fi
Now in this tutorial, we are building a program to Send Data to Web using Arduino and Wi-Fi module. For this we first need an IP address of either Global or Local server, here for the ease and demonstration purpose, we are using Local Server.
Components Required:
- Arduino UNO
- ESP8266 Wi-Fi Module
- USB Cable
- Connecting wires
- Laptop
- Power supply
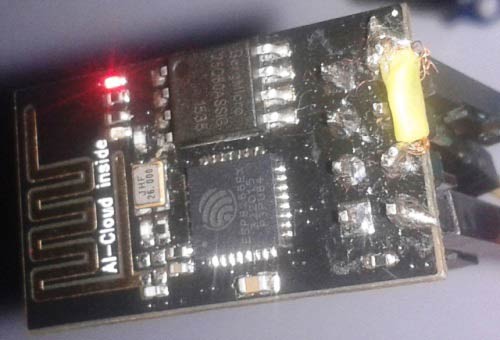
Wi-Fi Module ESP8266:
Circuit Connections:
Circuit Diagram for “Post Data from Arduino to Web” is given below. We mainly need a Arduino and ESP8266 Wi-Fi module. ESP8266’s Vcc and GND pins are directly connected to 3.3V and GND of Arduino and CH_PD is also connected with 3.3V. Tx and Rx pins of ESP8266 are directly connected to pin 2 and 3 of Arduino. Software Serial Library is used to allow serial communication on pin 2 and 3 of Arduino. We have already covered the Interfacing of ESP8266 Wi-Fi module to Arduino in detail.

By using Software Serial Library here, we have allowed serial communication on pin 2 and 3, and made them Rx and Tx respectively. By default Pin 0 and 1 of Arduino are used for serial communication but by using SoftwareSerial library, we can allow serial communication on other digital pins of the Arduino.
Note: To watch the response of ESP8266 on serial monitor, please open Serial Monitor of Arduino IDE.
Working Explanation:
First of all we need to connect our Wi-Fi module to Wi-Fi router for network connectivity. Then we will Configure the local server, Send the data to Web and finally Close the connection. This process and commands have been explained in below steps:
1. First we need to test the Wi-Fi module by sending AT command, it will revert back a response containing OK.
2. After this, we need to select mode using command AT+CWMODE=mode_id , we have used Mode id =3. Mode ids:
1 = Station mode (client)
2 = AP mode (host)
3 = AP + Station mode (Yes, ESP8266 has a dual mode!)
3. Now we need to disconnect our Wi-Fi module from the previously connected Wi-Fi network, by using the command AT+CWQAP, as ESP8266 is default auto connected with any previously available Wi-Fi network
4. After that, user can Reset the module with AT+RST command. This step is optional.
5. Now we need to connect ESP8266 to Wi-Fi router using given command
AT+CWJAP=”wifi_username”,”wifi_password”
6. Now get IP Address by using given command:
AT+CIFSR
It will return an IP Address.
7. Now enable the multiplex mode by using AT+CIPMUX=1 (1 for multiple connection and 0 for single connection)
8. Now configure ESP8266 as server by using AT+CIPSERVER=1,port_no (port may be 80). Now your Wi-Fi is ready. Here ‘1’ is used to create the server and ‘0’ to delete the server.
9. Now by using given command user can send data to local created server:
AT+CIPSEND =id, length of data
Id = ID no. of transmit connection
Length = Max length of data is 2 kb
10. After sending ID and Length to the server, we need to send data like : Serial.println(“[email protected]”);
11. After sending data we need close the connection by given command:
AT+CIPCLOSE=0
Now data has been transmitted to local server.
12. Now type IP Address in Address Bar in web browser and hit enter. Now user can see transmitted data on webpage.
Check the Video below for complete process.
Steps for Programming:
1. Include SoftwareSerial Library for allow serial communication on PIN 2 & 3 and declare some variables and strings.
#include<SoftwareSerial.h>
SoftwareSerial client(2,3); //RX, TX
String webpage="";
int i=0,k=0;
String readString;
int x=0;
boolean No_IP=false;
String IP="";
char temp1='0';
2. After this, we have to define some functions for performing our desired tasks.
In Setup() function, we initialise inbuilt serial UART communication for ESP8266 as client.begin(9600); at the baud rate of 9600.
void setup()
{
   Serial.begin(9600);
   client.begin(9600);
   wifi_init();
   Serial.println("System Ready..");
}
3. In wifi_init() function, we initialize the wifi module by sending some commands like reset, set mode, connect to router, configure connection etc. These commands have also been explained above in description part.
void wifi_init()
{
      connect_wifi("AT",100);
      connect_wifi("AT+CWMODE=3",100);
      connect_wifi("AT+CWQAP",100);
      connect_wifi("AT+RST",5000);
      ...... .....
      ..... .....
4. In connect_wifi() function, we send commands data to ESP8266 and then read response from ESP8266 Wi-Fi module.
void connect_wifi(String cmd, int t)
{
  int temp=0,i=0;
  while(1)
  {
    Serial.println(cmd);
    ...... .....
    ..... .....
5. sendwebdata( ) function is used for sending data to Local Server or Webpage.
void sendwebdata(String webPage)
{
    int ii=0;
     while(1)
     {
      unsigned int l=webPage.length();
      Serial.print("AT+CIPSEND=0,");
      client.print("AT+CIPSEND=0,");
      ...... .....
      ..... .....
6. void send() function is used for sending data strings to sendwebdata() function. That will be further sent to webpage.
void Send()
{
      webpage = "<h1>Welcome to Circuit Digest</h1><body bgcolor=f0f0f0>";
      sendwebdata(webpage);
      webpage=name;
      webpage+=dat;
      ...... .....
      ..... .....
7. get_ip() function is used for getting IP address of Local created server.
8. In void loop() function, we send instruction to user for refreshing the page and check whether the server is connected of not. When user refresh or request the webpage, data automatically transmitted to the same IP address.
void loop()
{
  k=0;
  Serial.println("Please Refresh your Page");
  while(k<1000)
  .... .....
  .... .....
We can display any data from Arduino to Webpage using this process, like Room Temperature & Humidity, Clock time, GPS coordinates, Heart beat Rate etc.
Complete Project Code
#include<SoftwareSerial.h>
SoftwareSerial client(2,3); //RX, TX
String webpage="";
int i=0,k=0;
String readString;
int x=0;
boolean No_IP=false;
String IP="";
char temp1='0';
String name="<p>Circuit Digest</p>";   //22
String dat="<p>Data Received Successfully.....</p>";     //21

void check4IP(int t1)
{
  int t2=millis();
  while(t2+t1>millis())
  {
    while(client.available()>0)
    {
      if(client.find("WIFI GOT IP"))
      {
        No_IP=true;
      }
    }
  }
}
void get_ip()
{
  IP="";
  char ch=0;
  while(1)
  {
    client.println("AT+CIFSR");
    while(client.available()>0)
    {
      if(client.find("STAIP,"))
      {
        delay(1000);
        Serial.print("IP Address:");
        while(client.available()>0)
        {
          ch=client.read();
          if(ch=='+')
          break;
          IP+=ch;
        }
      }
      if(ch=='+')
      break;
    }
    if(ch=='+')
    break;
    delay(1000);
  }
  Serial.print(IP);
  Serial.print("Port:");
  Serial.println(80);
}
void connect_wifi(String cmd, int t)
{
  int temp=0,i=0;
  while(1)
  {
    Serial.println(cmd);
    client.println(cmd);
    while(client.available())
    {
      if(client.find("OK"))
      i=8;
    }
    delay(t);
    if(i>5)
    break;
    i++;
  }
  if(i==8)
  Serial.println("OK");
  else
  Serial.println("Error");
}
void wifi_init()
{
      connect_wifi("AT",100);
      connect_wifi("AT+CWMODE=3",100);
      connect_wifi("AT+CWQAP",100);
      connect_wifi("AT+RST",5000);
      check4IP(5000);
      if(!No_IP)
      {
        Serial.println("Connecting Wifi....");
        connect_wifi("AT+CWJAP=\"1st floor\",\"muda1884\"",7000);         //provide your WiFi username and password here
     // connect_wifi("AT+CWJAP=\"vpn address\",\"wireless network\"",7000);
      }
      else
        {
        }
      Serial.println("Wifi Connected");
      get_ip();
      connect_wifi("AT+CIPMUX=1",100);
      connect_wifi("AT+CIPSERVER=1,80",100);
}
void sendwebdata(String webPage)
{
    int ii=0;
     while(1)
     {
      unsigned int l=webPage.length();
      Serial.print("AT+CIPSEND=0,");
      client.print("AT+CIPSEND=0,");
      Serial.println(l+2);
      client.println(l+2);
      delay(100);
      Serial.println(webPage);
      client.println(webPage);
      while(client.available())
      {
        //Serial.print(Serial.read());
        if(client.find("OK"))
        {
          ii=11;
          break;
        }
      }
      if(ii==11)
      break;
      delay(100);
     }
}
void setup()
{
   Serial.begin(9600);
   client.begin(9600);
   wifi_init();
   Serial.println("System Ready..");
}
void loop()
{
  k=0;
  Serial.println("Please Refresh your Page");
  while(k<1000)
  {
    k++;
   while(client.available())
   {
    if(client.find("0,CONNECT"))
    {
      Serial.println("Start Printing");
      Send();
      Serial.println("Done Printing");
      delay(1000);
    }
  }
  delay(1);
 }
}

void Send()
{
      webpage = "<h1>Welcome to Circuit Digest</h1><body bgcolor=f0f0f0>";
      sendwebdata(webpage);
      webpage=name;
      webpage+=dat;
      sendwebdata(webpage);
      delay(1000);
     webpage = "<a href="https://circuitdigest.com/";
     webpage+="\">Click Here for More projects</a>";
     sendwebdata(webpage);
     client.println("AT+CIPCLOSE=0");
}
Comments
i have a problem here
i have entered my wif-detail in the code
and that still shows an error at the wifi module connection,but my wifi module is good
so ,is this code a proper one
and i want step to do it
Hello,
I get upto AT+CIPSEND,0,5 and I get an error LINK NOT VALID - please help? I followed each step very carefully. I am using ESPLORER to send commands. I tried with PUTTY same story.
What is the "id" in the AT+CIPSEND =id, length of data command. I have tried the port number (80), the IP address as well as a generic 0, none of them seemed to work.
Thank you
Arduino: 1.6.11 Hourly Build 2016/08/09 03:34 (Windows 7), Board: "Arduino/Genuino Uno"
D:\jerin's\arduino\wifi\wifi.ino: In function 'void check4IP(int)':
D:\jerin's\arduino\wifi\wifi.ino:23:35: warning: deprecated conversion from string constant to 'char*' [-Wwrite-strings]
if(client.find("WIFI GOT IP"))
^
D:\jerin's\arduino\wifi\wifi.ino: In function 'void get_ip()':
D:\jerin's\arduino\wifi\wifi.ino:40:30: warning: deprecated conversion from string constant to 'char*' [-Wwrite-strings]
if(client.find("STAIP,"))
^
D:\jerin's\arduino\wifi\wifi.ino: In function 'void connect_wifi(String, int)':
D:\jerin's\arduino\wifi\wifi.ino:73:26: warning: deprecated conversion from string constant to 'char*' [-Wwrite-strings]
if(client.find("OK"))
^
D:\jerin's\arduino\wifi\wifi.ino: In function 'void sendwebdata(String)':
D:\jerin's\arduino\wifi\wifi.ino:125:28: warning: deprecated conversion from string constant to 'char*' [-Wwrite-strings]
if(client.find("OK"))
^
D:\jerin's\arduino\wifi\wifi.ino: In function 'void loop()':
D:\jerin's\arduino\wifi\wifi.ino:154:31: warning: deprecated conversion from string constant to 'char*' [-Wwrite-strings]
if(client.find("0,CONNECT"))
^
D:\jerin's\arduino\wifi\wifi.ino: In function 'void Send()':
wifi:174: error: unable to find string literal operator 'operator""http'
webpage = "<a href="http://circuitdigest.com/";
^
exit status 1
unable to find string literal operator 'operator""http'
This report would have more information with
"Show verbose output during compilation"
option enabled in File -> Preferences.
Hi....
man you help alot...
i just have a single error at this line
connect_wifi("AT+CWJAP=\"agriculturefyp\",\"agriculturefyp\"",7000);
it return error instead of OK
my wifi module password and ssid is same and looks fine......
any suggestion ??
Thanks in Advanced
Sir The wifi is getting connected but the ip adress is not being generated . what to do ?? Thanks in aadvance
First of all thanks for this wonderful tutorial, i have the same module but not giving output my module not responding. please tell me the solution to solve this problem
while connecting esp266 in ardunio shows error
at
error
at+cwmode=3
error
The problem should be with your ESP8266 module. Try changing the module or resetting it.
Hello, can u please share the whole code which is being in this tutorial, the code which is showed in this youtube video
while compiling the above code, i got this error
" exit status 1
unable to find string literal operator 'operator""http' "
exit status 1
unable to find string literal operator 'operator""http'
exit status 1
unable to find string literal operator 'operator""http'
Resolution: REMOVE THE "" after the http
webpage = "<a href=http://circuitdigest.com/";
AT
AT
Error
AT+CWMODE=3
AT+CWMODE=3
AT+CWMODE=3
AT+CWMODE=3
AT+CWMODE=3
AT+CWMODE=3
AT+CWMODE=3
Error
AT+CWQAP
AT+CWQAP
AT+CWQAP
AT+CWQAP
AT+CWQAP
AT+CWQAP
AT+CWQAP
Error
AT+RST
please help guys its important
I had the same problem. The factory baud rate for my esp was 115200. I had to set it to 9600. Now it works.
To change the esp baud rate, upload bareMinimum() example to arduino. This is a n empty sketch with a loop. Connect arduino ground to its reset. This way we can bypass arduino. Connect esp Tx to arduino Tx and eap Rx to arduino Rx. Now in serial monitor you should be able to send AT and get an OK response. Now change the esp baudrate by entering the command
AT+UART_DEF=9600,8,1,0,3
Once baud rate had changed, change connections back to this tutorial and run
I don't believe I was able to get this to work! Fifteen minutes ago it seemed hopeless.
First of all thanks to Andrei (above) for finding the problem with the http string!
One of the things I did (as suggested by some other article) was to use a series of resistors to reduce the TX voltage of the Arduino from 5 v down to about 2.7 v. This probably is not what fixed the problem, but should allow the ESP to live longer.
What seems to have fixed it was (again from some other article) to increase the wait time from 100 ms to 10,000 ms (10 secs). Like this:
void wifi_init()
{
connect_wifi("AT",10000);
connect_wifi("AT+CWMODE=3",10000);
connect_wifi("AT+CWQAP",10000);
connect_wifi("AT+RST",5000);
check4IP(5000);
Also, set the transmit and receive speeds to the ESP to 115200. Like this:
void setup()
{
Serial.begin(115200);
client.begin(115200);
Now, I get the proper "OK" return from the ESP, and eventually my router assigns an IP address. The Arduino console window reports the IP as 192.068.0.78, but that is wrong because my network is 192.168.0.x . I looked in my router setup screen and it assigns an IP to "ES" as 192.168.0.78.
Trying to open that page in a broswer initially gave an error, but after refreshing a few times, the webpage data from the code appeared.
what changes i need to do in order to send an http get request ?
i need to get some json data from a remote website..
is there any chance to do this with this set of code?
Yes, in fact the ESP8266 can be programmed using the Arduino IDE, you can dump the UNO; it has a whole wifi library and use the Arduino library to handle the Json returned from a Get request; just google "ESP8266 Arduino IDE"
Kindly tell the command to replace SoftwareSerial client(2,3); //RX, TX line as it shows the error "class WiFiClient' has no member named 'begin'" on compilation.
Thanks
I am using NodeMCU instead of standalone ESP module. The libraries to be included will be changed and //#include<SoftwareSerial.h>
//SoftwareSerial client(2,3); //RX, TX
Will be replaced .
Kindly help.
How to Use arduino nano in this Tutorial?
Please Help me!!
I am getting error "unable to find string literal operator'operator""http'
REMOVE THE "" after the http
webpage = "<a href=http://circuitdigest.com/";
I follow all the steps in the video, unfortunately, I cannot open the IP on the webpage. The webpage shows information as below. I try to use what is my IP but I got a different result, my IP on what is my IP is 183.78.56.210 and IP get by Arduino is 192.178.1.1911.
There is no Internet connection
Try:
Checking the network cables, modem, and router
Reconnecting to Wi-Fi
Running Windows Network Diagnostics
ERR_INTERNET_DISCONNECTED
Help me, how can I solves this problem. Tq in advance
AT
AT
AT
AT
AT
AT
AT
Error
AT+CWMODE=3
AT+CWMODE=3
AT+CWMODE=3
AT+CWMODE=3
AT+CWMODE=3
AT+CWMODE=3
AT+CWMODE=3
Error
AT+CWQAP
AT+CWQAP
AT+CWQAP
AT+CWQAP
AT+CWQAP
AT+CWQAP
AT+CWQAP
Error
AT+RST
AT+RST
AT+RST
AT+RST
AT+RST
AT+RST
AT+RST
Error
PLSS HELP...
AT
AT
AT
AT
Error
AT+CWMODE=3
AT+CWMODE=3
AT+CWMODE=3
AT+CWMODE=3
AT+CWMODE=3
AT+CWMODE=3
AT+CWMODE=3
Error
AT+CWQAP
AT+CWQAP
AT+CWQAP
AT+CWQAP
AT+CWQAP
AT+CWQAP
AT+CWQAP
Error
AT+RST
AT+RST
all error will be fix once you use 115200 instead of 9600 and remove pre double quotes from http:.
Serial.println("EHLO 192.168.1.123");
How can i get my personal ip address to mention in my program, and one more thing how to send message in this program.please guide me regarding these two issues.
Dear Sir,
I want to be able to send a message from my arduino uno to my friend's PC through wi-fi.
Can you please tell me how I can do this and what on my friend's PC has to be running in order to see the message that I sent?
Sincerely Yours,
Bill Dimitruou
can i send a data from the arduino, to a website that i created and hosted?
Same problem as Ross and John R. Used solution given by Anand and John S. but get the result as Rss and John R. Can anyone suggest what next to check? Any help much appreciated.
I changed Serial.begin(115200);
client.begin(115200);
and it connects to wifi but does not returns IP address.
When I added Serial.println(cmd);
client.println(cmd);
its returns IP address like this: IP Address:"172.F,93K"'4FL:,⸮j⸮H⸮"172.20.1IA::"172.2.FA::""172.200Port:80
I am working on Arduino uno and ESP8285.
Any help would be great!
I am stuck at
Wifi Connected
I don't get my IP Address.
Does anybody know how to solve this problem?
at+cwmode=3
error
others are okay
wifi is connected
void wifi_init()
{
      connect_wifi("AT",100); //make this 100 to 1000
      connect_wifi("AT+CWMODE=3",100);  //make this 100 to 1000
      connect_wifi("AT+CWQAP",100);  //make this 100 to 1000
      connect_wifi("AT+RST",5000);
///////because to get connected to any router of hotspot module,it takes time to get establish the connection
Hi thank you for the amazing post
Is it possible for ESP8266 to receive data from arduino uno and then send it to web server?
Hello,
Thanks you for this nice tutorial.
I also tried to make this code work with my esp-01 and arduino and finally, I succeeded. But I struggled a bit and had the same problem as John. R and Ross (i.e, an error after each AT commands). Here is the solution that works for me:
My ESP-01 (esp8266) works at 115200 for AT command but if i change 9600 to 115200 (as suggested by several comments above), it's too fast for software serial communication. Thus, to make it work, I had to change the baudrate of the esp-01 to 9600. To do this, there is this tutorial that is really helpful:
https://www.youtube.com/watch?v=KpDteD95T9o&t=54s
Here is a second link also helpful:
https://arduino.stackexchange.com/questions/24156/how-to-change-baudrate-of-esp8266-12e-permanently
One may learn that, using the bareMinimum sketch of arduino (in the example sketchs of arduino IDE, the code with only setup and loop), using TX/RX 0 1 at 115200, you should succeed to send AT command manually and receive "OK" in the monitor. To change the baudrate for one time (and then come back to 115200 by default after reset), one can use the following command:
- AT+UART_CUR=9600,8,1,0,0
It's a good way to test that it actually works. Then, one can change the baudrate of the monitor to 9600 and observe that AT send OK. But if one want the change to be permanent, there is the following command that I use and recommand:
- AT+UART_DEF=9600,8,1,0,0
This avoids that the esp goes back to 115200 after AT+RST.
After I obtained an OK with this command and also removed the quote before http as mentionned in the comments above and shown below:
//webpage = "<a href="http://circuitdigest.com/"; // the quote have to be removed
webpage = "<a href=http://circuitdigest.com/"; // suggestion from forum
I succeeded to make the code works and could see the web page in my browser (i.e, data correctly sent by my esp).
Hope that help.
Cheers,
Hi any one guide me
i want to read text file save in SD Card via Wifi Module ESP8622

Hi Saddam,
You have written a very detailed and a well explained steps for this tutorial. I have used exactly the same wifi module and done same wring as shown in your tutorial.
But i am gettin zero as return for client.available() function. Due to this my ESP8622 is not getitng connected to Wifi.
Please suggest what could be the issue ...i can see the output properly on the Serial Monitor for Serial.println ...not sure if client.println is working fine.
regards
kuldeep