QR code (Quick Response code) is a type of matrix barcode that contains information about the item to which it is attached, like location data, identifier, or a tracker that identifies a website or app, etc. It is a machine-readable optical label in the form of a 2D image with a unique pattern. To learn more about QR codes and how to generate a QR code, follow our previous tutorial. Also, if you want to learn how to interface a USB Barcode Scanner with a Raspberry Pi and read 2D barcodes with a Raspberry Pi, then follow this Raspberry Pi barcode scanner project.
In this tutorial, we will build a QR code scanner using Raspberry Pi and OpenCV, and the ZBar library. ZBar is the best library for detecting and decoding the different types of barcodes and QR codes. OpenCV is used to grab a new frame from a video stream, and process it. Once OpenCV captures a frame, we can pass it to a dedicated Python barcode decoding library such as ZBar, which decodes the barcode and converts it into the respective information.
QR Code Scanner using Raspberry Pi and OpenCV - Quick Overview
Build Time: 2-4 hours | Cost: $30-50 | Difficulty: Intermediate
What You'll Learn: Raspberry Pi setup, OpenCV image processing, ZBar QR decoding, camera interfacing, and Python programming.
Applications: Inventory management, ticketing systems, contactless information sharing, authentication, and retail payments.
Table of Contents
- Requirements of Raspberry Pi Camera QR Code Reader
- └ Alternative Components for the QR Code Reader Raspberry Pi
- QR Code Scanner Using Raspberry Pi Camera: Complete Explanation
- Installing OpenCV on Raspberry Pi
- Installing Other Required Packages
- Raspberry Pi Camera QR Code Reader Hardware Setup
- Raspberry Pi 3 QR Code Scanner Python Implementation
- Testing the Raspberry Pi QR Code Scanner
- └ Real-World Testing Scenarios for QR Code Scanner Using Raspberry Pi
- QR Code Scanner Using Raspberry Pi GitHub Repository
- Frequently Asked Questions
- Conclusion
- Other QR Code Scanner Projects
Requirements of Raspberry Pi Camera QR Code Reader
- Raspberry Pi 3 (any version)
- Pi Camera Module
Alternative Components for the QR Code Reader Raspberry Pi
While this tutorial focuses on implementation, you can also use:
- Raspberry Pi 4 for enhanced performance in your QR scanner Raspberry Pi project
- USB webcam as an alternative to Pi Camera for a QR code scanner using a Raspberry Pi camera setup
- Raspberry Pi Zero W for compact QR code reader, Raspberry Pi applications
Before proceeding with this QR code reader Raspberry Pi, first, we need to install OpenCV, Barcode decoding library ZBar, imutils, and some other dependencies for this project. OpenCV is used here for digital image processing. The most common applications of Digital Image Processing are object detection, Face Recognition, and people counting.
QR Code Scanner Using Raspberry Pi Camera: Complete Explanation
The potent combination of OpenCV for image processing and ZBar for barcode detection is used in this Raspberry Pi 3 QR code scanner Python tutorial. Both the Pi Camera and USB cameras can be used with our QR scanner Raspberry Pi setup.
Installing OpenCV on Raspberry Pi
Here OpenCV library will be used for the QR scanner Raspberry Pi. To install OpenCV, first, update the Raspberry Pi.
sudo apt-get updateThen, install the required dependencies for installing OpenCV on your Raspberry Pi.
sudo apt-get install libhdf5-dev -y
sudo apt-get install libhdf5-serial-dev –y
sudo apt-get install libatlas-base-dev –y
sudo apt-get install libjasper-dev -y
sudo apt-get install libqtgui4 –y
sudo apt-get install libqt4-test –y
After that, install OpenCV on the Raspberry Pi using the command below.
pip3 install opencv-contrib-python==4.1.0.25We previously used OpenCV with Raspberry Pi and created a lot of tutorials on it.
- Installing OpenCV on Raspberry Pi using CMake
- Real-Time Face Recognition with Raspberry Pi and OpenCV
- License Plate Recognition using Raspberry Pi and OpenCV
- Crowd Size Estimation Using OpenCV and Raspberry Pi
We have also created a series of OpenCV tutorials starting from the beginner level.
Installing Other Required Packages
Installing ZBar
Zbar is the best library for detecting and decoding the different types of barcodes and QR codes. Use the below command to install the library:
pip3 install pyzbarInstalling imutils
imutils is used to make essential image processing functions, such as translation, rotation, resizing, skeletonization, and displaying Matplotlib images, easier with OpenCV. Use the below command to install the imutils:
pip3 install imutilsInstalling argparse
Use the below command to install the argparse library. Argparse is responsible for parsing command-line arguments.
pip3 install argparseRaspberry Pi Camera QR Code Reader Hardware Setup
Here we only require a Pi camera for this Raspberry Pi QR code generator, and you just need to attach the camera ribbon connector in the camera slot given in the Raspberry Pi
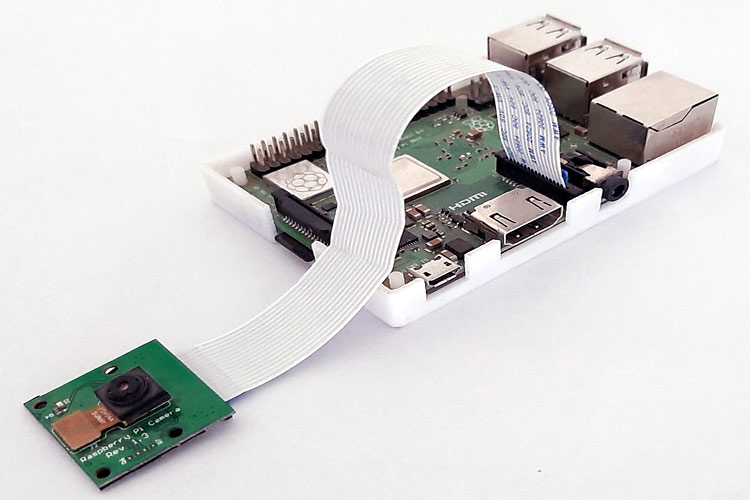
Pi camera can be used to build various interesting projects like Raspberry Pi Surveillance Camera, Visitor Monitoring System, Home Security System, etc.
Raspberry Pi 3 QR Code Scanner Python Implementation
The complete code for the Raspberry Pi camera QR code reader is given at the end of the page. Before we program the Raspberry Pi, let's understand the code.
So, as usual, start the code by importing all the required packages.
from imutils.video import VideoStream
from pyzbar import pyzbar
import argparse
import datetime
import imutils
import time
import cv2Then construct the argument parser and parse the arguments. The Command-line argument contains information about the path of the CSV file. The CSV (Comma Separated Values) file contains the timestamp and payload of every barcode from our video stream.
ap = argparse.ArgumentParser()
ap.add_argument("-o", "--output", type=str, default="barcodes.csv",
            help="path to output CSV file containing barcodes")
args = vars(ap.parse_args())
After that, initialize the video stream and uncomment the commented line if you are using a USB webcam.
#vs = VideoStream(src=0).start()
vs = VideoStream(usePiCamera=True).start()
time.sleep(2.0)
Now inside the loop, grab a frame from the video stream and resize it to 400 pixels. Once it grabs the frame, call the pyzbar.decode function to detect and decode the QR code.
frame = vs.read()
frame = imutils.resize(frame, width=400)
barcodes = pyzbar.decode(frame)
Now, loop over the detected barcodes to extract the location of the barcode and draw the bounding box around the barcode on the image.
for barcode in barcodes:
        (x, y, w, h) = barcode.rect
        cv2.rectangle(frame, (x, y), (x + w, y + h), (0, 0, 255), 2)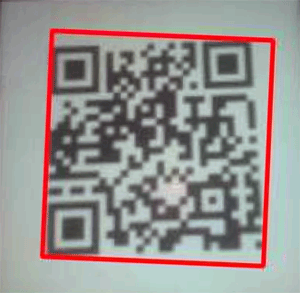
Then decode the detected barcode into a "utf-8" string using the decode ("utf-8") function, and then extract the type of barcode using the barcode. type function.
barcodeData = barcode.data.decode("utf-8")
barcodeType = barcode.type
After that, save the extracted barcode data and barcode type inside a variable named text, and draw the barcode data and type on the image.
text = "{} ({})".format(barcodeData, barcodeType)
cv2.putText(frame, text, (x, y - 10),
     cv2.FONT_HERSHEY_SIMPLEX, 0.5, (0, 0, 255), 2)
Now display the output with the barcode data and the barcode type.
cv2.imshow("Barcode Reader", frame)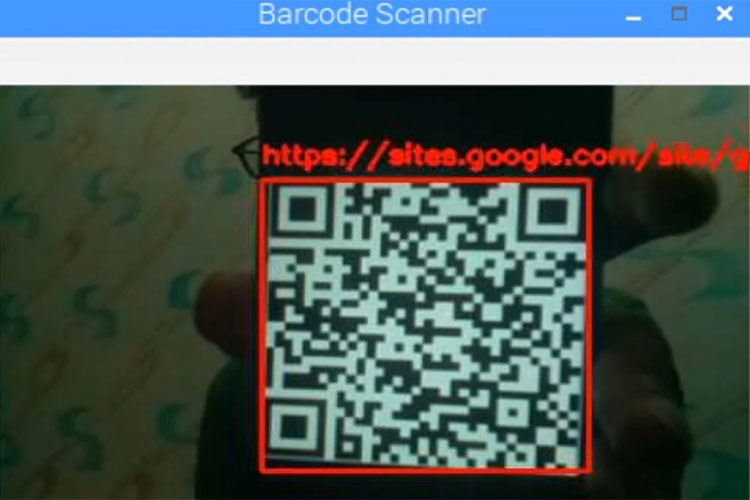
Now in the last step, check if the key ‘s’ is pressed, then break out of the main loop and start the clean-up process.
key = cv2.waitKey(1) & 0xFF
# if the `s` key is pressed, break from the loop
if key == ord("s"):
        break
print("[INFO] cleaning up...")
csv.close()
cv2.destroyAllWindows()
vs.stop()
Testing the Raspberry Pi QR Code Scanner
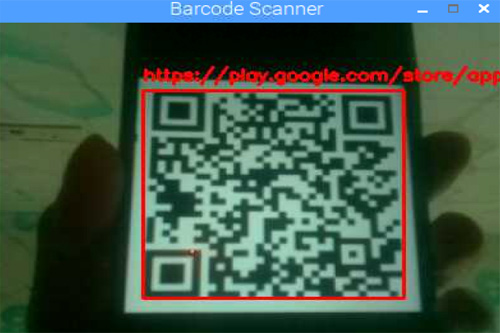
Once your setup is ready, launch the QR scanner Raspberry Pi program. You will see a window showing a live view from your camera. Now you can present barcodes in front of the PI camera. When pi decodes a barcode, it will draw a red box around it with barcode data and barcode type as shown in the image below:
Real-World Testing Scenarios for QR Code Scanner Using Raspberry Pi
Test your Raspberry Pi camera QR code reader with various scenarios:
- Product barcodes for inventory management
- WiFi QR codes for automatic network connection
- Contact information QR codes for digital business card scanning using Raspberry Pi 3
- URL QR codes for automatic website redirection in Raspberry Pi
This is how you can easily build a Raspberry Pi Camera QR Code Reader just using the Raspberry Pi board and Pi camera or USB camera.
QR Code Scanner Using Raspberry Pi GitHub Repository
Use this simple tutorial and full source code to create your own QR code scanner with a Raspberry Pi and camera module. Includes support for various barcode formats using Python and OpenCV, real-time QR code detection, and automatic data logging to CSV files. Perfect for developers, makers, and students who want to build useful automation projects with little hardware.
Frequently Asked Questions
⇥ How does the QR code reader for the Raspberry Pi camera operate?
The Raspberry Pi camera QR code reader employs the ZBar library to identify and decode QR codes and OpenCV to record video frames. The Raspberry Pi QR scanner decodes each frame in real time and shows the results on the screen.
⇥ Can I use a USB camera for my Raspberry Pi QR code reader instead of a Pi camera?
Yes, both USB and Pi cameras are supported by this QR code reader Raspberry Pi tutorial. To use external cameras with your Raspberry Pi 3 QR code scanner Python implementation, just uncomment the USB camera line in the Python code.
⇥ What sort of codes can be detected by this Raspberry Pi camera-based QR code scanner?
Using the Raspberry Pi camera, a QR code scanner can recognize and decode a wide range of barcode formats, such as QR codes, Code 128, Code 39, EAN-13, and many more that are supported by the ZBar library. The code type is automatically recognized by the Raspberry Pi QR scanner.
Conclusion
The QR code scanner using Raspberry Pi can detect and decode various types of barcodes and QR codes in real-time. This Raspberry Pi camera QR code reader project demonstrates the power of combining OpenCV and ZBar libraries for computer vision applications. The implementation can be easily modified for specific use cases like inventory management, access control, or data logging systems. This is how you can easily build a Raspberry Pi camera QR code reader just using the Raspberry Pi board and Pi camera or a USB camera. The QR code scanner using a Raspberry Pi camera setup is cost-effective and perfect for both learning and practical applications. The working video and complete code for this project are given below.
Other QR Code Scanner Projects
If you're looking to explore QR code scanning across different hardware platforms or application scenarios, here are some closely related projects worth checking out:
How to Scan QR Codes using ESP32-CAM Module?
the ESP32-CAM captures images and sends them to a server with a QR code recognition program via an API request. Once the recognition is complete, the server responds with the decoded data.
Smart Shopping Cart with POS Thermal Printer, Barcode Scanner, 20x4 LCD and Raspberry Pi
In this project we are going to build a Smart Shopping cart by interfacing a thermal receipt printer, LCD, and a USB barcode scanner with Raspberry Pi. This Smart Shopping cart will scan an item’s Barcode, display its information on 20x4 LCD, create the invoice, and print it using a Point of Service (POS) Thermal Printer.
QR Code Scanner API for Low-Power Embedded SoC Boards
This article is about the QR Code scanner API that can be used easily with ESP32-CAM and other low power SoC devices to decode QR code images easily. The API can handle poor quality images and also work with multiple QR codes in a single image.
Complete Project Code
from imutils.video import VideoStream
from pyzbar import pyzbar
import argparse
import datetime
import imutils
import time
import cv2

ap = argparse.ArgumentParser()
ap.add_argument("-o", "--output", type=str, default="barcodes.csv",
help="path to output CSV file containing barcodes")
args = vars(ap.parse_args())
#vs = VideoStream(src=0).start()  #Uncomment this if you are using Webcam
vs = VideoStream(usePiCamera=True).start() # For Pi Camera
time.sleep(2.0)
csv = open(args["output"], "w")
found = set()

while True:
frame = vs.read()
frame = imutils.resize(frame, width=400)
barcodes = pyzbar.decode(frame)
for barcode in barcodes:
(x, y, w, h) = barcode.rect
cv2.rectangle(frame, (x, y), (x + w, y + h), (0, 0, 255), 2)
barcodeData = barcode.data.decode("utf-8")
barcodeType = barcode.type
text = "{} ({})".format(barcodeData, barcodeType)
        print (text)
cv2.putText(frame, text, (x, y - 10),
cv2.FONT_HERSHEY_SIMPLEX, 0.5, (0, 0, 255), 2)

# if the barcode text is currently not in our CSV file, write
# the timestamp + barcode to disk and update the set
if barcodeData not in found:
csv.write("{},{}\n".format(datetime.datetime.now(),
barcodeData))
csv.flush()
found.add(barcodeData)
cv2.imshow("Barcode Reader", frame)
key = cv2.waitKey(1) & 0xFF

# if the `s` key is pressed, break from the loop
if key == ord("s"):
break
print("[INFO] cleaning up...")
csv.close()
cv2.destroyAllWindows()
vs.stop()


Hello,
Thank you for the installation steps.
I followed all the steps but i still run into an error when running the code.
Can you maybe help me solve the problem? I think is has something to do with the space, tabs in the code?