

Gardening is a very relaxing hobby. However, due to our busy lifestyles, the plants in our garden may not always get the attention they deserve. What if we could monitor their condition from a distance and give them the care they needed? There is a Way! I aim to address this problem by integrating IoT with gardening. This way our garden becomes smart and something extra. So, I call it Garden X. Garden X is a smart gardening system that monitors soil moisture level, air temperature, humidity, light intensity & air quality index, etc. Depending on these environmental conditions (soil moisture level specifically) this system takes decisions like watering the plant by itself whenever required. Garden X will also notify the user about other environmental conditions like soil moisture level, air temperature, humidity, light intensity & air quality index, etc., through a mobile application, so that the user can take necessary care that a plant needs.
To implement this project we are using an ESP32 as the main controller along with sensors that will tell us the environmental conditions, and they are DHT11 for temperature and humidity, capacitive soil moisture sensor, LDR for light intensity, MQ135 for air quality index monitoring. ESP32 read all the data coming from all the sensors, processes it, and sends it to the cloud database. A user can see these data using his/her mobile application. An automatic irrigation system is also included in the Garden X system, which will only trigger when the soil moisture level is too low.
Component Required for Garden X
Project Used Hardware
- ESP 32 (Wroom32),
- Sugar cube Relay (JIH JIK-> JQC-3FC(T73)DC12V),
- Capacitive soil moisture sensor, ADC (ADS1115),
- Humidity & temperature Sensor (DHT11),
- Air Quality Sensor (MQ135),
- Light Sensor (LDR - 5 m.m.),
- Transistor (BC547),
- LM7805, Red LED (5 m.m.),
- Green LED (5 m.m.), and Blue LED (5 m.m.),
- 5 m.m. LED holder,
- 3.5 mm Audio socket and jack,
- D.C. barrel socket and jack,
- THT Resistor (100 ohm/ 0.25 watt,
- 10 Kohm/ 0.25 watt) ,
- Solenoid Valve (6 m.m., 12volt),
- Relimate connectors,
- Heat Shrink Tubes (2.5 m.m., 6 m.m.) ,
- Vero Board (Dotted) ,
- PVC box (7” x 4”),
- 12 volt,
- 2A DC adapter,
- Diode 1N4007,
- Nut bolts,
- 6 m.m. PU pipe,
- 8 m.m. Flexible plastic pipe
Project Used Software
- Arduino IDE,
- Google Firebase,
- Easy EDA,
- Kodular
Project Hardware/Software Selection
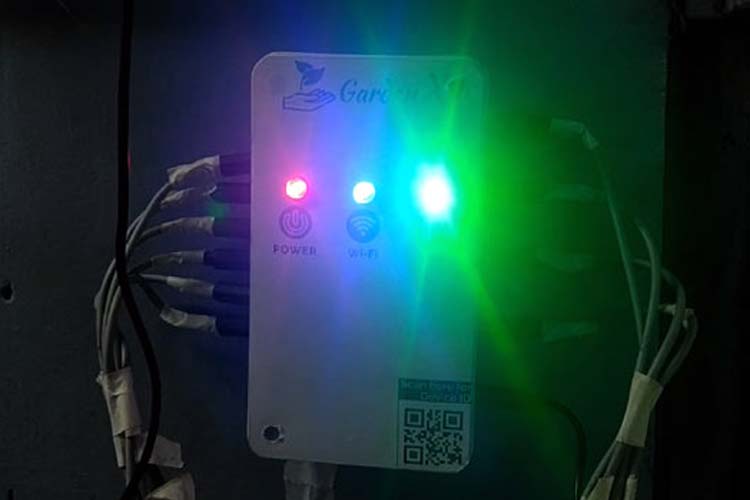
A PVC box of 7” x 4” is used to keep all the components together. 4 sugar cube relay is used to drive 4 solenoid valves. The solenoid valve is actuated at 12 volts D.C. In combination with the 6m.m. PU pipe and 8 m.m. a flexible plastic pipe supplied the water to the plants via the solenoids. For connecting the solenoid valves to the box I used a D.C. barrel socket and jacks on the right side of the box. ESP32 is the controller of the system. I choose this board over NodeMCU because it has more GPIOs and processing power which I can use later on for more improvement. For taking the reading of the soil moisture levels I used capacitive soil moisture sensors. It has some advantages over the resistive type soil moisture sensors. The electrode of the resistive type soil moisture sensor is exposed to the soil and the corrosion happens to that electrode. But in the case of capacitive sensors, the electrodes are covered with solder masking and epoxy so there is less chance of corrosion. For getting proper reading I used an ADC ADS 1115for the moisture sensors. DHT 11 is used for taking the humidity and temperature value of the surrounding ambient. I choose this because it is cheap well as it is a digital sensor so almost no need to calibrate. MQ 135 and LDR are used for Air quality monitoring and ambient light intensity monitoring respectively. For connecting all the sensors I have used a 3.5 m.m. audio socket and jacks to the left side of the box. I powered up the whole system using a 12 volt, 2 Amp D.C. adapter. A 7805 is used to power up the ESP32 board. LED indicators Power LED – RED WIFI LED – BLUE WEB LED – GREEN I used Arduino IDE to program the ESP32 board. I used it because it is very user-friendly and has a vast library collection for almost all the hardware devices and software systems. For the cloud service, I have used Google firebase because it is easy to use and comes with a certain free plan. The documentation of the firebase also helps to build projects. And it can be integrated with any mobile application. I have used the RTDB of the google firebase for storing & fetching the data. For making the schematics I used EasyEDA. Easy EDA has a huge library collection of components and the LCSC component library is also connected with this so it helps to choose the components easily. In this project, I made an android application using Kodular. Kodular is an online platform where people can make android apps by visual programming and it is absolutely free. Users have to login into their account and connect the gardenX device by scanning the QR code which is present in the bottom right corner of the device. Users are able to see the data of soil moisture levels of all the sensors and the status of the solenoid valves. Users can set the soil moisture level at which the solenoid valve will operate.
Garden X Circuit Diagram

Complete Project Code
#if defined(ESP32)

#include <WiFi.h>

#include <FirebaseESP32.h>

#elif defined(ESP8266)

#include <ESP8266WiFi.h>

#include <FirebaseESP8266.h>

#endif

#include <addons/TokenHelper.h>

#include <addons/RTDBHelper.h>

#include <Adafruit_ADS1X15.h>

#include <SimpleDHT.h>

#define WIFI_SSID "HOTSPOT_NAME"

#define WIFI_PASSWORD "SECRET_PASSWORD"

#define API_KEY "SECERET_API_KEY"

#define DATABASE_URL "FIREBASE_RTDB_URL"

FirebaseData fbdo;

FirebaseAuth auth;

FirebaseConfig config;
Adafruit_ADS1115 ads;
int pinDHT11 = 13;

SimpleDHT11 dht11(pinDHT11);

int sm1,sm2,sm3,sm4;

int ml1,ml2,ml3,ml4;

int s1=5, s2=18, s3=19, s4=23, s1s,s2s,s3s,s4s;

int16_t adc0, adc1, adc2, adc3;

float temp,hum;

byte temperature,humidity;

int mq=12, mqRead;

int ldr=14, readLDR;

int err;
int wifi=2, web=15;
unsigned long cm,pm;
void setup()

{
  Serial.begin(115200);

  delay(1000);

  pinMode(s1,OUTPUT); pinMode(s2,OUTPUT); pinMode(s3,OUTPUT); pinMode(s4,OUTPUT);

  pinMode(wifi,OUTPUT);pinMode(web,OUTPUT); pinMode(mq,INPUT); pinMode(ldr,INPUT);

  digitalWrite(s1,0); digitalWrite(s2,0); digitalWrite(s3,0); digitalWrite(s4,0);

  digitalWrite(web,0);digitalWrite(wifi,0);


  WiFi.begin(WIFI_SSID, WIFI_PASSWORD);

  Serial.print("Connecting to Wi-Fi");

  while (WiFi.status() != WL_CONNECTED)

  {

    Serial.print(".");

    delay(300);

  }

  digitalWrite(wifi,1);

  Serial.println();

  Serial.print("Connected with IP: ");

  Serial.println(WiFi.localIP());

  Serial.println();
  Serial.printf("Firebase Client v%s\n\n", FIREBASE_CLIENT_VERSION);
  config.api_key = API_KEY;

  config.database_url = DATABASE_URL;

  Firebase.begin(DATABASE_URL, API_KEY);

  Firebase.setDoubleDigits(5);

 while (!firebase.connected())

  {

    Serial.print(".");

    delay(300);

  }

  Serial.println("Connected with Firebase");

  digitalWrite(web,1);


  if (!ads.begin()) {

    Serial.println("Failed to initialize ADS.");

    while (1);

  }

}
void loop()

{

  adc0 = ads.readADC_SingleEnded(0);

  adc1 = ads.readADC_SingleEnded(1);

  adc2 = ads.readADC_SingleEnded(2);

  adc3 = ads.readADC_SingleEnded(3);
  sm1= map(adc0,3,26000, 0,100);

  sm2= map(adc1,4,26000, 0,100);

  sm3= map(adc2,7,26000, 0,100);

  sm4= map(adc3,7,26000, 0,100);
    if (sm1<ml1)  { s1s=1; }

    else          { s1s=0; }


    if (sm2<ml2)  { s2s=1; }

    else          { s2s=0; }


    if (sm3<ml3)  { s3s=1; }

    else          { s3s=0; }


    if (sm4<ml4)  { s4s=1; }

    else          { s4s=0; }
  digitalWrite(s1,s1s);

  digitalWrite(s2,s2s);

  digitalWrite(s3,s3s);

  digitalWrite(s4,s4s);


  if (Firebase.ready())

   {

    Firebase.setInt(fbdo, "/GX-D1-01/S1", s1s);

    Firebase.setInt(fbdo, "/GX-D1-01/S2", s2s);

    Firebase.setInt(fbdo, "/GX-D1-01/S3", s3s);

    Firebase.setInt(fbdo, "/GX-D1-01/S4", s4s);

   }

    err = SimpleDHTErrSuccess;

  if ((err = dht11.read(&temperature, &humidity, NULL)) != SimpleDHTErrSuccess) {

    Serial.print("Read DHT11 failed, err="); Serial.print(SimpleDHTErrCode(err));

    Serial.print(","); Serial.println(SimpleDHTErrDuration(err)); delay(1000);

    return; }


  temp=temperature;

  hum=humidity;
  mqRead  = analogRead(mq);

  mqRead  = map(mqRead,200,3026,150,600);


  readLDR = analogRead(ldr);

  readLDR = map(readLDR,0,4095,800,3);
    cm=millis();


   if( Firebase.ready() && (cm-pm>= 2000))

   {

     Firebase.setfloat(fbdo, "/GX-D1-01/T", temp);

     Firebase.setfloat(fbdo, "/GX-D1-01/H", hum);

     Firebase.setInt(fbdo, "/GX-D1-01/AQ", mqRead);

     Firebase.setInt(fbdo, "/GX-D1-01/LI", readLDR);


    Serial.printf("Get int a--  %s\n", Firebase.getInt(fbdo, "/GX-D1-01/ml1") ? String(fbdo.to<int>()).c_str() : fbdo.errorReason().c_str());

     ml1=fbdo.to<int>();

    Serial.printf("Get int a--  %s\n", Firebase.getInt(fbdo, "/GX-D1-01/ml2") ? String(fbdo.to<int>()).c_str() : fbdo.errorReason().c_str());

     ml2=fbdo.to<int>();

    Serial.printf("Get int a--  %s\n", Firebase.getInt(fbdo, "/GX-D1-01/ml3") ? String(fbdo.to<int>()).c_str() : fbdo.errorReason().c_str());

     ml3=fbdo.to<int>();

    Serial.printf("Get int a--  %s\n", Firebase.getInt(fbdo, "/GX-D1-01/m4l") ? String(fbdo.to<int>()).c_str() : fbdo.errorReason().c_str());

     ml4=fbdo.to<int>();


    pm= millis();

   }

}
