
In this project, we are going to learn,
- How to set up hardware support for Arduino in MATLAB software.
- How to control an Arduino using MATLAB code.
We normally use Arduino IDE to write and upload codes to Arduino. The advantage of MATLAB is, it uses a high-level programming language which is easier than C / C++. The other advantage of using MATLAB is, we can see the results of I/O operations quickly (without compiling). Moreover, MATLAB provides plotting functions that we can use to quickly analyze and visualize data collected from Arduino. First, we are going to learn how to setup hardware support package for Arduino in MATLAB software. After setting up hardware support package for Arduino in MATLAB software, we are going to control LEDs that are connected to Arduino board using MATLAB code. You can also check out how to use serial communication between Arduino and MATLAB.
Setup Hardware Support Package for MATLAB:
Step 1. Start MATLAB (latest Version preferred).

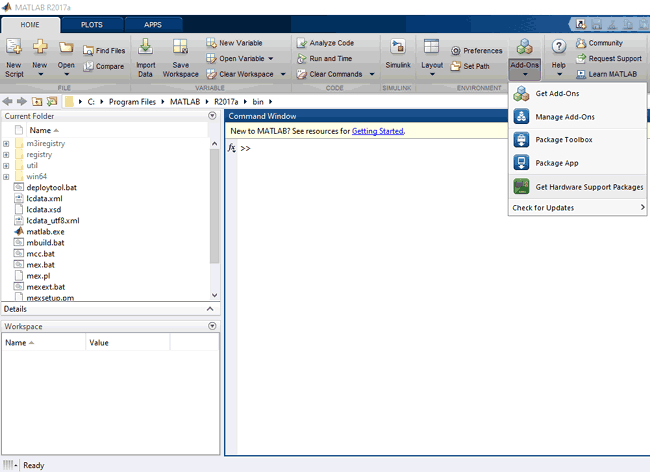
Step 2. In the Environment section, select Add-Ons > Get Hardware Support Packages.
Step 3. It will start the Add-On explorer window.
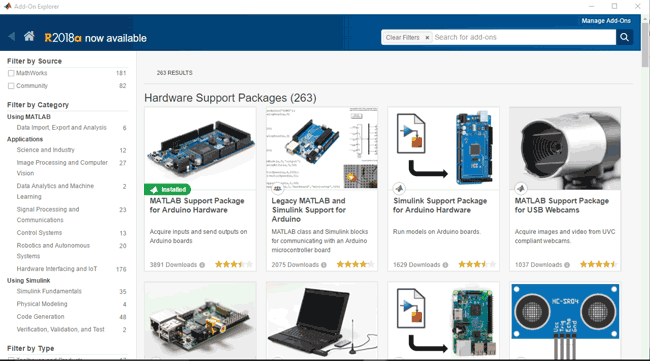
Step 4. Click on MATLAB Support Package for Arduino Hardware.
Step 5. Click on Install, now the installer will ask you to log into your MathWorks account. If you don’t have MathWorks account, you can create an account during installation.
Step 6. After logging in, Accept the license agreement and proceed to installation.
Step 7. Now, wait for the package to download and install.
Step 8. Now you have successfully installed Arduino Support Package for MATLAB.
Testing MATLAB:
After installing the support package for MATLAB, we need to check whether it is installed properly or not.
1. Open MATLAB.
2. Connect Arduino to PC.
3. Type the following command in MATLAB command window.
a = arduino()
4. If we have more than one Arduino connected to PC, then we can specify the board type and COM port to which it is connected using the following command.
a = arduino( ‘COM5’ , ‘uno’ )
5. After entering the above command, MATLAB will try to communicate with your Arduino, if successful, MATLAB will display the properties of Arduino board connected to PC.
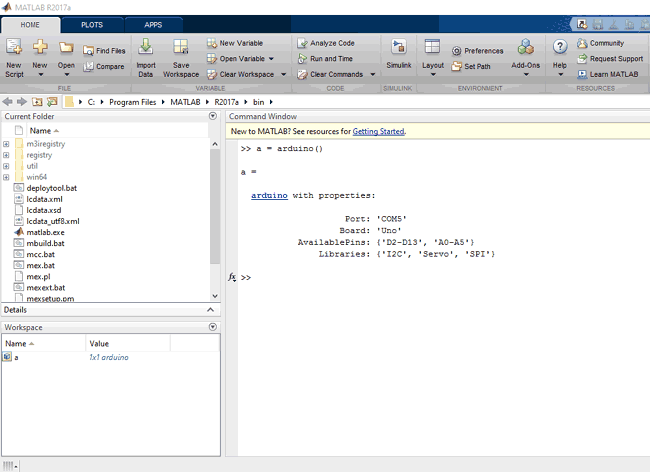
6. Now we can see the variable ‘a’ in the workspace, which is the MATLAB arduino object. To clear the object we can use the following command.
clear a
It will remove the Arduino object from the workspace.
Controlling LEDs using MATLAB and Arduino:
In this example, we are going to blink a LED that is connected to Arduino using MATLAB.
Components Required:
- Arduino
- Resistors
- LEDs
- USB cable for Arduino
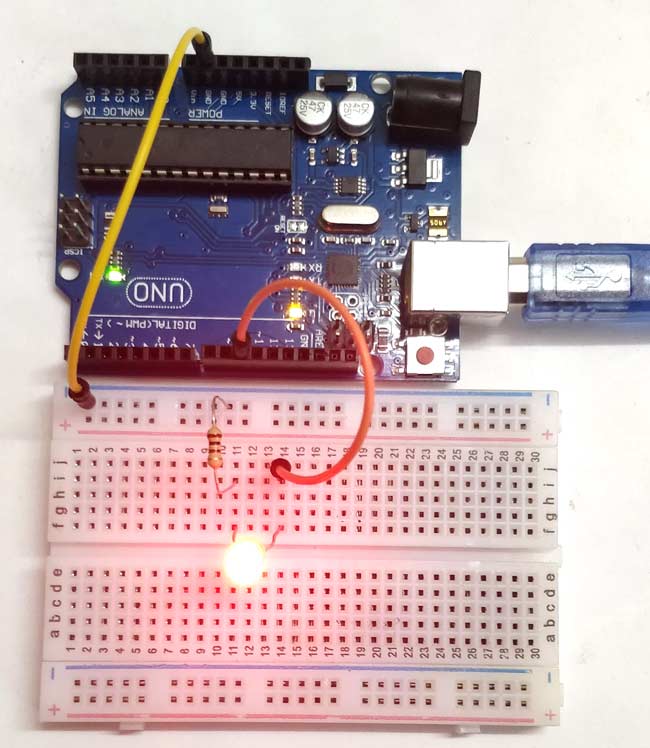
Schematic:

Steps:
- Start MATLAB.
- Connect your Arduino to PC.
- Make the circuit as shown in the schematic.
- Open your .m code.
- Save it and Run.
- LED starts Blinking.
- After blinking 5 times, LED turns off.
Code is very simple and it is given below, copy it and save it in file with .m extension. You can play around the code and customize it according to your requirements. Complete working of the project is demonstrated in the Video below.
Further if you want learn more about MATLAB graphical Interface with Arduino check this project: GUI Based Home Automation System using Arduino and MATLAB
Complete Project Code
% create an arduino object
a = arduino();
% start the loop to blink led for 5 seconds
for i=1:5
    writeDigitalPin(a, 'D10', 1);
    pause(0.5);
    writeDigitalPin(a, 'D10', 0);
    pause(0.5);
end
% end communication with arduino
clear a

Здравствуйте. Я три раза скачала и установила в Matlab программу для Arduino. Всё закончилась успешно, но когда я хочу проверит, командним окне появляется надпис что не правильное функция и проект не получается. Можите мне подсказать где я сделила ощибку?