The DHT22 temperature and humidity sensor is a versatile and cost-effective sensor used to measure ambient temperature and humidity for a wide range of applications. It is based on a digital signal output and can provide high-accuracy measurements with a resolution of 0.1 degrees Celsius for temperature and 0.1% for humidity. The sensor uses a capacitive humidity sensing element and a thermistor to measure the humidity and temperature, respectively. The DHT22 sensor is also relatively low power and can operate on a voltage range of 3.3V to 5V, making it suitable for battery-powered projects. Additionally, the sensor comes with long-term stability and high reliability, which makes it a perfect choice for various applications such as HVAC, weather stations, and indoor air quality monitoring systems. So, in this tutorial, we have decided to interface DHT22 with Arduino UNO and in the process, we will let you know all the details. So without further ado, let's get right into it.
DHT11 Sensor is very much similar to DHT22, and we have used DHT11 sensor with many other microcontrollers to build applications like:
- Interfacing DHT11 Temperature and Humidity Sensor with Raspberry Pi
- MATLAB Data Logging, Analysis and Visualization: Plotting DHT11 Sensor readings on MATLAB
- Automatic AC Temperature Controller using Arduino, DHT11 and IR Blaster
- IoT Weather Station using NodeMCU: Monitoring Humidity, Temperature and Pressure over the Internet
Table of Contents
- DHT22 Temperature and Humidity Sensor Module
- └ Specifications
- DHT22 Module Pinout
- └ DHT22 Module Pinout (3-Pin Version)
- └ DHT22 Bare Sensor Pinout (4-Pin Version)
- Parts Marking of the DHT22 Sensor Module
- Circuit Diagram of DHT22 Module
- DHT22 Sensor Working Principle
- Interfacing DHT22 Sensor with Arduino
- Arduino DHT22 Code
- GitHub Repository
DHT22 Temperature and Humidity Sensor Module
The DHT22 module has a total of 3 pins. And the DHT22 bare bone sensor has 4 pins. If we consider the module among three pins, two of which are power pins, and one is a data pin. If we are looking at the 4-pin sensor, the extra pin is an NC pin, and it has no functions. The pin diagram of both the module and the sensor is shown below.
DHT22 Sensor Specifications at a Glance
| Specification | Value |
|---|---|
| Temperature Range | -40°C to +125°C |
| Temperature Accuracy | ±0.5°C |
| Humidity Range | 0-100% RH |
| Humidity Accuracy | ±2-5% RH |
| Operating Voltage | 3.3V - 5V DC |
| Sampling Rate | 1Hz (once per second) |
| Communication Protocol | Single-wire digital |
Why Choose the DHT22 Humidity Sensor for Arduino Projects?
The DHT22 Module temperature sensor has many advantages when compared to other temperature sensors:
» High Accuracy: The DHT22 temperature and humidity measurements are accurate to 0.1°C and 0.1%, respectively.
» Digital Signal Output: There is no need to convert an analog temperature or humidity reading into a digital signal.
» Low Power: This is the low power option for a project that is using battery-powered IoT devices.
» Long-term Stability: It can hold calibration for multiple months.
» Inexpensive: This is a low-cost option for a weather station or outdoor temperature sensor.
DHT22 Module Pinout
The diagram below shows the pinout of the DHT22 module.

DHT22 Module Pinout (3-Pin Version)
| Pin Number | Pin Name | Function | Arduino Connection |
|---|---|---|---|
| 1 | VCC | Power Supply (3.3V - 5V) | Arduino 5V or 3.3V |
| 2 | DATA | Single-wire digital communication | Any digital pin (e.g., D2) |
| 3 | GND | Ground reference | Arduino GND |
DATA Data Pin for 1-Wire Communication
GND Ground Pin of the Module, Connects to the Ground pin of the Arduino.
VCC Supply Pin of the Module.
Not Used In this sensor, this pin is not used.
DHT22 Bare Sensor Pinout (4-Pin Version)
Important: The 4-pin DHT22 sensor includes an NC (Not Connected) pin. Always refer to the datasheet to identify the correct DATA pin position.
| Pin Position | Function | Note |
|---|---|---|
| Pin 1 | VCC (Power) | Connect to 3.3V or 5V |
| Pin 2 | DATA | Requires 10kΩ pull-up resistor |
| Pin 3 | NC (Not Connected) | Leave unconnected |
| Pin 4 | GND (Ground) | Connect to ground |
Parts Marking of the DHT22 Sensor Module
Aside from the sensor, the DHT22 module comprises only two components on the PCB: a pull-up resistor and a decoupling capacitor. The part marking of the DHT22 module is shown below.

Circuit Diagram of DHT22 Module
The complete schematic diagram of the DHT22 Temperature and Humidity Sensor Module is shown below:

The DHT22 module's schematic diagram is shown above. As previously stated, the board has only a few members. The VCC and GND pins are linked directly to the DHT22, and a pull-up resistor is attached to the DATA pin. Tantalum and multilayer capacitors offer enough filtering. As a power indication, and in some PCBs, you can find an indicator LED, but for most of the board, the LED is not present.
Commonly Asked Questions About DHT22 Sensor Module
⇥ Q. What is DHT22 in a nutshell?
The DHT22 is the more expensive version of the DHT11 sensor, which obviously has better specifications. Its temperature measuring range is from -40 to +125 degrees Celsius with +-0.5 degrees accuracy, while the DHT11 temperature range is from 0 to 50 degrees Celsius with +-2 degrees accuracy.
⇥ Q. Is DHT22 analog or digital?
The DHT-22 (also named AM2302) is a digital-output relative humidity and temperature sensor.
⇥ Q. Is the DHT22 waterproof?
No. It’s not waterproof.
⇥ Q. What’s the sampling rate of a DHT11 sensor?
DHT22 has a sampling rate of 1Hz.
⇥ Q. What protocol does DHT22 use?
The DHT22 sensor uses a proprietary single-bus communication protocol that can send and receive data with calculated timing pulses.
⇥ Q.Is DHT22 Analog or Digital Sensor?
DHT22 is a digital sensor, as it includes a built-in ADC and microcontroller. It provides calibrated digital signals using a single-wire communication protocol, so there is no need for outside analog-to-digital conversion, making interfacing with Arduino and other digital devices easier than connecting to analog sensors.
⇥ Q.What is the difference between DHT11 and DHT22?
DHT22 provides more usable performance. The temperature range of DHT22 is -40°C to +125°C, where DHT11 is listed at 0 to +50°C and likely will not deliver precise data beyond this operating range. DHT22 has an accuracy of ±0.5°C, DHT11 is ±2°C. The humidity range of DHT22 is 0-100% and the humidity accuracy of DHT22 is ±2-5%. DHT11 has a humidity range of 20-80% and humidity accuracy of ±5%. Overall, DHT22 is more than twice the cost of DHT11, but the upgraded temperature, accuracy, and humidity provide the RPI-DIY user with professional-grade data.
⇥ Q.How accurate is DHT22 compared to professional sensors?
In terms of accuracy, DHT22 has a temperature accuracy of ±0.5°C and a humidity accuracy of ±2-5% relative humidity. This would be sufficient for the hobbyist or semi-professional/academic user. Professional-grade meteorological sensors can provide temperature accuracy of ±0.1°C, but they are significantly more expensive than DHT22. For home automation or a personal or DIY weather station, DHT22 is a great choice, providing good quality for the price.
⇥ Q.Which Arduino libraries are compatible with DHT22?
Here are acceptable libraries (most prolific are recommended): Adafruit DHT Sensor Library (most commonly used), DHT sensor library for ESPx, SimpleDHT (lightweight). You can install these libraries through the Arduino Library Manager. The Adafruit library contains examples, heat index calculation, as well as support for variants of the DHT temperature and humidity sensors, DHT11, DHT21, and DHT22, to allow upgrading of sensors easily.
⇥ Q.Is DHT22 waterproof or weatherproof?
A standard DHT22 sensor is not waterproof. For outdoor applications, we recommend using weatherproof housings with appropriate airflow and venting for humidity sensing. Always try not to expose the sensor to direct water, condensation, or extreme weather conditions, if possible. You may also consider using waterproof temperature sensors like DS18B20 for applications when the sensor will be submerged.
DHT22 Sensor Working Principle: How It Measures Temperature and Humidity
Understanding the DHT22 sensor working principle helps troubleshoot issues and optimise performance in your Arduino projects. If you are using an original DHT22 sensor, then it will have an NTC thermistor and the sensor module inside it, but most of the sensors that you can find in the market are mostly non-genuine parts, and inside that, you will find a small sensor that you can see in the image below. The DHT22 temperature and humidity sensor employs an NTC (Negative Temperature Coefficient) thermistor for temperature sensing.

The humidity sensing component consists of a moisture-holding substrate sandwiched between two electrodes. When the substrate absorbs water, the resistance between the two electrodes decreases. The change in resistance between the two electrodes is proportional to the relative humidity. Higher relative humidity decreases the resistance between the electrodes, while lower relative humidity increases the resistance between the electrodes. This change in resistance is measured with the onboard MCU’s ADC, and the relative humidity is calculated.
Each DHT22 element is strictly calibrated in the laboratory, which is extremely accurate in humidity calibration. The calibration coefficients are stored as programs in the OTP memory, which are used by the sensor’s internal signal detecting process.
DHT22 Communication Protocol: Single-Wire Data Transmission
The DHT22 module communicates with Arduino using a proprietary single-wire protocol. Understanding this protocol helps troubleshoot communication issues in your projects. A single bus communication protocol is used to communicate with the DHT22 and microcontroller. A sample of data takes about 4ms to run down. This data consists of decimal and integer parts. The total data is 40 bits long, and it's in MSB format. The Data format is as follows: 8-bit integral RH data + 8-bit decimal RH data + 8-bit integral T data + 8-bit decimal T data + 8-bit checksum. If the data transmission is right, the checksum should be the last 8 bits of "8-bit integral RH data + 8-bit decimal RH data + 8-bit integral T data + 8-bit decimal T data".
When the MCU sends the start signal, DHT changes from low power mode to running mode and dumps all the 40-bit data to the microcontroller. The microcontroller reads the data and calculates the temperature and humidity from the binary data.

The image above shows how the data communication works with the microcontroller and the DHT22.
Interfacing DHT22 Sensor with Arduino: Complete Circuit Diagram
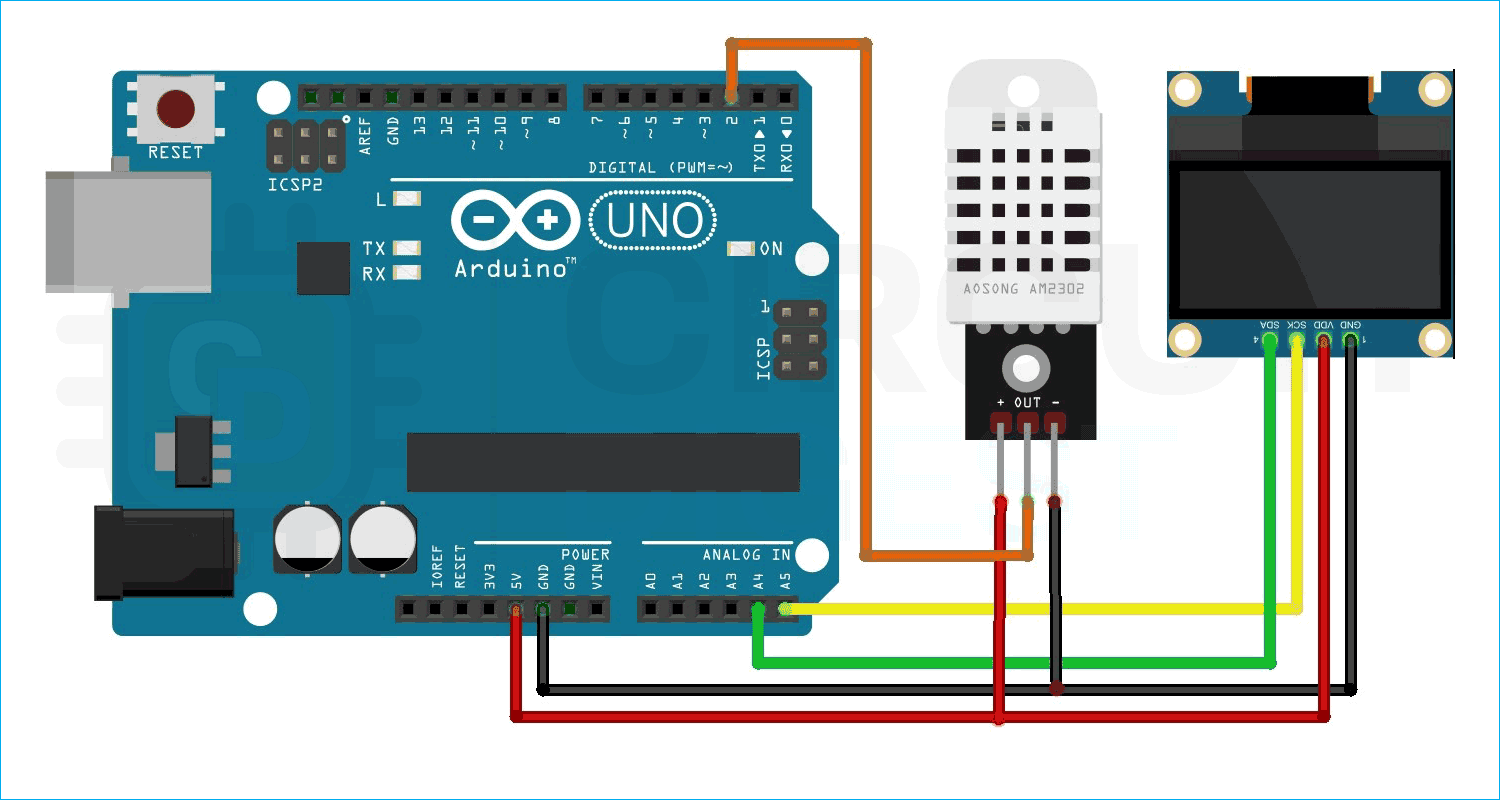
Now that we have completely understood how a DHT22 Sensor works, we can connect all the required wires to the Arduino and write the code to get all the data out from the sensor. The following image shows the circuit diagram for interfacing the DHT22 sensor module with Arduino. Connecting the Arduino DHT22 sensor is straightforward, requiring only three wires.
Connections are simple and only require three wires. Connect the VCC and GND of the module to the 5V and GND pins of the Arduino. Then connect the DATA pin to Arduino’s digital pin 2. We communicate with DHT22 through this pin.

Arduino DHT22 Code: Complete Programming Guide
Now let’s look at the code for interfacing the DHT22 sensor. First, install the Adafruit DHT sensor library and Adafruit Unified Sensor Driver through the library manager. Then create a blank sketch and paste the code at the end of this article into it.
#include <Wire.h>
#include "DHT.h"
#include <Adafruit_GFX.h>
#include <Adafruit_SSD1306.h>
At the start, we have included all the necessary libraries and defined the sensor type as DHT22 and the sensor pin as digital pin 2. And then created an instance for the DHT library.
#define DHTTYPE DHT22
Adafruit_SSD1306 display = Adafruit_SSD1306(128, 64, &Wire, -1);
unsigned long delayTime;
uint8_t DHTPin = 2;
DHT dht(DHTPin, DHTTYPE);
float Temperature;
float Humidity;
float Temp_Fahrenheit;
Next, we have our setup() function. In the setup function, we initialise the serial for debugging, we initialise the DHT, and we also initialise the display. We also set the text size and make the display colour white.
void setup() {
  Serial.begin(115200);
  pinMode(DHTPin, INPUT);
  dht.begin();
  display.begin(SSD1306_SWITCHCAPVCC, 0x3C);
  display.display();
  delay(100);
  display.clearDisplay();
  display.display();
  display.setTextSize(1.75);
  display.setTextColor(WHITE);
}
Next, we have our loop function. In the loop function, we get the humidity, we get the temperature, and we get the temperature in Celsius and Fahrenheit.
void loop(){
  Humidity = dht.readHumidity();
  // Read temperature as Celsius (the default)
  Temperature = dht.readTemperature();
  // Read temperature as Fahrenheit (isFahrenheit = true)
  Temp_Fahrenheit = dht.readTemperature(true);
  // Check if any reads failed and exit early (to try again).
  if (isnan(Humidity) || isnan(Temperature) || isnan(Temp_Fahrenheit)) {
    Serial.println(F("Failed to read from DHT sensor!"));
    return;
  }
}
Next, we print the data on the serial monitor and OLED;
Serial.print(F("Humidity: "));
  Serial.print(Humidity);
  Serial.print(F("%  Temperature: "));
  Serial.print(Temperature);
  Serial.print(F("°C "));
  Serial.print(Temp_Fahrenheit);
  Serial.println(F("°F "));
  display.setCursor(0, 0);
  display.clearDisplay();
  display.setTextSize(1);
  display.setCursor(0, 0);
  display.print("Temperature: ");
  display.setTextSize(2);
  display.setCursor(0, 10);
  display.print(Temperature);
  display.print(" ");
  display.setTextSize(1);
  display.cp437(true);
  display.write(167);
  display.setTextSize(2);
  display.print("C");
  display.setTextSize(1);
  display.setCursor(0, 35);
  display.print("Humidity: ");
  display.setTextSize(2);
  display.setCursor(0, 45);
  display.print(Humidity);
  display.print(" %");
  display.display();
  delay(1000);
}
Technical Summary and GitHub Repository
A technical summary explains the project’s concept and functionality in a simplified form, whereas the GitHub repository showcases the full technical execution and source code. This combination ensures transparency and reproducibility.
This tutorial was created by the Circuit Digest engineering team. Our experts focus on creating practical, hands-on tutorials that help makers and engineers master Raspberry Pi projects, Arduino projects, Electronic projects and IoT development projects.
I hope you liked this article and learned something new from it. If you have any doubts, you can ask in the comments below or use our forum for a detailed discussion.
Projects using DHT22 Sensor and Arduino
In our previous attempts, there were some interesting projects done with the DHT22 sensor. If you want to know more about those topics, links are given below.
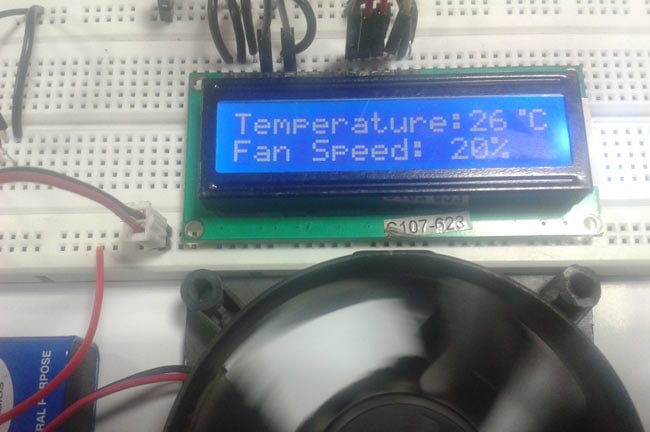
Arduino Temperature Control - Adjust Fan Speed based on Temperature
In this project, we are going to build a temperature-controlled fan using Arduino. With this circuit, we will be able to adjust the fan speed in our home or office according to the room temperature and also show the temperature and fan speed changes on a 16x2 LCD display.
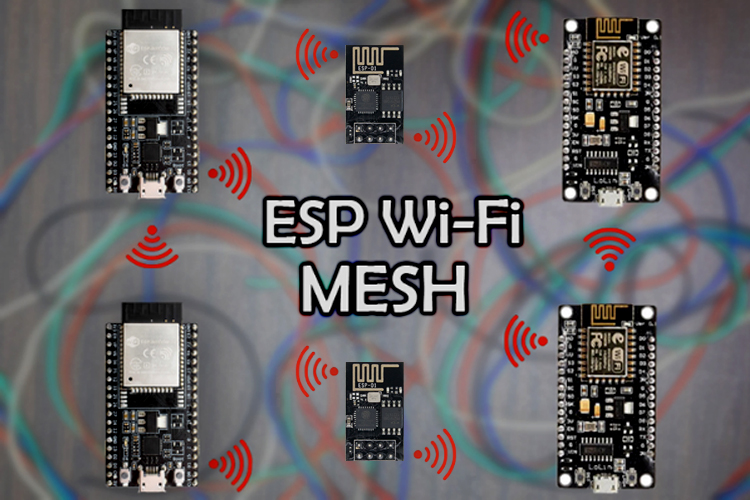
If you are a Python developer and looking for a way to use Python with ESP8266 or ESP32, then this project is for you, because in this project, we have not only used Python with ESP, but we have also used a DHT22 as an example to send data through a message.
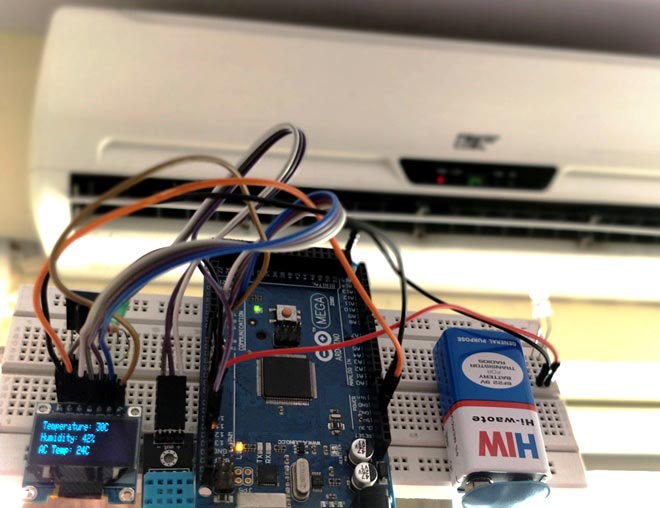
Automatic AC Temperature Controller using Arduino, DHT11 and IR Blaster
In this project, we are going to make a small Automatic Temperature Control Circuit that could minimise the electricity charges by varying the AC temperature automatically based on the Room's temperature.
Complete Project Code
#include <Wire.h>
#include "DHT.h"
#include <Adafruit_GFX.h>
#include <Adafruit_SSD1306.h>
  void setup() {
    Serial.begin(115200);
    pinMode(DHTPin, INPUT);
    dht.begin();
    display.begin(SSD1306_SWITCHCAPVCC, 0x3C);
    display.display();
    delay(100);
    display.clearDisplay();
    display.display();
    display.setTextSize(1.75);
    display.setTextColor(WHITE);
  }
void loop(){
  Humidity = dht.readHumidity();
  // Read temperature as Celsius (the default)
  Temperature = dht.readTemperature();
  // Read temperature as Fahrenheit (isFahrenheit = true)
  Temp_Fahrenheit = dht.readTemperature(true);
  // Check if any reads failed and exit early (to try again).
  if (isnan(Humidity) || isnan(Temperature) || isnan(Temp_Fahrenheit)) {
    Serial.println(F("Failed to read from DHT sensor!"));
    return;
  }
  Serial.print(F("Humidity: "));
  Serial.print(Humidity);
  Serial.print(F("%  Temperature: "));
  Serial.print(Temperature);
  Serial.print(F("°C "));
  Serial.print(Temp_Fahrenheit);
  Serial.println(F("°F "));
  display.setCursor(0, 0);
  display.clearDisplay();
  display.setTextSize(1);
  display.setCursor(0, 0);
  display.print("Temperature: ");
  display.setTextSize(2);
  display.setCursor(0, 10);
  display.print(Temperature);
  display.print(" ");
  display.setTextSize(1);
  display.cp437(true);
  display.write(167);
  display.setTextSize(2);
  display.print("C");
  display.setTextSize(1);
  display.setCursor(0, 35);
  display.print("Humidity: ");
  display.setTextSize(2);
  display.setCursor(0, 45);
  display.print(Humidity);
  display.print(" %");
  display.display();
  delay(1000);
}


