
Machine Learning and Artificial Intelligence are the trending topics in the industries now days and we can see their increasing involvement with the launch of every new electronics device. Almost every application of Computer science engineering is using Machine Learning for analyzing and predicting the future results. Already, there are many devices rolled in the market that are using the power of Machine learning and Artificial Intelligence, like Smartphone’s camera uses AI enabled features for face detection and telling the apparent age from the face detection. Explore hands-on learning with these AI projects and tutorials covering embedded AI, IoT, and smart systems.
There is no surprise that Google is one of the pioneers in this technology. Google already made many ML and AI frameworks that we can easily implement in our applications. TensorFlow is one of the well known Google’s open source Neural Network library which is used in machine learning applications like Image classification, object detections, etc.
In upcoming years, we will see more use of AI in our daily life and AI will be able to handle your daily tasks like ordering grocery online, driving a car, control your home appliances etc. So, why we left behind to exploit some machine algorithms on portable devices like Raspberry Pi.
In this tutorial, we will learn how to install TensorFlow on Raspberry Pi and will show some examples with simple image classification on a pre-trained neural network. We previously used Raspberry Pi for other Image Processing tasks like Optical Character Recognition, Face Recognition, Number Plate Detection etc.
Requirements
- Raspberry Pi with Raspbian OS installed in it (SD card atleast 16 GB)
- Working Internet Connection
Here, we will use SSH to access Raspberry Pi on the laptop. You can use VNC or Remote Desktop connection on the laptop, or can connect your Raspberry pi with a monitor. Learn more about setting up Raspberry Pi headlessly here without a monitor.
Raspberry pi, being a portable and less power consuming device, is used in many real-time image processing applications like Face Recognition, object tracking, Home security system, Surveillance camera etc. Any by using any Computer Vision software like OpenCV with Raspberry Pi, lot of powerful image processing applications can be built.
In past, installing TensorFlow was quite a difficult job but recent contribution of ML and AI developers made it very simple and now it can be installed just by using few commands. If you know some basics of Machine learning and deep learning it will be helpful for you to know whats going inside the neural network. But even If you are new to Machine learning domain, there will be no problem you can still continue with the tutorial and use some example programs to learn it.
Installing TensorFlow in Raspberry Pi
Below are the steps for installing TensorFlow in Raspberry pi:
Step 1: Before installing TensorFlow in Raspberry Pi, first update and upgrade the Raspbian OS by using following commands
sudo apt-get update
sudo apt-get upgrade
Step 2: Then Install the Atlas library to get support for the Numpy and other dependencies.
sudo apt install libatlas-base-dev
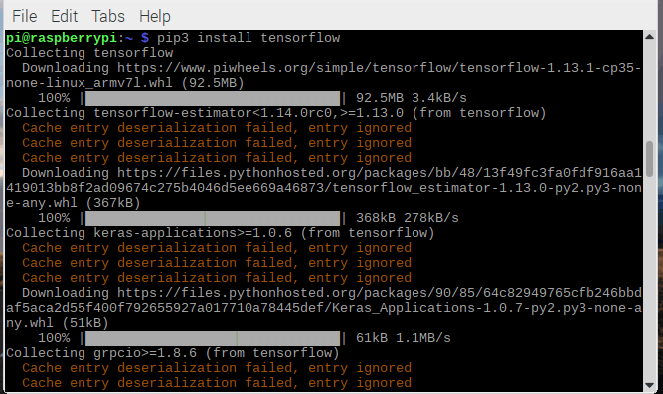
Step 3: Once that is finished, install TensorFlow via pip3 using below command
pip3 install tensorflow
It will take some to install the TensorFlow, if you face some error while installing, just retry it using above command.
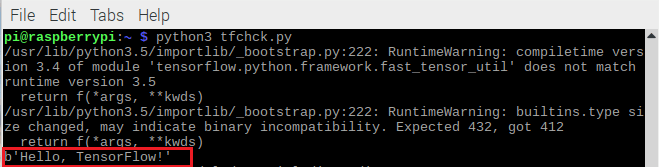
Step 4: After successful installation of TensorFlow, we will check whether it is installed properly by using a small Hello world program. To do that Open nano text editor using below command:
sudo nano tfcheck.py
And Copy-paste below lines in nano terminal and save it using ctrl+x and hit enter.
import tensorflow as tf
hello = tf.constant('Hello, TensorFlow!')
sess = tf.Session()
print(sess.run(hello))
Step 5: Now, run this script in the terminal using below command
python3 tfcheck.py
If all the packages installed properly then you will see a Hello Tensorflow! message in last line as shown below, ignore all the warnings.
It works fine and now we will do something interesting using TensorFlow and you don’t need to have any knowledge of Machine learning and deep learning to do this project. Here a image is fed in a pre-built model and TensorFlow will identify the image. TensorFlow will give the nearest probability of what is in the image.
Installing Image Classifier on Raspberry Pi for Image Recognition
Step 1:- Make a directory and navigate to the directory using below commands.
mkdir tf
cd tf
Step 2:- Now, download the models which is available on TensorFlow GIT repository. Clone the repository into the tf directory using below command
git clone https://github.com/tensorflow/models.git
This will take some time to install, and it is big in size so make sure you have sufficient data plan.
Step 3:- We will use image classification example which can be found in models/tutorials/image/imagenet. Navigate to this folder using below command
cd models/tutorials/image/imagenet
Step 4:- Now, feed an image in the pre-built neural network using below command.
python3 classify_image.py --image_file=/home/pi/image_file_name
Replace image_file_name with the image that you have to feed and then hit enter.
Below are some examples of detecting and recognizing images using TensorFlow.


Not bad! the neural net classified the image as a Egyptian cat with a high degree of certainty when compared to the other options.

In all the above examples, results are pretty good and the TensorFlow can easily classify the images with the close certainty. You can try this using your customize images.
If you have some knowledge of Machine learning then it can perform Object detection on this platform using some libraries.
