Hello guys, in this blog, we will learn how to program a Raspberry Pi Pico W in Micropython, we will learn in depth about its features, how to use its Wi-Fi to connect to the internet and last but not the least how to control an led, using a custom webserver, from any where in the world. You can also check how to build an ESP32 webserver or a ESP8266 NodeMCU Webserver if you want to try developments other than Raspberry pi Pico W
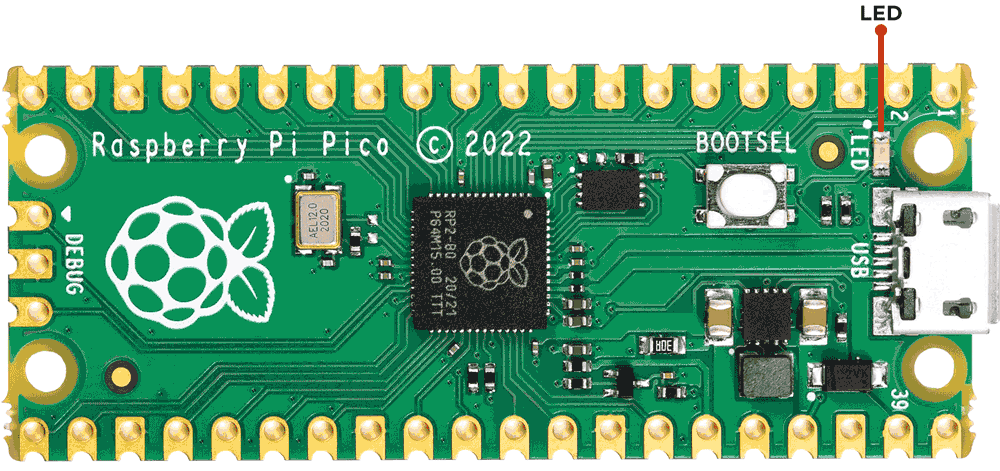
Raspberry Pi Pico W
The Raspberry Pi Foundation launched the Pico W, a microcontroller based on the RP2040 chip. It was priced at $6. The Pico W included an 802.11n WiFi radio, making it suitable for IoT projects.
The Pico W could be used as a drop-in replacement for projects based on its predecessor- the Pico, offering the convenience of built-in WiFi and Bluetooth.
Support for Bluetooth has been recently added to its software stack, but even then it is limited to c/c++ programming language. Micropython support is yet to be added to the pico W (hence we will not cover Bluetooth in this tutorial. Only wifi will be covered)
Circuit Diagram
Below is the circuit diagram for IoT based Raspberry Pi controlled LED:
Setting up Raspberry Pi Pico W for Micropython
Connect the Raspberry Pi Pico W to your computer using a micro USB cable.
Download and install the Thonny IDE.
Open Thonny and click on Tools>options

In the options menu, click on "Interpreter" and select "Raspberry Pi Pico" from the list.

Thonny will install the necessary firmware on the Pico W and make it ready for programming.
Copy and paste the below code in the thonny ide. This code should make the inbuilt LED blink on the pico W
import machine
import time
led_pin = machine.Pin(25, machine.Pin.OUT)
while True:
    led_pin.toggle()
    time.sleep(1)
The result will look something like this.
Uploading code to the Pico
- Connect the Raspberry Pi Pico W to your computer using a micro USB cable.
Click on "File" in the menu bar and select "Save As" to save the code file.

- Choose a suitable location on your raspberry pi pico and save the file with a ".py" extension (e.g., "blink.py").
In Thonny, click on "Run" in the menu bar and select "Run current script" or press the F5 key.

- Thonny will upload the code to the Pico W, and the LED web server will start running.
Writing Micropython code for connecting to Wi-Fi
Let’s check out simple code to connect to wifi hotspot
import network
from time import sleep
import machine
First thing we need to do is import all the necessary packages for connecting to Wi-Fi in Thonny IDE.
ssid = 'NAME OF YOUR WIFI NETWORK'
password = 'YOUR SECRET PASSWORD'
These are the variables which is basically the hotspot network the pico W will connect. you can replace and put your SSID and password there.
def connect():
                 wlan = network.WLAN(network.STA_IF)
                 wlan.active(True)
                 wlan.connect(ssid, password)
                 while wlan.isconnected() == False:
               print('Waiting for connection...')
               sleep(1)
                print(wlan.ifconfig())
This is a function which will activate WLAN which will in turn help us in creating the connection. The first line network.WLAN(network.STA_IF) configures the device as a client. wlan.active(True) activates the wifi and wlan.connect(ssid,password) establishes the wifi connection. The next line is a while loop which waits for connection and when a connection is established. the loop ends and the wifi ip adress and other details are printed.
try:
   connect()
except KeyboardInterrupt():
   machine.reset()
The code here is simple. It keeps trying to call the connect function. and if there is any other input in between. the pico resets automatically.

Writing Micropython Code for LED Webserver
Now that we are done with wifi connecting example. Let’s find out how we can create a webserver through which we can control our led. Below is the explanation of the code. The complete code can be found at the absolute bottom of this blog.
try:
  import usocket as socket
except:
  import socket
This code attempts to import the usocket module, which is a MicroPython-specific implementation of the socket module. If it fails, it falls back to importing the standard socket module.
from machine import Pin
import network
import gc
gc.collect()
These lines import the necessary modules: Pin from the machine module for controlling GPIO pins, network for network-related operations. The gc.collect() call performs garbage collection to free up memory.
ssid = 'your ssid'
password = 'your password'
station = network.WLAN(network.STA_IF)
station.active(True)
station.connect(ssid, password)
Here, the code sets the Wi-Fi network name (ssid) and password (password).you need to replace the ssid and password with your own hotspot. The station variable represents the Wi-Fi station interface. The code activates the station interface and connects to the specified network using the provided credentials.
while station.isconnected() == False:
  pass
This loop waits until the station interface is successfully connected to the Wi-Fi network.
print('Connection successful')
print(station.ifconfig())
Once the connection is established, these lines print a success message and display the IP address assigned to the microcontroller.
led = Pin('LED', Pin.OUT)
led_state = "OFF"
This code initializes the led variable to control the LED connected to the GPIO pin named 'LED' which is the default led connected to pin 25. It configures the pin as an output (Pin.OUT) and sets the initial state of the LED to "OFF".
def wepage():
<html>
<head>
    <meta name="viewport" content="width=device-width, initial-scale=1">
    <link rel="stylesheet" href="https://use.fontawesome.com/releases/v5.7.2/css/all.css"
     integrity="sha384-fnmOCqbTlWIlj8LyTjo7mOUStjsKC4pOpQbqyi7RrhN7udi9RwhKkMHpvLbHG9Sr" crossorigin="anonymous">
    <style>
        html {
            font-family: Arial;
            display: inline-block;
            margin: 0px auto;
            text-align: center;
        }
        .button {
            background-color: #ce1b0e;
            border: none;
            color: white;
            padding: 16px 40px;
            text-align: center;
            text-decoration: none;
            display: inline-block;
            font-size: 16px;
            margin: 4px 2px;
            cursor: pointer;
        }
        .button1 {
            background-color: #000000;
        }
    </style>
</head>
<body>
    <h2>Raspberry Pi Pico Web Server</h2>
    <p>LED state: <strong>""" + led_state + """</strong></p>
    <p>
        <i class="fas fa-lightbulb fa-3x" style="color:#c81919;"></i>
        <a href=\"led_on\"><button class="button">LED ON</button></a>
    </p>
    <p>
        <i class="far fa-lightbulb fa-3x" style="color:#000000;"></i>
        <a href=\"led_off\"><button class="button button1">LED OFF</button></a>
    </p>
</body>
</html>
The html code is inside a function called webpage.
This HTML code creates a simple web page with the following elements:
The <head> section includes a viewport meta tag for responsive design and a link to include a CSS file.
The CSS styles defined within the <style> tags are applied to the HTML elements. Here, the html element is centered, and there are styles defined for two classes: .button and .button1.
The <body> section contains the content of the web page.
The heading <h2> displays the text "Raspberry Pi Pico Web Server".
The paragraph <p> displays the current state of the LED using the led_state variable.
There are two paragraphs with buttons, each containing an icon and a button element wrapped in an anchor <a> tag. The first button has the class button, and the second button has both button and button1 classes.
When this HTML page is served by the web server, it will display the LED state and provide buttons to turn the LED on and off.
s = socket.socket(socket.AF_INET, socket.SOCK_STREAM)
The code creates a socket s using socket.socket() and specifies the address family (socket.AF_INET) and socket type (socket.SOCK_STREAM).
s.bind(('', 80))binds the socket to the specified IP address ('' means all available interfaces) and port number 80.
s.listen(5)
sets the socket to listen for incoming connections. The parameter 5 specifies the maximum number of queued connections.
while True:
    try:
        conn, addr = s.accept()
        conn.settimeout(3.0)
        print('Received HTTP GET connection request from %s' % str(addr))
        request = conn.recv(1024)
        conn.settimeout(None)
        request = str(request)
        print('GET Request Content = %s' % request)
The code enters an infinite loop to continuously accept incoming connections.
s.accept() waits until a client connects and returns a new socket conn for communication and the client address addr.
conn.settimeout(3.0) sets a timeout of 3 seconds for the socket operations.
The code prints information about the client that made the connection and receives the HTTP GET request from the client using conn.recv(1024). The request is then converted to a string for further processing.
led_on = request.find('/led_on')
led_off = request.find('/led_off')
if led_on == 6:
    print('LED ON -> GPIO25')
    led_state = "ON"
    led.on()
if led_off == 6:
    print('LED OFF -> GPIO25')
    led_state = "OFF"
    led.off()
The code searches for the presence of '/led_on' and '/led_off' in the received request using the find() method.
If '/led_on' is found at position 6, it means that the LED should be turned on. The code sets the LED state, turns the LED on, and updates the led_state variable accordingly.
If '/led_off' is found at position 6, it means that the LED should be turned off. The code sets the LED state, turns the LED off, and updates the led_state variable accordingly.
response = web_page()
conn.send('HTTP/1.1 200 OK\n')
conn.send('Content-Type: text/html\n')
conn.send('Connection: close\n\n')
conn.sendall(response)
conn.close()
The code generates the HTML response using the web_page() function.
It sends the HTTP response headers to the client using conn.send().
It sends the response content using conn.sendall().
Finally, it closes the connection with the client using conn.close().
except OSError as e:
    conn.close()
    print('Connection closed')
If an OSError occurs during the execution, it means there was an issue with the connection. The code closes the connection with the client and prints a message indicating that the connection was closed.
This code sets up a basic web server that listens for HTTP GET requests, handles requests to turn the LED on or off, and sends an HTML response back to the client.
Test the Webserver
Open a web browser on any device connected to the same network as the Raspberry Pi Pico W.
Enter the IP address of the Pico W in the address bar of your connected device. In this example, I’ve used my smartphone. You can find the IP address printed on the screen after you run the above code

When you put the address in your browser’s address bar. You should see a simple web page with buttons to turn the LED on and off.
Click on the buttons to control the LED.
Projects Using Raspberry Pi Pico
Temperature Data Logger using Raspberry Pi Pico and DHT22 Temperature Sensor
Discover the fascinating world of temperature monitoring with our latest project, the Temperature Data Logger. Leveraging the power of Raspberry Pi Pico and the precision of the DHT22 temperature sensor, we have developed a versatile and efficient solution for tracking temperature variations. In this blog post, we delve into the step-by-step process of setting up the hardware, configuring the software, and logging temperature data with impressive accuracy.
How to Program Raspberry Pi Pico using C/C++ SDK
Unlock the full potential of your Raspberry Pi Pico with our comprehensive guide on programming it using the C/C++ SDK. In this tutorial, we take you through the essential steps to set up your development environment, install the necessary tools, and dive into writing your first C/C++ program for the Raspberry Pi Pico. With our easy-to-follow instructions and sample code, you'll learn how to harness the power of this versatile microcontroller, tapping into its GPIO pins, peripherals, and advanced features.
Dual Core Programming on the Raspberry Pi Pico using MicroPython
Understand the untapped potential of the Raspberry Pi Pico with dual core programming using MicroPython. In this tutorial, we delve into the exciting world of multi-core processing and show you how to leverage the two cores of the Raspberry Pi Pico to unlock enhanced performance and capabilities. Learn how to harness the power of parallel processing, distribute tasks across cores, and synchronize their operations for efficient and responsive applications.
Supporting Files
You can download all the necessary files from the Circuit Digest GitHub repo, from the following link
Complete Project Code
# Pico W led blink

import machine
import time

led_pin = machine.Pin(25, machine.Pin.OUT)

while True:
  led_pin.toggle()
  time.sleep(1)

# Pico W led webserver

try:
 import usocket as socket
except:
 import socket

from machine import Pin
import network

import gc
gc.collect()

ssid = 'Enter_Your_SSID'
password = 'Enter_Your_PASSWORD'

station = network.WLAN(network.STA_IF)

station.active(True)
station.connect(ssid, password)

while station.isconnected() == False:
 pass

print('Connection successful')
print(station.ifconfig())

led = Pin('LED', Pin.OUT)
led_state = "OFF"

def web_page():
 html = """<html>

<head>
    <meta name="viewport" content="width=device-width, initial-scale=1">
    <link rel="stylesheet" href="https://use.fontawesome.com/releases/v5.7.2/css/all.css"
     integrity="sha384-fnmOCqbTlWIlj8LyTjo7mOUStjsKC4pOpQbqyi7RrhN7udi9RwhKkMHpvLbHG9Sr" crossorigin="anonymous">
    <style>
        html {
            font-family: Arial;
            display: inline-block;
            margin: 0px auto;
            text-align: center;
        }

        .button {
            background-color: #ce1b0e;
            border: none;
            color: white;
            padding: 16px 40px;
            text-align: center;
            text-decoration: none;
            display: inline-block;
            font-size: 16px;
            margin: 4px 2px;
            cursor: pointer;
        }

        .button1 {
            background-color: #000000;
        }
    </style>
</head>

<body>
    <h2>Raspberry Pi Pico Web Server</h2>
    <p>LED state: <strong>""" + led_state + """</strong></p>
    <p>
        <i class="fas fa-lightbulb fa-3x" style="color:#c81919;"></i>
        <a href=\"led_on\"><button class="button">LED ON</button></a>
    </p>
    <p>
        <i class="far fa-lightbulb fa-3x" style="color:#000000;"></i>
        <a href=\"led_off\"><button class="button button1">LED OFF</button></a>
    </p>
</body>

</html>"""
    return html


s = socket.socket(socket.AF_INET, socket.SOCK_STREAM)
s.bind(('', 80))
s.listen(5)

while True:
    try:
        conn, addr = s.accept()
        conn.settimeout(3.0)
        print('Received HTTP GET connection request from %s' % str(addr))
        request = conn.recv(1024)
        conn.settimeout(None)
        request = str(request)
        print('GET Rquest Content = %s' % request)
        led_on = request.find('/led_on')
        led_off = request.find('/led_off')
        if led_on == 6:
            print('LED ON -> GPIO25')
            led_state = "ON"
            led.on()
        if led_off == 6:
            print('LED OFF -> GPIO25')
            led_state = "OFF"
            led.off()
        response = web_page()
        conn.send('HTTP/1.1 200 OK\n')
        conn.send('Content-Type: text/html\n')
        conn.send('Connection: close\n\n')
        conn.sendall(response)
        conn.close()
    except OSError as e:
        conn.close()
        print('Connection closed')


