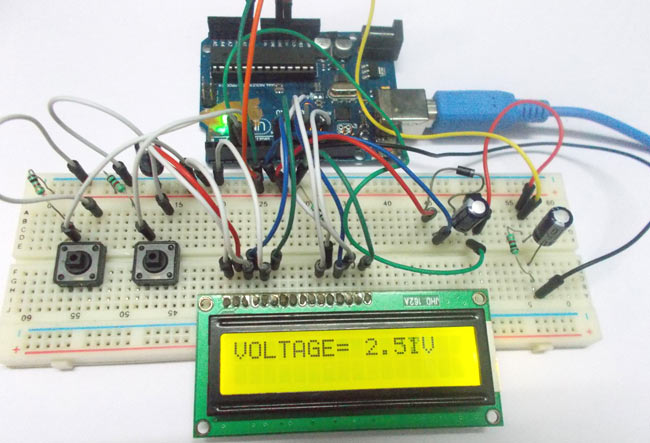
In this tutorial, we will develop a 5V variable voltage source from Arduino Uno. For that, we are going to use ADC (Analog to Digital Conversion) and PWM (Pulse Width Modulation) features.
Some digital electronic modules, like accelerometers, work on a voltage of 3.3V, and some work on 2.2V. Some even work on lower voltages. With this, we cannot get a regulator for every one of them. So here we will make a simple circuit which will provide a voltage output from 0-5 volts at a resolution of 0.05V. So with this, we may provide voltages accurately for the other modules. In this project, we'll construct an Arduino based power supply, also referred to as an Arduino adjustable power supply, which allows software-driven voltage adjustment. We have also done projects like SMPS Power Supply Circuits, Variable Voltage Regulator Circuit.
This Arduino variable power supply circuit can provide currents up to 100mA, making it perfect for:
- Powering sensor modules and small electronic components
- Testing circuits with different voltage requirements
- Charging AA or AAA rechargeable batteries
- Educational projects and prototyping
With the integrated LCD, you can easily monitor voltage fluctuations in real-time. This Arduino controlled variable power supply features a simple button interface for precise voltage programming.
Table of Contents
- Components Required for Arduino Based Power Supply
- Arduino Variable Power Supply Circuit Diagram and Working
- Arduino UNO ADC and PWM Features
- └ Analog-to-Digital Converter (ADC)
- └ Pulse Width Modulation (PWM)
- Frequently Asked Questions
- Arduino Controlled Variable Power Supply GitHub Repository
- Projects using Power Supply Circuit
Components Required for Arduino Based Power Supply
» Hardware:
- Arduino Uno,
- Power supply (5v),
- 100uF capacitor (2 pieces),
- button (2 pieces),
- 1KΩ resistor (3 pieces),
- 16*2 characters LCD,
- 2N2222 transistor
» Software: Atmel Studio 6.2 or AURDINO nightly.
Arduino Variable Power Supply Circuit Diagram and Working
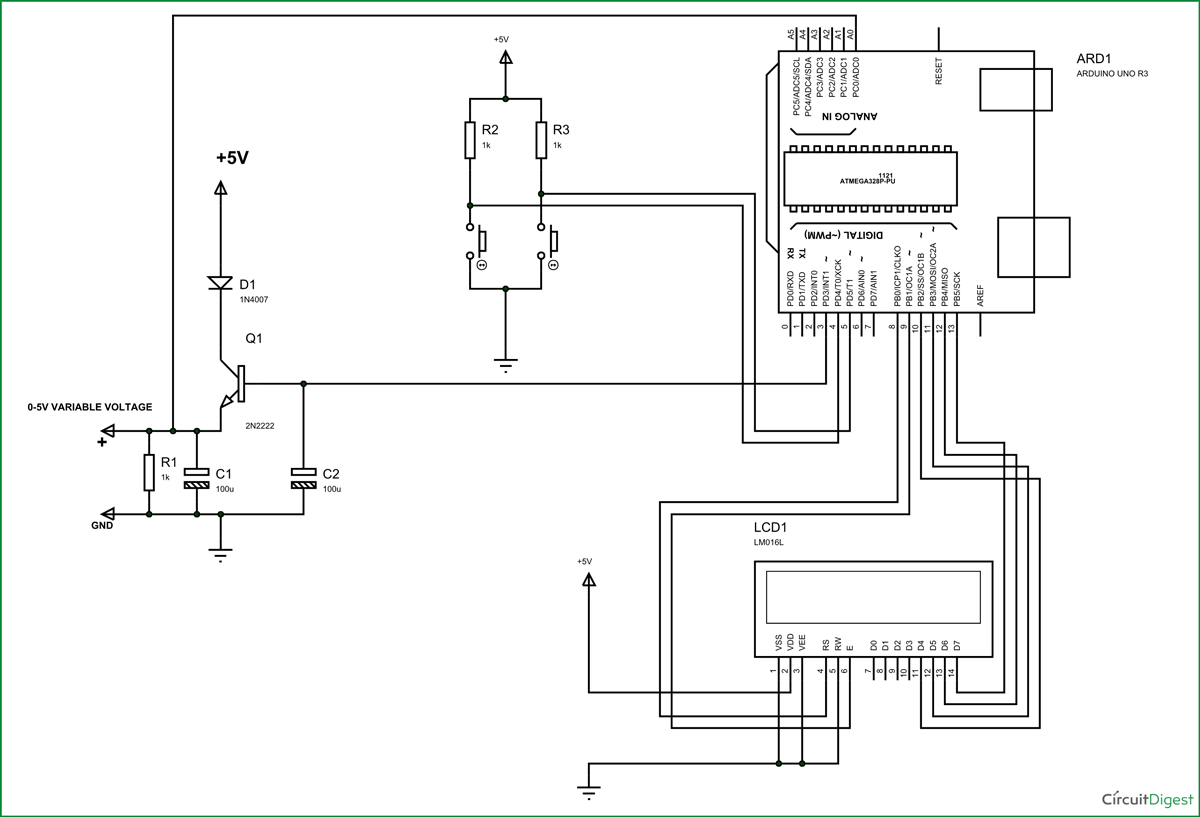
The circuit for the variable voltage unit using Arduino is shown in the diagram below. This Arduino variable power supply diagram clearly illustrates how each component is connected to enable real-time output voltage control and monitoring.
The voltage across output is not completely linear; it will be a noisy one. To filter out the noise capacitors are placed across output terminals as shown in figure. The two buttons here are for voltage increment and decrement. The Arduino variable power supply wiring diagram shows the voltage at the OUTPUT terminals.
Arduino UNO ADC and PWM Features
Before going for working we need to look into ADC and PWM features of Arduino UNO.
Analog-to-Digital Converter (ADC)
Here we are going to take the voltage provided at the OUTPUT terminal and feed it into one of ADC channels of Arduino. After conversion we are going to take that DIGITAL value and we will relate it to voltage and show the result in 16*2 display. This value on display represents the variable voltage value.
ARDUINO has six ADC channels, as show in figure. In those any one or all of them can be used as inputs for analog voltagein our variable power supply circuit. The UNO ADC is of 10 bit resolution (so the integer values from (0-(2^10) 1023)).This means that it will map input voltages between 0 and 5 volts into integer values between 0 and 1023. So for every (5/1024= 4.9mV) per unit.
Here we are going to use A0 of UNO.
|
First of all the UNO ADC channels has a default reference value of 5V. This means we can give a maximum input voltage of 5V for ADC conversion at any input channel. Since some sensors provide voltages from 0-2.5V, with a 5V reference we get lesser accuracy, so we have a instruction that enables us to change this reference value. So for changing the reference value we have (“analogReference();”) For now we leave it as.
As default we get the maximum board ADC resolution which is 10bits, this resolution can be changed by using the instruction (“analogReadResolution(bits);”). This resolution change can come in handy for some cases. For now we leave it as.
Now if the above conditions are set to default, the we can read value from ADC of channel ‘0’ by directly calling function “analogRead(pin);”, here “pin” represents pin where we connected analog signal, in this case it would be “A0”.
The value from ADC can be taken into an integer as “float VOLTAGEVALUE = analogRead(A0); ”, by this instruction the value after ADC gets stored in the integer “VOLTAGEVALUE”.
Pulse Width Modulation (PWM)
The PWM of UNO can achieved at any of pins symbolized as “ ~ ” on the PCB board. There are six PWM channels in UNO. We are going to use PIN3 for our purpose.
analogWrite(3,VALUE); |
From above condition we can directly get the PWM signal at the corresponding pin. The first parameter in brackets is for choosing the pin number of PWM signal. Second parameter is for writing duty ratio.
The PWM value of UNO can be changed from 0 to 255. With “0” as lowest to “255” as highest. With 255 as duty ratio we will get 5V at PIN3. If the duty ratio is given as 125 we will get 2.5V at PIN3
As said earlier there are two buttons connected to PIN4 and PIN5 of UNO. On press the duty ratio value of PWM will increase. When other button is pressed the duty ratio value of PWM decreases. So we are varying the duty ratio of PWM signal at PIN3.
This PWM signal at PIN3 is fed to the base of NPN transistor. This transistor provides a variable voltage at its emitter, while acting as a switching device.
With the variable duty ratio PWM at base there will be variable voltage at emitter output. With this we have a variable voltage source at hand.
The voltage output is feed to UNO ADC, for the user to see the voltage output.
Frequently Asked Questions
⇥ Can an Arduino be used to operate a power supply?
Yes, Arduino can use Pulse Width Modulation (PWM) and parts like MOSFETs or the LM317 voltage regulator to control a variable power supply. Arduino can dynamically control the power supply circuit's output voltage or current by varying the PWM signal.
⇥ What is this circuit's maximum voltage output?
The input voltage and the LM317's or comparable components' configuration determine the maximum voltage output. As long as the input voltage is high enough (32V or higher), and appropriate heat dissipation is controlled.
⇥ Is it feasible to use this circuit with high-current devices?
The MOSFET and LM317 ratings determine the circuit's current capacity. With a properly rated MOSFET and heat sink, you can support higher currents (e.g., 5A or more with an IRF540) than the LM317 can handle, which is normally up to 1.5A.
Arduino Controlled Variable Power Supply GitHub Repository
Projects using Power Supply Circuit
You can learn more about the many interesting projects we've used this Power Supply Circuit in the past by clicking on the links below.
Simple Variable Voltage Dual Power Supply Circuit (-14V to 14V)
In this tutorial, we are going to design a variable dual DC power supply circuit which can provide variable output voltage ranging from 14V to -14V. The voltage conversion task is performed in four steps, which are Transformer operation, Rectification, Smoothing, and Regulation.
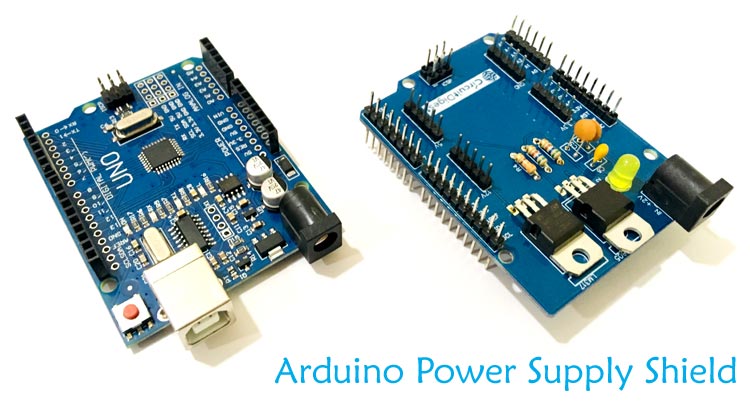
DIY Arduino Power Supply Shield with 3.3v, 5v and 12v Output Options
Today, we’ll be creating a versatile power supply, specifically an Arduino UNO Power Supply Shield, capable of delivering multiple voltage outputs, including 3.3V, 5V, and 12V.
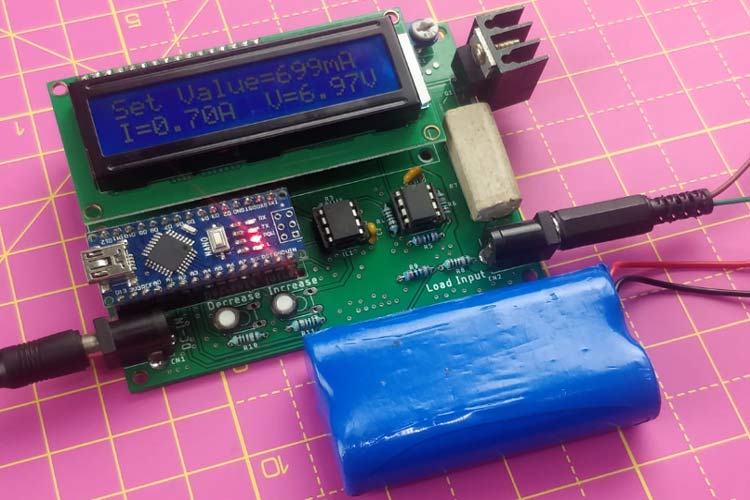
Build your own Adjustable Electronic DC Load using Arduino
In this tutorial, we will apply that circuit and make a digitally controlled current source. Obviously, A digitally controlled current source requires a digital circuit and to serve the purpose, an Arduino NANO is used.
Complete Project Code
#include <LiquidCrystal.h>
LiquidCrystal lcd(8, 9, 10, 11, 12, 13);//RS,EN,D4,D5,D6,D7
int voltageadjust =125;//starting initial variable output at 2.5V
float check =0;

void setup()
{
                pinMode(3,OUTPUT);//PWM output pin
                pinMode(4,INPUT);//button 1
                pinMode(5,INPUT);//button 2

                lcd.begin(16, 2);//number of characters on LCD
                // Print a logo message to the LCD.
                lcd.print("  CIRCUITDIGEST");
                lcd.setCursor(0, 1);
                delay (2500);
                delay (2500);

                lcd.clear();
                lcd.print("VOLTAGE= ");//printing name
                lcd.setCursor(9, 0);
}

void loop()
{
                float VOLTAGEVALUE = (analogRead(A0));//read ADC value at A0
                VOLTAGEVALUE = (VOLTAGEVALUE*5)/1024;//converting digital value to voltage

                if ((check > (VOLTAGEVALUE+0.05))|(check < (VOLTAGEVALUE-0.05)))
// if voltage change is higher or lower than 0.5 of previous value (to avoid fluctuations)
                {
                                lcd.print(VOLTAGEVALUE);
                                lcd.print("V ");
                                lcd.setCursor(9, 0);//go to position 9 on LCD
                                check = VOLTAGEVALUE;//store previous value
                }

                analogWrite(3,voltageadjust);//provide PWM at PIN3


                if (digitalRead(4)==LOW)
                {
                                if (voltageadjust<250)
                                {
                                                voltageadjust++;//if button1 is pressed and value is less than 250 increment the PWM value
                                                delay(30);
                                }
                }
                if (digitalRead(5)==LOW)
                {
                                if (voltageadjust>0)
                                {
                                                voltageadjust--;// if button2 is pressed and value is greater than 0 decrement the PWM value
                                                delay(30);
                               }
                }
                delay(200);
}
Comments
I have built it on bread board and its working, although I didn't try to simulate it on Proteus.
There is basic and major design problem with pwm based supply. They cant goto zero properly. specially if you are switching higher voltage. For that you also needs to change voltage of pwm at lower ends, like 1%. if you goto zero it will fluctuate.
hello, i want to do this project but without using arduino board , instead using atmega8. plz can somebody help, how will be circuit diagram
Hi, guys, I am working on a Scorbot ER-V plus, I am controlling the joint position by a linear potentiometer in place of encoder it is working and I got some variation at fixed position how can I control that fluctuation in joint position how can we modified the feedback rate by Arduino.
please help me to how can i increase input power supply to 15V dc ?if i want to increase power supply what will be the modification of my arduino code and other parts of circuit ?
i have learnt alot in ur tutorial.thanks alot
http://www.novreczky.eu/belimo/pdf/trd24sr.pdfHi! Great project! A question regarding the schematics. I need to generate 0…10V DC to control this rotary actuator: http://www.novreczky.eu/belimo/pdf/trd24sr.pdf Do I need to change the R1’s value to make it work at VMaxOutput=10V? Make it 2K (since the max voltage is 2x higher)? Thanks!


Hi. I already done this circuit design as shown in your circuit diagram on Proteus 8. The lcd is working but there is no output for PWM. Can i know why ? is it related to the given coding ?