

When it comes to giving your projects wireless capabilities, A 433MHz RF Module is the most common and easiest way to get things done. A 433MHz RF module uses the ASK modulation methods to transmit and receive data between two devices. It is widely used in many applications, including remote control systems, wireless security systems, and telemetry systems. So in this tutorial, we will make a simple circuit with the help of the 433 Mhz RF module that requires no microcontroller and no code to light an LED wireless.
Note: If we search the web for 433MHz RF modules, you will find many different variations of this module, but only the green module with variable capacitor works, at least from what we have tested.
433Mhz RF Module Pinout
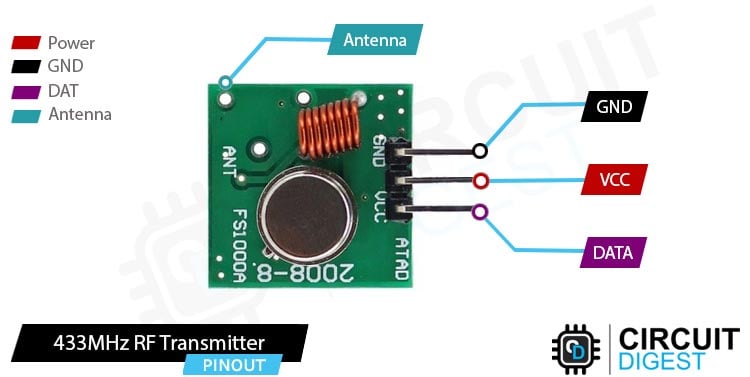
DATA Pin accepts digital data that's needed to be transmitted.
VCC is the power pin of the module. The operating voltage of the device is 3.3V to 5V. Please note that the range of the device is directly proportional to the supply voltage. This means providing more voltage can provide it with more range.
GND is the Ground pin of the RF Transmitter module.
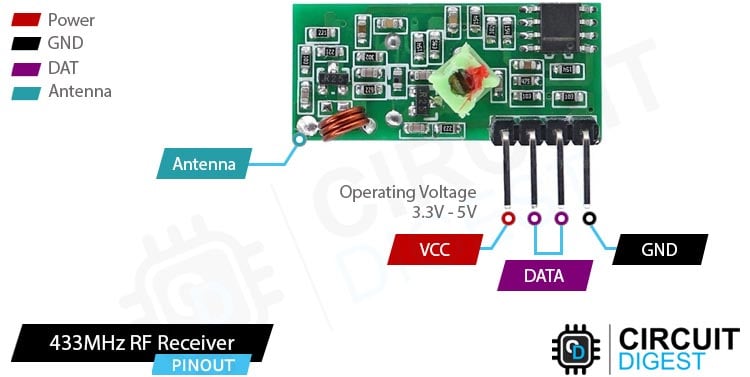
VCC Provides power to the 433MHz module. Unlike the transmitter, the receiver requires a 3.3V - 5V supply voltage.
DATA There are two data pins for the module This is the data out pin of the module.
GND The first ground pin of the module.
Circuit Diagram of 433MHz RF Transceiver
The schematic diagram of the RF link is shown below, the circuit is very simple and can be built very easily.

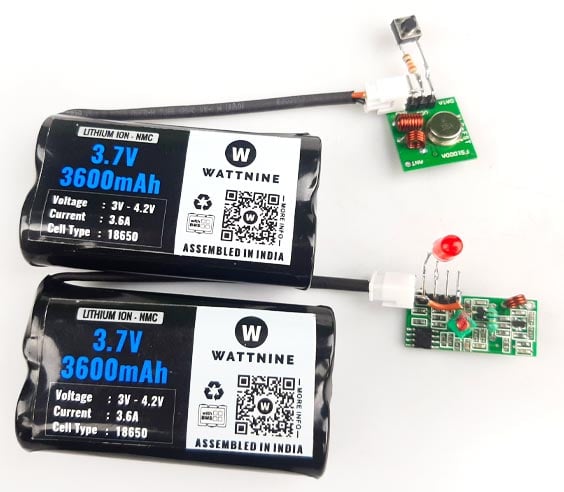
At the left hand side we can see the 433MHz RF Receiver and on the right hand side we can see the RF Transmitter. In the transmitter we have connected a push button with a resistor in series and, for the receiver we have connected a LED on the Data line, and both the circuits are powered by a 3.7V lithium battery pack. The Image shown below shows the complete circuit of the 433MHz RF Tx RX module in working state.
Project using 433MHz RF Module

If you are thinking about building a wireless doorbell, then this is the project that you are looking for. In this project we have built a Doorbell using 433MHz RF links and Arduino.

If you are trying to build a simple RF based wireless switch, then this project is for you. In this project we have used the HT12E and HT12D encoder decoder module to light up some LEDs.

If you are looking for a simple home automation project then this might be the one you are looking for, as in this project we have used some RF modules and relays to enable and disable a CFL lamp.

If you want to learn in depth about the working of a 433MHz RF link then you definitely need to check this project, because in this project we have gone into details about the 433Mhz RF link and interfaced a ESP32 with it as an example.

Hi, thanks for the info.
I've tried this modules in the same way as you explain, but It seems like the modules don't connect between them.
Any idea to solve it?
Thanks!