

In this tutorial, we will show you how to control DC motor using MATLB and Arduino. If you are new with MATLAB then it is recommend to get started with simple LED blink program with MATLAB.
Creating MATLAB Graphical User Interface for controlling DC Motor
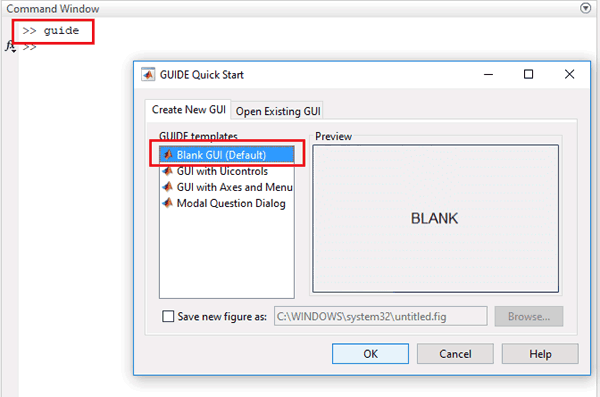
After finishing setup with Arduino for MATLAB, we have to build GUI (Graphical User Interface) to control DC motor. To launch the GUI, type the below command in the command window
guide
A popup window will open, then select new blank GUI as shown in below image,
Now choose three pushbuttons for Clockwise rotation, Anti-clockwise rotation and STOP, as shown below,
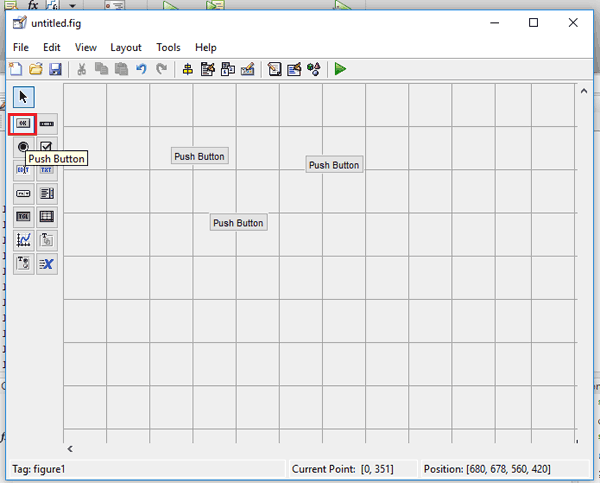
To resize or to change the shape of the button, just click on it and you will be able to drag the corners of the button. By double-clicking on pushbutton you can change the color, string and tag of that particular button. We have customized three buttons as shown in below picture.
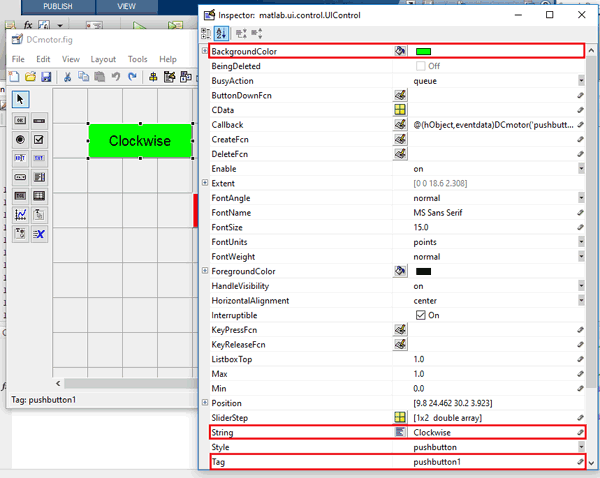
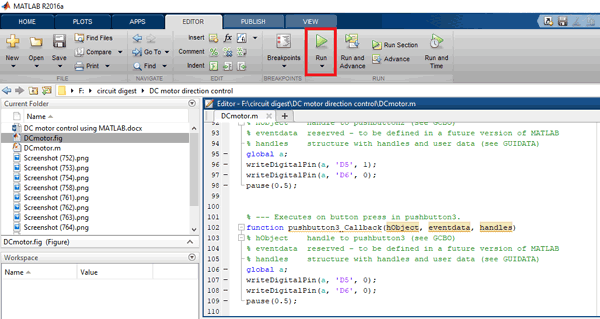
You can customize the buttons as per your choice. Now when you save this, a code is generated in the Editor window of MATLAB. To code your Arduino for performing any task related to your project, you always have to edit this generated code. So below we have edited the MATLAB code.
MATLAB Code for controlling DC Motor with Arduino
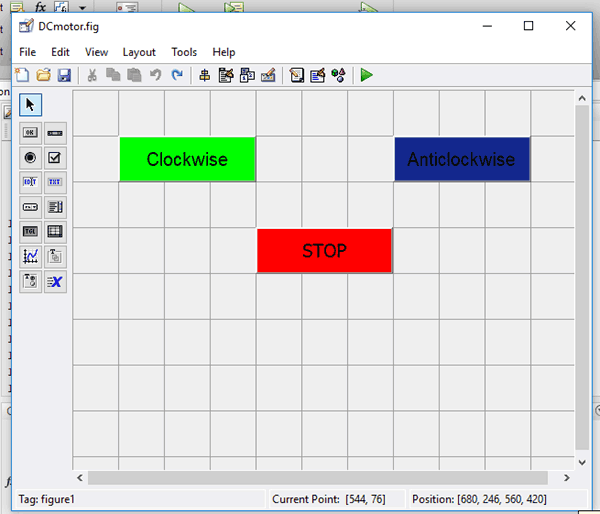
Complete MATLAB code, after editing it for DC motor control, is given at the end of this project. Further we are including the GUI file (.fig) and code file(.m) here for download, using which you can customize the buttons as per your requirement. Below are some tweaks we did for rotating the DC Motor clockwise, anticlockwise and stop using three push buttons.
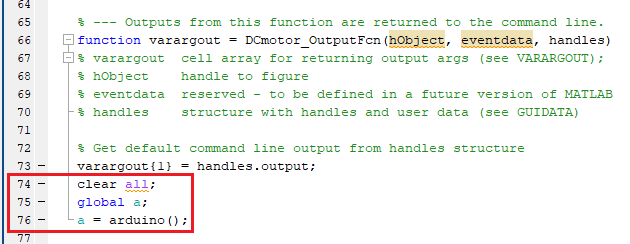
Copy and paste the below code on line no. 74 to make sure that the Arduino is talking with MATLAB every time you run the m-file.
clear all;
global a;
a = arduino();
When you scroll down, you will see that there are three functions for every Button in the GUI. Now write the code in every function according to task you want to perform on click.
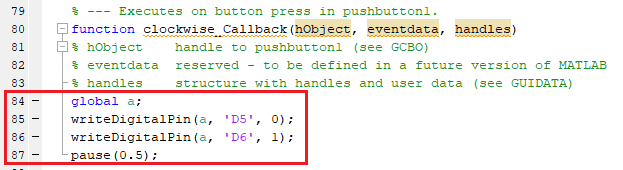
In Clockwise button’s function, copy and paste the below code just before the ending braces of the function to rotate the motor in clockwise direction. Here we are giving HIGH at pin 6 and LOW at pin 5 to rotate the motor in clockwise direction.
global a;
writeDigitalPin(a, 'D5', 0);
writeDigitalPin(a, 'D6', 1);
pause(0.5);
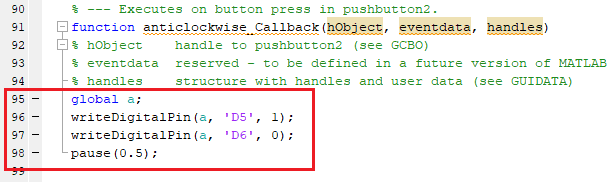
Now in Anti-clockwise button’s function, paste the below code at the end of the function to rotate the motor in anti-clockwise direction. Here we are giving HIGH at pin 5 and LOW at pin 6 to rotate the motor in Anti-clockwise direction.
global a;
writeDigitalPin(a, 'D5', 1);
writeDigitalPin(a, 'D6', 0);
pause(0.5);
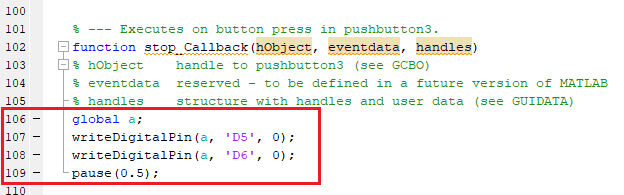
Finally in STOP button’s function, paste the below code at the end, to stop the rotation of motor. Here we are giving LOW at both pin 5 and 6 to stop the motor.
global a;
writeDigitalPin(a, 'D5', 0);
writeDigitalPin(a, 'D6', 0);
pause(0.5);
Material Required
- MATLAB installed Laptop (Preference: R2016a or above versions)
- Arduino UNO
- DC Motor
- L293D- motor driver
Circuit Diagram

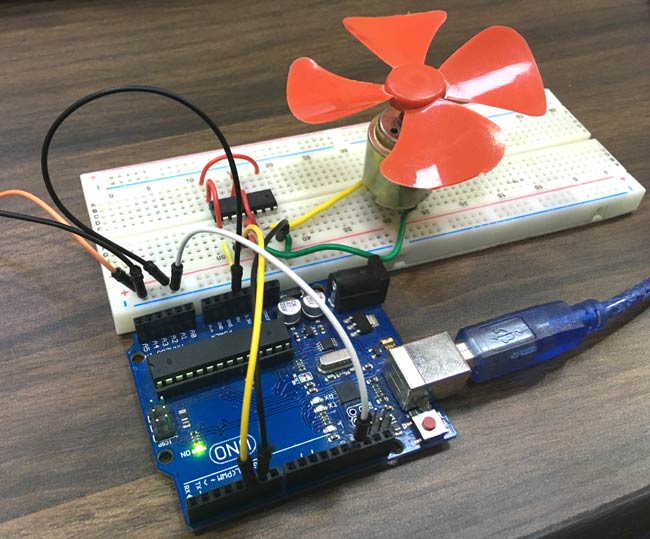
Controlling DC Motor with MATLAB
After setup the hardware according to circuit diagram, just click on the run button to run the edited code in .m file
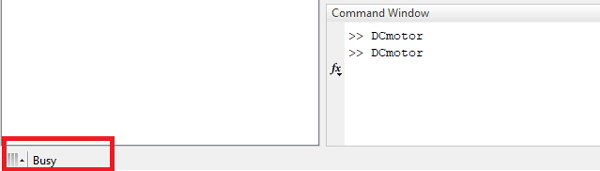
MATLAB may take few seconds to respond, do not click on any GUI button until MATLAB shows BUSY indication, which you can see at the left bottom corner of the screen as shown below,
When everything is ready, click on clockwise or anticlockwise button to rotate the motor. When you press Clockwise button current flow through Pin 6 to Pin 5 and motor will rotate in clockwise direction while in anticlockwise current flows through Pin 5 to Pin 6 and motor will rotate in clockwise direction will rotate in clockwise direction. To stop the rotation of DC motor press STOP button. Same method can be used to control the servo Motor using MATLAB, we just need to a edit the code accordingly. You can check out the video below to understand the complete process of MATLAB DC motor control using the Arduino.
Complete Project Code
function varargout = DCmotor(varargin)

gui_Singleton = 1;

gui_State = struct('gui_Name',       mfilename, ...

                   'gui_Singleton',  gui_Singleton, ...

                   'gui_OpeningFcn', @DCmotor_OpeningFcn, ...

                   'gui_OutputFcn',  @DCmotor_OutputFcn, ...

                   'gui_LayoutFcn',  [] , ...

                   'gui_Callback',   []);

if nargin && ischar(varargin{1})

    gui_State.gui_Callback = str2func(varargin{1});

end

if nargout

    [varargout{1:nargout}] = gui_mainfcn(gui_State, varargin{:});

else

    gui_mainfcn(gui_State, varargin{:});

end

function DCmotor_OpeningFcn(hObject, eventdata, handles, varargin)

guidata(hObject, handles);

function varargout = DCmotor_OutputFcn(hObject, eventdata, handles)
varargout{1} = handles.output;

clear all;

global a;

a = arduino();


function clockwise_Callback(hObject, eventdata, handles)
global a;

writeDigitalPin(a, 'D5', 0);

writeDigitalPin(a, 'D6', 1);

pause(0.5);


function anticlockwise_Callback(hObject, eventdata, handles)
global a;

writeDigitalPin(a, 'D5', 1);

writeDigitalPin(a, 'D6', 0);

pause(0.5);


function stop_Callback(hObject, eventdata, handles)
global a;

writeDigitalPin(a, 'D5', 0);

writeDigitalPin(a, 'D6', 0);

pause(0.5);

My project is Control speed of AC motor using Arduino nano. Can someone please help me with the code?