

Be it a boring afternoon, a monotonous job or a lonely long drive FM radio stations have always kept us entertained. While on the contradictory it should also be agreed that sometimes these FM stations get very boring with the RJ blabbering irrelevant stuff or some bugging advertisements and that might have kept you guessing why you can’t have your own FM Broadcast station to air your voice and music over a short distance.
Almost every electronics engineer try to build a FM Transmitter using coil and other components, but its a tedious task to properly tune it. Surprising enough with the help of Raspberry Pi it should hardly take less than half an hour to set up your own FM broadcasting station and get on air within a local area. With the help of a proper antenna you should be able to cover an area of 50m Radius which should be enough to broadcast within your school or locality. Interesting right!! So let’s get started.
Warning: This is an educational experiment and is not intended to be misused for causing trouble. Also it is an offense to interfere with local FM frequencies, so use this with responsibility. We take no holdings for any mishaps.
Material Required
- Raspberry Pi
- Internet connection
- Microphone
- An enthusiastic RJ
Pre-requisites
It is assumed that your Raspberry Pi is already flashed with an operating system and is able to connect to the internet. If not, follow the Getting started with Raspberry Pi tutorial before proceeding. Here we are using Rasbian Jessie installed Rasbperrry Pi 3.
It is also assumed that you have access to your Pi either through terminal window or through some victual server like VNC. In this tutorial we will be using the putty terminal window to execute the program on Raspberry Pi.
How Raspberry Pi works as an FM broadcast Station (Transmitter)
One common question that might arise in everyone’s mind is that how can Raspberry Pi a board which is intended to be a microprocessor development Board can act as a FM Transmitter without any additional hardware?
Every microprocessor will have a synchronous digital system associated with it which is used to reduce the electromagnetic interference. This EMI suppression is done by a signal called Spread-spectrum clock signal or SSCS for short. The frequency of this signal can vary from 1MHz to 250MHz which luckily for us falls within the FM band. So by writing a code to perform frequency modulation using the spread-spectrum clock signal we can tweak the Pi to work as a FM transmitter. The modulated signal will be given out through the GPIO pin 4 of the Raspberry Pi. We can simply attach a normal wire of 20 cm maximum to this pin to act as an antenna.
Setting up the Raspberry Pi for programming
If you already know how to reach your pi though Terminal window then skip this step, else read through. Once you have flashed a new OS into your Pi boot it by connecting the HDMI out to a monitor and also connect a Keyboard and Mouse to your Pi.
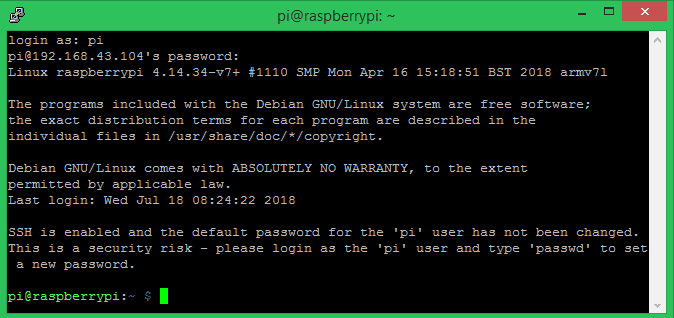
When you enter the desktop of PI, search for network option and connect your Pi to your router. Then get into pi menu and select pi configuration and then enable allow SSH communication. Now on get onto your windows/MAC laptop and connect your laptop to the same router so that your Pi and Laptop works on the local network. Now install Putty and open it. Enter the IP address of the Pi and click on enter. If you do not know the IP address of PI get into your router admin page and check what IP is allocated to your PI, it should be something like 192.168.43.XXX. If everything is done right a terminal window will pop up asking for username and password. By default the username will be pi and the password will be raspberry. Enter it and press enter you will get the following screen.
Converting RPi into FM transmitter
The program to convert the RPI in to a Radio transmitter is already given by Markondej at GitHub page. You can directly clone this page into your pi, compile the program and launch it if you know how to do it. For others, just follow the steps below and you will be broadcasting your own audios in no time.
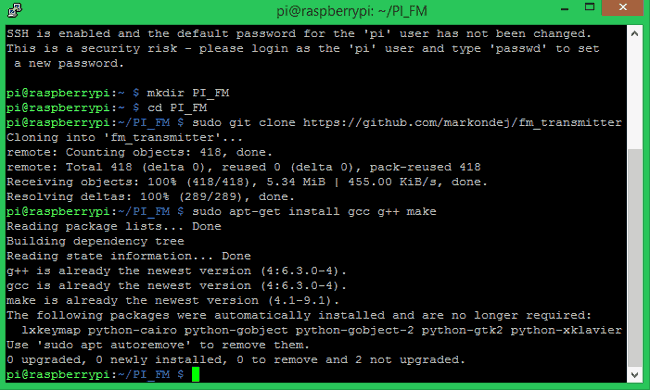
Step 1: Create a New Folder (directory) inside which we will place all our required program files. Here I am using the terminal window to create a directory called PI_FM by using the command mkdir PI_FM and moving into it by using the command cd PI_FM.
mkdir PI_FM
cd PI_FM

Step 2: Now we have to clone (download) the program from GitHub into the directory that we just created. Since we have already moved in the directory, we can just run the below command to do the job and you should get the screen shown here
sudo git clone https://github.com/markondej/fm_transmitter

Step 3: The program that we just downloaded is a C code, so we need the suitable compilers and tools to compile this program and launch it. The compilers for this program is called as gcc and g++ and the tool to compile them is called make. Use the following code to download compilers. Your screen will look like this below once the download is complete
sudo apt-get install gcc g++ make
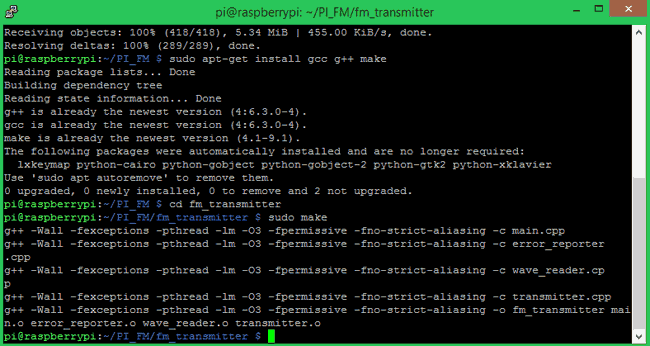
Step 4: Now we have everything ready to compile the program. To do that get into the downloaded directory by using cd fm_transmitter then compile the code using the line sudo make. You program should get compiled and you will get the following screen.
cd fm_transmitter
sudo make
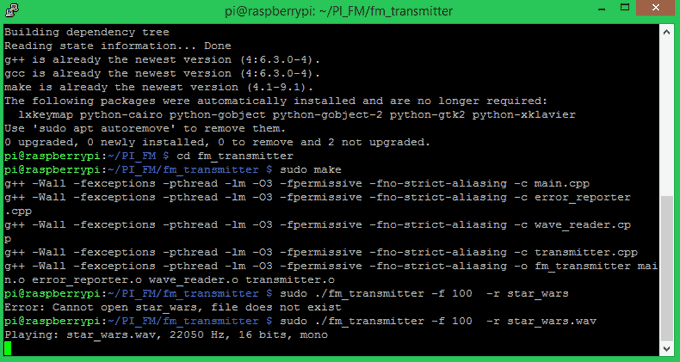
Step 5: The final step is launch the program. While launching the program we have to mention the frequency at which we want to broadcast and the name of the audio file whcih we want to play. By default there will be an audio file downloaded along with the program called star_wars.wav. So we will play this stars wars theme music at a 100MHz frequency to check of the Program works. The syntex for the launch line is
sudo ./fm_transmitter [-f frequency] [-r] filename
Since we need 100MHz frequency and play the star_wars.wav file the line will be
sudo ./fm_transmitter -f 100 -r star_wars.wav
Testing your Raspberry Pi FM Transmitter
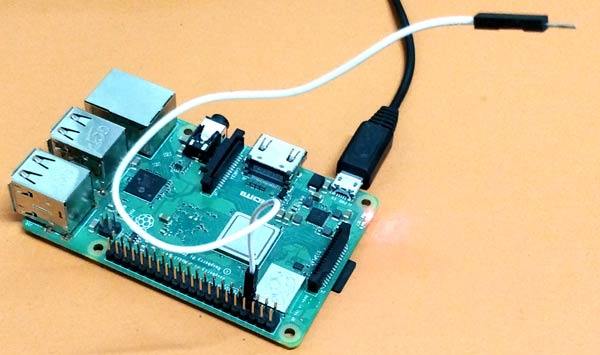
Once you have launched the program and you get the playing message as shown above we can attach an antenna to the GPIO pin 4 of the Pi, I have used a normal hook up wire and it worked fine for me. The picture of my set-up is shown below.
Now, all that is left to do it to do is grab a FM radio and tune it to 100MHz frequency and you should be able to hear the broadcasted star wars music. Once you have tested the working, you can replace the star wars theme with any of your desired music or voice recording and play it using the same command used in step 5.

Broadcasting live voice using Pi

While it is fun to play pre-recorded music clips, it would be more appealing if we can broadcast live voice using this FM Transmitter Raspberry Pi 3. This can also be achieved using the same program. Simply connect a microphone to the USB port of Pi and change the launch command line. You can refer the github page for more info on this. If you have any problem in getting this to work, use the comment line below of the forums.
Comments
I did try adding my own music as well it worked as long as they were in .wav format. What error are you getting?
sudo ./fm_transmitter -f 102.0 acoustic_guitar_duet.wav
I have the same issue as adressed by @ashim ks, I try to replace the star_wars.wav file with my own music files I placed in the fm_transmitter folder but it keeps telling me the data is corrupted.
Is there a way to loop the playing of the file.
How do we go about to increase the range? Or Can we?
I am unable to copy .wav file into fm_transmitter folder, access denied (Raspberry Pi 3). Any suggestion?
With sudo command, I'm able to copy the file but now getting error: Error while opening SONG1.wav, data corrupted. SONG1.wav file is correct and I'm able to play with music player. Any suggestion?
so basiccly if you want to use your own file to fm_transmitter you need covert it for mp3 to wav by special way not usng coverter in internet or you laptop
sudo apt-get install sox
sudo apt-get install sox libsox-fmt-mp3
sox my-audio.mp3 -r 22050 -c 1 -b 16 -t wav my-converted-audio.wav
sudo ./fm_transmitter -f 100.6 my-converted-audio.wav
i found it on README.md and its work for me
Is it working also with an Raspberry Pi Zero also? What pin should I use to connect the hook up wire?
why showing star_wars.wav does not exist.
When trying to run the program in the terminal i get an error saying ./fm_transmitter: command not found. When I try to execute it, i get the error xterm not found. Help?

I can't add my music files with the wav extension to the fm transmitter folder to broadcast my own music files.Is there any solution?