

Programming has always been fun and it just got a lot better with development platforms like Arduino. Almost every programmer out here would have tried to develop some kind of game using the language that they learning/practising. This helps them to tune their programming skills in a fun yet productive way. I have been a big fan of Arduino ever since I got introduced to it and always wanted to try something cool with it, when I found out how cool it can get with a Graphical LCD like Nokia 5110 along with Arduino my idea of developing a game kicked in. It was an interesting way to tune up few programming skills and have fun at the same time, so though you guys might be interested in developing your game as well. Hence In this tutorial we will learn how we can create Decent Game using Arduino and Graphical LCDs.
We have already built that old fashioned Snake game using Arduino so this time we are trying something new and we named this game as Space Race Game where you need to keep your ship safe from enemy ships using joystick.
Game Plan:
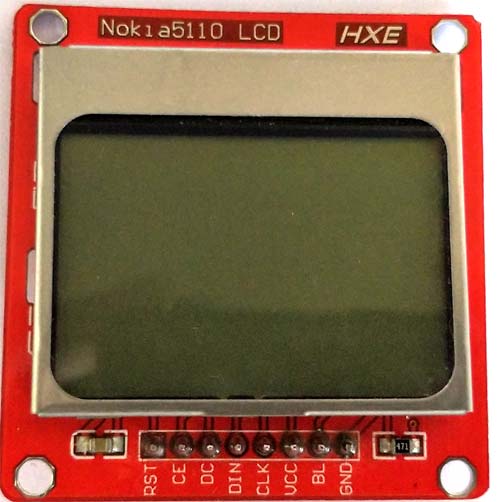
Before we start up, it is very important to plan out how you game would actually work. I went with the Nokia5110 Graphical LCD and Joystick for my hardware selection. I assume in this tutorial that you have also selected the same. Since the Nokia 5110 does not come with a lot of space we have plan our entire game inside the 84*48 pixel resolution of our display. We have already made tutorials on how to interface Nokia 5110 LCD with Arduino and Joystick with Arduino.
Within this space we have to tightly fit in the gaming area and the score board area which will display things like score and stuff. It is very important to know the pixel location of where you place stuff to keep track of the pixel locations and update them on the screen.
Once the game screen appearance is decided we have to decide the characters in our game. For my game we have only two, the player character which is a space ship and an enemy character which should kind of look like an alien spaceship. The Nokia LCD can display bitmap images, so I decided to use that option to display my space ship and the enemies.
So we will have a space ship that is racing through the aliens spaceships, this spaceship will have three lanes to changes in order to avoid a hit with the aliens. At all time the aliens can occupy only two track and the player should be able to drive through the free track. Once these ideas are concluded we can proceed with the Hardware and then the programming.
Circuit Diagram:
The circuit for this Arduino game is very simple; we just have to interface the Nokia 5110 LCD module and the Joystick with Arduino. The complete circuit diagram is shown below

The Nokia 5110 LCD works with the 3.3V and the Joystick module work son 5V, so make sure you connect the LCD with 3.3V only, because 5V may damage it permanently. The LCD communicates with Arduino through SPI protocol and the Joystick only read ADC to read the change in voltage. The connection set-up will look something like this below

Pre-requisites:
Before we dive into the programming part it is important for you people to be convenient with the Display module and the Joystick, so you can use the following tutorials to know more about them and then get back here to make sure things are working the way we need it to!
Programming Arduino for Space Race Game:
The complete program for the game can be found at the end of this page; you can use it directly on your Arduino IDE and upload it to you Board. But if you want to know what actually happens inside the code then read further.
As always we start our program with adding our library header files, we need three libraries for this project out of which the SPI library is added to your IDE by default. The other two library has to be downloaded from the Adafruit Github page. Follow the LCD interfacing tutorial mentioned in the pre-requisites section if you are not sure how to add the library.
#include <SPI.h> //SPI librarey for Communication
#include <Adafruit_GFX.h> //Graphics lib for LCD
#include <Adafruit_PCD8544.h> //Nokia 5110 LCD library
If you have followed the tutorial you should know that it is possible to display the bitmap images in the LCD. So we have to convert the image required into bitmap code by using software mentioned in the tutorial, you can select any image from the internet and use it by converting them to bitmap code. Make sure the image is simple enough to be displayed on our LCD screen, check the preview before actually trying on the LCD screen. In our program we have used two bitmap characters one is the space ship and the other is the enemy ship, the bitmap code for both is added in our code as shown below.
//Bitmap Data for SpaceShip
static const unsigned char PROGMEM ship[] =
{
B00000000,B00000000,
B00000001,B00000000,
B00000011,B10000000,
B00000010,B10000000,
B00000010,B11000000,
B00000111,B11000000,
B00001101,B11100000,
B00011111,B11110000,
B00111111,B11111000,
B01111111,B11111100,
B01111111,B11111100,
B01111111,B11111100,
B00011111,B11110000,
B00000111,B11100000,
B00000000,B00000000,
};

//Bitmap Data for enemyship
static const unsigned char PROGMEM enemy[] =
{
B00000101,B11000000,
B00001011,B11100000,
B00000011,B11100000,
B00110011,B11111000,
B01111111,B11111100,
B10111111,B11111010,
B01110111,B11011100,
B01111110,B11111100,
B00111111,B11111100,
B11101111,B11101110,
B11000001,B00000110,
B10000001,B00000010,
B10000000,B00000010,
B00000000,B00000000,
};
We have to specify the pins to which the Nokia LCD 5110 display is connected to. The display is communicated with using the SPI communication, if you have followed the circuit diagram above, the code to initialise the LCD will be as follows you need not change it.
Adafruit_PCD8544 display = Adafruit_PCD8544(7, 6, 5, 4, 3); //Specifiy the pins to which the LCD is connected
Inside the setup function we just start the Serial monitor at 9600 baud rate so that we can debug stuff and then initialize the LCD display. We also have to set the contrast of the LCD display, each display will work the best in a different contrast level, so play with the value to check which suits the best for you. Finally we also clear the display screen to start fresh.
void setup()   {
  Serial.begin(9600); //Serial Monitor for Debugging
  display.begin(); //Begin the LCD communication
  display.setContrast(30); //Set the contrast of the display
  display.clearDisplay();   // clears the screen and start new
}
As soon as the screen is cleared we jump into the loop function and there we display the game screen. The game screen is nothing but which displays a basic skeleton for the game along with the score and speed level. We have used the line function to draw three lines as borders and to the right we display the text score and speed just like the old retro hand held gaming devices.
void gamescreen()
{

//Draw the Border for Screen
  display.drawLine(0, 0, 0, 47, BLACK);
  display.drawLine(50, 0, 50, 47, BLACK);
  display.drawLine(0, 47, 50, 47, BLACK);

//Enter Default Texts
  display.setTextSize(1);
  display.setTextColor(BLACK);
  display.setCursor(52,2);
  display.println("Speed");
  display.setCursor(54,12);
  display.println(game_speed);
  display.setCursor(52,25);
  display.println("Score");
  display.setCursor(54,35);
  display.println(score);
}
Next we have to get the input from user to allow him/her to control the space ship. The input will be received from the Joystick module which is connected to pin A1. The analog value from the sensor will be 512 if it is not moved and will increase and decrease when moved along the X-axis. We use these values to determine if the user wants to move to left or to the right. You should read the Joystick interfacing with Arduino tutorial mentioned in the pre-requisites if you finding it hard to understand the below program.
  //Get input from user
  Joy_X = analogRead(A1); //Read the X vaue from Joystick
  if (Joy_X < 312 && POS!=1 && control==true) //If joy stick moves right
  { POS--; control = false;} //Decrement position of spaceship
  else if (Joy_X > 712 && POS!=3 && control==true) //If joy stick moves right
  { POS++; control = false;} //Increment position of spaceship
  else if (Joy_X >502 && Joy_X<522) //If joystick back to initial position
  control = true; //Preare it for next move
  //Input from user received
After getting the position of the spaceship from the user we have to place the space ship at that particular place. We use the below function and pass the value of position as a parameter, then based on the position the space ship is placed in its respective track.
void player_car(char pos) //Place the spaceship based on the user selected position
{
  if (pos==1)
  display.drawBitmap(2, 32, ship, 15, 15, BLACK);

  if (pos==2)
  display.drawBitmap(18, 32, ship, 15, 15, BLACK);

  if (pos==3)
  display.drawBitmap(34, 32, ship, 15, 15, BLACK);
}
Now that our spaceship is placed on the screen and is ready for racing we have to introduce the enemy ships who will be competing along with the player. Each time an enemy ship has crossed the screen we assume he is dead and when he is dead we have to create a new space ship. The below function does just the same. It creates a new position for two enemy ships and places them on the top of the screen.
  if (enemy_dead) //Check of enemy ships are dead
  { //If they are dead
  enemy_0_pos = POS; //create first enemy above the space ship
  enemy_1_pos = random(0,4); //create secound enemy at some other random place
  enemy_phase = 0; //Bring the enemy form the top
  enemy_dead = false; //Enemy is created so they are not dead anymore
  }
After placing the enemy ships on the top of the screen we have to bring it down so that it spears as if our player is racing upwards, to do that we just have to increment the phase (the place where the image is displayed) so that it comes down slowly. The same is done for both the enemy ships as shown below
  enemy_ship (enemy_0_pos,enemy_phase); enemy_phase++; //Place the first enemy on screen and drive him down
  enemy_ship (enemy_1_pos,enemy_phase); enemy_phase++; //Place the secound enemy on screen and drive him down
The function enemy_ship is shown below, it is very similar to the player car function but here we have two parameters. One is for placing the enemy on a track and the other is for moving the enemy towards the bottom.
void enemy_ship(int place, int phase) //Place the enemy_ship in the new place and phase

{

  if (place==1)

  display.drawBitmap(2, phase, enemy, 15, 15, BLACK);


  if (place==2)

  display.drawBitmap(18, phase, enemy, 15, 15, BLACK);


  if (place==3)

  display.drawBitmap(34, phase, enemy, 15, 15, BLACK);

}
The next piece of code should check if the space ship has avoided the enemy ship. To check this we need to know the position of enemy ships and the player’s space ship. Since we know all that we just have to check if the space ship position is as same as the enemy ship. We check this only if the enemy ship has reached near the space ship. If the player has not avoided the enemy it means game over.
  if (enemy_phase>22 && ((enemy_0_pos == POS) || (enemy_1_pos == POS)) ) //If the Spaceship touches any one of the enemy
  game_over(); //Display game over
If the player has avoided the enemy successfully then we should kill the enemy and give the player a point. To do this we just check if the enemy has reached to the bottom of the screen and if it does we kill it using the code below
  if (enemy_phase>40) //If thespace ship escapes the enemies
  {enemy_dead = true; score++;} //Increase the score and kill the enemies
What fun it would be, if we do not increase the difficulty of the game as we get high scores. So we use another function which then monitors the score of the player and based on the score it will increase the speed of the game. The speed is actually controlled by using the delay function this will control the refresh interval of the game thus making it fast or slow.
void   Level_Controller() //Increase the speed of game based on the score.
{
  if (score>=0 && score<=10) //If score 0-10
  {
    game_speed = 0; delay(80); //slow the game by 80ms
  }
    if (score>10 && score<=20) //If score 10-40
  {
    game_speed = 1; delay(70); //slow the game by 70ms
  }
    if (score>20 && score<=30) //If score 20-40
  {
    game_speed = 2; delay(60); //slow the game by 60ms
  }
    if (score>30 && score<=40) //If score 30-40
  {
    game_speed = 3; delay(50); //slow the game by 50ms
  }
}
Arduino Space Racer Game working:
After making sure the hardware and program is understood, just build the circuit and upload the code to the Arduino Board. You should notice the game getting started as shown below
Use the joystick to escape the enemy ship by moving left or right. For avoiding each enemy you will get your score increased by one. When the score goes high the speed of the game will also increase, that is the speed increase by 10ms for every 10 points you score. You can go ahead and build upon this game to introduce new levels or every make some hardware changes to control it though motion using an accelerometer. Creativity is the only limit. For your reference you learn to use Accelerometer with Arduino here.
Hope you understood the project and enjoyed building it. If you have faced any problem in getting this to work, please feel free to post the problem on the comment section below or use the forums for technical help. Happy gaming!!
Check the complete code and the Demonstration Video below.
Complete Project Code
/* SPACE RACE Game using Arduino and Nokia 5110 LCD
 * Coded by: Aswinth Raj
 * Dated: 10-5-2018
 * Input -> Joystick (A0,A1)
*/
#include <SPI.h> //SPI librarey for Communication
#include <Adafruit_GFX.h> //Graphics lib for LCD
#include <Adafruit_PCD8544.h> //Nokia 5110 LCD librarey
//More info on how to interface Nokia 5110 with LCD is given here: https://circuitdigest.com/microcontroller-projects/nokia5110-graphical-…
//Bitmap Data for SpaceShip
static const unsigned char PROGMEM ship[] =
{
B00000000,B00000000,
B00000001,B00000000,
B00000011,B10000000,
B00000010,B10000000,
B00000010,B11000000,
B00000111,B11000000,
B00001101,B11100000,
B00011111,B11110000,
B00111111,B11111000,
B01111111,B11111100,
B01111111,B11111100,
B01111111,B11111100,
B00011111,B11110000,
B00000111,B11100000,
B00000000,B00000000,
};
//Bitmap Data for enemyship
static const unsigned char PROGMEM enemy[] =
{
B00000101,B11000000,
B00001011,B11100000,
B00000011,B11100000,
B00110011,B11111000,
B01111111,B11111100,
B10111111,B11111010,
B01110111,B11011100,
B01111110,B11111100,
B00111111,B11111100,
B11101111,B11101110,
B11000001,B00000110,
B10000001,B00000010,
B10000000,B00000010,
B00000000,B00000000,
};
Adafruit_PCD8544 display = Adafruit_PCD8544(7, 6, 5, 4, 3); //Specifiy the pins to which the LCD is connected
int enemy_0_pos, enemy_1_pos, enemy_phase;
int Joy_X;
int game_speed = 0;
int score = 0;
char POS=2;
boolean enemy_dead = true;
boolean control = true;
void setup()   {
  Serial.begin(9600); //Serial Monitor for Debugging
  display.begin(); //Begin the LCD communication
  display.setContrast(30); //Set the contrast of the display
  display.clearDisplay();   // clears the screen and start new
}
void loop() {
  display.clearDisplay();   // clears the screen and start new
  gamescreen(); //Displays the box, score and speed values
  //Get input from user
  Joy_X = analogRead(A1); //Read the X vaue from Joystick
  if (Joy_X < 312 && POS!=1 && control==true) //If joy stick moves right
  { POS--; control = false;} //Decrement position of spaceship
  else if (Joy_X > 712 && POS!=3 && control==true) //If joy stick moves right
  { POS++; control = false;} //Increment position of spaceship
  else if (Joy_X >502 && Joy_X<522) //If joystick back to initial position
  control = true; //Preare it for next move
  //Input from user received

  player_car(POS); //Place the Space ship based on the input from user
  if (enemy_dead) //Check of enemy ships are dead
  { //If they are dead
  enemy_0_pos = POS; //create first enemy above the space ship
  enemy_1_pos = random(0,4); //create secound enemy at some other random place
  enemy_phase = 0; //Bring the enemy form the top
  enemy_dead = false; //Enemy is created so they are not dead anymore
  }
  enemy_ship (enemy_0_pos,enemy_phase); enemy_phase++; //Place the first enemy on screen and drive him down
  enemy_ship (enemy_1_pos,enemy_phase); enemy_phase++; //Place the secound enemy on screen and drive him down
  if (enemy_phase>22 && ((enemy_0_pos == POS) || (enemy_1_pos == POS)) ) //If the Spaceship touches any one of the enemy
  game_over(); //Display game over

  if (enemy_phase>40) //If thespace ship escapes the enemys
  {enemy_dead = true; score++;} //Increase the score and kill the enemys
  Level_Controller(); //BAsed on score increase the speed of game

  display.display();  //Update the display with all the changes made so far
}
void   Level_Controller() //Increase the speed of game based on the score.
{
  if (score>=0 && score<=10) //If score 0-10
  {
    game_speed = 0; delay(80); //slow the game by 80ms
  }
    if (score>10 && score<=20) //If score 10-40
  {
    game_speed = 1; delay(70); //slow the game by 70ms
  }
    if (score>20 && score<=30) //If score 20-40
  {
    game_speed = 2; delay(60); //slow the game by 60ms
  }
    if (score>30 && score<=40) //If score 30-40
  {
    game_speed = 3; delay(50); //slow the game by 50ms
  }
}
void enemy_ship(int place, int phase) //Place the enemy_ship in the new place and phase
{
  if (place==1)
  display.drawBitmap(2, phase, enemy, 15, 15, BLACK);
  if (place==2)
  display.drawBitmap(18, phase, enemy, 15, 15, BLACK);
  if (place==3)
  display.drawBitmap(34, phase, enemy, 15, 15, BLACK);
}
void game_over() //Display game over screen
{
  while(1) //The program will be stuck here for ever
  {
    delay(100);
  display.clearDisplay();
  display.setCursor(20,2);
  display.println("GAME OVER");

  display.display();
  }
}
void gamescreen()
{
//Draw the Border for Screen
  display.drawLine(0, 0, 0, 47, BLACK);
  display.drawLine(50, 0, 50, 47, BLACK);
  display.drawLine(0, 47, 50, 47, BLACK);
//Enter Default Texts
  display.setTextSize(1);
  display.setTextColor(BLACK);
  display.setCursor(52,2);
  display.println("Speed");
  display.setCursor(54,12);
  display.println(game_speed);
  display.setCursor(52,25);
  display.println("Score");
  display.setCursor(54,35);
  display.println(score);
}
void player_car(char pos) //Place the spaceship based on the user selected position
{
  if (pos==1)
  display.drawBitmap(2, 32, ship, 15, 15, BLACK);
  if (pos==2)
  display.drawBitmap(18, 32, ship, 15, 15, BLACK);
  if (pos==3)
  display.drawBitmap(34, 32, ship, 15, 15, BLACK);
}
Comments
Its not working,on my display nothing is showing. what to do
I thank the author, I have confirmed that there is no problem with the code, just pay attention to the correct connection of LCD5110

project on GPS and GSM advanced vehicle trackin system with arduino uno software