

Once the OS (Raspbian Jessie) installed SD card is inserted into the Raspberry Pi with the screen, keyboard and mouse connected, we are ready to boot the Jessie first time. For this particular OS you don’t need Ethernet connection.
Once the power is started ON, you will see the power RED LED glowing. The BLUE LED will start blinking at this stage, this means the OS (Operating System) is loading and the PI is checking all the drivers.
By this time you will see data on the screen as shown below,
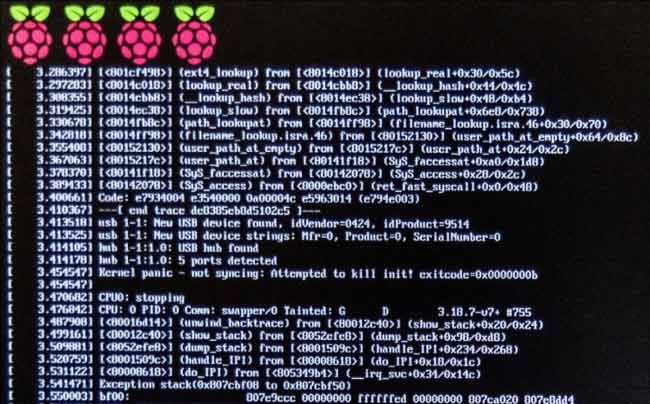
As told its just PI is loading all the drives. You have to wait until all the drivers are checked, in case of error, turn off and on to restart PI. If there is still trouble try installing the OS on to the SD card again by following the steps described in first session.
If everything goes successfully, you will be asked for authorization. This authorization is predefined, with Username “pi” and password “raspberry”,
USER:  pi
< Press enter>
PASSWORD:  raspberry
< Press enter>
Once you enter these details, you will be entered in CLI mode (Command Line) of Raspberry Pi. For entering into the DESKTOP of PI you need to type,
startx
< Press enter>
BIOS settings:
Now you have entered into the screen of Raspberry Pi and you are ready to go. Before going for the programming,
1. You need to configure the BIOS settings of PI.
2. You need to configure the keyboard, you have chosen.
If you don’t do these two things first you get lot of errors, while programming and operating the PI.
For configuring the BIOS of PI first open the ‘LX TERMINAL” of PI and enter this
sudo raspi-config
< Press enter>
You will be entered into BIOS after this; you can watch the video below to see how it’s done.
The BIOS options are as,

We will discuss each of these options briefly below,
1. Expand File System: After first start, some memory of the SD will be misplaced and is not considered by PI. You need to select this option to get the files & order and to display the remaining memory of SD card. Once you choose this option, the PI will REBOOT to get everything in order. If you don’t expand the file system, you will not be able to use remaining memory of SD card.
2. Change Password: This option changes the login password, its “pi” by default. Just leave it, if you are not doing any important work.
3. Boot To Desktop: On the first start you are entered in CLI mode, as discussed earlier. This option disables that, so that you can enter DESKTOP of Pi with every start.
4. Internationalisation Options: This option is for choosing language. Its ENLGLISH by default, leave it you don’t want to change the language and date. The DATE may be wrong, we will configure theses settings later.
5. Enable Camera: If you have a camera module at hand, configure this option. It will turn on the CAM. If you don’t have a camera, just leave it. Remember camera module draws power, so once you enable it the module will be drawing power continuously.
6. Add To Rastack: This option is for connecting your PI online. Just leave it.
7. Over Clock: This option over clocks PI, thus increasing your PI speed and also its power consumption. Over clocking might damage the board, if efficient cooling system is not provided. For basic programming, you need not over clock the PI, just leave it 900MHz.
8. Advanced Options: These options for BOARD devices (like AUDIO, I2C etc) configuration:
We have few options under this, but the important for now is, ‘AUDIO’. The PI can output AUDIO either from HEADPHONE jack (on the PI board) or from HDMI port. To find out the ports, check Getting Started with Raspberry Pi. Choose the appropriate one based on you usage. If you won’t configure this, you won’t get AUDIO. The remaining options are not important for now.
The advanced options are listed as shown in video below,
That’s it you have configured the PI BIOS settings.
Keyboard Configuring:
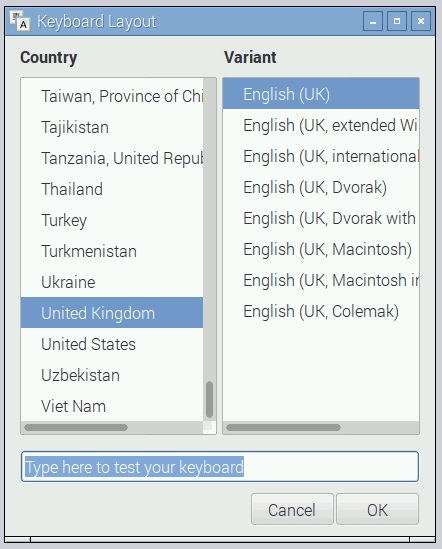
We use different type of keyboard all around the world, most of the keys match for all keyboards. But few keys mismatch. This will cause really trouble while programming, as special keys play a crucial part while doing programming in PYTHON and LINUX. So we need to configure the Raspberry Pi to the keyboard we are using. I am from INDIA and almost everyone one here uses US (United States) keyboard models.
So I am configuring this on the ‘Keyboard Layout’ option,
In the video below I will show you how I configured my keyboard in detail,
Errors:
Sometimes you will have white borders at the edges of the screen, you can select them by RIGHT MOUSE BUTTON and delete then by LEFT MOUSE BUTTON.
So we have learnt basics of Raspberry pi in these two tutorials, now in next tutorial we will blink an LED with Raspberry Pi
