
By Yash Izate
A home is meant to be the safest place for a child, yet falls remain the leading cause of injury in domestic environments. Studies show that nearly 60% of home injuries in children are due to falls, with incidents from heights such as balconies, staircases, and windows being the most severe. Hospital reports indicate that balconies alone contribute to around 60% of fall-from-height cases, and thousands of children suffer serious injuries each year, with many incidents resulting in life-altering consequences.
What makes these accidents especially tragic is how quickly they happen. In just a few seconds, a child’s curiosity or playful movement can turn into a dangerous situation while caregivers are momentarily busy. Most homes rely only on supervision or passive CCTV systems, which cannot actively warn when risk is developing.
SafeEdge Guardian is designed to bridge this gap by continuously monitoring high-risk areas and detecting when a child approaches a dangerous boundary. Instead of recording incidents after they occur, the system provides early warnings, enabling timely intervention and preventing accidents before they happen.
By combining real-time local detection with a low-cost and privacy-focused design, the system adds an extra layer of protection where it matters most. The goal is simple but meaningful — to help parents and caregivers feel more secure and to ensure that everyday living spaces remain truly safe for children.
Components Required
| Component Name | Quantity | Datasheet/Link |
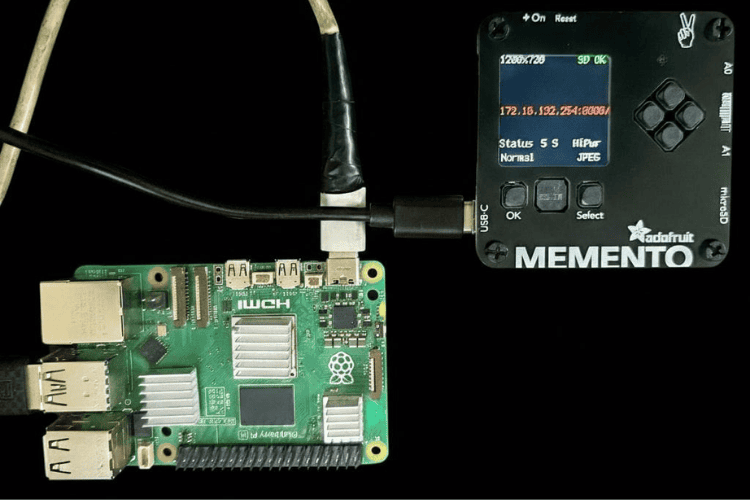
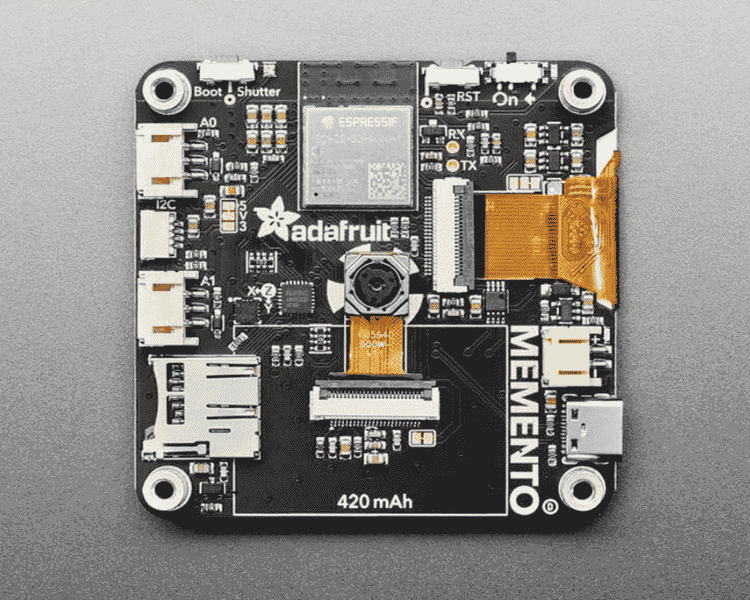
| MEMENTO Programmable Camera from Adafruit | 1 | View Datasheet |
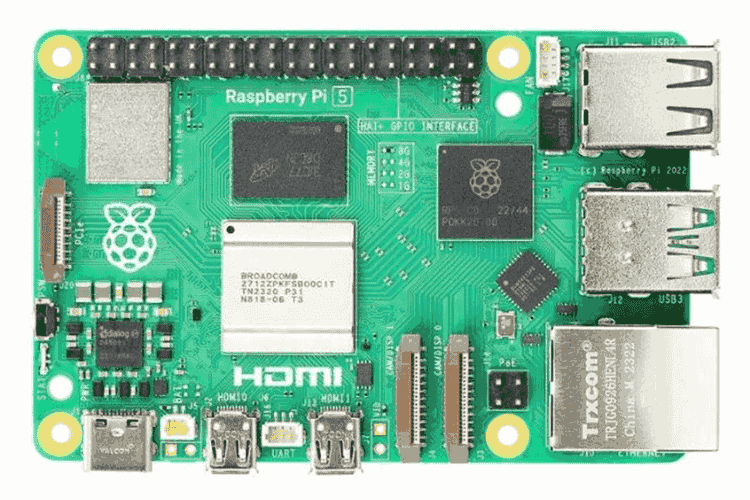
| Raspberry Pie 5 | 1 | View Datasheet |
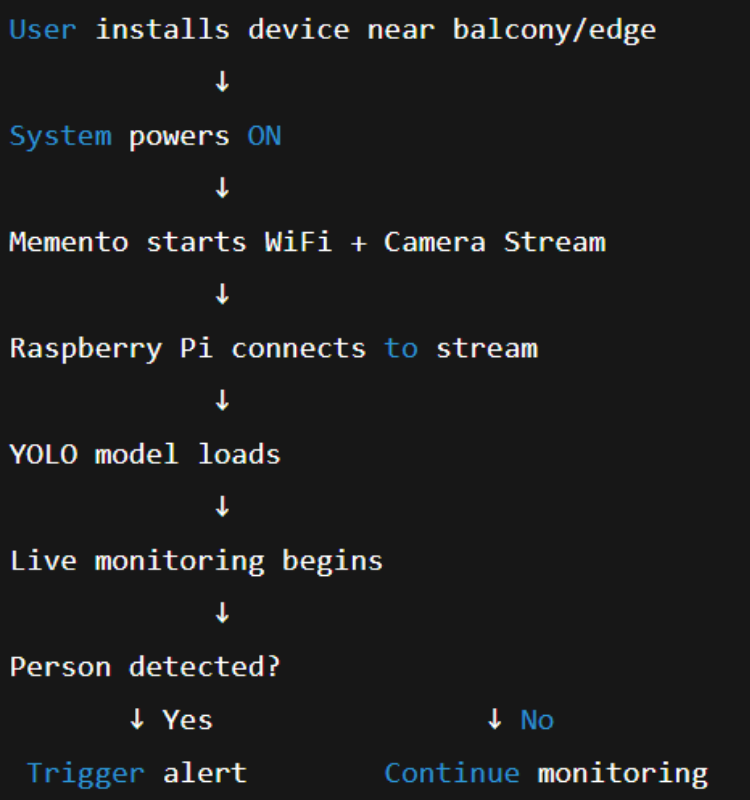
USER FLOW
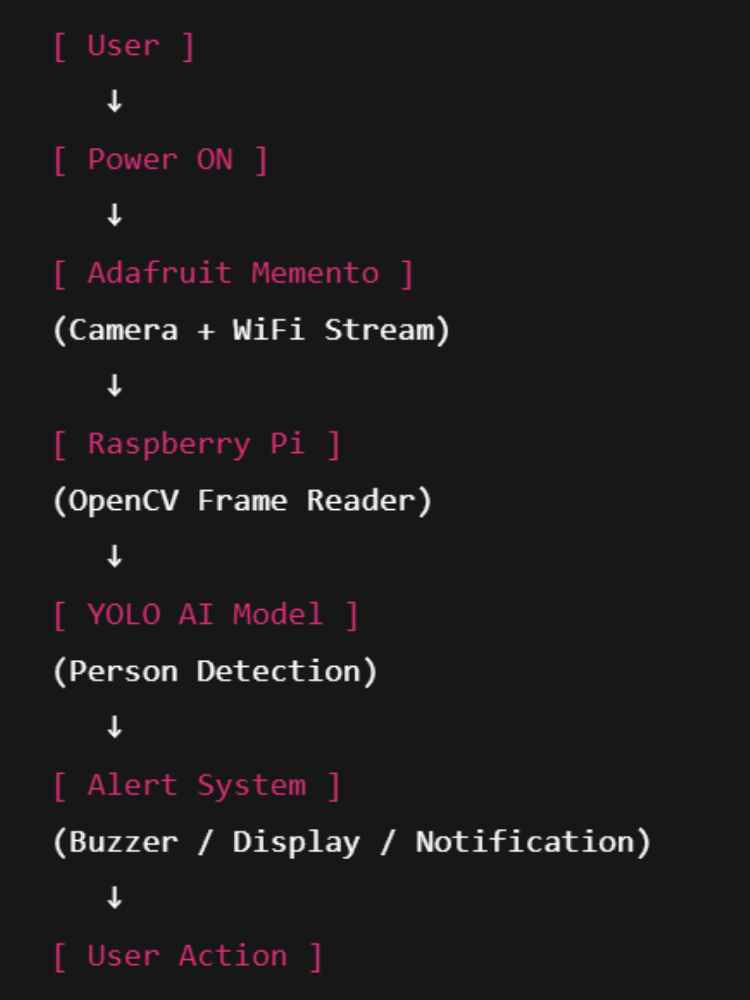
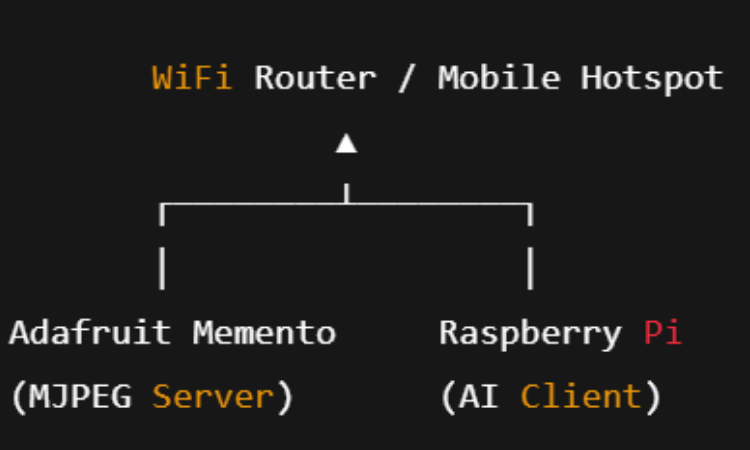
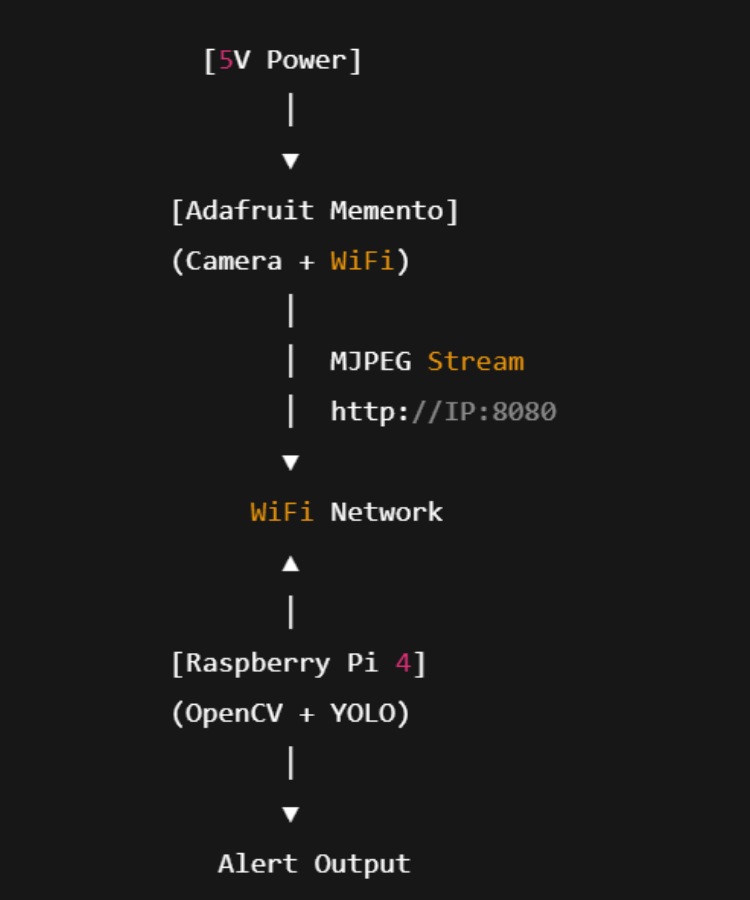
ARCHITECTURE FLOW
CIRCUIT FLOW
Raspberry Pi Connections

Adafruit Memento

Network Connection (Logical Wiring)
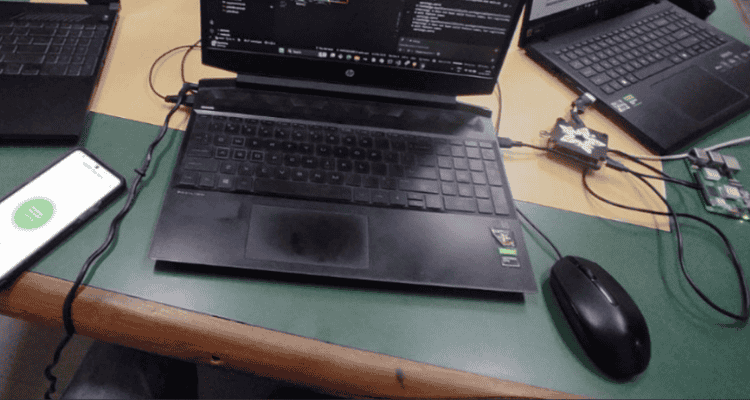
Complete working circuit
Hardware Assembly
1. Camera Node Assembly (Memento Unit)
The camera node is based on the Adafruit MEMENTO Programmable Camera.
Assembly steps:
Insert a microSD card into the Memento for temporary image storage.
Connect the NeoPixel LED ring (8 LEDs) to the Memento:
Data → NeoPixel data pin (as per code configuration)
VCC → 5V / 3.3V (as required)
GND → Common ground
Power the Memento using a USB cable or power bank.
Mount the Memento securely facing the danger zone (balcony, stairs, or window).
Adjust the camera angle to ensure full coverage of the monitored area.
The LED ring provides illumination during image capture, especially in low-light conditions.
2. Processing Unit Assembly (Raspberry Pi)
The local AI processing unit uses a Raspberry Pi 5.
Assembly steps:
Insert the 32GB microSD card with Raspberry Pi OS installed.
Connect:
Power supply (official adapter recommended)
Wi-Fi (for local network communication)
Optional: Monitor, keyboard, and mouse for initial setup.
Transfer the main Flask + YOLO program to the Raspberry Pi.
Ensure the Raspberry Pi and Memento are connected to the same Wi-Fi network.
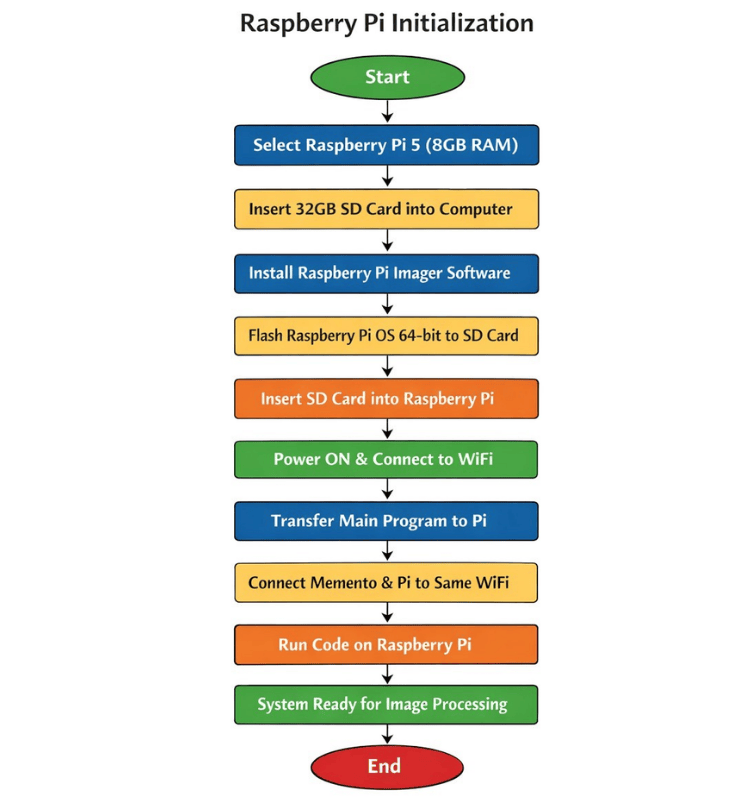
3. Raspberry Pi Setup Flowchart
Start
|
v
Select Hardware
(Raspberry Pi 5 – 8GB RAM)
|
v
Insert MicroSD Card (32GB) into Computer
|
v
Install "Raspberry Pi Imager" Software
|
v
Flash OS
(Raspberry Pi OS 64-bit) onto SD Card
|
v
Insert SD Card into Raspberry Pi
|
v
Power ON Raspberry Pi
|
v
Initial Setup & Connect to WiFi
|
v
Transfer Main Program to Raspberry Pi
|
v
Connect Memento and Raspberry Pi
to the Same WiFi Network
|
v
Run the Program on Raspberry Pi
|
v
System Ready for Image Processing
|
v
End
4. System Placement
Place the Raspberry Pi in a safe indoor location near a power source.
Install the Memento at a height where it clearly monitors the risk boundary area.
Maintain stable Wi-Fi connectivity between both devices.
Power both units continuously for uninterrupted monitoring.
Code Explanation
Memento programable camera
https://github.com/ARPIT20012005/pycamera-web-streaming
- Initializes the Memento camera
- Configures it for JPEG streaming
- Starts a small HTTP server
- Streams continuous MJPEG frames
- Raspberry Pi connects and reads the stream
- It basically turns your Memento into:
A live wireless IP camera.
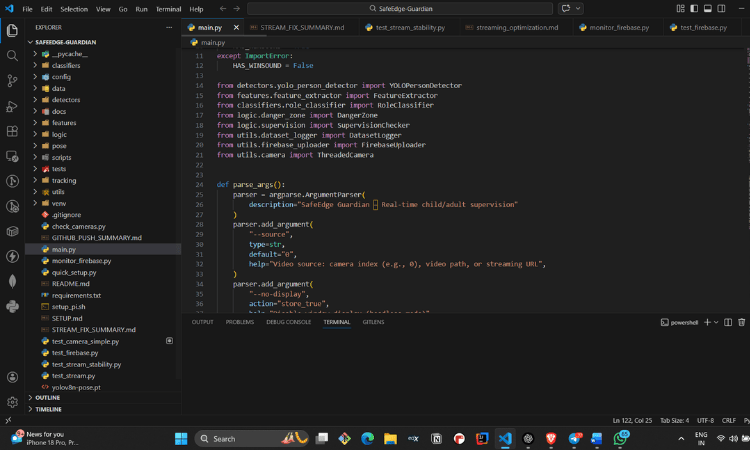
Raspberry pi
in raspberry pi given the live stream receiver code.
that will receive the live stram from the memento and processed it with the help of the modal trained for the child classification and detection
Connects to the Memento MJPEG stream
- Extracts frames using OpenCV
- Runs YOLO model on each frame
- Detects person
- Draws bounding boxes
COMPLETE SYSTEM WORKFLOW
- Power ON system
- Memento connects to WiFi
- Memento starts MJPEG streaming
- Raspberry Pi connects to stream
- OpenCV extracts frames
- YOLO detects objects
- If person detected → Alert triggered
- System continues monitoring
ARCHITECTURE SUMMARY
[Adafruit Memento]
(Camera + WiFi)
↓
[WiFi Network]
↓
[Raspberry Pi]
(OpenCV + YOLO)
↓
[Detection + Alert]


