

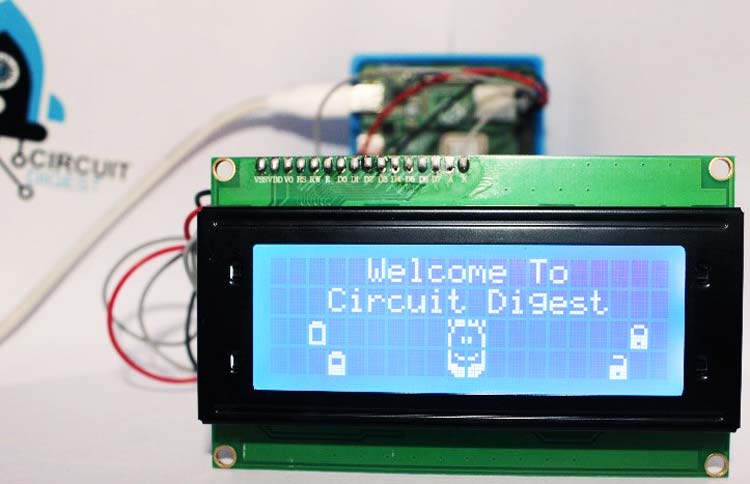
When we talk about interfacing displays with microcontrollers for an embedded project, alpha numeric Liquid Crystal Displays (LCD) are the most commonly used displays which are usually based on Hitachi HD44780 Driver. They are low powered, robust LCDs that are capable of displaying various characters in 5X8 or 8X10 pixel matrix. In this article, we will be interfacing an HD44780 based 20x4 alpha numeric LCD with raspberry pi 4, also, we will try to print a string, scroll text, create new custom characters, and a lot more.
In this tutorial, you will be learning the use of different functions of an open source library RPLCD from PyPI. Further, you can create your own custom functions like scrolling texts, custom Characters, etc.
Components Required for Interfacing LCD with Raspberry Pi
|
Component Name |
Qty. |
|
Raspberry Pi 4 |
1 |
|
20*4 Alphanumeric LCD |
1 |
|
Jumper Wires |
As req. |
Here is the list of components required. I am using raspberry pi 4 for this project you can use anyone, also while purchasing the LCD try to buy the original Hitachi HD44780 based LCD so that we can rely on the robustness of our components.
20*4 alpha numeric LCD
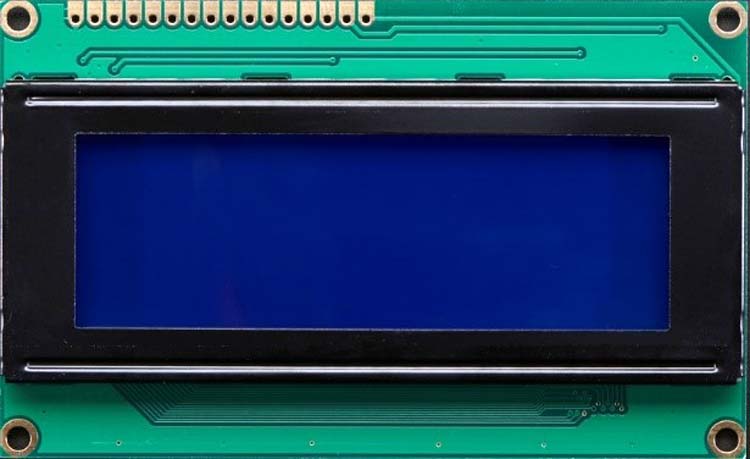
This LCD has an HD44780 driven circuit that behaves as the heart of the LCD. See Datasheet of HD44780 for more details. As far as the interfacing of this LCD is concerned, you can interface it with raspberry pi in both ways either in I2C based or direct pins based, but if you are using the direct pins, it will require 14 pins of raspberry pi, also it consumes the SPI port if you are using it in 8 bit mode for the transmission. Today we are using it in I2C mode for interfacing.
For the connections and raspberry pi settings for LCD in I2C mode, you can visit CircuitDigest official website. Also, for the GPIO connections of the raspberry pi in case of having no I2C module you can connect it as follows
|
LCD Pin |
Pi GPIO Pin |
|
RS |
15 |
|
RW |
18 |
|
E |
16 |
|
Data 4 |
21 |
|
Data 5 |
22 |
|
Data 6 |
23 |
|
Data 7 |
24 |
Interfacing LCD with Raspberry Pi Circuit Diagram
Here you can see the connections in GPIO mode of connections. For more alternate modes of connections please visit RPLCD Documentation.

The above image is showing you the connections of LCD I2C with raspberry pi 4. It can be noted that the I2C option is quite easy and clean to use.
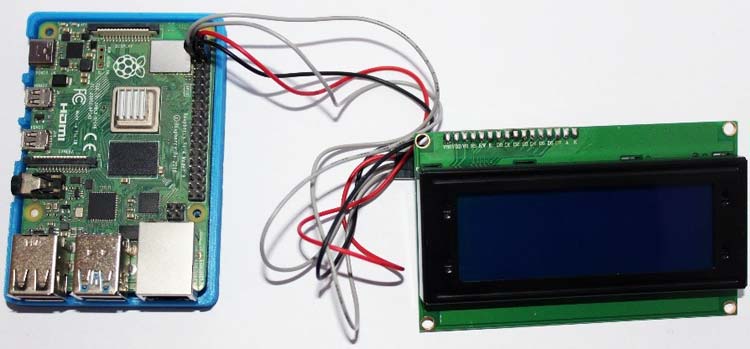
This image is showing the actual setup of Pi and LCD that I have done for this tutorial.
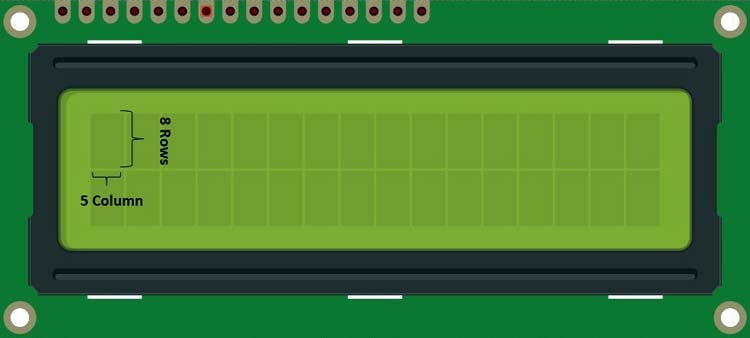
The image is showing that every single block can display 1 character made up of 8x5 pixel matrix. Here a pixel matrix is of 8 rows and 5 columns.
I2C Expender Module PCF8574
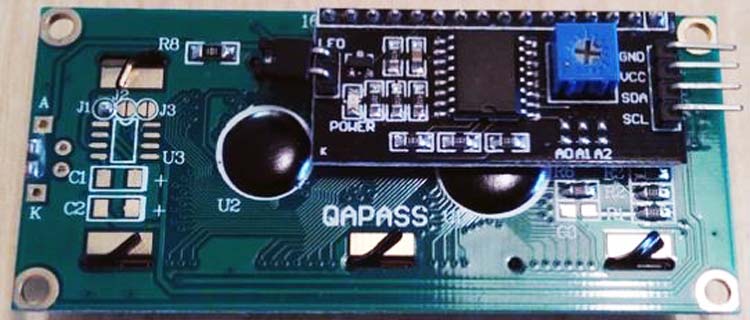
It is a general-purpose remote I/O expansion via 2-wire bidirectional I2C-bus (serial clock ‘SCL’ and Serial Data ‘SDA’. It is low consumption of 2.5uA that is used in mobile applications. It is an I2C- bus to parallel expender with an operating supply voltage of 2.5 V to 6V with non-overvoltage tolerant. It can provide Latched outputs that can directly drive LEDs.
Installing Libraries for the LCD
For this tutorial, I am using RPLCD from PyPI. Alternatively, you can install it using pip by writing the following command
Sudo pip install RPLCD
If you are using the I2C Module then you have to install Python-SMBUS for interfacing it with LCD. You can use the following command for the same
sudo apt install python-smbus
or
sudo pip install smbus2
RPLCD will take the necessary smbus automatically. Here as soon as you successfully install the library, you will be asked to set the address of the i2c and expender as usually i2c can be made using PCF8574 or MCP2308 or MCP23017. Here we will have PCF8574 I2C Expander at 0x27 address (learn how to find the i2c address of your device).
Here we are using LCD in 4bit Mode so i2c will be worked in that mode only, however, the i2c library is not available for using it in 8 bit mode, this can be done by avoiding use of i2c at this time, use GPIOs interfacing instead for using it in 8 bit mode.
Code for printing String on LCD
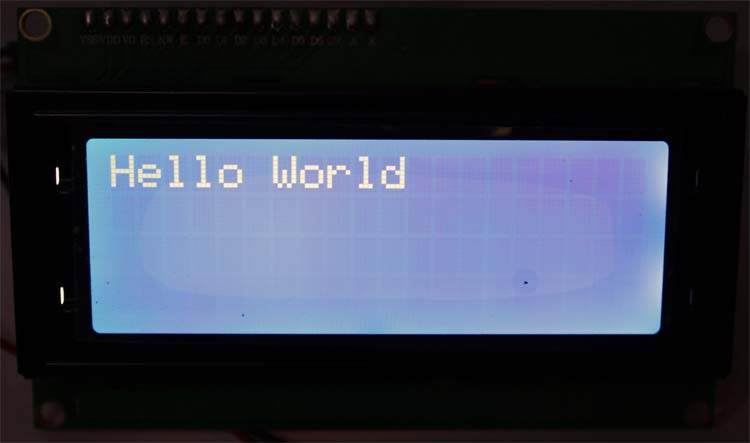
Now it’s the time for printing ‘Hello world’ on your LCD, for doing that you need to create a new python file name it by your choice. Write the following code for printing your very first string on the LCD.
from RPLCD import *
from time import sleep
from RPLCD.i2c import CharLCD
lcd = CharLCD('PCF8574', 0x27)
Here you can see that the RPLCD contains i2c.py and by importing it you are getting all the methods written in the "i2c.py". Now in the argument on CharLCD() you can pass the I2C name and the address of it, mine is 0x27, and m using PCF8574
lcd.cursor_pos = (0, 0)
lcd.write_string('Hello World')
By simply writing this you can print any string. You just pass the string in lcd.write_string(). You may change the position of the string by adjusting the cursor_pos(m,n) where m is the no. row (from 0 to 3 for 20x4 LCD) and n is the no. of column (from 0 to 19 for 20x2 LCD).
Remember that you can only print text in string format as lcd.write_string() function can only display string not the integer value. If you still want to display numbers then you can do it after converting the integer in string by any type casting method. It can display the long text in two lines of the LCD until auto_linebreak() is disabled.dd
Code for Scrolling Text on LCD
As of now, we don’t have any function for displaying the long text in a single line or scrolling the text, hence we will try to figure it out.
framebuffer = [
        '',
        '',
        ]
def write_to_lcd(lcd, framebuffer, num_cols):
        """Write the framebuffer out to the specified LCD."""
        lcd.home()
        for row in framebuffer:
            lcd.write_string(row.ljust(num_cols)[:num_cols])
            lcd.write_string('\r\n')
def long_text(text):
        if len(text)<20:
            lcd.write_string(text)
        for i in range(len(text) - 20 + 1):
            framebuffer[1] = text[i:i+20]
            write_to_lcd(lcd, framebuffer, 20)
            sleep(0.2)
In the above code, we are using the frame buffer method to display long strings. After creating the 2-dimensional list having rows and columns for 20x4 LCD.
Now to print the long scrolling text you can use the following function
lcd.cursor_pos = (1, 0)
long_text('This is a long Scrolling text')
This will print the scrolling text on the second line of the LCD. You can see this in the below image.
Code for Creating New Character on LCD
Lets, try out more on LCD. We can create our own characters on our LCD by using a function create_char(location,bitmap_tuple)
Here location is the memory location of the character, and bitmap tuple is the binary information stored in 5 bits in each 8 Elements. Here 5 and 8 represents the 5X8 character sets as our LCD has 20x4 characters and each character is made up of 5x8 pixel matrics. Usually, 8x10 or 5x8 pixel matrix is used to represent all the possible English characters in an LCD.
Our LCD has a memory of creating 8 new custom characters as of now. Each of it can be stored in any of x00 to x07. For calling it we will directly call the created character.
Locked = (
  0b00000,
  0b01110,
  0b10001,
  0b10001,
  0b11111,
  0b11111,
  0b11011,
  0b11111
)
Un_Locked = (
  0b00000,
  0b01110,
  0b00001,
  0b00001,
  0b11111,
  0b11111,
  0b11011,
  0b11111
)
In the above code we are creating our bitmap information of our locked and unlock sign.
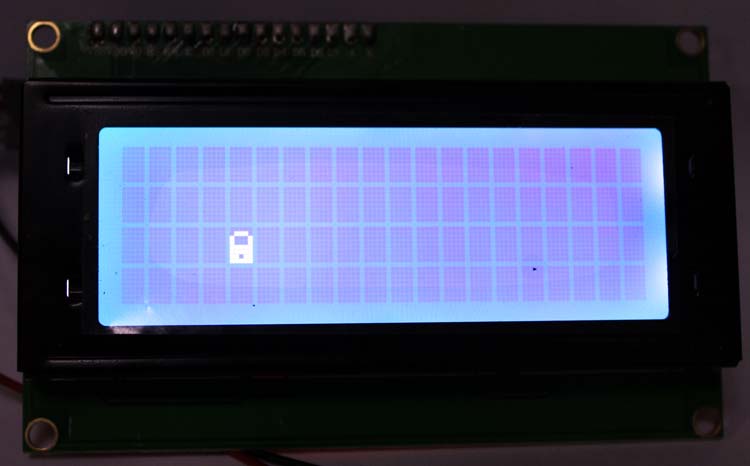
lcd.create_char(0, Locked)
With the above line of code, we have stored the character on 0th location.
lcd.cursor_pos = (2, 4)
lcd.write_string(‘\x00’)
Here we are printing the Locked sign on the (2,4) location. Hope you have learned how to create a custom character on an LCD.
Code for Displaying Battery Charging Animation
In the upcoming code, we will try to make a battery charging animation
battery_EMP = (
  0b00000,
  0b01110,
  0b11111,
  0b10001,
  0b10001,
  0b10001,
  0b10001,
  0b11111
)
battery_HLF = (
  0b00000,
  0b01110,
  0b11111,
  0b10001,
  0b10001,
  0b11111,
  0b11111,
  0b11111
)
battery_FULL = (
  0b00000,
  0b01110,
  0b11111,
  0b11111,
  0b11111,
  0b11111,
  0b11111,
  0b11111
)
Declaring the binary information of the characters,
lcd.create_char(2, battery_EMP)
lcd.create_char(3, battery_HLF)
lcd.create_char(4, battery_FULL)
while 1:
    lcd.cursor_pos = (0, 0)
    lcd.write_string('Battery Charging')
    lcd.cursor_pos = (0, 19)
    lcd.write_string(‘\x02’)
    sleep(.4)
    lcd.cursor_pos = (0, 19)
    lcd.write_string(‘\x03’)
    sleep(.4)
    lcd.cursor_pos = (0, 19)
    lcd.write_string(‘\x04’)
    sleep(.6)
Hence, we can see here that the cursor position has been kept unchanged for making it animated.
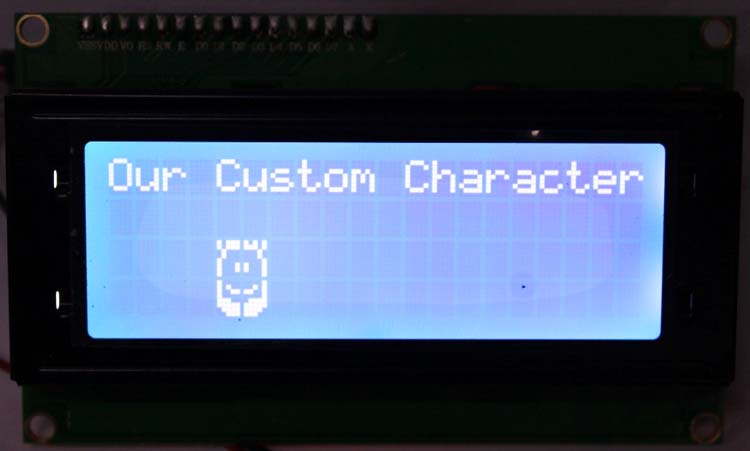
Code for Creating Characters(more than one)
First, we will create facial characters in four pieces i.e., Bottom Left LB, Left Top LT, Right Top RT, Right Bottom RB. Here I have used an online tool for creating this character. You can use any.
face_LB=(
  0b10000,
  0b10100,
  0b10011,
  0b10000,
  0b11100,
  0b11111,
  0b01111,
  0b00111
)
face_LT=(
  0b10111,
  0b10111,
  0b01000,
  0b01000,
  0b10000,
  0b10001,
  0b10001,
  0b10000
)
face_RT=(
  0b10101,
  0b11101,
  0b00010,
  0b00010,
  0b00001,
  0b10001,
  0b10001,
  0b00001
)
face_RB=(
  0b00001,
  0b00101,
  0b11001,
  0b00001,
  0b01111,
  0b11111,
  0b11110,
  0b11100
)
lcd.create_char(4, face_LT)
lcd.create_char(5, face_RT)
lcd.create_char(6, face_LB)
lcd.create_char(7, face_RB)
lcd.cursor_pos = (0, 0)
lcd.write_string('Our Custom Character')
lcd.cursor_pos = (2, 4)
lcd.write_string('\x04')
lcd.cursor_pos = (2, 5)
lcd.write_string('\x05')
lcd.cursor_pos = (3, 4)
lcd.write_string('\x06')
lcd.cursor_pos = (3, 5)
lcd.write_string('\x07')
Hence, we have made a large character using 4 characters that can be used for printing an animated character. You can make your own Packman character using it.
Conclusion
Hence, we have done with the initializing setup of interfacing 20x4 LCD with i2C with our Raspberry Pi, also we get to know about the character creation in the LCD, and also, we have created multiple pixel characters. We have seen how a long string can be displayed using the scrolling text technique.
Complete Project Code
#Try RPLCD Liberary
# from RPLCD-master import *
# from RPLCD import RPLCD
from RPLCD import *
from time import sleep
from RPLCD.i2c import CharLCD
lcd = CharLCD('PCF8574', 0x27)
lcd.cursor_pos = (0, 5)
lcd.write_string('Wlcomme to')
lcd.cursor_pos = (1, 3)
lcd.write_string('Circuit Digest')
sleep(2)
framebuffer = [
        '',
        '',
        ]
def write_to_lcd(lcd, framebuffer, num_cols):
        """Write the framebuffer out to the specified LCD."""
        lcd.home()
        for row in framebuffer:
            lcd.write_string(row.ljust(num_cols)[:num_cols])
            lcd.write_string('\r\n')
def long_text(text):
        if len(text)<20:
            lcd.write_string(text)
        for i in range(len(text) - 20 + 1):
            framebuffer[1] = text[i:i+20]
            write_to_lcd(lcd, framebuffer, 20)
            sleep(0.2)
face_LB=(
  0b10000,
  0b10100,
  0b10011,
  0b10000,
  0b11100,
  0b11111,
  0b01111,
  0b00111
    )
face_LT=(
  0b10111,
  0b10111,
  0b01000,
  0b01000,
  0b10000,
  0b10001,
  0b10001,
  0b10000
)
face_RT=(
  0b10101,
  0b11101,
  0b00010,
  0b00010,
  0b00001,
  0b10001,
  0b10001,
  0b00001
)
face_RB=(
  0b00001,
  0b00101,
  0b11001,
  0b00001,
  0b01111,
  0b11111,
  0b11110,
  0b11100
)
battery_EMP = (
  0b00000,
  0b01110,
  0b11111,
  0b10001,
  0b10001,
  0b10001,
  0b10001,
  0b11111
)
battery_HLF = (
  0b00000,
  0b01110,
  0b11111,
  0b10001,
  0b10001,
  0b11111,
  0b11111,
  0b11111
)
battery_FULL = (
  0b00000,
  0b01110,
  0b11111,
  0b11111,
  0b11111,
  0b11111,
  0b11111,
  0b11111
)
Locked = (
  0b00000,
  0b01110,
  0b10001,
  0b10001,
  0b11111,
  0b11111,
  0b11011,
  0b11111
)
Un_Locked = (
  0b00000,
  0b01110,
  0b00001,
  0b00001,
  0b11111,
  0b11111,
  0b11011,
  0b11111
)
lcd.create_char(0, battery_EMP)
lcd.create_char(1, battery_HLF)
lcd.create_char(2, battery_FULL)
lcd.create_char(3, Locked)
# lcd.create_char(4, Un_Locked)
lcd.create_char(4, face_LT)
lcd.create_char(5, face_RT)
lcd.create_char(6, face_LB)
lcd.create_char(7, face_RB)
# U_L_Ch='\x04'
L_Ch='\x03'
B_F_Ch='\x02'
B_H_Ch='\x01'
B_E_Ch='\x00'
while 1:
    lcd.clear()
    lcd.cursor_pos = (0, 0)
    lcd.write_string('Chargerging')
    lcd.cursor_pos = (0, 19)
    lcd.write_string(B_E_Ch)
    sleep(.4)
    lcd.cursor_pos = (0, 19)
    lcd.write_string(B_H_Ch)
    sleep(.4)
    lcd.cursor_pos = (0, 19)
    lcd.write_string(B_F_Ch)
    sleep(1)
    lcd.cursor_pos = (1, 0)
    long_text('This is a Scrolling text')
#     lcd.cursor_pos = (3, 19)
#     lcd.write_string(U_L_Ch)
#     sleep(.6)
    lcd.cursor_pos = (2, 4)
    lcd.write_string('\x04')
    lcd.cursor_pos = (2, 5)
    lcd.write_string('\x05')
    lcd.cursor_pos = (3, 4)
    lcd.write_string('\x06')
    lcd.cursor_pos = (3, 5)
    lcd.write_string('\x07')
#     sleep(2)
    lcd.cursor_pos = (3, 19)
    lcd.write_string(L_Ch)
    sleep(2)