We all know about accelerometers and gyroscopes; they are primarily used to detect acceleration. While an Accelerometer can measure linear acceleration, the gyroscope can help find the rotational acceleration. A gyroscope is used to measure angular velocity, which uses the Earth’s gravity to determine the orientation of the object in motion. There is a sensor like MPU6050, which has both an accelerometer and a gyroscope, and it works as an Inertial Measurement Unit (IMU) to find the orientation, position, and velocity.
Here we are discussing the ADXL345 Accelerometer, which is used to measure the acceleration or change in velocity in the x, y, and z-axis. These small sensors are used in cars and bikes to detect accidents to deploy the airbags, and are also used in mobile phones for a variety of applications, like compass and location tracking. The ADXL345 accelerometer Arduino interface is a popular project for measuring acceleration in three axis.
We used the accelerometer to build various useful applications, which you can check at the links below:
- Vehicle Accident Alert System
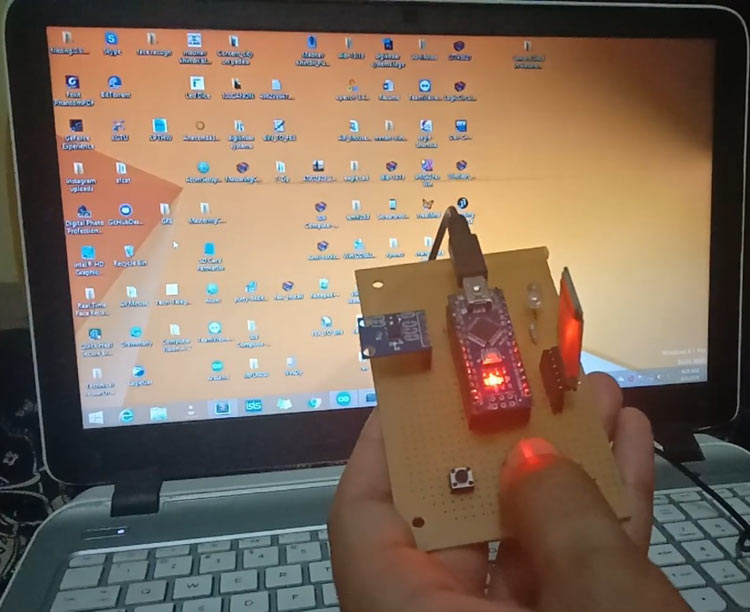
- Hand Gesture Controlled Robot using Arduino
- Earthquake Detector Alarm
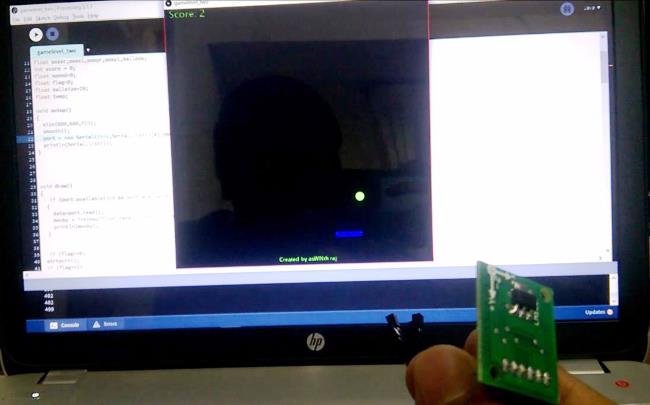
- Ping Pong Game
You can see all the accelerometer-based projects here.
Table of Contents
ADXL345 Specifications
| Specification | Value |
| Operating Voltage | 3.3V - 5V |
| Measurement Range | ±2g to ±16g |
| Interface | I2C, SPI |
| Resolution | 13-bit |
| Power Consumption | 140µA (typical) |
What is the ADXL345 Accelerometer?
Both accelerometers and gyroscopes are vital motion and orientation detection sensors. An accelerometer measures linear acceleration, while gyroscopes measure rotational motion. The ADXL345 accelerometer is a highly versatile digital 3-axis sensor that can measure both static and dynamic acceleration.
The following ADXL345 Arduino project illustrates how to integrate this sensor for several great projects, including:
- Vehicle accident detection systems to deploy airbags automatically
- Gesture-controlled robotic devices with Arduino
- Early warning alarms for earthquake detection
- Computer gaming applications for ping pong games, etc.
- Mobile phone orientation and motion detection
Types of Accelerometer Sensors
There are many types of MEMS accelerometer sensors available in the market. They can be classified on the basis of precision, power consumption, and interfacing. All these sensors are portable and can be fitted in any kind of device, like wearables. These sensors measure acceleration in 3-axis (x,y,z).
Some widely used Sensors are:
- ADXL335
- ADXL345
- ADXL356

These accelerometer sensors are very popular, and apart from these three, there are many other accelerometer sensors like ADXL354, ADXL355, ADXL372, etc.
Let’s see the difference between these sensors.
ADXL345 vs Other Accelerometer Sensors
Understanding the differences between popular accelerometer sensors helps choose the right one for your ADXL345 interface with Arduino project:
| Feature | ADXL356 | ADXL345 | ADXL335 |
| Range | ±10g to ±40g | ±16g | ±3g, small range with precise readings |
| Interface | Analog | SPI, I2C | Analog |
| Power Consumption | Low Typical: 150µ | Low Typical: 140µ | Standard Typical: 350µ |
| Pricing | High | Low | Lowest |
ADXL345 Arduino Pinout and Connections
The ADXL345 accelerometer Arduino code implementation offers digital precision while maintaining cost-effectiveness, making it ideal for most Arduino projects. Among the above three, ADXL345 is easy to interface because of its digital nature. But its programming is difficult as it works on the SPI/I2C protocol. ADXL345 can measure static and dynamic accelerations and is suitable for mobile applications. Also, these sensors are laboratory-calibrated and don’t require any further calibrations.

Here, we will use the Adafruit library for the ADXL345 sensor to interface it with the Arduino Uno.
Interfacing ADXL345 Accelerometer with Arduino UNO Pinout
| ADXL345 Pin | Arduino UNO Pin | Connection Type |
| VCC | 5V | Power Supply |
| GND | GND | Ground |
| SDA | A4 | I2C Data |
| SCL | A5 | I2C Clock |
| CS | Not Connected | Chip Select (I2C mode) |
Required Components for ADXL345 Arduino Project
- Arduino UNO
- ADXL345 Accelerometer
- Male-female wires
- Breadboard
Interfacing ADXL345 Accelerometer with Arduino UNO Diagram
The interfacing ADXL345 accelerometer with Arduino UNO diagram shows a simple I2C connection setup. A circuit diagram for the ADXL345 accelerometer interface with Arduino is given below:
ADXL345 Arduino Connections:
- Connect A4 pin (SDA) of Arduino -> SDA pin of adxl345
- Connect A5 pin (SCL) of Arduino -> SCL pin of adxl345
- Connect the GND of Arduino -> the GND pin of the ADXL345
- Connect 5V of Arduino -> Vcc of adxl345

ADXL345 Accelerometer Arduino Code Implementation
For this ADXL345 Arduino project, we need two libraries for the ADXL345 Sensor.
- Adafruit ADXL345
- Adafruit Unified sensor
To download the above libraries, open Arduino IDE and go to Sketch -> Include Library -> Manage Libraries. Search for Adafruit ADXL345 and install it. Similarly, search for Adafruit Unified sensor and install.


Now, we are ready to write the code. Example code can be found in Files -> Example -> Adafruit ADXL345 -> sensortest
1. First, include all the required library header files to support the functionality of the sensor. Here we are also using a wire library for I2C communication.
#include <Wire.h>
#include <Adafruit_Sensor.h>
#include <Adafruit_ADXL345_U.h>
2. Make an instance by using any variable, like accel, to use the various functions of the ADXL345 Arduino library.
Adafruit_ADXL345_Unified accel = Adafruit_ADXL345_Unified();3. In the void setup() function, initialise serial communication to print data on a serial monitor using the Serial.begin() function. Now, check whether the valid ADXL sensor is connected or not. We will check the result returned by accel.begin() function if it returns false, then print a message that no valid sensor was found.
   void setup()
{
   Serial.begin(9600);
   if(!accel.begin())
   {
      Serial.println("No valid sensor found");
      while(1);
   }
}
4. In void loop() function, create a variable to use sensors_event_t structure. Use this variable (in this case “event”) to fill the structure members using the .getevent() function. Now, print the values of acceleration in the x,y, z-axis using event.acceleration.x() function.
void loop()
{
sensors_event_t event;
accel.getEvent(&event);
Serial.print("X: "); Serial.print(event.acceleration.x); Serial.print("");
Serial.print("Y: "); Serial.print(event.acceleration.y); Serial.print("");
Serial.print("Z: "); Serial.print(event.acceleration.z); Serial.print("");
Serial.println("m/s^2 ");
delay(500);
}
Complete code with a Demonstration video is given at the end of this article.
Testing the ADXL345 Arduino Interface
Finally, connect the ADXL345 sensor with the Arduino UNO properly and upload the code to the Arduino UNO board. Then open the Serial monitor, and you will see acceleration readings in x, y, and z-axis as shown below.

Try to move the sensor slowly in all directions and observe the readings.

So this is how an Accelerometer can be used with Arduino UNO to detect the variations in the x, y, and z-axis.
ADXL345 Advanced Features
» Tap Detection: Able to sense the single and the double tap
» Free Fall Detection: Automatic recognition for free fall
» Activity/Inactivity: Monitoring of motion thresholds
» Interrupt Generation: Hardware interrupts generation
» FIFO Buffer: Buffers data to enable batch processing
Project Applications and Extensions
ADXL345 interface with Arduino can be enhanced for various applications:
∗ Motion-Activated LED System
∗ Tilt-Based Game Controller
∗ Vehicle Monitoring System
∗ Fitness Tracker Prototype
∗ Vibration Analysis Tool
Technical Summary and GitHub Repository
A concise overview explains the project’s functionality and design. Our GitHub Repository contains source files, schematics, and documentation. Both provide quick understanding and practical resources for developers.
Frequently Asked Questions about the ADXL345 interface with Arduino
⇥ Why isn't my ADXL345 sensor detected?
Please check your wiring to ensure you have power from an appropriate source (3.3V-5V). Check for any conflicting I2C addresses and ensure that all libraries are installed properly in the Arduino IDE.
⇥ Will my ADXL345 work on an Arduino operating at 3.3V?
Yes, ADXL345 works at both 3.3V and 5V. The most popular Arduino boards (like Uno, Nano and ESP32) will work with an ADXL345.
⇥ What is the range of measurement of the ADXL345?
The ADXL345 provides programmable measurement ranges of ±2g, ±4g, ±8g and ±16g. Utilising the upper limits will permit you to find higher accelerations, just with reduced sensitivity.
⇥ What is the precision of acceleration measurements from the ADXL345?
ADXL345 has very high 13-bit accuracy resolution, with usual noise under 1mg, and is more than sufficiently accurate for high-end motion sensing applications.
⇥ Can you use several ADXL345 sensors on a single Arduino?
Yes, by using several sensors with the same I2C address, in SPI mode, or otherwise. You can use up to 127 I2C devices on the same bus.
⇥ What's the difference between an ADXL345 and an ADXL335?
ADXL335 has a digital I2C/SPI interface with range programmability (±16g max), and the ADXL335 has an analog output, a fixed ±3g range and is simpler to interface.
⇥ How can I calibrate my ADXL345 to make it more accurate?
The ADXL345 is pre-calibrated at the factory; however, you can make it more accurate by adding offset compensation. While the ADXL345 is stationary, just sample the x,y,z axis and do the software calibration for each based on the axis.
⇥ What can I create using the ADXL345 Arduino?
Design motion sensors, gesture controls, an earthquake alarm, a tilt sensor, activity tracking, game controls, and a car monitoring system with ADXL345 and Arduino
This complete guide covers everything necessary for a successful DXL345 accelerometer interface with Arduino. The ADXL345 accelerometer Arduino code shown was an excellent start for future projects.
Complete the ADXL345 Arduino Code with the video given below.
Hands-on Projects Using Accelerometer Sensors
Several of our earlier projects were designed using this Accelerometer. For detailed insights, please check the links provided below.
DIY Gesture-Controlled Arduino-Based Air Mouse using Accelerometer
In this tutorial, we'll explore how to build a DIY air mouse using an accelerometer and Arduino that gives you a revolutionary way to interact with your system instead of using a traditional mouse.
Ping Pong Game using Arduino and Accelerometer
In this project, let's try to have fun as we learn through the project. Let us create a game (Yes, you heard me correctly, we are going to create a game) and play it using your hand movements. We are creating the classic Ping Pong Ball Game using Arduino and an Accelerometer.
DIY Arduino Pedometer - Counting Steps using Arduino and Accelerometer
So in this tutorial, we are going to build an easy and cheap DIY Pedometer using Arduino and an accelerometer. This Pedometer will count the number of footsteps and display them on a 16x2 LCD module.
Complete Project Code
#include <Wire.h>
#include <Adafruit_Sensor.h>
#include <Adafruit_ADXL345_U.h>
Adafruit_ADXL345_Unified accel = Adafruit_ADXL345_Unified();
void setup(void)
{
   Serial.begin(9600);
   if(!accel.begin())
   {
      Serial.println("No valid sensor found");
      while(1);
   }
}
void loop(void)
{
   sensors_event_t event;
   accel.getEvent(&event);
   Serial.print("X: "); Serial.print(event.acceleration.x); Serial.print("  ");
   Serial.print("Y: "); Serial.print(event.acceleration.y); Serial.print("  ");
   Serial.print("Z: "); Serial.print(event.acceleration.z); Serial.print("  ");
   Serial.println("m/s^2 ");
   delay(500);
}


