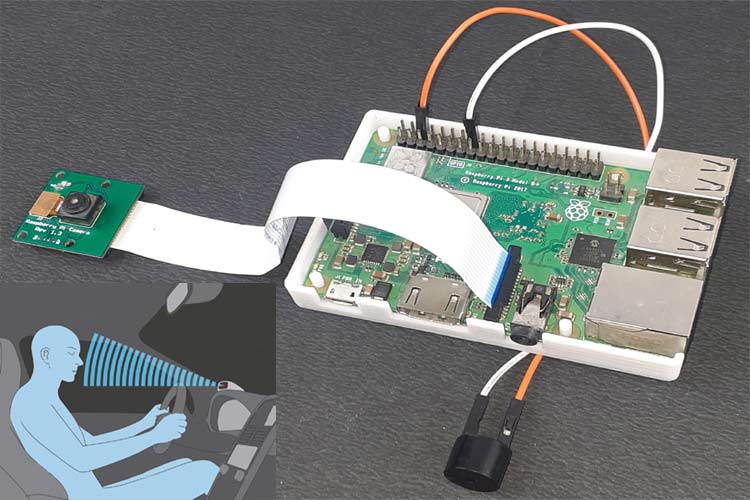
Truck drivers who transport the cargo and heavy materials over long distances during day and nighttime, they often suffer from a lack of sleep, fatigue, and drowsiness are some of the leading causes of major accidents on Highways. The automobile industry is working on some technologies that can detect the drowsiness and alert the driver about it. Almost 30% of road accidents are fatigue-related, so Sleep Detection While Driving can prevent losing the control of the vehicle.
Table of Contents
- Components Required
- Benefits and Features of Drowsiness Detection Device
- Installing OpenCV in Raspberry Pi
- Installing Other Required Packages
- Programming the Raspberry Pi
- Testing the Driver Drowsiness Detection System
- Advanced Features for Enhanced Driver Drowsiness Detection
- Frequently Asked Questions
- Driver Drowsiness Detection GitHub Repository
- Similar Projects on Drowsiness Detection & Alerting System
In this project, we are going to build a Sleep Sensing and Alerting System for Drivers using Raspberry Pi, OpenCV, and Pi camera module. The basic purpose of this system is to track the driver’s facial condition and eye movements and if the driver is feeling drowsy, then the system will trigger a warning message. However, the preliminary signs can be found with a Driver Drowsiness Detection System for Accident Prevention. This is the extension of our previous facial landmark detection and Face recognition application.
Components Required
Hardware Components
- Raspberry Pi 3
- Pi Camera Module
- Micro USB Cable
- Buzzer
Software and Online Services
- OpenCV
- Dlib
- Python3
With the above components, the Drowsy Driver Sleeping Device gives a driver alert system. Before proceeding with this driver drowsiness detection project, first, we need to install OpenCV, imutils, dlib, Numpy, and some other dependencies in this project. OpenCV is used here for digital image processing. The most common applications of Digital Image Processing are object detection, Face Recognition, and people counter. The system sounds an alert when these ratios consistently drop below preset thresholds.
- Ratio of Eye Aspects (EAR) Monitoring: Monitors blink patterns and eyelid movement
- 68-point facial landmark mapping is used for facial landmark detection.
- Real-time processing: 30 frames per second video feed analysis for prompt detection
- Adaptable Thresholds: Sensitivity that can be changed according to user patterns
Benefits and Features of Drowsiness Detection Device
| Features | Benefits |
| Real-Time Eye Tracking | Helps in Accident Prevention |
| Alert System | Sleep detection while driving |
| Facial Recognition | Ensures Real-Time Monitoring |
| Optimized for Raspberry Pi | More Compact and Portable |
| Python-Powered | Easy to customize, shareable with Open Source |
| Customizable Alert Thresholds | Detects different behaviors or conditions of the driver |
| Efficient Video Processing | Maintains performance with limited hardware resources |
| Edge Operation | Works without internet, ideal for remote work |
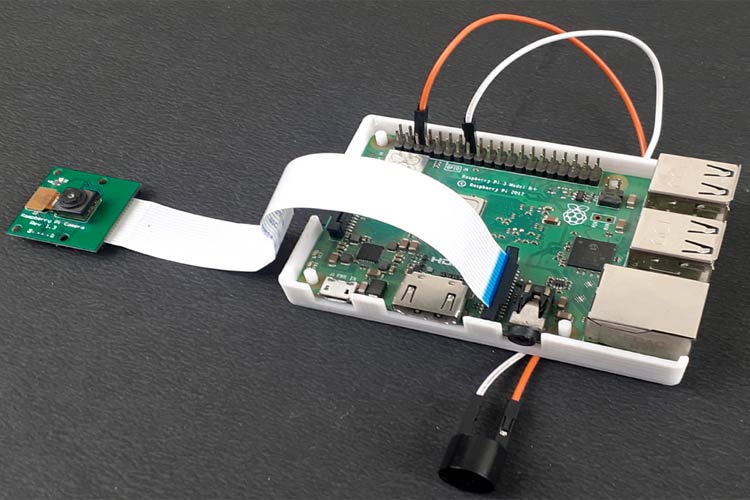
Here we are only using Raspberry Pi, Pi Camera, and a buzzer to build this Sleep detection system.
Installing OpenCV in Raspberry Pi
Before installing the OpenCV and other dependencies, the Raspberry Pi needs to be fully updated. Use the below commands to update the Raspberry Pi to its latest version:
sudo apt-get updateThen use the following commands to install the required dependencies for installing OpenCV on your Raspberry Pi.
sudo apt-get install libhdf5-dev -y
sudo apt-get install libhdf5-serial-dev –y
sudo apt-get install libatlas-base-dev –y
sudo apt-get install libjasper-dev -y
sudo apt-get install libqtgui4 –y
sudo apt-get install libqt4-test –y
Finally, install the OpenCV on Raspberry Pi using the below commands.
pip3 install opencv-contrib-python==4.1.0.25If you are new to OpenCV, check our previous OpenCV tutorials with Raspberry Pi:
- Installing OpenCV on Raspberry Pi using CMake
- Real-Time Face Recognition with Raspberry Pi and OpenCV
- License Plate Recognition using Raspberry Pi and OpenCV
- Crowd Size Estimation Using OpenCV and Raspberry Pi
We have also created a series of OpenCV tutorials starting from the beginner level. It enables a real-time driver drowsiness detection device using Python, which makes an ideal solution for developers and researchers.
Installing Other Required Packages
Before programming the Raspberry Pi for the Driver Drowsiness System Project , let’s install the other required packages.
Installing dlib: dlib is the modern toolkit that contains Machine Learning algorithms and tools for real-world problems. Use the below command to install the dlib.
pip3 install dlibInstalling NumPy: NumPy is the core library for scientific computing that contains a powerful n-dimensional array object, provides tools for integrating C, C++, etc.
pip3 install numpyInstalling face_recognition module: This library used to Recognize and manipulate faces from Python or the command line. Use the below command to install the face recognition library.
Pip3 install face_recognitionAnd in the last, install the eye_game library using the following command:
pip3 install eye-gameProgramming the Raspberry Pi
Complete code for Driver Drowsiness Detector Using OpenCV is given at the end of the page. Here we are explaining some important parts of the code for better understanding. This project utilizes a Raspberry Pi to develop a Drowsy Driver Detection System Using Image Processing for a real-time feed from a camera.
So, as usual, start the code by including all the required libraries.
import face_recognition
import cv2
import numpy as np
import time
import cv2
import RPi.GPIO as GPIO
import eye_game
After that, create an instance to obtain the video feed from the pi camera. If you are using more than one camera, then replace zero with one in cv2.VideoCapture(0) function.
video_capture = cv2.VideoCapture(0)Now in the next lines, enter the file name and path of the file. In my case, both the code and file are in the same folder. Then use the face encodings to get the face location in the picture.
img_image = face_recognition.load_image_file("img.jpg")
img_face_encoding = face_recognition.face_encodings(img_image)[0]
After that create two arrays to save the faces and their names. I am only using one image; you can add more images and their paths in the code.
known_face_encodings = [
    img_face_encoding ]
known_face_names = [
    "Ashish"
]
Then create some variables to store the face parts locations, face names, and encodings.
face_locations = []
face_encodings = []
face_names = []
process_this_frame = True
Inside the while function, capture the video frames from the streaming and resize the frames to smaller size and also convert the captured frame to RGB color for face recognition.
ret, frame = video_capture.read()
 small_frame = cv2.resize(frame, (0, 0), fx=0.25, fy=0.25)
 rgb_small_frame = small_frame[:, :, ::-1]
After that, run the face recognition process to compare the faces in the video with the image. And also get the face parts locations.
if process_this_frame:
        face_locations = face_recognition.face_locations(rgb_small_frame)
        face_encodings = face_recognition.face_encodings(rgb_small_frame, face_locations)
        cv2.imwrite(file, small_frame)
If the recognized face matches with the face in the image, then call the eyegame function to track the eye movements. The code will repeatedly track the position of eye and eyeball.
face_distances = face_recognition.face_distance(known_face_encodings, face_encoding)
            best_match_index = np.argmin(face_distances)
            if matches[best_match_index]:
                name = known_face_names[best_match_index]
                direction= eye_game.get_eyeball_direction(file)
                print(direction)
If the code doesn’t detect any eye movement for 10 seconds, then it will trigger the alarm to wake up the person.
else:
                    count=1+count
                    print(count)
                    if (count>=10):
                       GPIO.output(BUZZER, GPIO.HIGH)
                       time.sleep(2)
                       GPIO.output(BUZZER, GPIO.LOW)
                       print("Alert!! Alert!! Driver Drowsiness Detected ")
Then use the OpenCV functions to draw a rectangle around the face and put a text on it. Also, show the video frames using the cv2.imshow function.
cv2.rectangle(frame, (left, top), (right, bottom), (0, 255, 0), 2)
 cv2.rectangle(frame, (left, bottom - 35), (right, bottom), (0, 255, 0), cv2.FILLED)
 font = cv2.FONT_HERSHEY_DUPLEX
 cv2.putText(frame, name, (left + 6, bottom - 6), font, 1.0, (0, 0, 255), 1)
 cv2.imshow('Video', frame)
Set the Key ‘S’ to stop the code.
if cv2.waitKey(1) & 0xFF == ord('s'):
        break
Testing the Driver Drowsiness Detection System
Once the code is ready, connect the Pi camera and buzzer to Raspberry Pi and run the code. After Approx 10 seconds, a window will appear with the live streaming from your Raspberry Pi camera. When the device recognizes the face, it will print your name on the frame and start tracking the eye movement. Now close your eyes for 7 to 8 seconds to test the alarm. When the count becomes more than 10, it will trigger an alarm, alerting you about the situation.
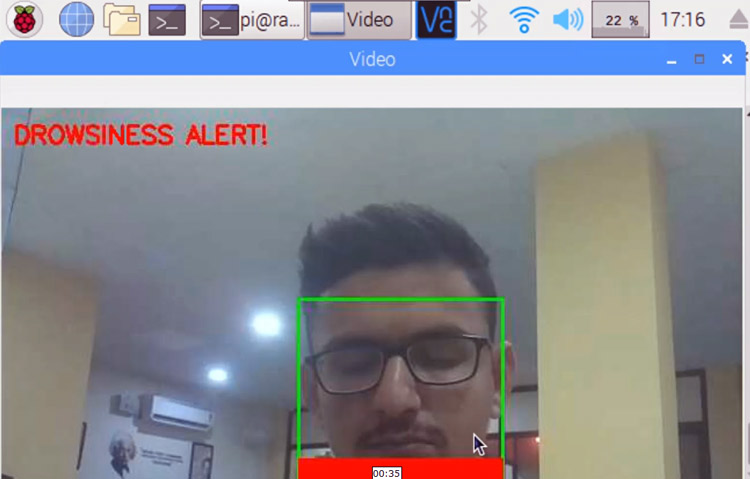
This is how you can build a Drowsiness Detector using OpenCV and Raspberry Pi. Scroll down for the working video and Code
Advanced Features for Enhanced Driver Drowsiness Detection
Implementing Multi-Modal Detection
∗ Heart Rate Monitoring: Implement a pulse sensor to identify physiological drowsiness
∗ Analyze steering wheel movements for any unusual trends.
∗ Estimating Head Pose: Keep track of head nodding and odd head postures.
∗ Yawning Detection: Examine patterns of mouth opening to identify signs of exhaustion.
Integration with Vehicle Systems
∗ When drowsiness is detected, automatic emergency braking initiates a gradual deceleration.
∗ Turn on lane departure prevention devices to provide lane keep assistance.
∗ Emergency Contact Alerts: Notify fleet managers or emergency contacts.
∗ Dashboard Integration: Show notifications on the car's infotainment system
Frequently Asked Questions
⇥ Is it possible for the system to function under various lighting conditions?
Yes, the OpenCV system's drowsiness detection is effective in a range of lighting conditions. Add infrared lighting for optimal effects in low light.
⇥ How much does it cost to construct a full-featured drowsiness detection system?
The entire cost of a Raspberry Pi-based driver drowsiness detection system, including the Raspberry Pi 4, camera module, buzzer, and accessories, is around $80-100.
⇥ What is the difference between this and commercial driver monitoring systems?
At one-twentieth the price of commercial alternatives, our Raspberry Pi drowsiness detection solution offers exceptional value, even though commercial systems have higher accuracy (95–98%).
Driver Drowsiness Detection GitHub Repository
This repository contains
» Raspberry Pi setup instructions
» Python code for facial and eye recognition
» Real-time buzzer alerting
» Uses OpenCV, dlib, and face_recognition libraries for accurate detection
Similar Projects on Drowsiness Detection & Alerting System
There are several easy-to-understand projects on detecting when a driver is sleepy and alerting them in time—check out the links below for full tutorials and how they work.
Arduino based Driver Drowsiness Detection & Alerting System
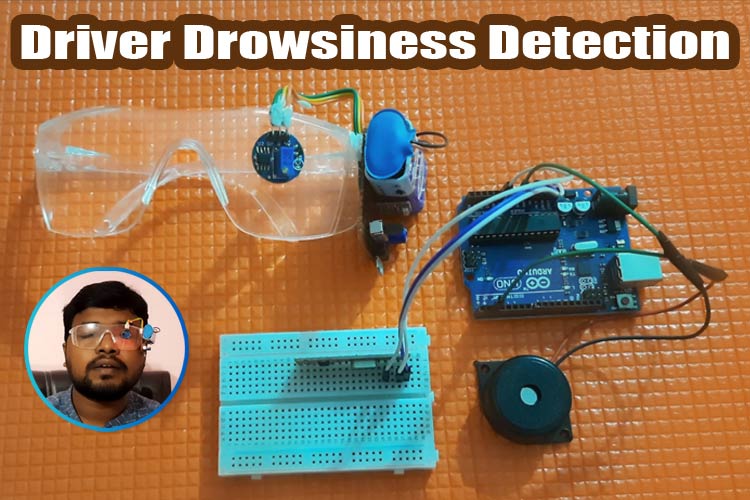
In this project, we have thought of building a Driver Drowsiness Detection and Alerting System for Drivers using Arduino Nano, Eye blink Sensor, and RF Transceiver module. The basic purpose of this system is to track the driver’s eye movements using Eye blink Sensor and if the driver is feeling drowsy, then the system will trigger a warning message using a loud buzzer alert.
How to Build a Smart Helmet using Arduino?
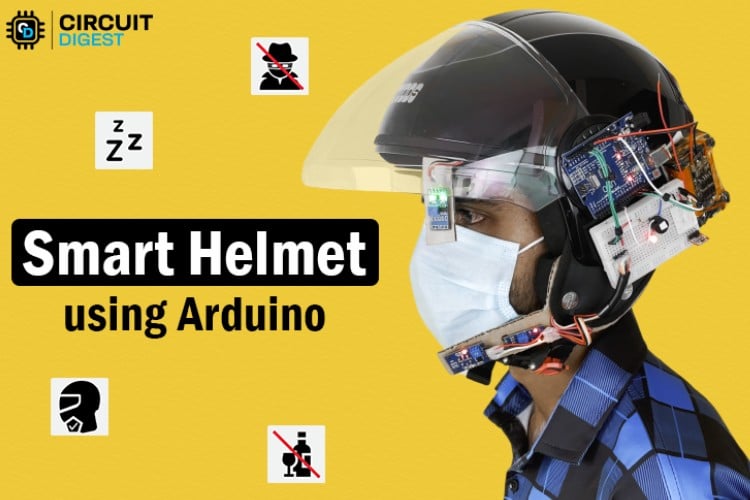
In this Arduino project, we’re turning an ordinary two-wheeler helmet into a Smart Helmet using Arduino Uno and an RF Transmitter & Receiver by adding features like a theft alarm, wear detection, alcohol detection, and drowsiness detection.
iN-Car Drowsiness Detection and Alert System with CAN Bus Integration
We have done this project with Integrating eye status detection system into an automotive grid involves using eye-tracking data to enhance driver safety and vehicle functionality.
Complete Project Code
import face_recognition
import cv2
import numpy as np
import time
import cv2
import eye_game
import RPi.GPIO as GPIO
GPIO.setmode(GPIO.BCM)
GPIO.setwarnings(False)
BUZZER= 23
GPIO.setup(BUZZER, GPIO.OUT)
previous ="Unknown"
count=0
video_capture = cv2.VideoCapture(0)
#frame = (video_capture, file)
file = 'image_data/image.jpg'
# Load a sample picture and learn how to recognize it.
img_image = face_recognition.load_image_file("img.jpg")
img_face_encoding = face_recognition.face_encodings(img_image)[0]
# Create arrays of known face encodings and their names
known_face_encodings = [
    img_face_encoding
]

known_face_names = [
    "Ashish"
]

# Initialize some variables
face_locations = []
face_encodings = []
face_names = []
process_this_frame = True
while True:
    # Grab a single frame of video
    ret, frame = video_capture.read()
    # Resize frame of video to 1/4 size for faster face recognition processing
    small_frame = cv2.resize(frame, (0, 0), fx=0.25, fy=0.25)
    # Convert the image from BGR color (which OpenCV uses) to RGB color (which face_recognition uses)
    rgb_small_frame = small_frame[:, :, ::-1]
    # Only process every other frame of video to save time
    if process_this_frame:
        # Find all the faces and face encodings in the current frame of video
        face_locations = face_recognition.face_locations(rgb_small_frame)
        face_encodings = face_recognition.face_encodings(rgb_small_frame, face_locations)
        cv2.imwrite(file, small_frame)
        face_names = []
        for face_encoding in face_encodings:
            # See if the face is a match for the known face(s)
            matches = face_recognition.compare_faces(known_face_encodings, face_encoding)
            name = "Unknown"
            face_distances = face_recognition.face_distance(known_face_encodings, face_encoding)
            best_match_index = np.argmin(face_distances)
            if matches[best_match_index]:
                name = known_face_names[best_match_index]
                direction= eye_game.get_eyeball_direction(file)
                print(direction)
                #eye_game.api.get_eyeball_direction(cv_image_array)
                if previous != direction:
                    previous=direction
                else:
                    print("old same")
                    count=1+count
                    print(count)
                    if (count>=10):
                       GPIO.output(BUZZER, GPIO.HIGH)
                       time.sleep(2)
                       GPIO.output(BUZZER, GPIO.LOW)
                       print("Alert!! Alert!! Driver Drowsiness Detected")
                       cv2.putText(frame, "DROWSINESS ALERT!", (10, 30),

cv2.FONT_HERSHEY_SIMPLEX, 0.7, (0, 0, 255), 2)
            face_names.append(name)
    process_this_frame = not process_this_frame
    # Display the results
    for (top, right, bottom, left), name in zip(face_locations, face_names):
        # Scale back up face locations since the frame we detected in was scaled to 1/4 size
        top *= 4
        right *= 4
        bottom *= 4
        left *= 4
        # Draw a box around the face
        cv2.rectangle(frame, (left, top), (right, bottom), (0, 255, 0), 2)
        # Draw a label with a name below the face
        cv2.rectangle(frame, (left, bottom - 35), (right, bottom), (0, 0, 255), cv2.FILLED)
        font = cv2.FONT_HERSHEY_DUPLEX
        cv2.putText(frame, name, (left + 6, bottom - 6), font, 1.0, (0, 0, 255), 1)
        #cv2.putText(frame, frame_string, (left + 10, top - 10), font, 1.0, (255, 255, 255), 1)
    # Display the resulting image
    cv2.imshow('Video', frame)
    # Hit 'q' on the keyboard to quit!
    if cv2.waitKey(1) & 0xFF == ord('q'):
        break
# Release handle to the webcam
video_capture.release()
cv2.destroyAllWindows()Comments
You can use this code as it is.
Thank you for the reply. In the code at line 16 it says about image file. Is that image should of mine or I can download any image from internet and use it?? Thank you once again
Hey can you please provide me software ,compiler and editor name which is used in this porject i will helped me a lot.. thanks
Thank you for the reply. In the code at line 16 it says about image file. Is that image should of mine or I can download any image from internet and use it?? Thank you once again
I was using this code and I get an error at line 19. Here is my code
16 file = 'image_data/img.jpg'
17 # Load a sample picture and learn how to recognize it.
18 img_image = face_recognition.load_image_file("/home/pi/Desktop/Pi_project/img.jpg")
19 img_face_encoding = face_recognition.face_encodings(img_image)[0]
20 # Create arrays of known face encodings and their names
And here is the error I am getting.
>>> %Run Drowsiness_detector.py
Traceback (most recent call last):
File "/home/pi/Desktop/Pi_project/Drowsiness_detector.py", line 19, in <module>
img_face_encoding = face_recognition.face_encodings(img_image)[0]
IndexError: list index out of range
Please tell me which editor and compiler you have used in project driver drowiness detection
This code working perfectly but I'm unable to see the live stream video output
Can you tell me what should I do
This code working perfectly but I'm unable to see the live stream video output
Can you tell me what should I do
sir can you help me with this error
"Traceback (most recent call last):
File "/home/pi/Desktop/eye /eyedetection.py", line 38, in <module>
small_frame = cv2.resize(frame, (0, 0), fx=0.25, fy=0.25)
cv2.error: OpenCV(4.1.0) /home/pi/opencv-python/opencv/modules/imgproc/src/resize.cpp:3718: error: (-215:Assertion failed) !ssize.empty() in function 'resize' "
what i change in file to download my image
thank you for your time
OpenCV throws this error when the frame is empty. Please chaekc you camera.
the buzer beebs every 2 sec even if i'm not closing my eyes can you tell me what should i do?
VIDEOIO ERROR: V4L: can't open camera by index 0
Traceback (most recent call last):
File "/home/pi/driver drawsiness.py", line 18, in <module>
img_image = face_recognition.load_image_file("img.jpg")
File "/home/pi/.local/lib/python3.7/site-packages/face_recognition/api.py", line 86, in load_image_file
im = PIL.Image.open(file)
File "/usr/lib/python3/dist-packages/PIL/Image.py", line 2634, in open
fp = builtins.open(filename, "rb")
FileNotFoundError: [Errno 2] No such file or directory: 'img.jpg'
>>>
i grt this error please tell me how add img.jpg file and whare to add
Error no attribute
Hello, I followed all the steps needed for running the code & I'm getting this error
Traceback (most recent call last):
File "sleep.py", line 56, in <module>
direction= eye_game.get_eyeball_direction(file)
AttributeError: module 'eye_game' has no attribute 'get_eyeball_direction'
Can you please help me understand the issue? thanks!
Hello. I came across your project. Can you please explain these two blocks:
"known_face_encodings"
"known_face_names"
Why you gave your name in the block?
Is it because, whenever your picamera starts live streaming of you, your name going to get appear?



I am working on drowsiness detection project. Can I use the above code as is or di i need to modify it. are there anyother files other drowsiness_detection.py file that are required to run this code