
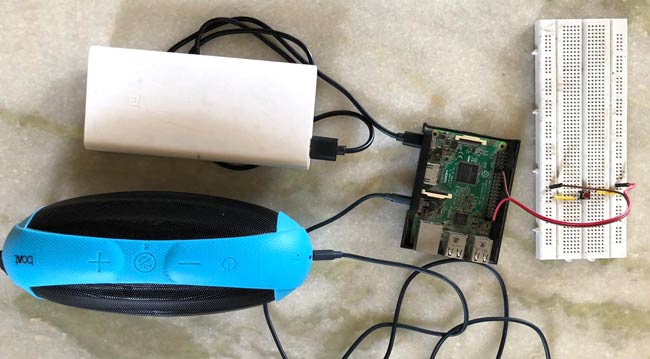
Raspberry Pi is a palm sized computer having in-built Bluetooth, Wi-Fi, Ethernet port, Camera port etc. which makes it most suitable microcontroller for IoT based embedded applications. It is also used to make many kind of servers like Print server, Media Server, Web Server etc. Today we will learn how a Raspberry Pi can convert a normal speaker having 3.5mm jack into a wireless bluetooth speaker.
In this post we will build Raspberry Pi based Bluetooth Speaker by fusing the power of A2DP, Linux and audio codec to stream the data packets from an audio source to an audio sink wirelessly. To do so we are going to hack a little bit of Linux system and write a piece of code in bash and python and we will be in business.
A2DP
A2DP is the acronym of Advanced Audio Distribution Profile. This is a protocol that is present in almost all the Bluetooth enabled devices. It paves way for the data transmission of sound from one device to the other provided they are both connected to each other via Bluetooth. A2dp uses lossless compression algorithm to compress the audio packets before transmission to reduce latency but the losses due to this compression is hardly perceptible to human ears.

Preparing Raspberry Pi for Headless Setup
For converting the Raspberry Pi into a wireless Speaker, first of all install the OS (Raspbian Stretch) into Raspberry PI SD card, if you are new to Raspberry Pi then follow this article to get started with Raspberry Pi.
Most of us own a Raspberry Pi and a laptop but lack a monitor. But in order to SSH into Raspberry Pi we want the same to be connected in the same network in which our computer is connected. We need monitor connected to Pi through which we can select the Wi-Fi and get connected?
Actually we don’t. Raspberry Pi can be connected to Wi-Fi by adding an entry to a file named wpa_supplicant.conf
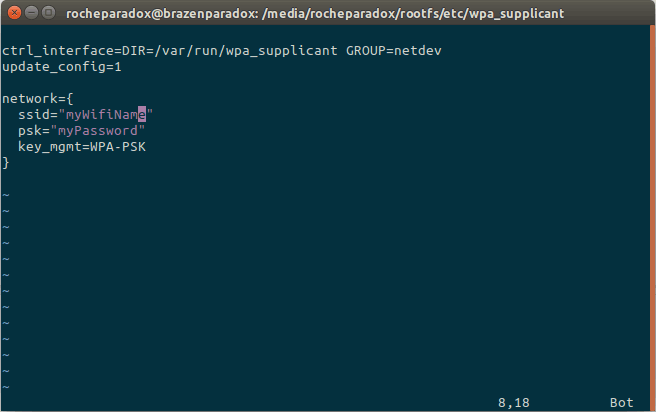
To do so, connect the SD card to the computer and open the file rootfs/etc/wpa_supplicant/wpa_supplicant.conf and add the following entry to the same. Don’t forget to open the file with administrator (root) privileges.
network={
ssid="wifi_ssid"
psk="wifi_passkey"
key_mgmt=WPA-PSK
}
Entry should look similar to this.
The above entry should get us connected to the Wi-Fi but that is not enough to create and maintain an SSH connection between Raspberry Pi and computer. By default SSH is disabled in Raspberry Pi, so to enable it, create an empty file named ssh in boot directory.
Now Raspberry Pi is technically enabled to be accessed remotely. Connect the raspberry pi to the power source. Now pi would get connected to the Wi-Fi automatically but its IP address is required in order to SSH into it. There are multiple ways to find out the same. I use nmap command
nmap -sn [gateway ip address]/24
This command would give us the IP addresses of all the devices connected in our network. For example,
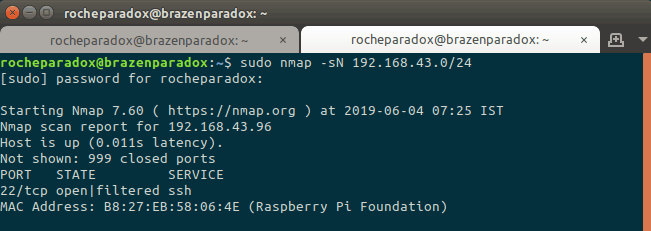
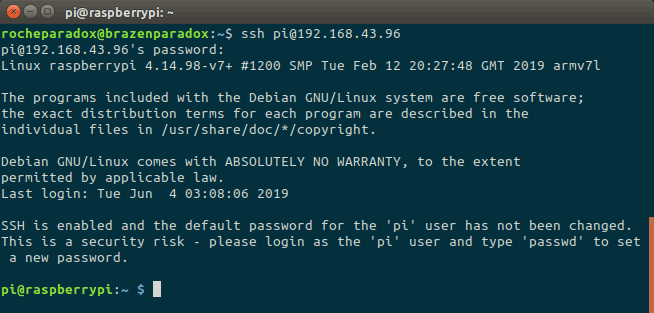
One of them is of raspberry pi’s. Now we know the IP address of the pi let us connect to the it
ssh pi@pi_ip_address
There are also other ways to start with Raspberry Pi headlessly, check the link to learn the same.
Prerequisites to be installed in Raspberry Pi
BlueZ
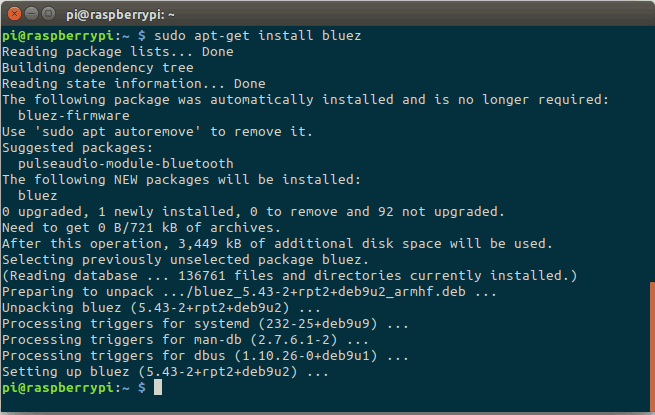
BlueZ is the default application that comes with Raspbian distro. It is used to access the bluetooth controls of the system. It can also be installed in case you do not have it available in you pi for reasons only you may know.
Below command gets the Bluetooth interface application installed in our pi.
apt-get install bluez
PulseAudio
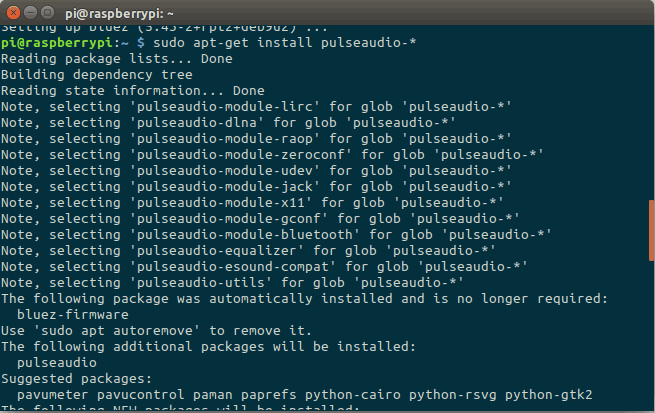
Pulse Audio is an application that converts bytes of computer data into human perception. It is also called as the music player. A2DP protocol is available in PulseAudio application plugins. So let us install all the pulse-audio related applications by using below command:
apt-get install pulseaudio-*.
Pairing Bluetooth Device with Raspberry Pi
Open the BlueZ application using the command
bluetoothctl
A Bluetooth agent is a broker that talks between two bluetooth enabled devices and initialize a connection between them. There are different types of bluetooth agents. The one that we will use is NoInputNoOutput agent because it lets us connect without user intervention. So let us initialize the agent by running the following commands.
agent NoInputNoOutput
You should get the message “Agent registered” as the response. Now that we have our agent registered, let us make it the default one.
default-agent
For which the response should be “Default agent request successful”
Now let us make our device discoverable
discoverable on
For which the response should be “Changing discoverable on succeeded”
Now try connecting your mobile phone or the computer to the Raspberry Pi
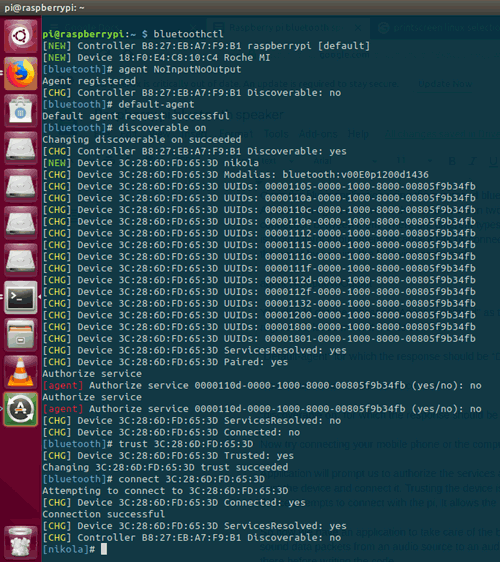
Application will prompt us to authorize the services and we need not do them. Instead we will just trust the device and connect it. Trusting the device is very important because when the trusted device attempts to connect with the pi, it allows the same with no user intervention whatsoever.
trust [device mac address]
connect [device mac address]
After all these actions, your terminal should look similar to this one.
Yay! We have our phone connected with the Raspberry Pi via Bluetooth. But is that enough? Obviously no, we want our sound data packets to be transferred from the phone to pi and then from the pi to the speaker that is connected to the pi’s audio port.
Let us make sure that we have our phone listed in the audio source of PulseAudio application by running the below command:
pactl list short
It will list all the loaded sound modules, audio sinks and audio sources
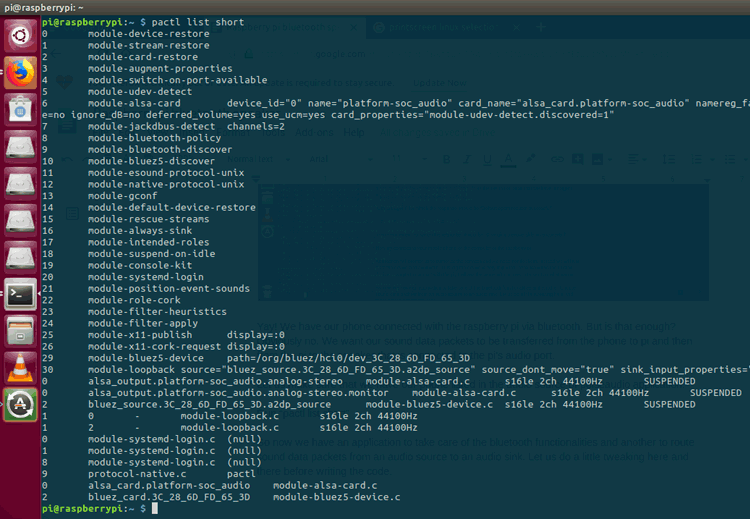
Look at the values against the serial number 30. Bluez_source means the source of audio via BlueZ application which is bluetooth. Cross check the device mac address which is in between bluez_source and a2dp_source and the address that you have in BlueZ application. In my case it is bluez_source.3C_28_6D_FD_65_3D.a2dp_source which is the same as the one from the BlueZ application. Now if you play a song from the device that is connected to the pi It should be routed to the speaker that is connected to the audio port of raspberry pi.
Eureka! We have successfully built a Bluetooth speaker. We have routed the sound but that is not all. We cannot do all the above steps manually so let us automate them using expect script and interface pi with a switch which when pressed, pairs the Pi with devices.
Cool? Let us now get down to business.
Automate the Bluetooth Paring Process with Python Scripts
Expect Scripts are like bash scripts but automated. It looks for the given word in the terminal and when the same arrives, it sends the command as per the script. Let us automate the process of pairing. Create a file called pair_bluetooth_device.expect
set timeout 30
spawn bluetoothctl
expect "# "
send "agent off\r"
expect "?gistered"
send "\r"
expect "# "
send "agent NoInputNoOutput\r"
expect "Agent registered"
send "\r"
expect "# "
send "default-agent\r"
expect "Default agent request successful"
send "\r"
expect "# "
send "discoverable on\r"
expect "Authorize "
send "yes\r"
send "exit\r"
Copy the code and paste the same in the file. It just does automatically, the actions that we did while pairing the mobile with raspberry pi. It just lets the device connect but does not trust it. To trust a device we need the mac address of it. So we shall print the output of this expect script to a log file from which the mac address can be gripped.
grep -Pom 1 "(?<=Device ).*(?= Connected)"
The above command prints out the value in between the string “Device” and “Connected”. In our case ( Device 3C:28:6D:FD:65:3D Connected: no ) it is the mac address of the device.
Let us write an expect script that will take in the mac address as the first argument and trust and connect to that device.
Create a file named trust_and_connect.expect
set timeout 30
spawn bluetoothctl
expect "# "
send "agent off\r"
expect "?egistered"
send "\r"
expect "# "
send "agent on\r"
expect "Agent registered"
send "\r"
expect "# "
send "default-agent\r"
expect "Default agent request successful"
send "\r"
expect "# "
send "trust [lindex $argv 0]\r"
expect "Changing"
send "connect [lindex $argv 0]\r"
expect "Connection successful"
send "exit\r"
Copy the above code into that file. It does the trusting and connecting part automatically.
Let us now put all this in a Python script file so that the whole pairing process can be automated.
Let us a create a file pair_and_trust_bluetooth_device.sh
cd $(dirname $0)
echo "Pairing..."
expect pair_bluetooth_device.expect > expect_script.log
chmod 777 expect_script.log
sleep 2
echo "Trusting and connecting.."
device_mac_address=$(cat expect_script.log | grep -Pom 1 "(?<=Device ).*(?= Connected)")
echo mac address is $device_mac_address
if [[ ! -z $device_mac_address ]] ; then
            expect trust_and_connect.expect $device_mac_address
else
            echo "No device connected"
fi
rm expect_script.log
So the bash script,
- Calls an expect script (whose output will be printed to a file named expect_script.log) which,
- Initiates the NoInputNoOutput agent
- Makes it the default-agent
- Turns on the discoverability of pi
- Waits for someone to connect and exits when someone does or timeouts
- Sleep for 2 seconds
- Grab the expect_script.log file for the device mac address
- Trusts and connects the device if the mac_address is null
- Removes the residue file expect_script.log
Trigger the Bluetooth Pairing Script with a Button
Now we have the script to automate the pairing process. But this script has to run at convenience, whenever the user desires. So lets hook this script up with a physical button so that this script gets called every time when button is pressed. Interrupt is one of the vital parts of embedded programming. For starters, interrupts when sensed put the regular routine of the program and runs a pre-defined ISR known as Interrupt Service Routine.
So let us connect the push button to gpio pin 11 and assign an ISR to the same. Inside the ISR, we shall call the script.
Let us create a python file named Bluetooth-speaker-main.py and add the code below to it. I have added the comments in the program so in case if you use this code, you still have them
#import required packages
import subprocess
import RPi.GPIO as gpio
import time
import os
import logging
pair_pin=11
#fetch the file directory from which the python script is run
fileDirectory = os.path.dirname(os.path.realpath(__file__))
#Set the log file location as same as the python script location
logFile=fileDirectory+"/bluetoothSpeaker.log"
logging.basicConfig(filename=logFile, filemode='w', format='%(name)s - %(levelname)s - %(message)s', level=logging.INFO)
def pairNewDevice(channel):
    #ISR for pin 11
    print("Waiting to pair")
    logging.info("Waiting to pair")
    output = subprocess.call(["/bin/bash",fileDirectory+"/pair_and_trust_bluetooth_device.sh", ">>", fileDirectory+"/bluetoothSpeaker.log"])
gpio.setmode(gpio.BOARD)
gpio.setup(pair_pin, gpio.IN, pull_up_down=gpio.PUD_UP)
try:
    #Set the pair_pin as an interrupt pin that detects the falling edge and when it does, call the pairNewDevice function
    gpio.add_event_detect(pair_pin, gpio.FALLING, callback=pairNewDevice, bouncetime=1000)
    print("Bluetooth program has started")
    logging.info("Bluetooth program has started")
    while True:
        time.sleep(5)

except KeyboardInterrupt:
    gpio.cleanup()
Circuit Diagram
Below is the circuit diagram to connect a button with GPIO11 of Raspberry Pi to trigger the Bluetooth pairing process for audio transfer via Bluetooth.

Setup a Cron Job to start the Bluetooth Speaker Python Program on Boot
Now finally let us set a cron job which will start this python program everytime the pi boots up.
crontab -e
Select your favourite editor and add the below line at the end of the file
@reboot python3 /home/pi/blueooth-speaker/Bluetooth-speaker-main.py
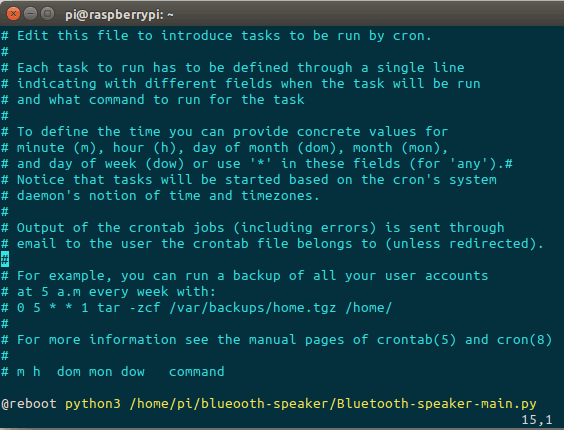
This will call our python program every time the pi boots up.
And this is it. The eagle has landed. You have made a Headless Raspberry Pi Bluetooth Speaker.
Restart your Pi, pair your phone and stream the audio. :)

All the scripts for this Raspberry Pi Bluetooth Speaker can be downloaded from the GitHub Account. Also check the video given below.
Comments
Hi! this is very cool project, but I have a problem with connecting my phone to raspberry. After discoverable ok and try to connect I see this:
[bluetooth]# trust 80:60:07:18:D3:1B
Changing 80:60:07:18:D3:1B trust succeeded
[bluetooth]# connect 80:60:07:18:D3:1B
Attempting to connect to 80:60:07:18:D3:1B
[CHG] Device 80:60:07:18:D3:1B Connected: yes
Failed to connect: org.bluez.Error.Failed
[CHG] Device 80:60:07:18:D3:1B Connected: no
[CHG] Device 80:60:07:18:D3:1B Connected: yes
[CHG] Device 80:60:07:18:D3:1B Connected: no
How can I solve this issue?

Is it possible this projekt to bring on a Rasperry Pi Zero W / WH.
Thanks.
Greetings from Germany. Uwe