

As far as we know, Drones are unmanned aerial or flying robots that can be controlled from a base station or autonomously navigated by a software-controlled flight plan that is in its embedded systems. It can have onboard sensors and GPS. Nowadays drones are being used in many applications like photography, surveillance, search and rescue, fire fighting, traffic monitoring, agriculture, weather monitoring, delivery services, etc.
Today, we will be working on a delivery drone that can deliver a package or can drop the package from the sky in rescue operations. We will be using KK 2.1 flight controller as of now, but we can also use CC3D or KK 2.1.5. In this project, we are not focusing on drone making as we have already covered it in previous tutorials. We will be covering up the building of the gripper mechanism, and configuration of the remote for controlling the servos. I've included the STLs for 3D Print along with this article, you can 3D print them after downloading. We will use a 1045 propeller set as High Thrust for lifting the package and landing gear will be required. Build your own drones with our DIY drone projects, complete with code and tutorials.
Components Required for Delivery Drone
Component | Qty. |
Quadcopter Frame 450 | 1 |
A2212 1000 KV BLDC | 4 |
ESC 30 A | 4 |
Flight Controller KK2.1 | 1 |
Servo Motor MG-90 | 2 |
Li-Po 2200 mAh 11.1 Volts 3s 30c battery | 1 |
FS-i6 Radio Transmitter with Rx | 1 |
Propeller 1045 | 2 set |
Note: I will recommend buying 2 extra sets of propellers as they may break if you are a beginner.
Delivery Drone Circuit Diagram
If you are a beginner, you should know, how a flysky FS-i6 works. As we know, FS-i6 has 6 channels for PWM and PPM signals along with i-bus and s-bus as additional features. We will be using PWM pins. We will use 4 channels for controlling the drone and 2 channels for controlling the servos. Now, for controlling the servos we will be required to reverse a channel (either 5 or 6) so that both servo motors can run in the opposite direction. The rest of the tuning can be done using the tutorials that we have referred to.

Additional Tuning Requirement at the FS-i6 Transmitter
First, turn on the transmitter and then follow the instructions
- Long press the ‘OK’ Button
- Go to ‘SYSTEM’ by pressing ‘OK’ Again
- Navigate to the ‘RX Setup’, press ok again
- Now Navigate to the ‘Servo Freq’
- Set it to 78 then ‘OK’
- Come back to ‘Menu’ again
- Now go to ‘Function Setup’
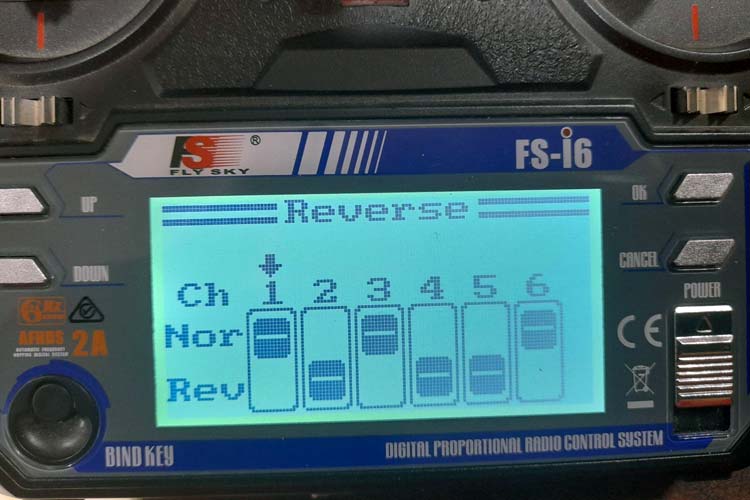
- Then Go to ‘Reverse Option’ and put channel 2,4,5 in reverse (refer to the below image)
- Then go to ‘Aux. Channel’ and set ‘Source’ of channel 5 and 6 as ‘SwD’
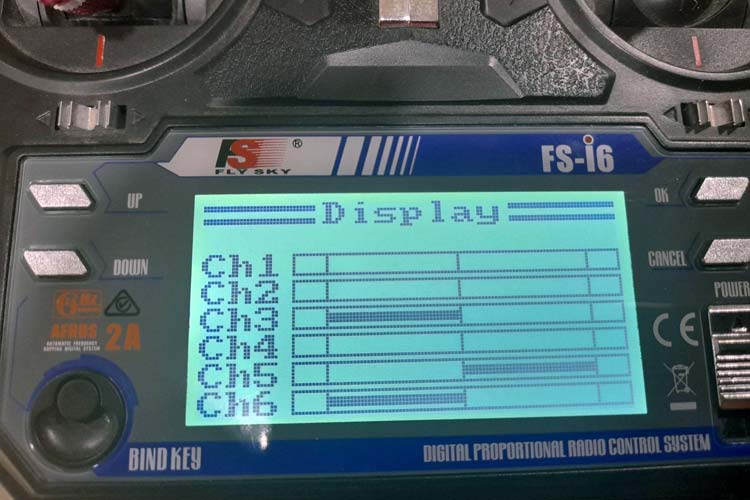
- Now go to ‘Display’ from the previous ‘Menu’.
- You can see that the Switch D is controlling the Ch5 and Ch6 bars
Delivery Drone using 2 MG-90 Servo Motors
We are going to make a delivery drone with 2 MG-90 Servo Motor. So here we go.
Gripper of the Drone
I prefer to use Tinkercad for all such basic designs, so, I have designed the gripping horns for the servo using this online tool. These horns can be directly attached to the servo horns with the help of Screws.
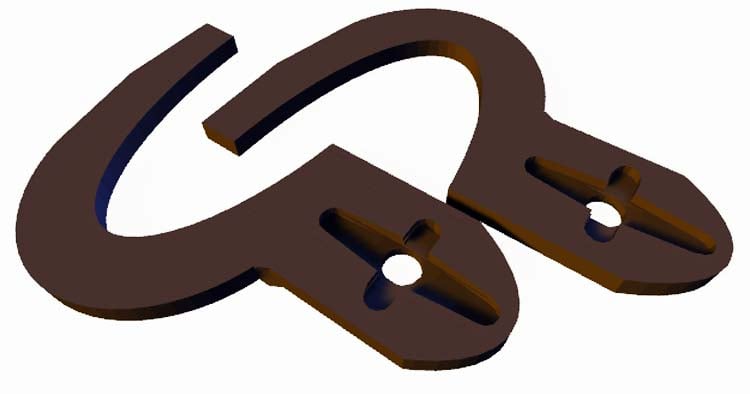
These horns are designed for MG-90 servo motors. Servo mounts can be fitted in the voids of the gripper hook and can be attached with screws. I am attaching STL files of both the control horns. You can download it from here.
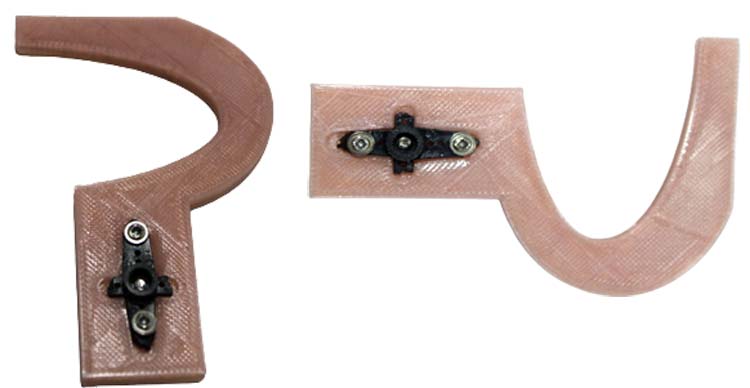
Attaching horns of Servo motor with 3D Printed Holders
Here the horns that come up with the MG-90 Servo motor can be fixed in the void. Attach them with the help of screws provided in the packet. It will look like below.
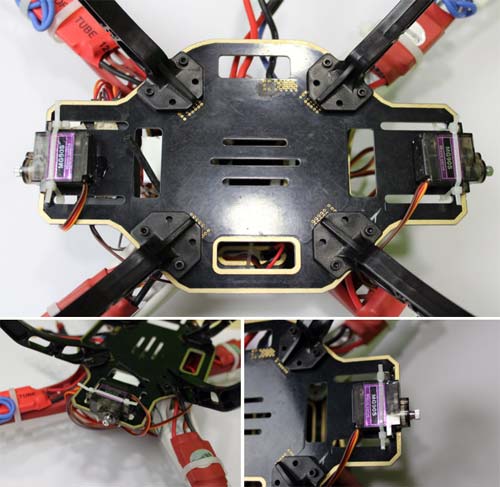
Attaching Servo Motors on the Drone
Now both the servo motors will be attached at the bottom of the Drone facing each other. Just keep in mind that each servo motor will be attached in a symmetrical way so that the balancing of the drone could not be affected. Right now I am using Medium Size Cable ties to tie the motors.
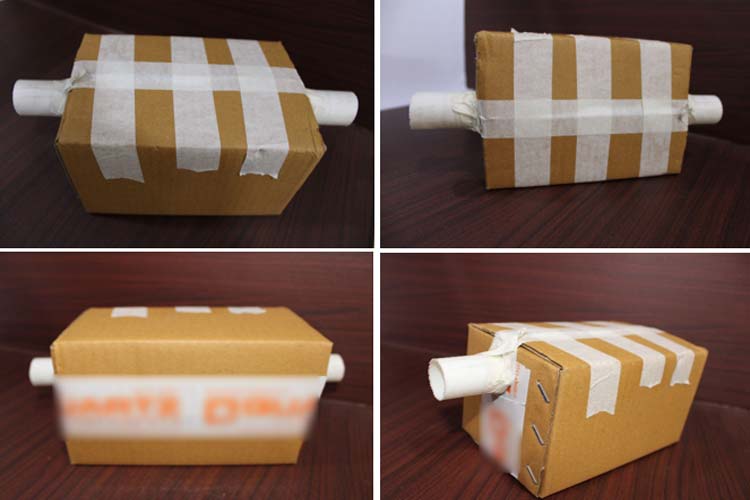
Building Boxes for the Delivery Drone
I have made a customized cardboard box for the gripping mechanism. You can design it in your own creative way. You can see that I have attached a rod horizontally so that it can be held by the hooks of the drone holder.
Attaching Holders on Servo Motor
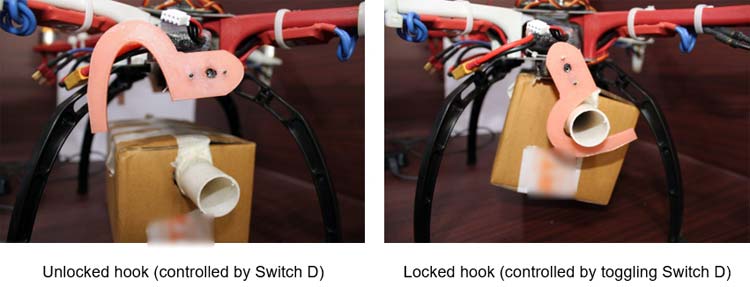
To attach it in the correct manner you must have to power up the drone and transmitter. By doing so, both the servo motors come up in a neutral position. Now, check whether the Servos are controlled by toggling Switch D of your Transmitter. Now, we will attach our 3D printed Holders on the servo motor with the screws provided.
Note: You will have to synchronize the movements of the holders in such a way that by toggling Switch D, the gripping hook must be locked or unlocked.
Applications
We know that delivery drones are made for transferring packages from one place to another and have already covered a detailed article on the applications of drone delivery on our website.
Delivery Drone Testing
We have marked the delivery location with a white tile. We will try to land the drone on that tile and leave the package there. And then we will fly again to get back to the launching site.
Dropping in Rescue Zones
Now we will try to drop the package on a given site from the sky. By doing so, we will try to mimic the aerial package drops in a rescued zone. Now the drone will fly to the rescue site and then drop the package containing medical and essential supplies.
Conclusion
Now we have built up our own delivery drone that can Drop the package during flight as well as on a certain marked point. Since we are not using any GPS or an expensive flight controller that's why we have to control our drone manually which will require more practice. I hope you enjoyed the project. If you have any queries, feel free to ask in the comment section or in our forum.
