
In today’s world of cutting-edge technologies, Digital Image Processing is growing very fast and become an important part of many digital devices like mobile, security cameras, laptops, etc.
The most common applications of Digital Image Processing are object detection, Face Recognition, and people counter. So in this tutorial, we are going to build an OpenCV crowd counting using Raspberry Pi and ThingSpeak. Here the pi camera module will be used for continuously capturing the frames and then these frames will be processed with HOG (Histogram Oriented Object descriptor) to detect the objects in the image. After this, these frames will be compared with OpenCV’s pre-trained model for people detection. The people counting will be displayed on the ThingSpeak channel which can be monitored from anywhere in the world.
Components Required
Hardware
- Raspberry Pi 3 (any version)
- Pi Camera
Software & Online Services
- ThingSpeak
- Python3.0
- OpenCV3.0
Installing OpenCV in Raspberry Pi
Here OpenCV library will be used to detect the crowd. To install the OpenCV, first, update the Raspberry Pi.
sudo apt-get update
Then install the required dependencies for installing OpenCV on your Raspberry Pi.
sudo apt-get install libhdf5-dev -y
sudo apt-get install libhdf5-serial-dev –y
sudo apt-get install libatlas-base-dev –y
sudo apt-get install libjasper-dev -y
sudo apt-get install libqtgui4 –y
sudo apt-get install libqt4-test –y
After that, install the OpenCV in Raspberry Pi using the below command.
pip3 install opencv-contrib-python==4.1.0.25
We previously used OpenCV with Raspberry pi and created a lot of tutorials on it.
- Installing OpenCV on Raspberry Pi using CMake
- Real-Time Face Recognition with Raspberry Pi and OpenCV
- License Plate Recognition using Raspberry Pi and OpenCV
We have also created a series of OpenCV tutorials starting from the beginner level.
Installing other Required Packages
Before programing the Raspberry Pi for Crowd Counting, let’s install the other required packages.
Installing imutils: imutils is used to execute few necessary image processing functions such as translation, rotation, resizing, skeletonization, and displaying Matplotlib images easier with OpenCV. So install imutils using below command:
pip3 install imutils
matplotlib: After that, install the matplotlib library. Matplotlib is a comprehensive library for creating static, animated, and interactive visualizations in Python.
pip3 install matplotlib
ThingSpeak Setup for People Counting
ThingSpeak is a very popular IoT platform and by using the ThingSpeak platform, we can monitor our data over the Internet from anywhere. It is also used to control the system over the Internet, using the Channels and webpages provided by ThingSpeak. We previously used ThingSpeak to build many IoT based projects.
To create a channel on ThingSpeak first, first Sign up on ThingSpeak. In case if you already have an account on ThingSpeak, sign in using your id and password.

Click on Sing up and enter your details.
After this, verify your E-mail id and click on continue.
Now, after login, create a new channel by clicking the “New Channel” button.
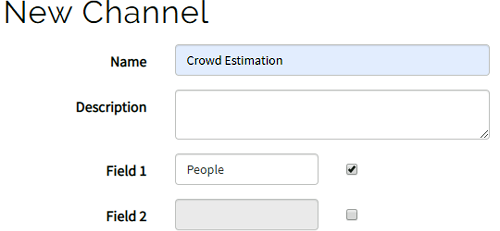
After clicking on “New Channel,” enter the Name and Description of the data you want to upload on this channel. Here we have created one field named People. Multiple fields can be created according to requirements.
After this, click on the save channel button to save the details.
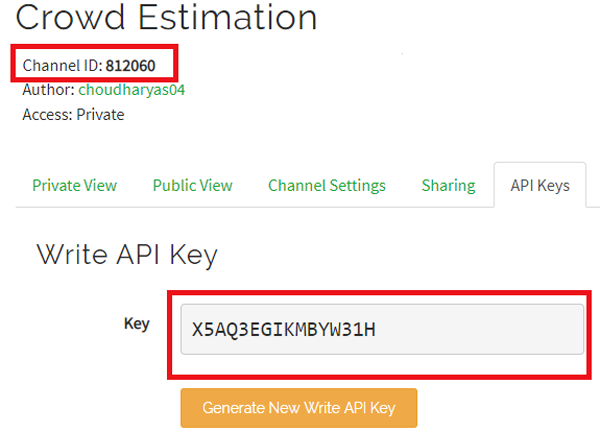
To send data to ThingSpeak, enter the API key and channel ID in Python script, so copy the API key and channel ID.
Hardware Setup
Here we only require Raspberry Pi and Pi camera for this OpenCV human counting project and you just need to attach the camera ribbon connector in the camera slot given in the Raspberry pi

Pi camera can be used to build various interesting projects like Raspberry Pi Surveillance Camera, Visitor Monitoring System, Home Security System, etc.

Python Program Explanation for People Counter
Complete python code for this crowd counting OpenCV project is given at the end of the page. Here we are explaining the important sections of the code for a better explanation.
So at the starting of the code, import all the required libraries that are going to be used in this project.
import cv2 import imutils from imutils.object_detection import non_max_suppression import numpy as np import requests import time import base64 from matplotlib import pyplot as plt from urllib.request import urlopen
After importing the libraries, enter the ThingSpeak channel ID and Write an API key that you copied earlier.
channel_id = 812060 # PUT CHANNEL ID HERE
WRITE_API = 'X5AQ3EGIKMBYW31H' # PUT YOUR WRITE KEY HERE
BASE_URL = "https://api.thingspeak.com/update?api_key= {}".format(WRITE_API)
Now, initialize the HOG (Histogram Oriented Object descriptor). HOG is one of the most popular techniques for object detection and has been used in several applications. cv2.HOGDescriptor_getDefaultPeopleDetector() used to call a pre-trained model of OpenCV for people detection. We previously explained HOG in detail in the previous OpenCV tutorial.
hog = cv2.HOGDescriptor()
hog.setSVMDetector(cv2.HOGDescriptor_getDefaultPeopleDetector())
Inside the detector(), Pi receives an RGB image split into three colour channels. After it, it resizes the image using imutils. Then it calls the detectMultiScale() method to analyze the image to know if a person exists using the classification result from the SVM model.
def detector(image):
   image = imutils.resize(image, width=min(400, image.shape[1]))
   clone = image.copy()
   rects, weights = hog.detectMultiScale(image, winStride=(4, 4), padding=(8, 8), scale=1.05)
Sometimes the capture-boxes overlap and generate false positives or detection errors, so below code applies non-max suppression from imutils to kick-off overlapped boxes.
for (x, y, w, h) in rects:
       cv2.rectangle(image, (x, y), (x + w, y + h), (0, 0, 255), 2)
   rects = np.array([[x, y, x + w, y + h] for (x, y, w, h) in rects])
   result = non_max_suppression(rects, probs=None, overlapThresh=0.7)
   return result
Inside the record() function, it retrieves the image directly from the Pi camera using the VideoCapture() method from OpenCV, resizes it using the imultis and sends the results to ThingSpeak.
def record(sample_time=5):
  camera = cv2.VideoCapture(0)
frame = imutils.resize(frame, width=min(400, frame.shape[1]))
result = detector(frame.copy())
thingspeakHttp = BASE_URL + "&field1={}".format(result1)
Testing the OpenCV Person Counter
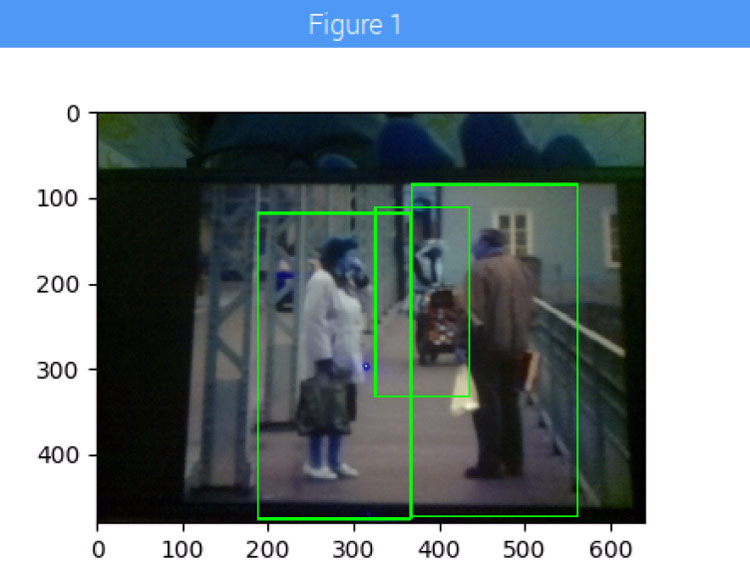
Before launching the python script, first, check whether your PI camera is working or not. After reviewing the camera, launch the python script by issuing the following command:

Then you will find a window popping up with your video feed in it. Pi will take the first frame and process it using the OpenCV to detect the number of peoples. If it detects the people, you will find a box around it like this:
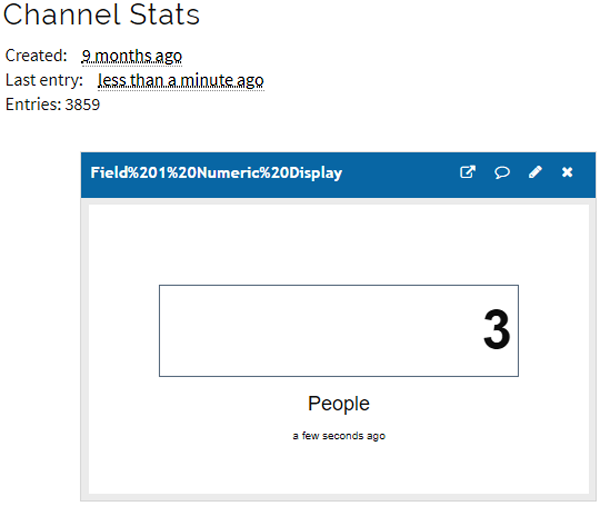
Now check your ThingSpeak channel, where you can monitor the crowd size from anywhere in the world.
This is how you can make OpenCV crowd counting using the Raspberry Pi. Working video and code is given at the end of the page.
Complete Project Code
import cv2
import imutils
from imutils.object_detection import non_max_suppression
import numpy as np
import requests
import time
import base64
from matplotlib import pyplot as plt
from urllib.request import urlopen
channel_id = 812060 # PUT CHANNEL ID HERE
WRITE_API  = 'X5AQ3EGIKMBYW31H' # PUT YOUR WRITE KEY HERE
BASE_URL = "https://api.thingspeak.com/update?api_key={}".format(WRITE_API)
hog = cv2.HOGDescriptor()
hog.setSVMDetector(cv2.HOGDescriptor_getDefaultPeopleDetector())
# In[3]:
def detector(image):
   image = imutils.resize(image, width=min(400, image.shape[1]))
   clone = image.copy()
   rects, weights = hog.detectMultiScale(image, winStride=(4, 4), padding=(8, 8), scale=1.05)
   for (x, y, w, h) in rects:
       cv2.rectangle(image, (x, y), (x + w, y + h), (0, 0, 255), 2)
   rects = np.array([[x, y, x + w, y + h] for (x, y, w, h) in rects])
   result = non_max_suppression(rects, probs=None, overlapThresh=0.7)
   return result
def record(sample_time=5):
   print("recording")
   camera = cv2.VideoCapture(0)
   init = time.time()
   # ubidots sample limit
   if sample_time < 3:
       sample_time = 1
   while(True):
       print("cap frames")
       ret, frame = camera.read()
       frame = imutils.resize(frame, width=min(400, frame.shape[1]))
       result = detector(frame.copy())
       result1 = len(result)
       print (result1)
       for (xA, yA, xB, yB) in result:
           cv2.rectangle(frame, (xA, yA), (xB, yB), (0, 255, 0), 2)
       plt.imshow(frame)
       plt.show()
       # sends results
       if time.time() - init >= sample_time:
           thingspeakHttp = BASE_URL + "&field1={}".format(result1)
           print(thingspeakHttp)
           conn = urlopen(thingspeakHttp)
           print("sending result")
           init = time.time()
   camera.release()
   cv2.destroyAllWindows()
# In[7]:
def main():
   record()
# In[8]:
if __name__ == '__main__':
main() Comments
This is because OpenCV is not correctly installed on Your Pi.
Got this working very quickly. Thanks for the project.
However, the app 'freezes' after printing 'cap frames'
Can you help?
Ian
hi may i know why the number of people at channel status in thingspeak did not show up and can I sent this analysis through my email?
hello, Im using Rpi model 3B+ for this, but while running the project 3 errors are there.
eoors on line no 57, 55 and 36. it is not taking main(), record() and frame = imutils.resize(frame, width=min(400, frame.shape[1])).
showing errors for this.
can you help regarding this?

I am having a lot of traceback errors. In line 1, with import cv2 and line 3, from .cv2 import *