

Earlier day’s computer obtained input information from keyboards and mouse, now they have evolved to be able to process information from images and videos. The ability of a computer (machine) to extract, analyze and understand information from an image is called as Computer Vision. In recent years the capability of Computer vision has become sophisticated enough, not only to recognize people/objects but also to also analyze their nature or read even their emotions. All these were made possible with the help of deep learning / AI where an algorithm trained with many similar images so that it can look for information in a new image. Today the technology has become reliable enough to be used in Security, hospitality and even in Financial Payment Portals.
The most commonly used library for Computer vision is OpenCV. It is an open source free to use cross-platform library from Intel, meaning it could work on every operating system like windows, mac or Linux. We already explained installing OpenCV on Windows and also done some Image Manipulations using Python OpenCV on Windows. Today we will learn how to install the OpenCV4 library on Raspberry Pi 3 so that we can use it for Computer vision applications. This will allows OpenCV to run on a portable device like Pi opening doors to many possibilities. So let’s get started
Installing OpenCV on Pi is a daunting process, mainly because it is very time consuming and the chances of stumbling across an error is high. So I have made this tutorial as simple and informative as possible based on the difficulties that I had and making sure you don’t face the same. At the time of writing this tutorial OpenCV has already released the 4.0.1 version three months back, but I decided to stick on to the previous version that is 4.0.0 since the new version had some problem in getting compiled.
Prerequisites
Before we dive in, I assume you have already installed the latest OS on your Raspberry PI and have access to it via SSH. If not, follow the Getting started with Raspberry Pi tutorial before proceeding. Here I am using Rasbian Stretch installed on Raspberry Pi 3.
Pip Installing OpenCV on Raspberry PI
As we all know python has its own package manager called pip which can be used to easily add libraries for the python. And yes there is also a way to use PIP to install openCV within minutes on Pi, but sadly it did not work for me and for many others as well. Also installing through pip does not allow us to get full control over the OpenCV library, but still if you are looking for the quickest way then you might give this a try as well.
Make sure pip is installed on your pi and is upgraded to latest version. Then enter the following commands on your terminal one by one
sudo apt-get install libhdf5-dev libhdf5-serial-dev sudo apt-get install libqtwebkit4 libqt4-test sudo pip install opencv-contrib-python
This should install OpenCV on your Pi, if you are successful with this step then you can skip the tutorial and scroll down to Step 13 to check if OpenCV is installed properly with python. Else, take a deep breath and start following the tutorial below.
Installing OpenCV 4 on Raspberry Pi using CMake
In this method we will download the source package of OpenCV and compile it on our Raspberry Pi using CMake. Some people tend to install OpenCV on virtual environment so that they can use different version of python or OpenCV on the same machine. But I am not opting for that since I would like to keep this article short and also I don’t see any need for it anytime soon.
Step 1: Before we begin let’s make sure the system is updated to the current version, to do this enter the following command
sudo apt-get update && sudo apt-get upgrade
This should download any latest packages if available and install it. The process will take 15-20 minutes so wait for it.

Step 2: Next we have to update the apt-get package so that we will be able to download CMake in our next step
sudo apt-get update
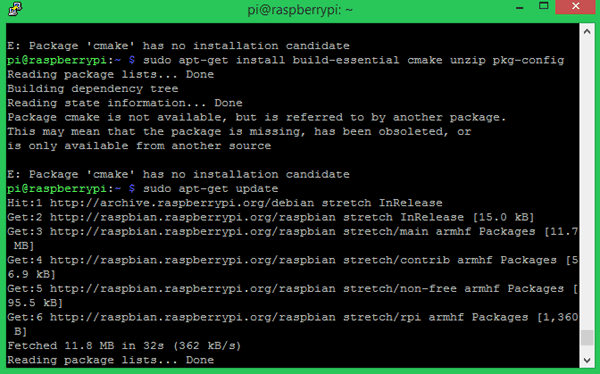
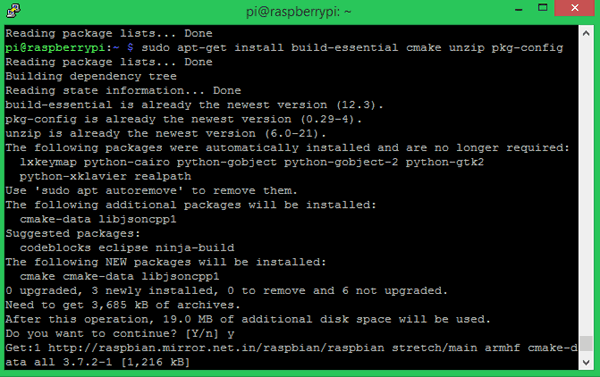
Step 3: Once we have upgraded the apt-get software, we can download and install the CMake package using the below command
sudo apt-get install build-essential cmake unzip pkg-config
Your screen would look like something like this below during the installation of CMake
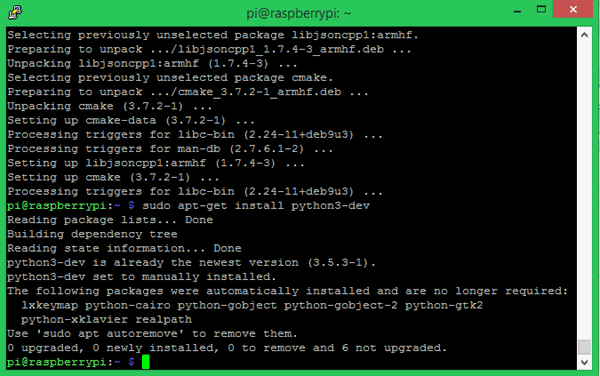
Step 4: Then install the python 3 development headers using the below command
sudo apt-get install python3-dev
Mine already had it installed so it displays something like this.
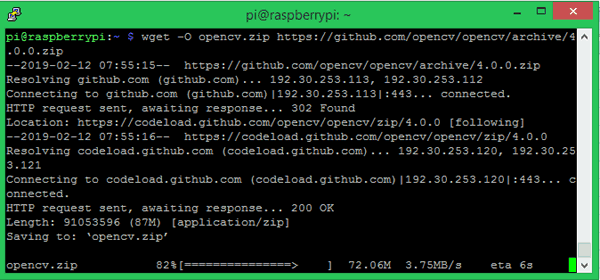
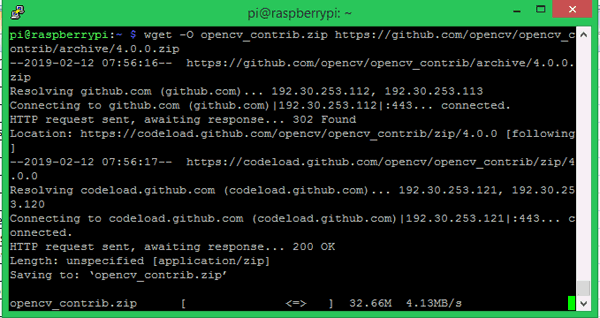
Step 5: The next step would be to download the OpenCV Zip file from GitHub. Use the following command to do the same
wget -O opencv.zip https://github.com/opencv/opencv/archive/4.0.0.zip
As you can see we are downloading the version 4.0.0
Step 6: OpenCV has some pre-built packages for python which will help us in developing stuff easier called the OpenCV contrib. So let’s also download that by using a similar command that is shown below.
wget -O opencv_contrib.zip https://github.com/opencv/opencv_contrib/archive/4.0.0.zip
At this point you should have downloaded two zip files named “opencv-4.0.0” and “opencv-contrib-4.0.0” on your home directory. You can check it out just in case if you want to be sure.
Step 7: Lets unzip the opencv-4.0.0 zip file using the following command.
unzip opencv.zip

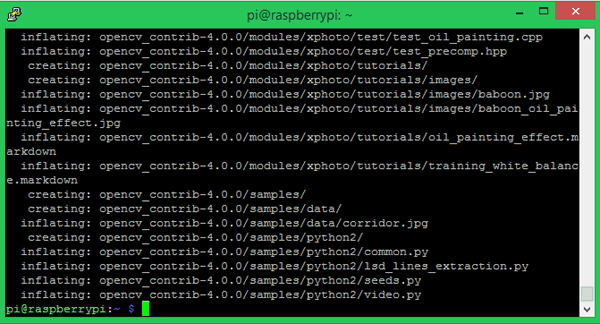
Step 8: Similarly also extract the opencv_contrib-4.0.0 using the command line
unzip opencv_contrib.zip
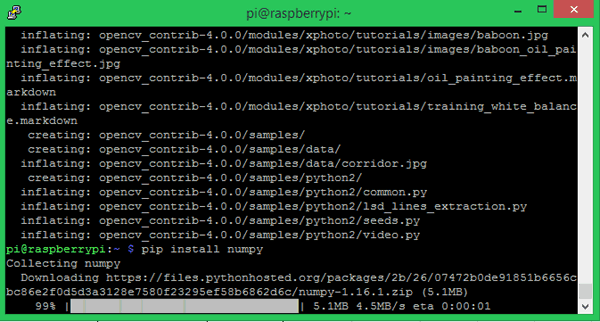
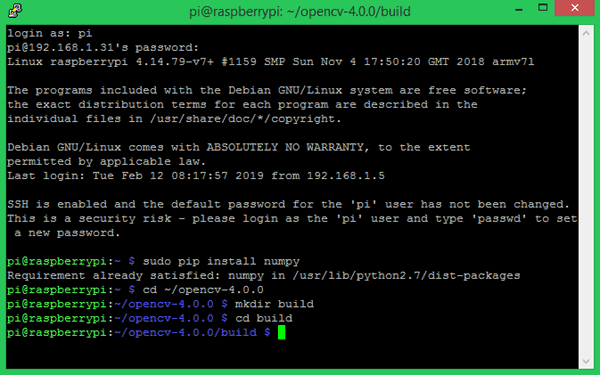
Step 9: OpenCV requires numpy as a prerequisite to work. So let’s install it using the below command.
pip install numpy
Step 10: Now, we would have two directories named “opencv-4.0.0” and “opencv_contrib-4.0.0” in our home directory. The next step would be to compile the Opencv library, to do that we need to create a new directory called “build” inside the opencv-4.0.0 directory. Follow the below commands to do the same
cd~/opencv
mkdir build
cd build
Step 11: Now, we have to run CMake for OpenCV. This is the place where we can configure how OpenCV has to be compiled. Make sure you are in the path “~/opencv-4.0.0/build”. Then copy the below lines and past in the terminal window
cmake -D CMAKE_BUILD_TYPE=RELEASE \
    -D CMAKE_INSTALL_PREFIX=/usr/local \
    -D OPENCV_EXTRA_MODULES_PATH=~/opencv_contrib-4.0.0/modules \
    -D ENABLE_NEON=ON \
    -D ENABLE_VFPV3=ON \
    -D BUILD_TESTS=OFF \
    -D WITH_TBB=OFF \
    -D INSTALL_PYTHON_EXAMPLES=OFF \
    -D BUILD_EXAMPLES=OFF ..
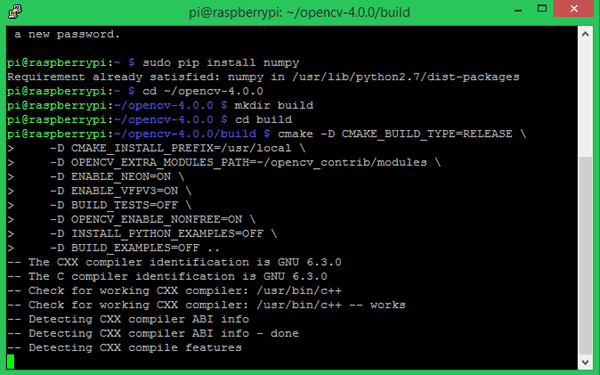
It should get configured without any errors and you should see the text “Configuring done” and “Generating done” in the as shown below.

If you get any error in this process then make sure you have typed in the proper path and you have two directories named “opencv-4.0.0” and “opencv_contrib-4.0.0” in the home directory path.
Step 12: This would be the most time consuming step. Again make sure you are in the path “~/opencv-4.0.0/build” and use the following command to compile OpenCV.
Make –j4
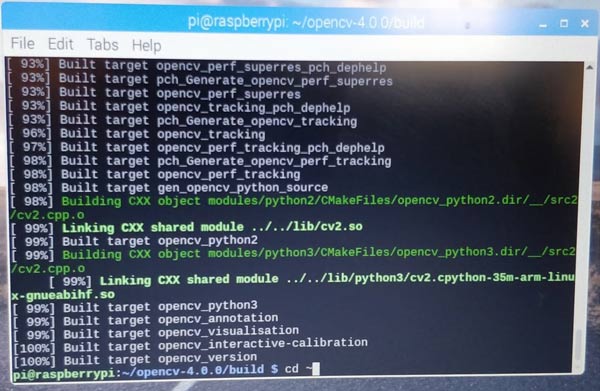
This would start building OpenCV and you would be able to see the progress in percentage. The process would take around 3-4 hours and if it gets completely built you should see a screen like this above.
The command “make –j4” makes use of all the four cores to compile OpenCV. At 99% percentage some people might find it taking too long for the process to complete wait patiently and it should get finished.
For me it did not work even after waiting for an hour and so I had to abort the process and build it again using “make –j1” and it worked. Using make –j1 uses only single core of pi and it would take a longer time than make j4 so it is recommended to use make j4 and then uses make j1 since most of the compilation would be done by make j4.
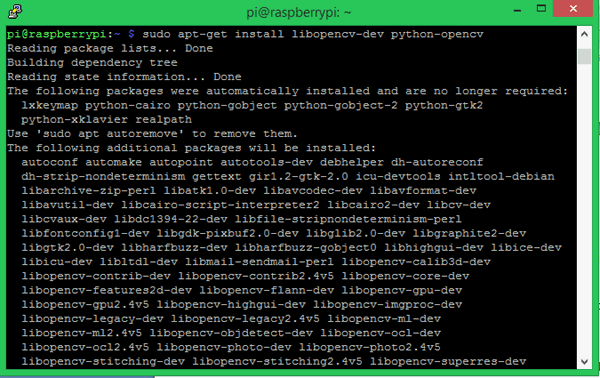
Step 13: If you have reached this step then, that is it you have sailed through the process. The final step would be to install libopecv using the following command.
sudo apt-get install libopencv-dev python-opencv
Step 14: Finally you can check if the library was added successfully by running a simple python script. Type python and try “import cv2” like shown below. You should not receive any error when you do this.
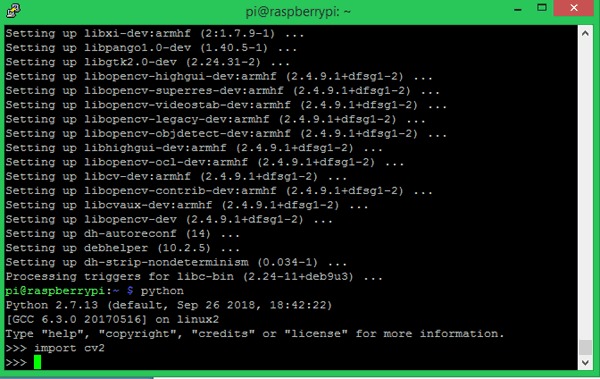
If you get this screen then you can proceed with whatever OpenCV project you have in mind. If you are just getting started with OpenCV then you can also look into this Basic OpenCV tutorial. Also check our other Image processing tutorials.
Hope this article was able to help you in installing OpenCV on Raspberry Pi, if you have any problem post them in the comment section and I will try my best in getting it resolved. You can also try using our forums for more technical questions.
Comments
No sure what exactly is
No sure what exactly is causing this problem. But why do you want to use python 3 instead of python 2. Most people have probelm in working with OpenCV with Python 3.
Anyway if you still wish to continue you can proceed with step 10. Because numpy is already installed in python 3 so you can skip this step
Though I am installing
Though I am installing python3,the python environment is still at 2.7, opencv2.4.. After using the command make -j1, I a unable to logon to the pi via putty again, and so I have to unplug the voltage source, and again restart the system.. Can I Know the solution for this..?
After using the command make
After using the command make -j1, I a unable to logon to the pi via putty again,
Does this mean you are being logged out when you use make -j1
In pi you can open the terminal with python 3, by just typing in python 3
Raspberry Pi lockup at step 12
Any advice from experienced readers ? When I execute step 12, make -j4 , the Raspberry Pi will lockup.
The symptoms of lockup, the Raspberry Pi green LED lites solid all the time, and the raspberry pi real time clock on Desktop stops keeing time, and no progress seen on make command %.
I started with a 16Gb uSD card, but the first time using STEP 12 on the make step, the uSD card filled up.
I got a fresh 32 Gb uSD card , installed NOOBs, and retry.
In fact, I retried several times, reformatting the uSD card (somethimes quick format sometime full overwrite, using SD card format SW) , installing Noobs, after reboot, then install openCV. Repeat after lockup.
I have tried make -j1, make -j2, make - j3 AND make -j4. After some tries, after raspberry pi lockup, I just reboot and repeat STEP 12, it continues on, but never finishes before raspberry Pi lockup.
I also am using both a Raspberry Pi 3B+ and a Raspberry Pi 3A , and they both behave the same way with this uSD card load.
I am following instructions to the letter, and dont understand why the Raspberry Pi locks up. I really want to use this install procedure because the article explains this application very well, and is good for begineers.
Please any advice ?
I managed it by temporarily
I managed it by temporarily change the value of CONF_SWAPSIZE from 100 to 2048 in /etc/dphys-swapfile before compiling. This way you can use all 4 cores of the pi to compile OpenCV. But don't forget to set it back to 100 after compilation finished!
Do this on your own risk as this can burn out your sd card!
Oh and after changing the
Oh and after changing the value you have to restart the dphys-swapfile service
Pi 4 will save you from this probelms
We have raspberry pi 4 to save us from these probelms. anyway for people with Pi3 use a heatsink if you are playing with swap values
after entering sudo apt-get
after entering sudo apt-get install libopencv-dev python-opencv, the installing gets to around 40% before it says E: Unable to fetch some archives, maybe run apt-get update or try with --fix-missing?
installation of opencv in raspberry 3
sir
i am regular follower of your website and interested in arduino based projects .
with ur code many more projects done successfully.
but in the case of opencv installation , the about compiling 60 percent
the controller becomes halt and stayed
please give some suggestions to install opencv
thanking u
chockalingam , 91 9444863248
Please Help me
Please Help me
I am using Raspberry pi 3 Model b i have also swap 100 to 1024 but i am still stuck on 100% while using make -j4 command i have tried 2 to 3 methods to resolve but failed can you please give me solution As Soon As Possible
Thanks In Advance
Same problem
Hello,
I am also facing the same problem. Can you help me out?
Not able to complete the installation process
Hello,
I am trying to install the opencv on raspberry pi. I am not getting any error but the process is not completed in action. When I am running the "make -j4" command the process continyues till 100% and stops. No error, nothing. When I interrrupt in then it says interruption error.
Please help me out with this. I have tried it for two time. Facing same issuse.
Thank you in advance
Actual version installed is 3.2.0
Thanks for the great tutorial, it worked well and smoothly with no errors on my Raspberry Pi 4 running Raspbian 10 (buster), with 4GB of RAM.
It compiled in less than an hour but a bit of patience is required when it reaches 99% and 100% :)
However, it seems like the final commands:
"sudo apt-get install libopencv-dev python-opencv"
install opencv version 3.2.0 and not the downloaded 4.0.0
Also tried :
"sudo apt-get install libopencv-dev python3-opencv"
In both cases, python 2 and python3 return:
>> import cv2
>> cv2.__version__
>> '3.2.0
What am I missing?
Thanks!

hello and soory for my bag english
i had problem for install opencv, but i found your blog.
so i follow your instruction and...
step 9:
ok, i go and..
pi@raspberrypi:~ $ sudo pip install numpy
DEPRECATION: Python 3.4 support has been deprecated. pip 19.1 will be the last one supporting it. Please upgrade your Python as Python 3.4 won't be maintained after March 2019 (cf PEP 429).
Requirement already satisfied: numpy in /usr/lib/python3/dist-packages (1.8.2)
why,i'm desesprate,please help me.