
Twitter like most other social media platforms is officially part of our everyday life, either for personal or business use, its become a great way to connect with the world, either by trolling or sharing important information. For business especially, there is always a great need to schedule tweets or automate things in one way or the other. What if there was a way to do that with little or no human supervision once its all setup, that’s why for today’s tutorial, we will focus on equipping our Raspberry Pi with the ability to post and read tweets. This becomes very useful in the case of events where you want the Raspberry Pi to take pictures at random and post them on twitter or when you need to post a thread.
Today’s Tutorial relies heavily on the python library, Twython, which is a python module for interfacing with twitter. With twython, we could do most of the things you normally would want to do on your twitter handle like send DMs, Post tweets, read tweets, read DMs, Upload an image, change DP, Change background image, and a lot more. Twython requires authentication from twitter, which can be received by creating a twitter app. All these will be covered in the step by step instructions as we proceed.
Lets dive in!
Required Components
The following components are required to build this project;
- Raspberry pi 2 or 3
- SD Card (8gb Minimum)
- LAN Cable
- Power source
Optional
- Keyboard
- Mouse
- Monitor
- HDMI Cable
To proceed, we will be using the Raspbian stretch OS for this tutorial and since its setup is same as that of the Jessie, I will assume you are familiar with setting up the Raspberry Pi with the Raspbian stretch OS. I also want to assume you know how to ssh into the Raspberry Pi using a terminal software like putty. If you have issues with any of the things mentioned, there are tons of Raspberry Pi Tutorials on this website that can help.
For new Stretch users (fresh installs), you should note that SSH is disabled and you will need to enable it before you can talk to the raspberry pi over SSH. One way to do this is to activate it by connecting a monitor and enabling ssh, while the second which is my favorite is by creating a file named ssh (with no extension) and copying it to the root folder on your SD card. This can be done by inserting it the SD card into your PC.
With that done, lets setup our Raspberry Pi Twitter Bot.
Installing Twython on Raspberry Pi
The first thing we do is install the Twython library for the Raspberry Pi which is what we will be using to interface with twitter.
Follow these steps to install Twython.
Step 1: Like we always do, update and upgrade your raspberry pi using the following command;
sudo apt-get update
sudo apt-get upgrade
Step 2: Install python tools
sudo apt-get install python-setuptools
Step 3: install pip if not previously installed.
sudo easy_install pip
Step 4: Install twython via pip
sudo pip install twython
After these steps, you should have Twython installed and ready to be used by python. Next we create the Twitter App.
Create a Twitter App
To be able to interact with twitter from outside the twitter domain, we need the twitter API and to have access to that, we need to create a new twitter app, whose details will then be used by the Twython library to connect the our python script to twitter.
Follow the steps below to get it up and running.
Step 1: Sign in to your twitter account and go to this URL https://apps.twitter.com/app/new
Step 2: Fill in the details. An example is shown below.
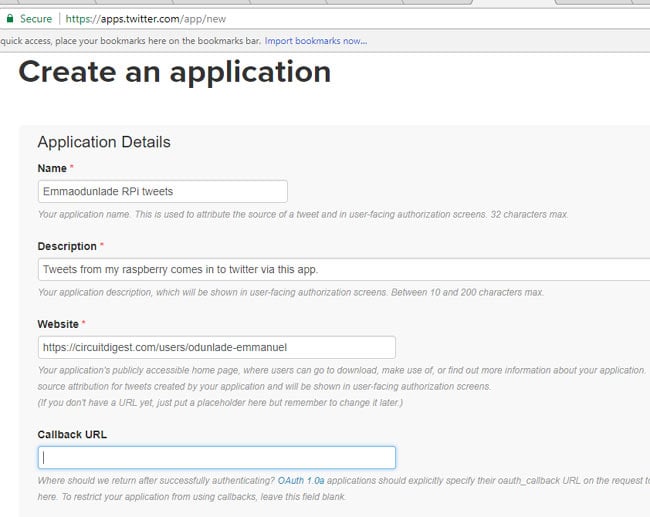
Go through the developer agreement, if you are ok with it, hit submit. Yup, the app is created.
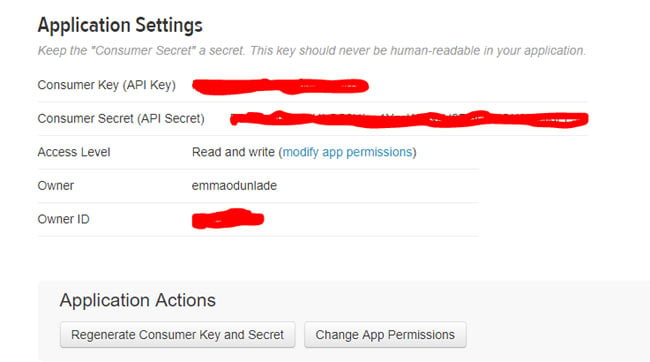
On the next page after clicking submit, you should see application settings, keys and access tokens, and permissions. Go through the permissions section and ensure everything looks like the image below

Step 3: Next we generate the access tokens which will be used to access twitter from our python script.

Step 4: You will also need the consumer secret and the consumer key which is also found under the keys and access tokens section to set up the Twython.
With our access keys and tokens in hand and the Twython library installed, we are ready to write the script with which we will be able to post messages to or read messages from twitter.
Python Script for Raspberry Pi Twitter Bot:
Ensure you are in the root folder by entering the command
cd ~
If you already have a project folder for your Raspberry Pi projects, CD into it. if not, it’s better to create one to keep your work organized and all in one place.
So if you are in the second category let’s create a project folder using;
mkdir rpiprojects
PS: you can call it whatever name you desire.
Change directory to that of the project folder:
cd rpiprojects
then open an editor to write your python script;
sudo nano pitwits.py
You can also call this any name you desire.
Once the editor opens, type in the following lines of code,
#!/usr/bin/env python
import sys
from twython import Twython
#enter the keys and secrets inbetween the quotes
consumerKey = ' '
consumerSecret= ''
accessKey= ' '
accessSecret = ' '
api = Twython(consumerKey,consumerSecret,accessKey,accessSecret)
api.update_status(status=sys.argv)
Ensure to input the access tokens and keys from the twitter app we created earlier, before saving and exiting the editor. Enter Ctrl + X followed by Y to save while exiting the editor.
With the python script all done, we are now ready to post some tweets but before that, we need to make the python script an executable file. We can do this by entering the following in the terminal;
sudo chmod +x pitwits.py
The script should now be an executable file and we can now post a tweet by entering the commands as shown below;
sudo python pitwits.py ‘yee-haw, my Pi tweets’
Automate the Tweets by Raspberry Pi
So one of the coolest things we could do is automate the data being posted by the PI, so if you were working on a temperature and humidity based project for instance and you want the data to be available to the general public, or a traffic tweeting device.
All you will need do basically is include the script that measures your temperature and humidity for instance and create a cron job to automate the script.
So in this example I’m going to assume we are at an event and I want the raspberry pi to tweet images from the event autonomously.
To do this, we will just make a few changes to the pitwits.py and give it a new name piimagetwits.py
#!/usr/bin/env python
import sys
from twython import Twython
import os
import pygame
import pygame.camera
from pygame.locals import *
#enter the keys and secrets inbetween the quotes
consumerKey = ' '
consumerSecret= ''
accessKey= ' '
accessSecret = ' '
pygame.init()
pygame.camera.init()
api = Twython(consumerKey,consumerSecret,accessKey,accessSecret)
cam = pygame.camera.Camera("/dev/video0",(640,480))
cam.start()
image = cam.get_image()
pygame.image.save(image,'eventimg.jpg')
photo = open('webcam.jpg','rb')
api.update_status_with_media(media=photo, status='Event photo Updates ')
Save and exit.
Then as we did the first script, make this an executable too.
Sudo chmod +x piimagetwits.py
Then proceed to creating a cron job with it. Run the command:
sudo crontab -e
To create a cron job and add these lines below it depending on the timing you want.
*/60 * * * * * python /home/pi/rpiprojects/piimagetwits.py
This cron job runs every minute due to the timing indicated by the asterisks, but you can set your own timing as described below.
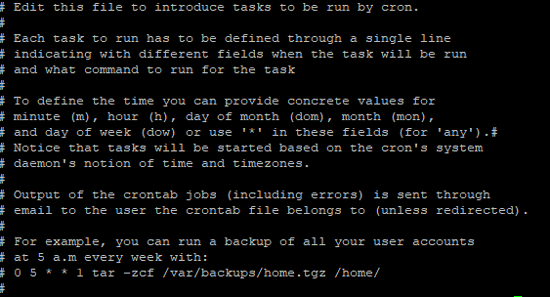
More information on how to use the cron job timing can be found in the description of any of the editor you chose to use. For example I prefer vim for no particular reason and here is a description of how to use the timing.

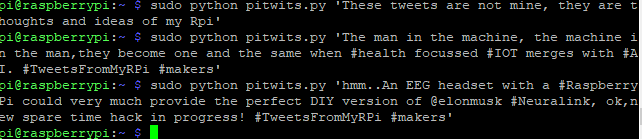
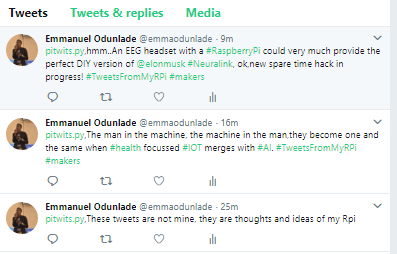
Raspberry Pi Twitter Bot in Action:
So I posted a couple of tweets, worked like a charm.
That’s it for this tutorial guys, feel free to drop any question you might have in the comment section, and also follow me on twitter: @emmaodunlade to see more awesome tweets from my mi pi.
Till next time
Comments
works great
Followed the steps and had my own twitter bot in about 10 minutes. The section about the auth keys could be expanded a bit.
Thanks! will take that into
Thanks! will take that into consideration next time
Error Tweeting
Regarding the Access token, does it contain our Owner ID or do we leave that out?
Also when attempting to enter sudo python pitwits.py ‘yee-haw, my Pi tweets’ I get the terminal error message " No module named requests_oauthlib "

very nice information...!!!