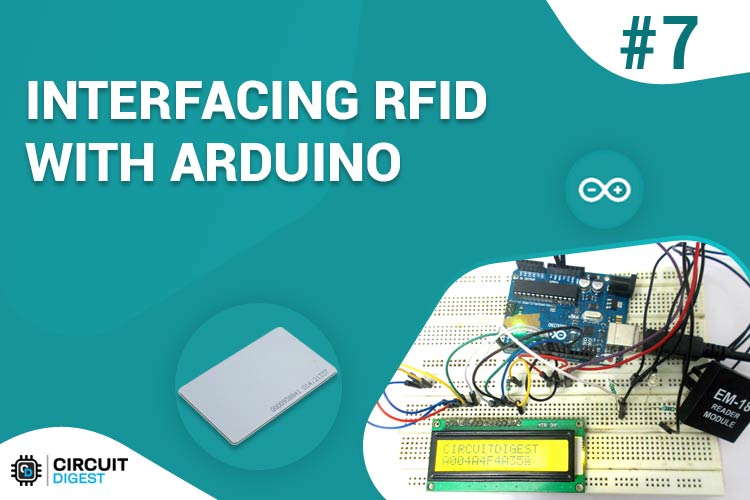
In this tutorial we are going to design a system to read the ID of RFID cards. RFID stands for Radio Frequency Identification. Each card has a unique ID embedded in it. These systems have many applications, like in offices, shopping malls and in many other places where only the person with authorization card is allowed to enter in the room. RFID is used in shopping malls to stop a theft from happening, here the product will be tagged with RFID chip and when a person leaves a building with the RFID chip an alarm is raised automatically and so the theft is stopped. The RFID tag is designed as small as grain of sand. The RFID authentication systems are easy to design and are cheap in cost. Some schools and colleges nowadays use RFID as attendance register.
Components Required
Hardware: ARDUINO UNO, power supply (5v), 100uF capacitor , buttons (two pieces), 1KΩ resistor (two pieces), EM-18(RFID reader module), LED, JHD_162ALCD (16*2LCD).
Software: arduino IDE (Arduino nightly).
Circuit Diagram and Explanation
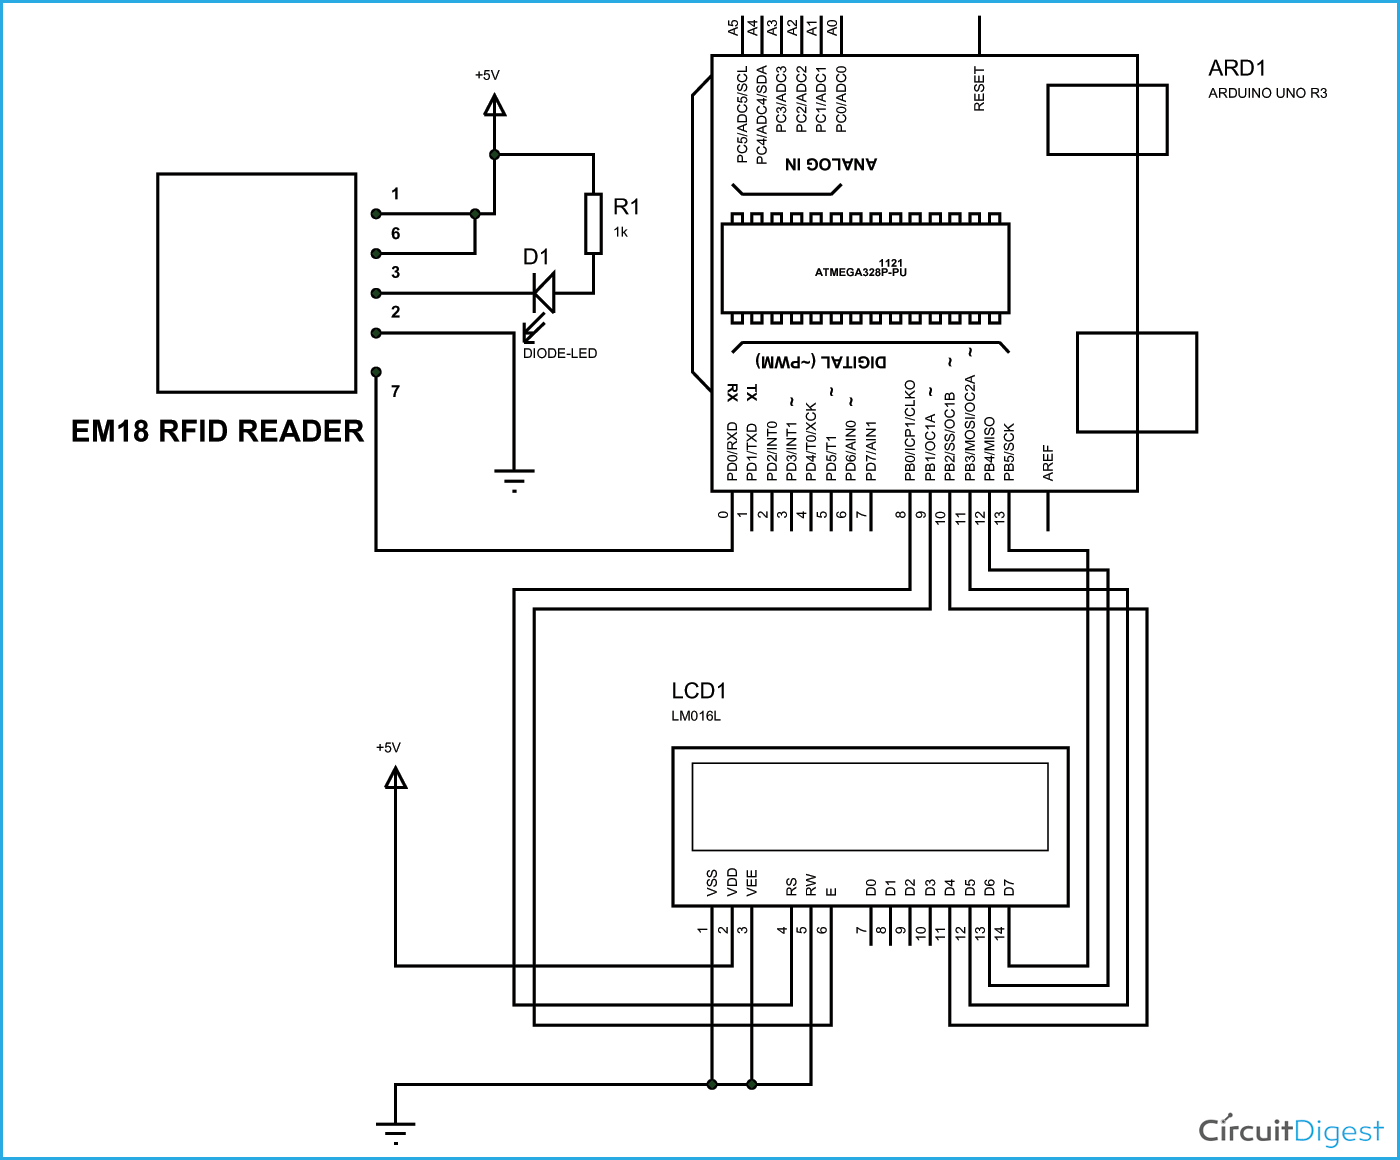
In 16x2 LCD there are 16 pins over all if there is a back light, if there is no back light there will be 14 pins. One can power or leave the back light pins. Now in the 14 pins there are 8 data pins (7-14 or D0-D7), 2 power supply pins (1&2 or VSS&VDD or GND&+5v), 3rd pin for contrast control (VEE-controls how thick the characters should be shown) and 3 control pins (RS&RW&E).
In the circuit, you can observe that I only took two control pins as his give the flexibility of better understanding. The contrast bit and READ/WRITE are not often used so they can be shorted to ground. This puts LCD in highest contrast and read mode. We just need to control ENABLE and RS pins to send characters and data accordingly.
The connections which are done for LCD are given below:
PIN1 or VSS to ground
PIN2 or VDD or VCC to +5v power
PIN3 or VEE to ground (gives maximum contrast best for a beginner)
PIN4 or RS (Register Selection) to PIN8 of ARDUINO UNO
PIN5 or RW (Read/Write) to ground (puts LCD in read mode eases the communication for user)
PIN6 or E (Enable) to PIN9 of ARDUINO UNO
PIN11 or D4 to PIN10 of ARDUINO UNO
PIN12 or D5 to PIN11 of ARDUINO UNO
PIN13 or D6 to PIN12 of ARDUINO UNO
PIN14 or D7 to PIN13 of ARDUINO UNO
Before going to further we need to understand about the serial communication. The RFID module here sends data to the controller in serial. It has other mode of communication but for easy communication we are choosing RS232. The RS232 pin of module is connected to RXD pin of UNO.
The data sent by the RFID module goes as:

Now for setting up a connection between RFID reader and Arduino Uno, we need to enable the serial communication in UNO. The serial communication enabling in UNO can be done by using a single command.
|
As shown in figure above, the communication of RFID is done by a BAUD rate of 9600 bits per second. So for UNO to establish such baud rate and to start serial communication we use command "Serial.begin(9600);". Here 9600 is the baud rate and is changeable.
Now once data is received by the UNO, it will be available for taking. This data is picked up by command “data = Serial.read();”. By this command serial data is taken to ‘data’ named integer.
Once a card is brought near reader, the reader reads the serial data and sends it to UNO, the UNO will be programmed to show that value in LCD, so we will have ID of card on LCD.
You can understand more about RFID in this tutorial: RFID based voting machine, RFID based toll plaza system.
Complete Project Code
#include <LiquidCrystal.h>
// initialize the library with the numbers of the interface pins
LiquidCrystal lcd(8, 9, 10, 11, 12, 13);//RS,EN,D4,D5,D6,D7
int count = 0;          //integer for storing character of ID
char input[12];//memory for storing 12 characters of ID
void setup()
{
                // set up the LCD's number of columns and rows:
                lcd.begin(16, 2);
                Serial.begin(9600);//serial communication enabling by 9600 baud rate
    pinMode(0,INPUT);//receive pin set as output
                                lcd.print("CIRCUITDIGEST");//showing name
                                lcd.setCursor(0, 1);//move courser to second line
}
void loop()
{
                                while(Serial.available() && count < 12)          // Read 12 characters and store them in input array
                                {
                                input[count] = Serial.read();//storing 12 characters one by one
                                                count++;
                                                lcd.print(input[count]);//showing 12 characters on LCD one by one
                                                if (count==12)
                                                {
                                                                lcd.print("             ");
                                                count = 0;// once 12 characters are read get to start and wait for second ID
                                                                lcd.setCursor(0, 1);//move courser to start.
                                                }
                                }
}
Comments
Hi, suppose if I want to store few names with card id and when we punch in that card,name assigned to that card should be displayed on LCD.
How can I do it,could someone plz help me?
I am not sure about that reader connection.how does it work?
Good afternoon, I work with a company that deals with public carts and was curious how I could take this idea and make it to where the rfid scanners would track inventory coming in and going out and store it into a program where we can log in and view different machines and their inventory levels? We have an area in the back of the machine where carts are put into a track and then a rental spot up front where carts are rented.


This is really useful, thanks for this awesome tutorial.
I am a regular reader of your articles and was waiting for something like this. Can you also help me with making a device to copy/modify/delete/make RFID tags with Arduino or Raspberry pi?