
Raspberry Pi is an amazing credit-card sized computer most suited for IoT based applications and online servers like Print server, webserver, Media server. Many types of custom ROMs and custom operating systems are available for Raspberry Pi and you just need to burn the custom ROM on SD card and insert it in Raspberry Pi. Like Windows 10 and Android can be easily installed on Raspberry Pi, check the following links to know how?
So one such popular custom OS is RetroPie which is built upon Raspbian OS to turn the Raspberry Pi into a Retro Gaming Console.
RetroPie is a software library used to emulate retro video games on the Raspberry Pi. In this tutorial, we are going to install RetroPie on Raspberry Pi and transform it into a powerful retro-gaming system. RetroPie supports 52 different gaming systems that means you can play everything in one place. You can easily setup RetroPie on your Raspberry Pi by following this tutorial.
Components Required
Hardware
- Raspberry Pi
- SD Card (At least 8GB)
- USB Keyboard
- HDMI Cable
- Monitor
Software
- RetroPie SD Image
- Etcher
Download RetroPie
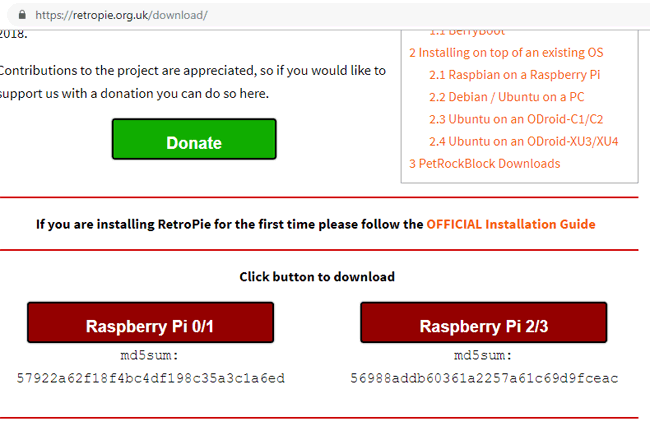
RetroPie is a software package for the Raspberry Pi that is based on the Raspbian OS. To set up RetroPie, Download the latest RetroPie SD-Card Image from here. There are two versions of the RetroPie SD-Card Image, one for Raspberry Pi Zero and One and other for Raspberry Pi 2 and 3. You can choose according to your Raspberry Pi version.
Download Etcher for writing RetroPie Image to SD-Card
balenaEtcher is a free and open-source utility used for burning image files such as .iso, .img files and zipped folders to create live SD cards and USB flash drives. In this tutorial, we are using balenaEtcher to burn our Raspbian operating system on our SD card.
You can download Etcher from its official website (https://www.balena.io/etcher/).
It will automatically detect your operating system, or you can choose it manually.
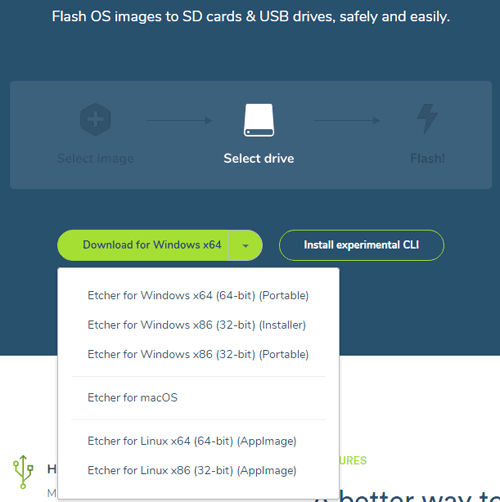
After selecting the operating system click on Install experimental CLI button and select Etcher CLI for windows 64 bit (Mine is windows 64 bit, you can choose according to your operating system) and it will start downloading.
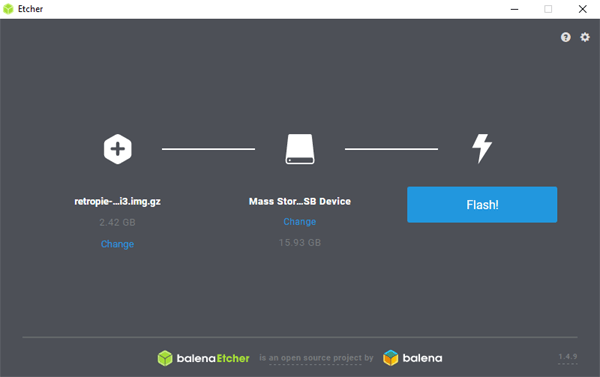
To install operating system in SD card, first select the RetroPie SD image. To select an image file, click on Select Image in Etcher. Use the file manager window and locate the image you unzipped in the previous step. Click Open and then the image will appear under Select Image. Now attach your SD card to the computer using SD card reader. Etcher will detect it automatically. Etcher won’t write to your hard drives by default. Now click Flash to write the image file to the SD card.
Boot Your Raspberry Pi
Insert the SD card you just burned, and other peripherals (Keyboard, HDMI Cable, Game- Controller) then turn on the Raspberry Pi. Your Pi will boot now. When it's done, you'll see the screen to set up your controller. If you have a Game Controller connected setup the controls and click ‘OK.’ At this point, RetroPie is installed on your Raspberry Pi.
Now to setup Wi-Fi, choose Wi-Fi from the RetroPie desktop and enter your Wi-Fi SSID and Password. After this choose ‘Show IP’ to find out your Pi’s IP address.

Transfer Game ROMs to Raspberry Pi Gaming Console
After the setup, now transfer the game ROMs from your Primary PC/Laptop to the Raspberry Pi. You can download ROMs from websites like MAMEDev or ROM Hustler.
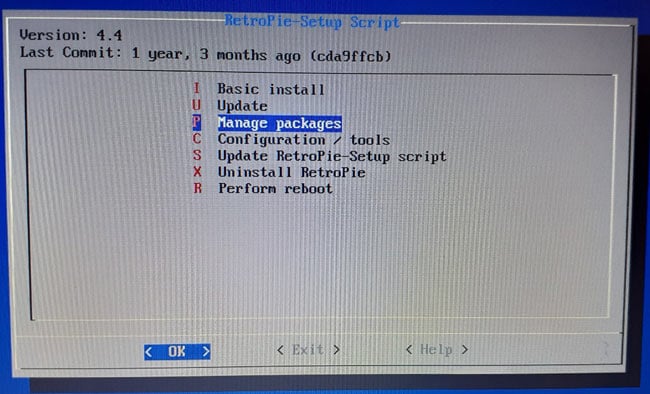
Go back to the options page and choose RetroPie Setup from the list.

Choose Manage Packages from the next list.
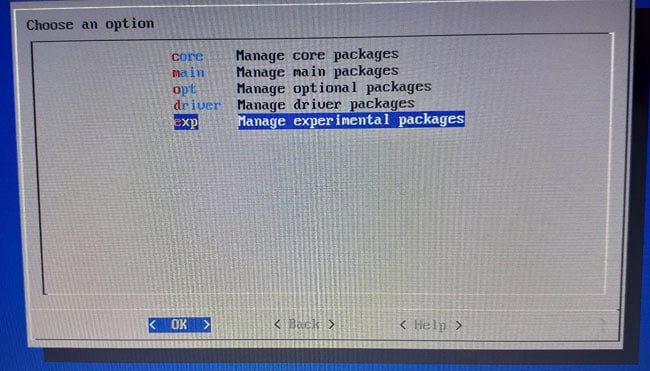
Choose Manage Experimental Packages from the next list.
After that, a window with a list of applications will open, scroll down, and choose retropie-manager. Go ahead and select Install from source.
Now you'll see configuration/options on the next list, choose it, after that choose Enable RetroPie-Manager on boot so that it starts up every time you boot up the Raspberry Pi.
Now reboot the Raspberry Pi. You can do this by the terminal window or by pressing the Start button on the RetroPie desktop. To open terminal window press F4, then type reboot and press the Enter.
After reboot, go back to your laptop and search for https://< Your Pi’s IP>:8000 using your browser. RetroPie manager will open on your laptop.

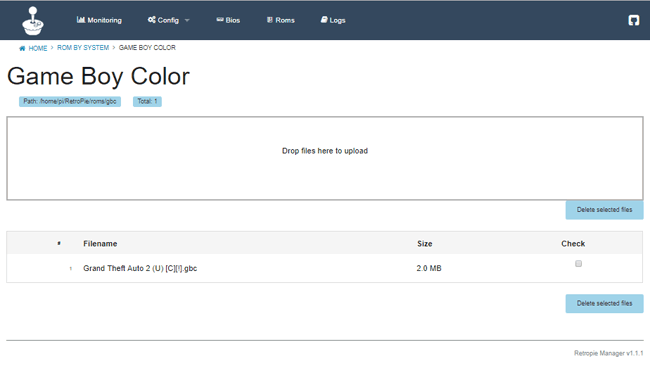
Using this manager window, you can transfer ROM files from your laptop to Raspberry Pi.
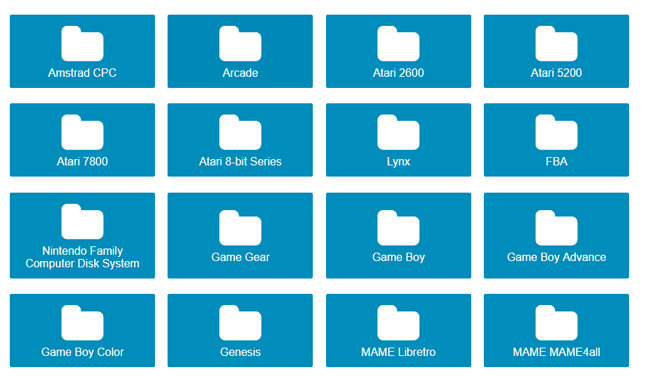
To transfer the ROM file click on ‘Manage Rom files for the emulated system.’ Now choose what type of file you're going to transfer.
Drag the ROM file or click in the box to choose the file that you downloaded from the above-given link.
When it's done, close the browser window and reboot the Pi. When Raspberry Pi boots back up you'll see the Emulation Station program running, and the emulator you uploaded a ROM for is now in the list.

Now select the emulator and start the game. You can add more games to your RetroPie gaming station by downloading more ROM files and transferring them to Pi.
RetroPie is capable of emulating a large number of systems. But the number of systems a Raspberry Pi can process, depends on the Model of Raspberry Pi. The processing power and RAM of the Raspberry Pi rely on the model. This means not every version of the Raspberry Pi will be able to emulate every system. For example, on Raspberry Pi zero you can run Nintendo Entertainment System but can’t expect to run Sega Dreamcast games.
