
Hi guys, we are in the spirit of streaming and accessing media files from anywhere and everywhere and that’s why as a follow up to the last tutorial which is the implementation of a Plex server on the Raspberry Pi, for this tutorial, we will be implementing the KODI 17.4 (krypton) on our Raspberry Pi 3 running Raspbian Jessie.
Introduction to Kodi Media Player:
Kodi/XBMC is free and open source media player software which can playback media files including audio, video and display pictures locally stored on a drive connected to the computer on which the software is running. It can also be used to stream videos, sounds and pictures from the internet. It is capable of playing this media files created in any of the popular file formats. KODI/XBMC is created to run in full screen mode and is thus better when used with a TV screen but can also be used with a monitor with a keypad or mouse for control/navigation of the KODI screen.

There are several KODI prebuilt Operating system for the Raspberry Pi like openELEC, RASPBMC, Xbian, but when you use the Raspberry Pi for a million other things with different space requirements you would agree with me it’s better to have it install on your favorite OS so you can handle other things. For this tutorial of turning your Raspberry pi into Media Server, we will be Installing KODI on the Raspbian because it takes up less space on the SD card and its more convenient to do other tasks than booting both Raspbian and a KODI based OS together.
Required Components:
For this project, the following components will be required.
- Raspberry pi 3
- SD card (8gb at least)
- USB Drive or External Hard Disk
- HDMI Cable
- Display Monitor
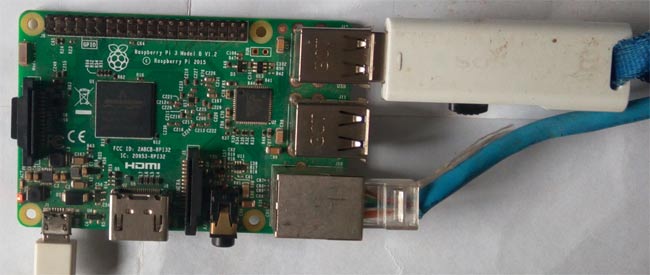
For installing Kodi/XBMC on Raspberry Pi, we are using Raspberry Pi 3 with Raspbian Jessie OS. All the basic Hardware and Software requirements are previously discussed, you can look it up in the Raspberry Pi Introduction.
So here I am assuming that you are familiar with setting up the Raspberry Pi and you know how to access your Raspberry Pi via terminal using software like putty. Those are pretty basic stuffs which you can learn from our previous Raspberry Pi projects.
We will install Kodi on Raspbian in below steps, follow them carefully and the project will work like a charm. Lets dive in!
Installing Kodi Media Server on Raspberry Pi 3:
Step 1: Upgrading the Pi
Its second nature for me to update my raspberry pi before starting any new project and you should learn to do that too. To update the pi, run;
sudo apt-get update
sudo apt-get upgrade
With this done, reboot the pi;
sudo reboot
Wait for the Pi to undergo reboot then jump to step 2
Step 2: Adding Pipplware repo to Sources
The pipplware repository ensure we always have the current and stable release of KODI faster than the official Raspberry Pi repository, so we will be installing kodi from the pipplware repo and thus need to add the repo to the RPi sources list.
Follow the steps below to do this.
1.Add the pipplware repo to /etc/apt/sources.list using;
sudo nano /etc/apt/sources.list
When the file opens, add the following line below it;
deb http://pipplware.pplware.pt/pipplware.dists/jessie/main/binary /
Save and exit using CTRL +X then y
2.The next step is to add the keys.
Try;
Wget –o – http://pipplware.pplware.pt/pipplware/key.asc | sudo apt-key add –
This worked on my first Raspberry Pi but I got the error below while trying to replicate and test again on another pi before posting the tutorial.

To solve this I included a –no-check-certificate and did a split of the command.
So run;
wget –no-check-certificate –q –o – http://pipplware.pplware.pt/pipplware/key.asc
Followed by;
sudo apt-key add key.asc
This should return OK then we can move to step 3
3.After adding the key, we then need to update the sources and upgrade the pi
To do this, run;
Sudo apt-get update && sudo apt-get dist-upgrade
Then run a reboot.
With this done, we can then go to step 3.
Step 3: KODI installation and setup
Under this step, we will install KODI and perform additional settings.
1.Install KODI. This can be done using;
sudo apt-get install kodi
2.We need to set some permissions for kodi. Run;
sudo addgroup --system input
3.The next thing is to create the input rules.
Create a new file using;
sudo nano /etc/udev/rules.d/99-input.rules
Then add the lines below.
            SUBSYSTEM==input, GROUP=input, MODE=0660
            KERNEL ==tty[0-9]*, GROUP =tty, MODE =0660
4.Next we create the permissions rules.
Create a new file using;
Sudo nano /etc/udev/rules.d/10-permissions.rules
Then add the following lines below in the files.
#input
KERNEL==”mouse|mice|event|”, MODE =”0660, GROUP=”input”
KERNEL==”ts[0-9]|uinput”, MODE=”0660”, GROUP=”input”
KERNEL==js[0-9], MODE=0660, GROUP=input
#tty
KERNEL==tty[0-9]*, MODE = 0666
#vchiq
SUBSYTEM==vchiq, GROUP=video, MODE=0660
Save the file and exit.
5.We need to run the following commands to perform other settings necessary for kodi to run smoothly.
Just run them one after the other.
Sudo usermod –a –G audio pi
Sudo usermod – a –G video pi
Sudo usermod – a –G input pi
Sudo usermod – a –G dialout pi
Sudo usermod –a –G plugdev pi
Sudo usermod –a –G tty pi
With this steps all done, we are ready to start using Kodi.
Kindly note that the “pi” at the end of the commands is the user name. so if you have changed the username of your raspberry pi, you will need to change the pi to whatever your user name is.
Before launching though, I will advise you run a sudo reboot after this stage.
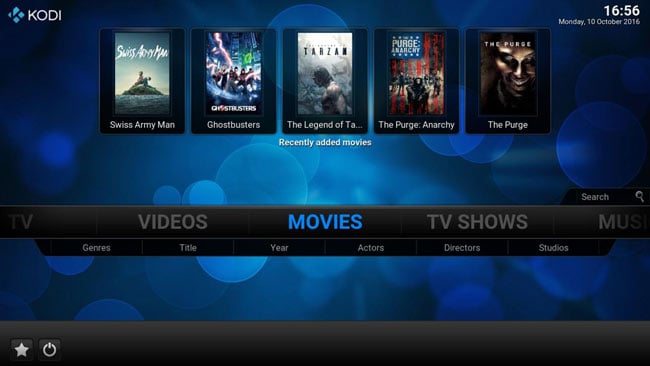
Step 4: Stream on!
Kodi can be either installed to start automatically with the raspberry pi boot or run it from the command window.
To run from the command window (which is preferred by me, simply issue the command;
kodi-standalone
This will launch kodi and you can see things via the monitor.
To start Kodi automatically on Boot, you will need to add a Kodi upstart script.
Run the following command to do that.
sudo wget –o /etc/init.d/kodi
https://gist.githubusercontent.com/shyamjos/60ea61fd8932fd5c868c80543b34f033/raw;sudo chmod +x /etc/init.d/kodi
Then enable the upstart script by running the command below
sudo systemctl enable kodi
Should you ever want to disable the upstart script, run;
sudo systemctl disable kodi
This will disable from running automatically at system boot.
With this done you have successfully installed Kodi on your raspberry pi.
Other Useful Commands for Kodi
To start kodi from the terminal, alternatively you can use;
sudo systemctl start kodi
To check the status of Kodi via terminal, run;
sudo systemctl status kodi
To stop Kodi from running;
sudo systemctl stop kodi
Additional Info: Enabling shutdown/reboot Option in Power Menu
This step shows how to add a shutdown or reboot options to the Kodi power menu. To do this we will first of all need to install policykit-1 then create a new policy kit file.
Run;
sudo nano /etc/polkit-1/localauthority/50-local.d/all_users_shutdown_reboot.pkla
Then add the following lines below to the file
Identity=unix-user:*
Action=org.freedesktop.login1.*;org.freedesktop.upower.*;org.freedesktop.consolekit.system.*
ResultActive=yes
ResultAny=yes
ResultInactive=yes
This will allow all users to shut down and reboot kodi from the Power menu.
That’s it for this tutorial guys. Let me know if you have any questions in the comment section.
Comments
"sudo" should be lowercase. You are using an uppercase "S".
Consider taking some time to learn the basics of the Linux command line before starting a project like this.
anyone got an answer? thanks
42?
Honestly, an answer to what question?
When strting Kodi , I am getting this error
ERROR: Unable to create GUI. Exiting
Segmentation fault

Hi, I'm stuck at the step creating the permissions rules
everytime I run the command: Sudo nano /etc/udev/rules.d/10-permissions.rules
it says
bash: Sudo: command not found