
Ever wondered why do you need Node-RED with Home Assistant? It looks like that both Home Assistant and Node-RED do the same things but they excel in different areas. Home Assistant’s main power is its ability to interface and control any smart device existing at the moment. The main method of creating automation in Home Assistant is by using YAML files for automation but it is complicated and can be intimidating for any beginner. This is where the strengths of Node-RED naturally complement those of Home Assistant. Node-RED allows flow-based automations are significantly more powerful and user-friendly.
In this tutorial, I am going to use Node-RED in conjunction with Home Assistant to build a Home Automation System. Setting up Node-RED with Home Assistant is very simple and it takes only few minutes. But before starting, you need to make sure that you already have home assistant up and running. If you are a beginner you can follow our previous getting started guides for Home Assistant and Node-Red.
Components Required for Home Automation using Node-RED
Hardware
- Raspberry Pi
- Relay Module
- DHT11 Sensor
- AC Bulb
- 12V Fan
- Breadboard
- Jumper Wires
Software
- Home Assistant
- Node-RED
Integrating LED & Fan connected to Pi GPIO with Home Assistant
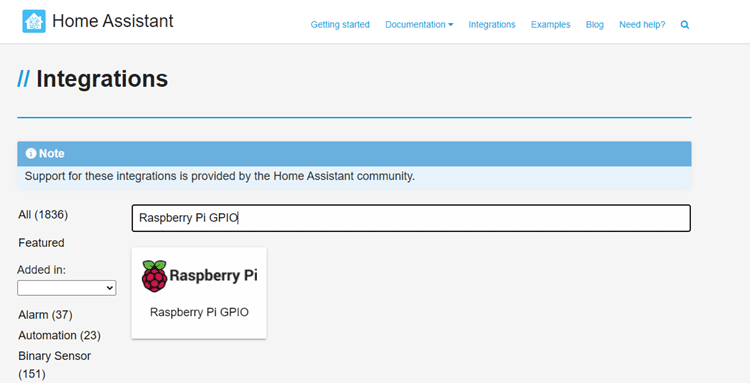
To control the LED and fan using Home Assistant and Node-RED, the first thing that we need to do is make some changes to the configuration.yaml file. For that, go to https://home-assistant.io/components/ and search for ‘Raspberry Pi GPIO’.
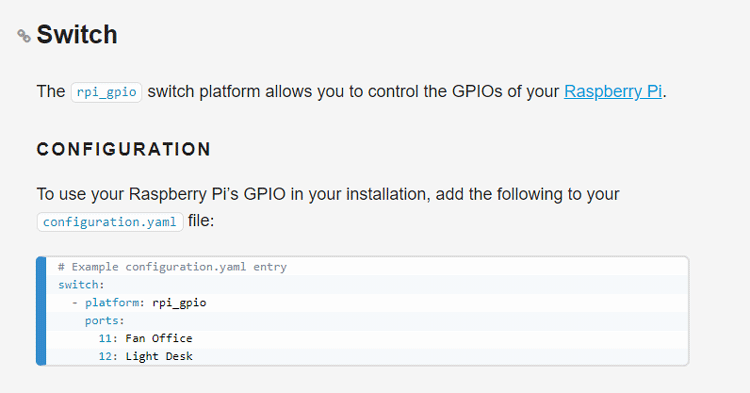
Now on the Raspberry Pi GPIO page, scroll down and copy the configuration code for ‘Switch.’
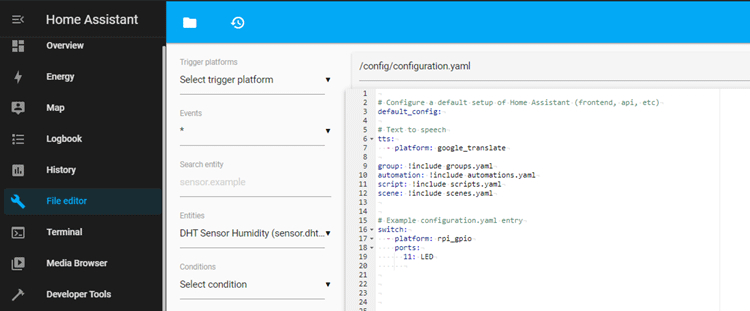
Then go to the File editor tab and click on the folder icon in the top left corner to browse the file system. From there, click on the ‘configuration.yaml’ tab and it will open the configuration file. Now, paste the code that you copied from the Home Assistant page and save the file.
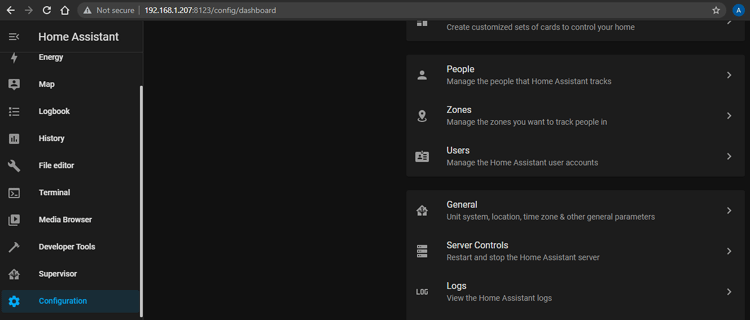
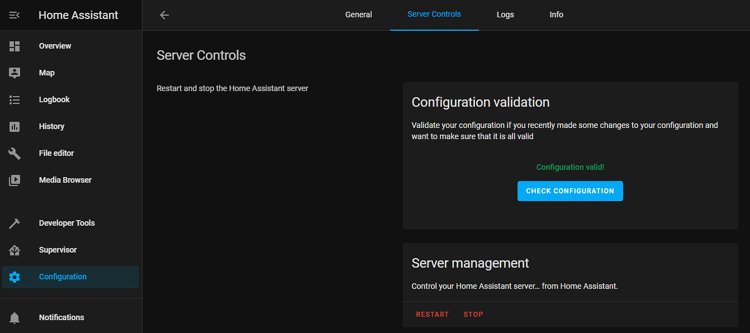
Once you have made the change in any configuration file, it is a good practice to check if the configuration is valid or not. To check the configuration, go to the ‘Configuration’ tab, and select General, and click "CHECK CONFIG".
Now, if the changes that you have made don’t have an error then it will display a message "Configuration Valid". Once the configuration is valid, press "RESTART" under Server Management, and wait until the home assistant starts again.
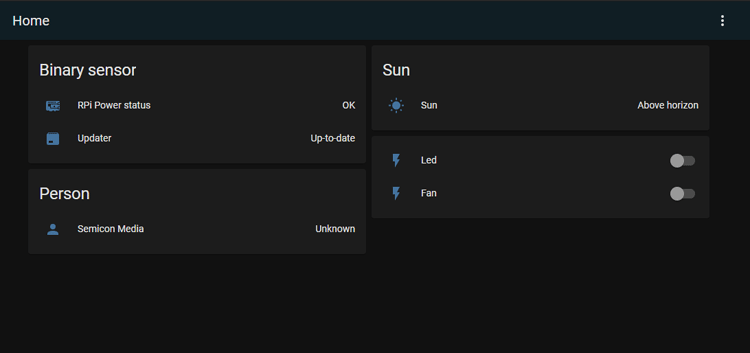
After restarting, go to your Home Assistant User Interface and you should see two new switches added to your home assistant UI.
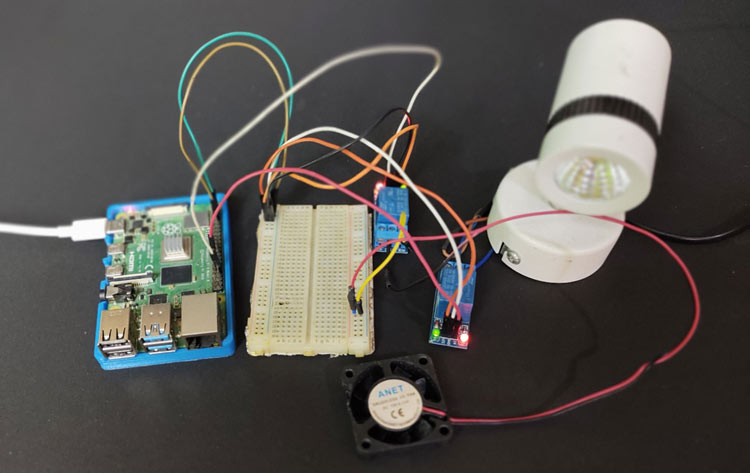
Now, connect the Bulb and Fan to Raspberry Pi GPIO pins 11 and 12 as shown in the below image:

Connecting Home Assistant to Node-RED
Connecting Node-RED and Home Assistant is very easy and there are multiple ways of doing that. The first one is, installing Node-RED add-on on Home Assistant and the second one is installing Home Assistant Node on Node-RED. For this tutorial, we are going to use the first method that is installing Node-RED add-on on Home Assistant. Now, I am assuming that you have Home Assistant installed on Pi and have Home Assistant Dashboard open. From Home Assistant Dashboard, go to the ‘Supervisor’ tab and then click on ‘Add-on Store.’ Here, search for ‘Node-RED’ and install it.

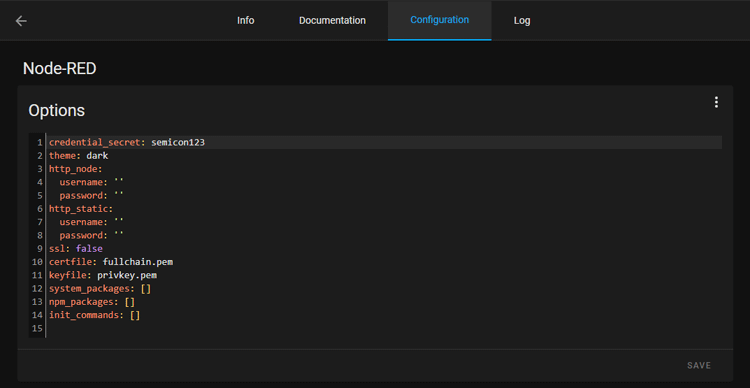
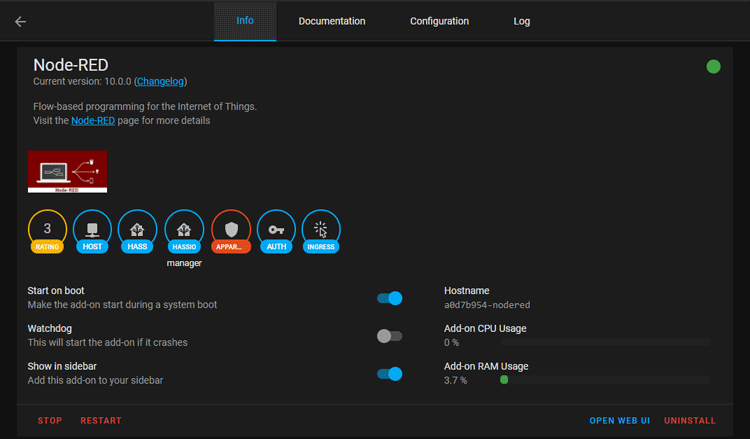
Once the add-on installs, you have to make some changes in its configuration. For that go to ‘Configuration.’ Here, first add the credential secret. It can be your name or password or anything. Then set the SSL to false and save the changes.
Now, click on start and also enable the "Show in Sidebar" option to make it easily accessible. Open Node-RED web UI by clicking on the ‘Open WEB UI.’
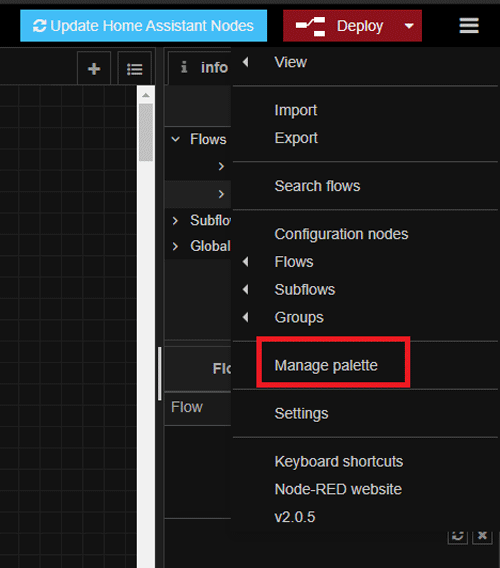
Before we start building the flows, we need to install the palette for the Google Assistant (NORA) in node-red. For that, click the menu icon on the top right corner and then click on “Manage Palette”.
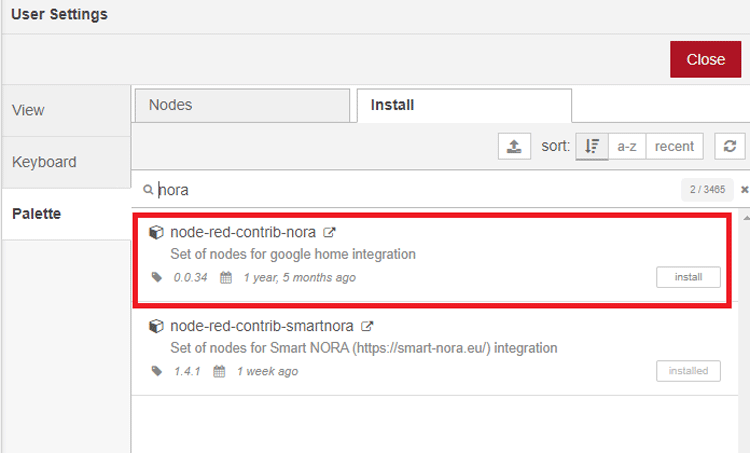
Go to the Install tab and then search and install the ‘node-red-contrib-smartnora’ node.
Creating a Home Automation Flow in Node-RED
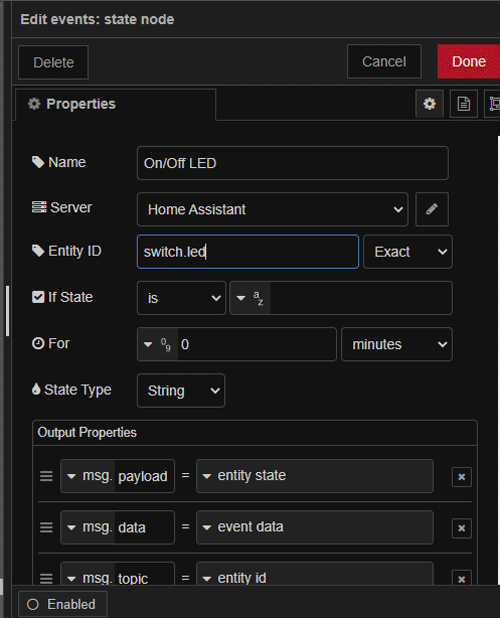
With the Node-RED running on Home Assistant, the next task will be creating a flow to control and automate the devices connected to Raspberry Pi. Here, the flow that we are going to create will have two sequences, one for controlling a bulb and the other for controlling a Fan. We will start with creating a sequence for controlling a bulb connected to a Raspberry Pi. For that, go to the home assistant palette and drag the ‘events state’ node into the flow section. This node is used to read all the state change events.
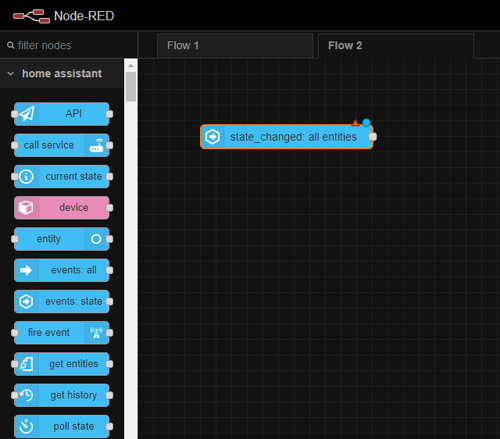
Now, double-click on the node and on the properties, page change, its name, and select the switch.led in Entity Id option. Leave all other options unchanged.
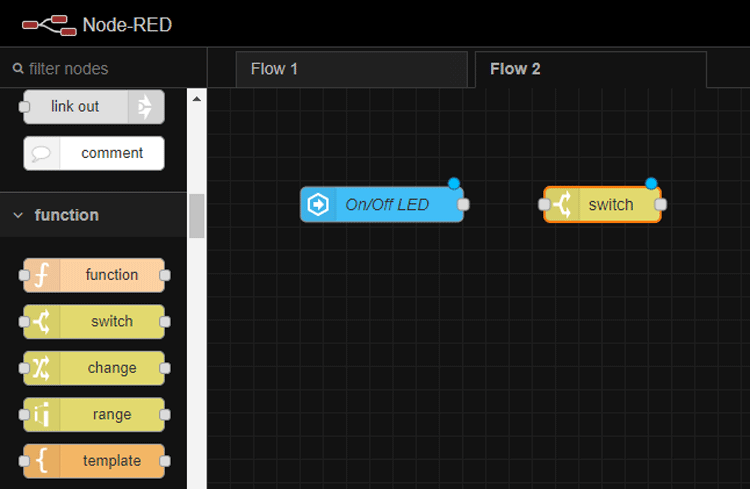
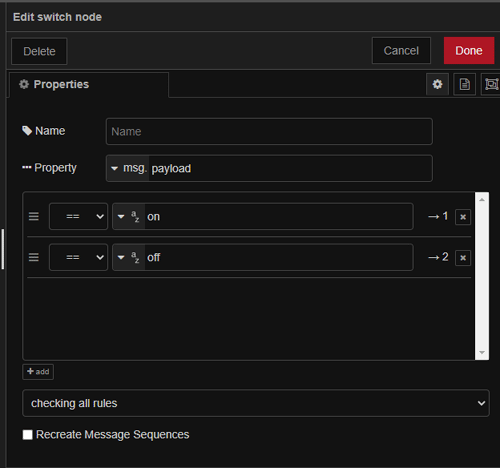
Then go to the function palette and drag & drop the ‘switch’ node into the flow section.
Again, double-click on the node to edit its properties. There is nothing much to change, just add two payloads that are ON and OFF.
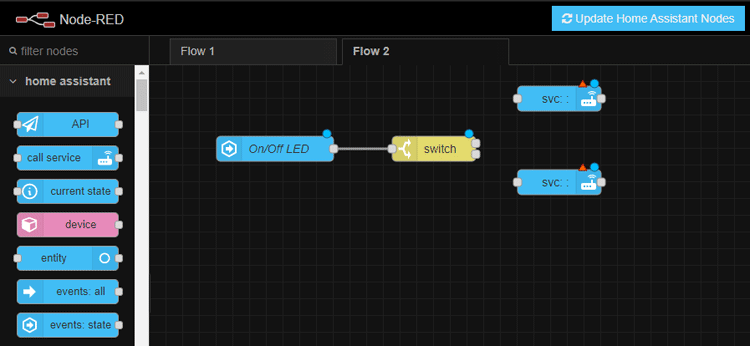
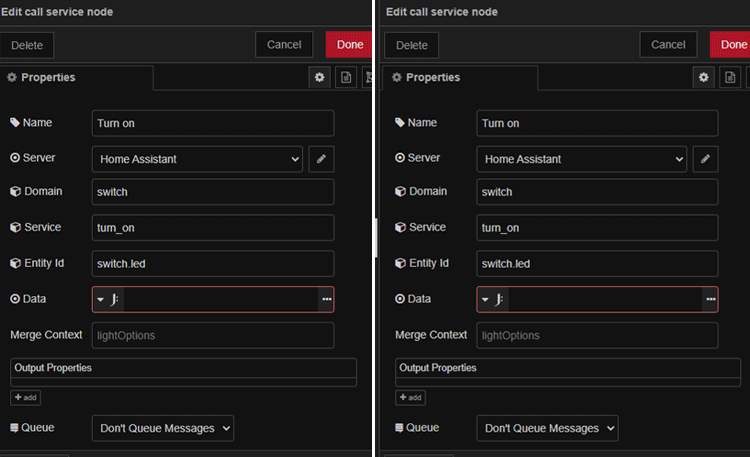
Then drag and drop two ‘call service’ nodes from the home assistant palette. Call Service node is used to send a request to the home assistant for any domain and service available. Here, we will use this node to change the Raspberry Pi gpio state according to the payload that we receive from the home assistant.
Now, double click on node and on properties page, change the properties as shown in below image. Similarly, change the properties of the second call service node.
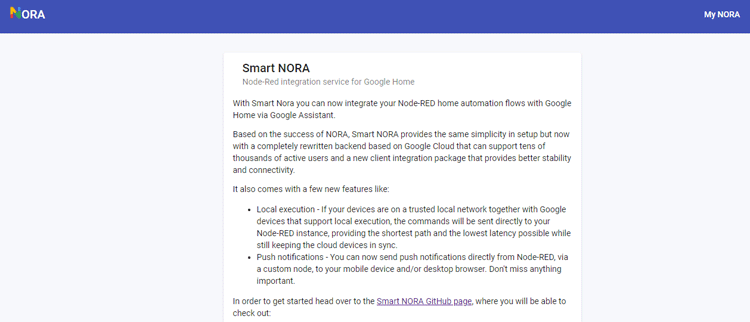
Now, connect all the nodes and with this, we have created a simple sequence that will read the button state on Home Assistant Dashboard and change the Raspberry GPIO state according to that. Next, we will add another node i.e., the Smart Nora node to this sequence to control the bulb using Google Assistant. To get started with NORA, you have to register an account on the NORA website. So, go ahead and click on ‘Sign in with Google'. Make sure, you select the same Google account as your Google Assistant. On the next screen, it will ask you to verify the email. Verify your email address by clicking the link in the email.
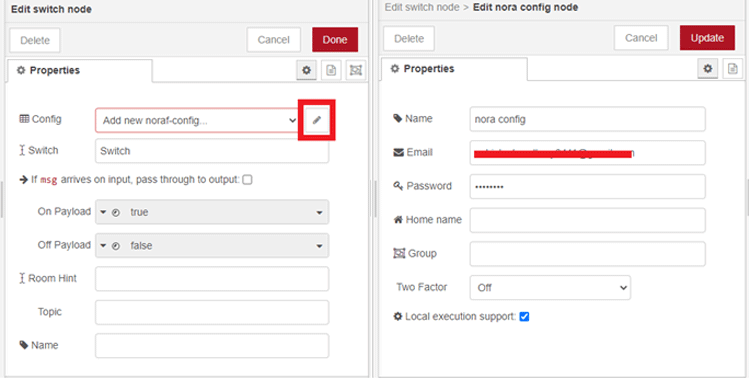
Now, go to the ‘nora’ palette and drag the ‘switch’ node into the flow section.
Now, double-click on the Switch node to edit it. Then click on the pencil icon to configure it. On the next screen, enter your credentials (email/password) used when you created your Smart NORA account.
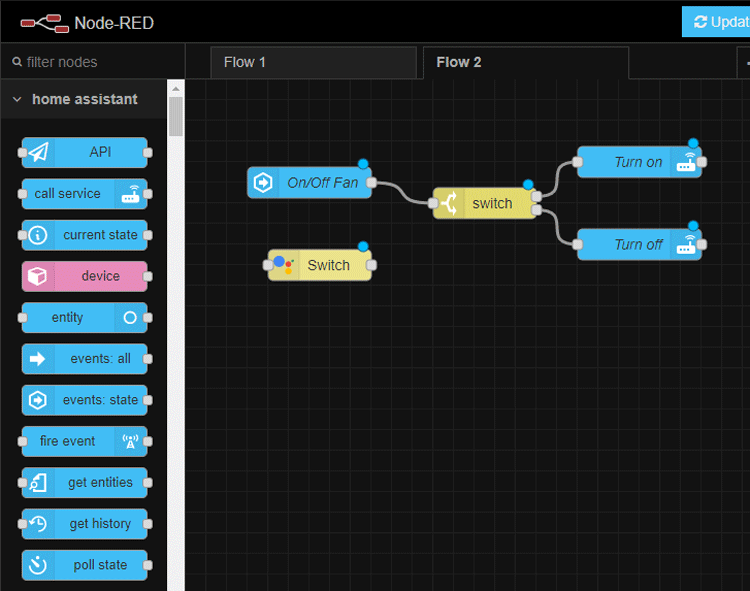
Now, connect all the nodes and follow the same process for creating a sequence for Fan. But don’t forget to change the entity id from switch.led to switch.fan. The complete flow will look like this:
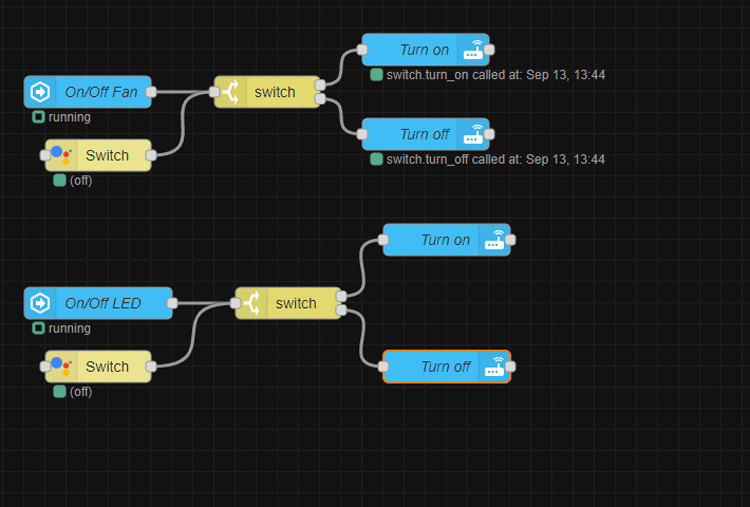
With this, the flow is complete. Deploy it and move to your Home Assistant Dashboard. Now you should be able to control the Bulb and Fan using the switches on Dashboard as well as using Google Assistant. Adding Google assistant features to the Smart Home system is a hectic task if you are using Home Assistant but with Node-RED, it can be done in few minutes. Apart from Google assistant, Node-RED can be used with Home Assistant to easily configure devices to add some awesome features and automation.
That’s all about using Node-RED and Home Assistant together to build a Smart Home. A complete working video can be found below.

Hii, thank you for the helpful guide! I was trying to find node-red-contrib-nora or smartnora, but it is noth there on node red home assistant, what can i replace it with? Also, i just want to control my fan via home assistant, so maybe no need for this one in specific? I am not sure, I'm new to this tech world and would appreciate your help! Thanks!