
With the Internet of Things taking over the lives, home automation is becoming more and more common. Home automation can include the scheduling and automatic operation of lighting, heating, cooling, window blinds, security systems, and other devices. There are many home automations platforms available that allow vital home functions to be controlled remotely from anywhere in the world. Home Assistant is one of them. So, in this tutorial, we’re going to show you how to get started with Home Assistant on Raspberry Pi. We’ll show you how to set up Home Assistant and how to add things and automate them. So, let’s get started.
What is Home Assistant? How does it work? And how it is different from others?
Home Assistant is an open-source operating system for smart homes. It can be used as a hub to connect all your smart devices. It can be installed on Raspberry Pi or on your old computer as a local server. This results in smoother service, reliability, and better security. Home assistant allows products from hundreds of manufactures and protocols to integrate seamlessly with DIY projects and home-made solutions. It lets you set up schedules for individual smart devices and let the devices become as smart as they need to be. Home assistant can automatically find all the smart devices on your Wi-Fi network. The benefits of the home assistant are better security, speed, compatibility, reliability and of course, it is free to use.
Components Required for Installing Home Assistant on Raspberry Pi
Hardware
- Raspberry Pi 4
- Micro SD Card
- SD Card Reader
Software
- Home Assistant Image
- Balena Etcher
Installing Home Assistant on Raspberry Pi
There are different ways to install Home Assistant. It can be either installed on a laptop using a virtual machine or on a Raspberry Pi to act as an exclusive home automation device. Here we’re going to install Home Assistant on Raspberry Pi 4.
Step1. The first step for installing Home Assistant on Raspberry Pi will be downloading the appropriate Disk Image for Home Assistant for your Raspberry Pi from the Home Assistant page.
Step2. Now as we have the image file, the next step will be flashing this file on a micro-SD card. Here we will be using the balenaEtcher for flashing image file on Raspberry Pi. Etcher is a free and open-source utility used for burning image files such as .iso, .img files, and zipped folders to create live SD cards and USB flash drives. You can use any image flasher tool of your choice.
Step3. balenaEtcher flashes the operating system in three steps, the first step is selecting the image file that you want to flash. The second step is selecting the right SD card and the third and final step is flashing the selected image file on the SD card.
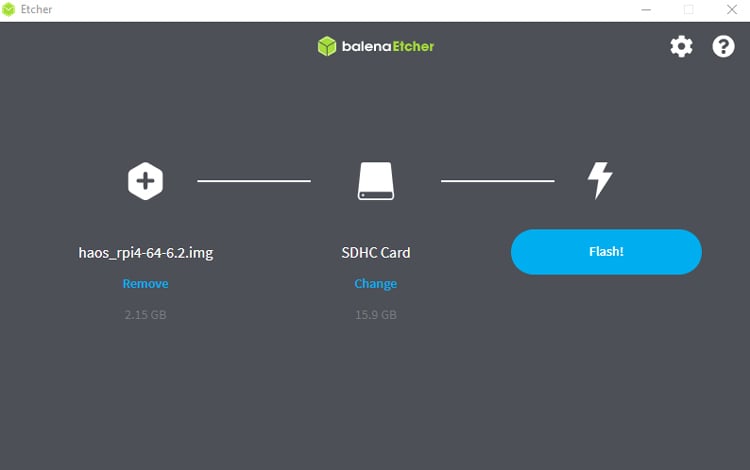
Once you selected the image file and SD card, click on flash. This process will take some time so you can either stare at the progress bar or do other things.
Once the flashing process completes, the next step will be mounting the SD card on Raspberry Pi, connecting the ethernet cable to Pi, and Booting Up the Raspberry Pi. But what if you don’t have ethernet and want to connect Raspberry Pi to your Wi-Fi? Well, there is a way to connect Home Assistant Pi to Wi-Fi. For that, mount the SD card on your laptop and navigate to your SD card i.e. hassos boot, and create a new folder called ‘CONFIG’. Now inside the CONFIG folder, create a new folder called ‘network.’ Within the network folder, create a file named ‘my network without a file extension and paste the below lines. Change the Wi-Fi name and password with yours.
[connection]
id=my-network
uuid=72111c67-4a5d-4d5c-925e-f8ee26efb3c3
type=802-11-wireless
[802-11-wireless]
mode=infrastructure
ssid=MY_SSID
# Uncomment below if your SSID is not broadcasted
#hidden=true
[802-11-wireless-security]
auth-alg=open
key-mgmt=wpa-psk
psk=MY_WLAN_SECRET_KEY
[ipv4]
method=auto
[ipv6]
addr-gen-mode=stable-privacy
method=auto
Step4: Now insert the SD card into Raspberry Pi and Power it up. After a few minutes, you should be able to access Home Assistant UI from a device connected to the same network as your Pi using the HTTP://your-pi-ip-address:8123. The installation process may take up to 20 minutes to install all the dependencies.
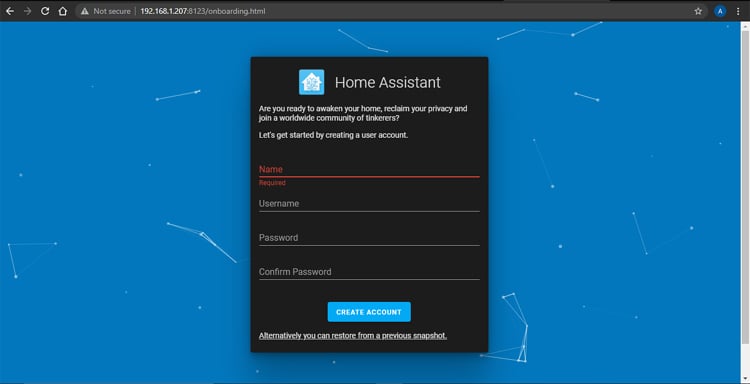
Once the Raspberry Pi is done with the installation process it will auto reboot and after this, you will be taken to the below screen to create a new user account. Enter a Name, User name, Password, and click on “Create Account”.
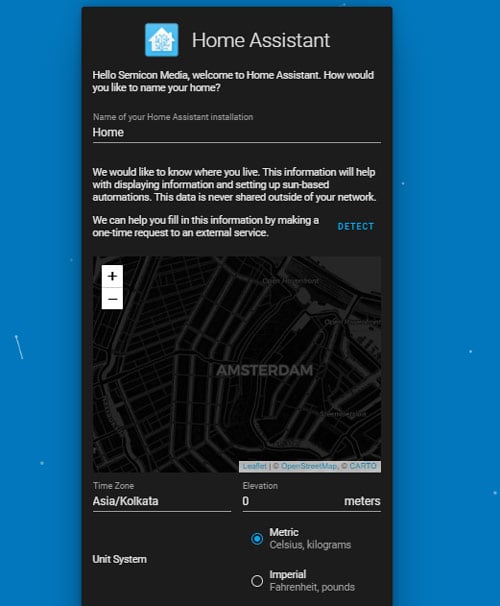
Now on the next screen, you have to set some parameters like time zone and unit system. You can even give a name to your Home Assistant.
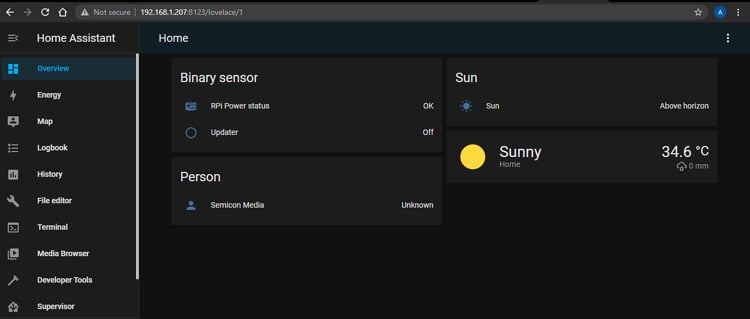
Finally, click Finish and you will be redirected to your newly created Home Assistant Dashboard. This screen will show all of your devices.
With this done, Home Assistant is now Up and Running and you can play around with its features to create some awesome automation. Here we are going to connect an LED and a DHT11 sensor to Raspberry Pi GPIO and control them. We will also automate the LED to turn on/off automatically at a specific time. But before doing this, we have to install some add-ons like File Editor so that we can make changes in the configuration file.
Installing Add-On’s
Home Assistant offers many add-ons that you can install to get home assistant even better. We are going to install the File Editor add-on. This add-on allows users to browse and modify the files on the home assistant file directory. You can also install other available add-ons that you find useful.
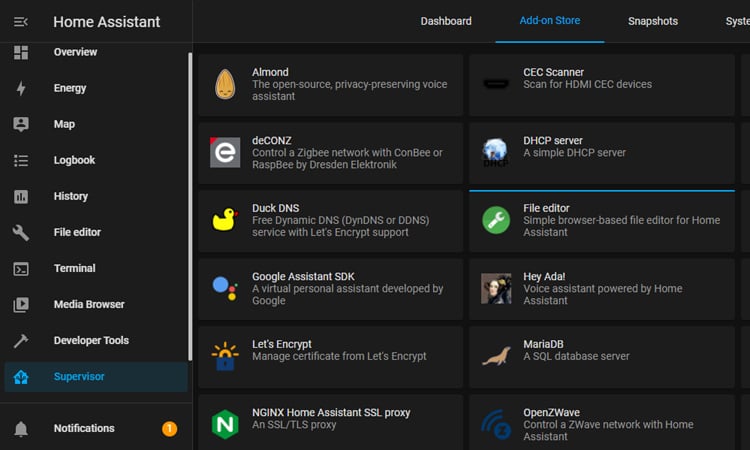
To install this add-on, go to the Supervisor tab, and then click on ‘Add-on Store.’ Here search for ‘File Editor’ and install it.
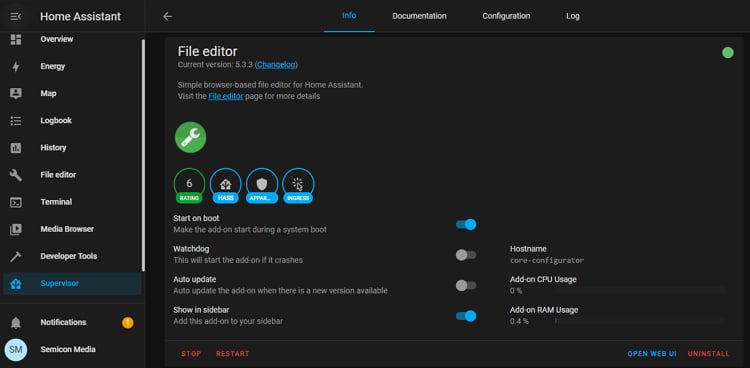
Once the add-on installs, click on start and also enable the "Show in Sidebar" option to make it easily accessible.
Apart from the file editor, you can also install ‘Terminal & SSH’ and ‘Sambha Share’ add-ons. Terminal & SSH add-on allows access to your Home Assistant folders with any SSH client. It also includes a command-line tool to access the Home Assistant API while the Samba Share add-on allows you to enable file sharing across different operating systems over a network. It lets you access your config files with Windows and macOS devices.
Ok, so now let’s move to our main objective that is adding and controlling things with Home Assistant. Home assistant allows us to integrate many popular platforms like ESP Home, Tasmota, and Google Assistant. We will cover them all in our upcoming tutorials, but for this project, we are going to control and automate an LED and read DHT11 sensor data connected to Raspberry Pi GPIO to get familiar with adding components and building automations on Home Assistant.
Controlling LED and Reading DHT11 sensor data using Home Assistant
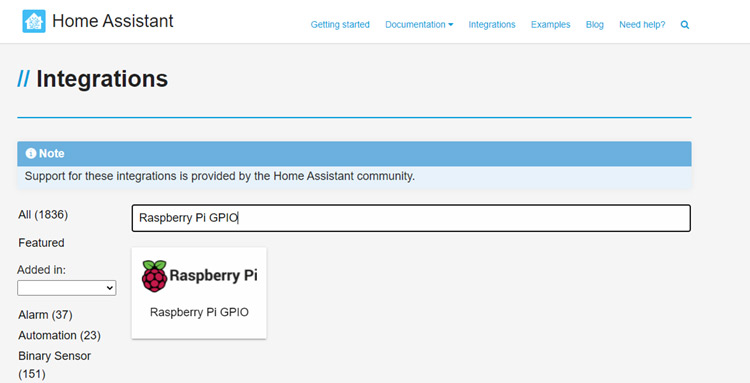
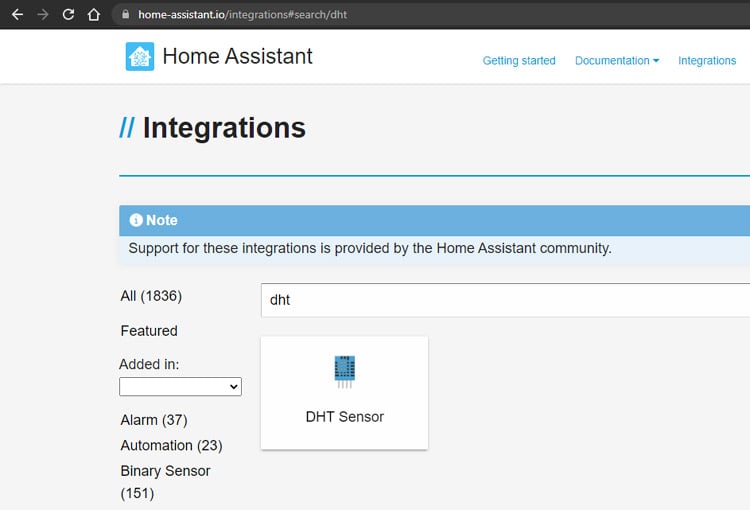
To control an LED and read sensor data, the first thing that we need to do is making some changes to the configuration.yaml file. The configuration.yaml file is the main file used by the Home Assistant to gather all of the information about the user's desired configuration. It let Home Assistant know what the user wants to do, what components he is using, how they are organized, and how to automate them. Luckily, Home Assistant already included all the .yaml codes for Raspberry Pi GPIO and popular sensors. So, we only have to find the code for that particular component and paste it into configuration file. For that, go to https://home-assistant.io/components/ and search for ‘Raspberry Pi GPIO’.
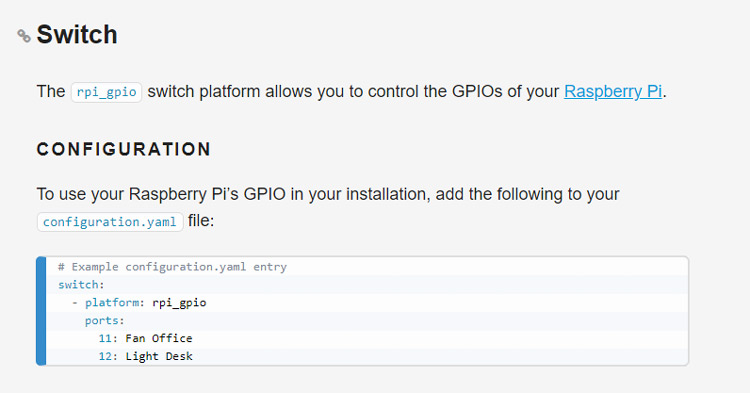
Now on the Raspberry Pi GPIO page, scroll down and copy the configuration code for ‘Switch.’
Then go to the File editor tab and click on the folder icon in the top left corner to browse the file system.
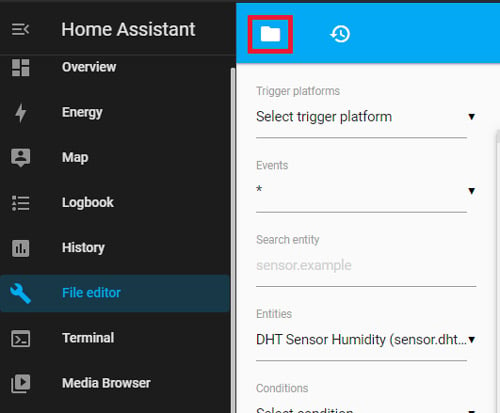
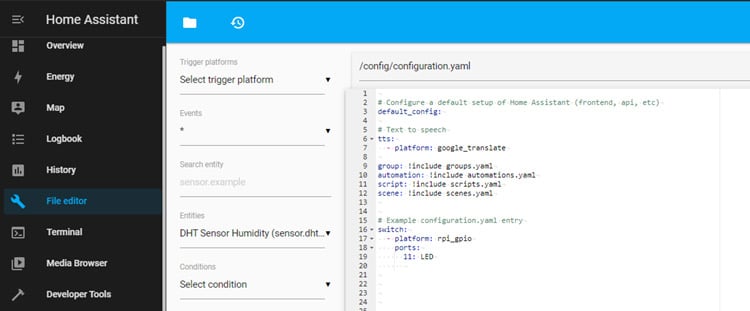
From there click on ‘configuration.yaml’ tab and it will open the configuration file. Now paste the code that you copied from the Home Assistant page and save the file.
Now we will follow the same procedure for the DHT11 sensor. So again, go to the components page and search for the DHT sensor.
Copy the configuration code for DHT and paste it into the configuration file below the LED code and save the changes. Don’t forget to change the DHT type and GPIO pin.

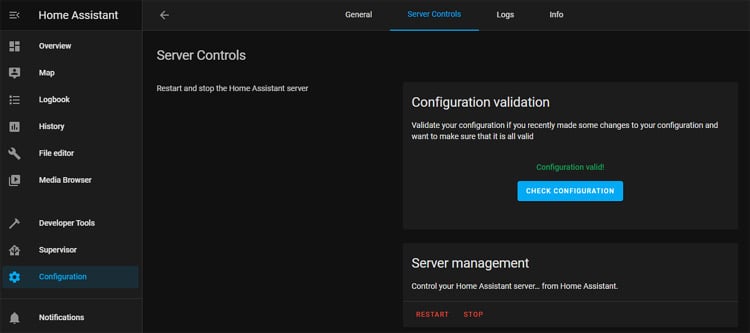
Once you have made the change in any configuration file it is a good practice to check if the configuration is valid or not. To check the configuration, go to the ‘Configuration’ tab, and select General, and click "CHECK CONFIG".
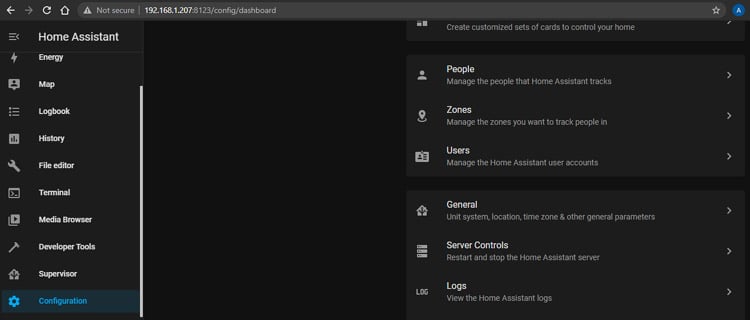
Now if the changes that you have made don’t have an error, then it will display a message "Configuration Valid". Once the configuration is valid, press "RESTART" under Server Management, and wait until the home assistant starts again.
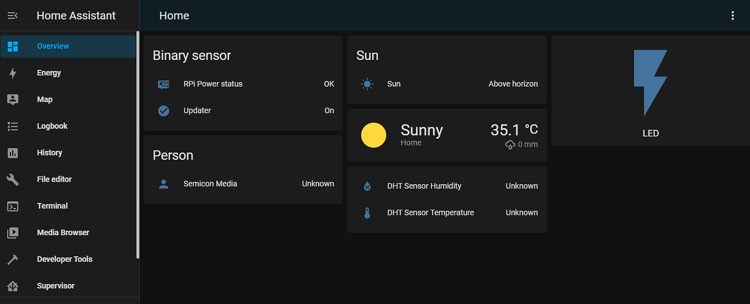
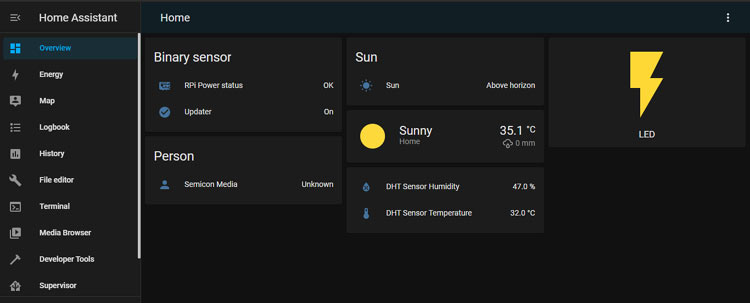
After restarting, go to your Home Assistant User Interface and you should see two new blocks added to your home assistant UI. One for controlling the led and the other for displaying DHT11 sensor data.
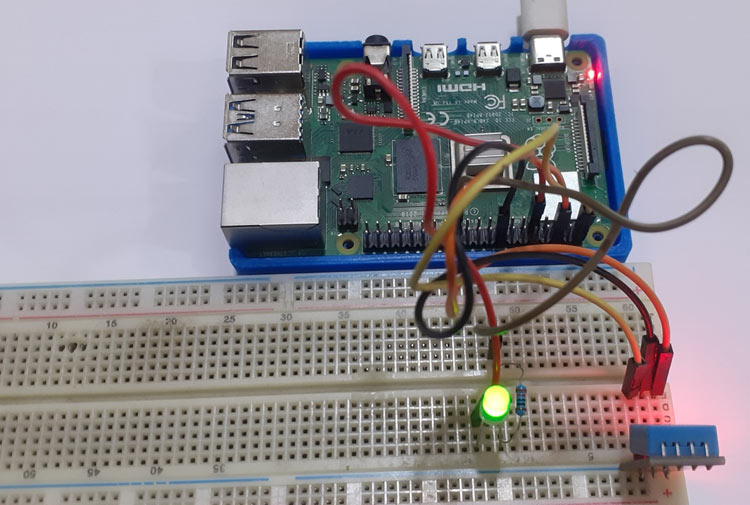
Now to test whether this works or not connect LEDs to GPIO 11 and DHT11 sensor to GPIO 23 of Raspberry Pi as shown in the below image and the readings from DHT11 sensor will be displayed on Home Assistant UI.

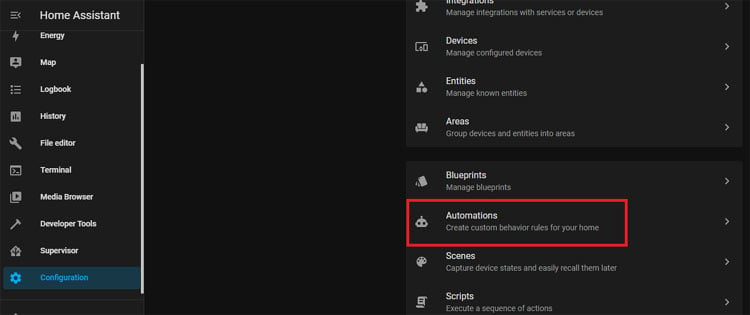
So, this is how we can control LED and read DHT11 sensor data using Home Assistant. Now in the next step, we are going to automate the LED so that it can be turned on/off at a fixed time. For that, go to the ‘Configuration’ tab and click on ‘Automations’.
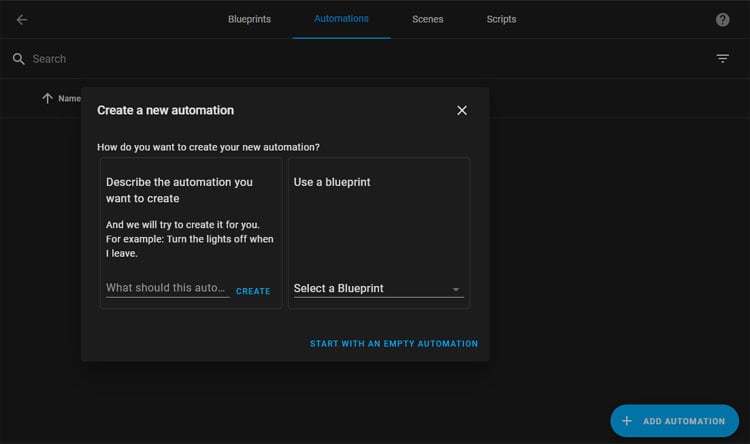
In the Automation section, click on the ‘Add Automation’ card and give a name to your automation. You can call it whatever you want.
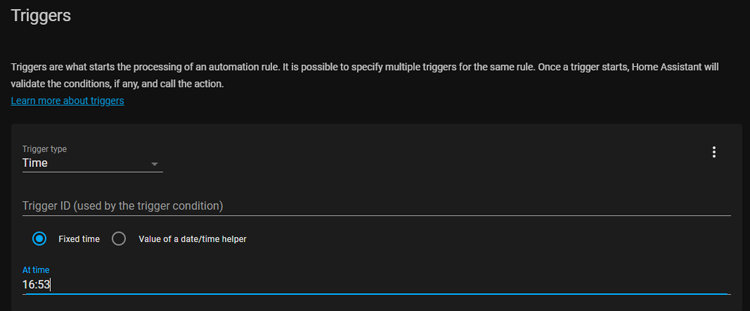
Here we are going to automatically turn on the LED at a specific time. So, in the Trigger Type, select time. In the ‘At Time’ section enter the time you want to trigger the automation.
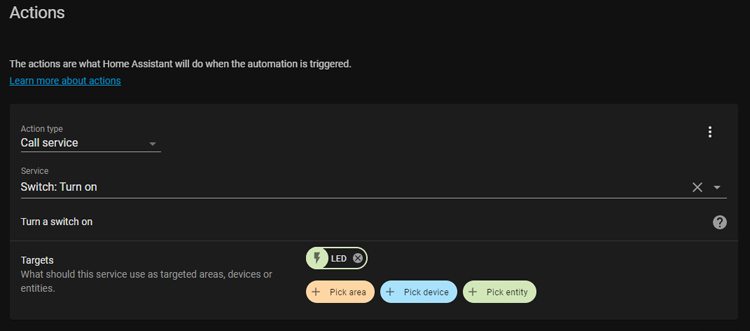
Now on the Actions section, select Action type as ‘Call Service’, Service as ‘Switch: Turn on’, and Target is LED. After that, click on ‘Save’ and your automation is ready.
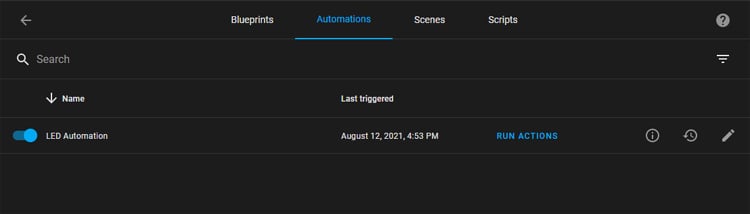
Now to check whether this automation is working or not click on the ‘Run Actions’ buttons and it should turn on the LED.
So, that’s all about how to how to install Home Assistant on Raspberry Pi and how to add things and control & automate them. This was a basic introduction tutorial and Home Assistant offers many more complex features than this. We will cover them all in our future tutorials. If you have any questions, please leave them in the comment section below or use our forum to start a discussion on this.
