
Today we can say the Mobile phone is our friend. Smartphones can do almost everything. So, is it possible to tell your friend (phone) to switch on the fan or any kind of electrical machine? A big ‘Yes’. This project is a little example of that. To make this, the main things we need are Arduino microcontroller boards (Arduino Uno) and a Bluetooth module like HC-05. Now, you have to download Arduino IDE software with the help of any browser on the desktop or laptop. We use this software to write the program and admin/upload it to the Arduino board. Let's move to the connection and hardware parts. To give the power supply to Arduino please use 5 volts to 12 volts not more than that. Actually, Arduino and Bluetooth modules work with 5 volts supply. In the Arduino board, there is a voltage regulator to maintain the voltage. In this project we are dealing with an Alternating Current source, in short, that is called AC. So we need a minimum 5V-6A Relay or Relay module if we want to operate home appliances. To make the connection among all the things there is needed some jumper wires, normal copper wires(0.75mm or above), and a USB-A type cable. The Relay is acted as a switch. So, the main logic behind it is to communicate between two machines like our human beings communication. After admin/uploading the program to the Arduino, we have to give power to all the devices as per our requirement. Then connect the mobile Bluetooth to the HC-05 Bluetooth module. Download any Bluetooth controlled voice app from the play store. Make sure the app should be in proper working condition. After installing the app, open it and make it paired with HC05. Now it is ready to work. We have previously built many home automation projects.
Component Required for Mobile Controlled Electrical Appliances
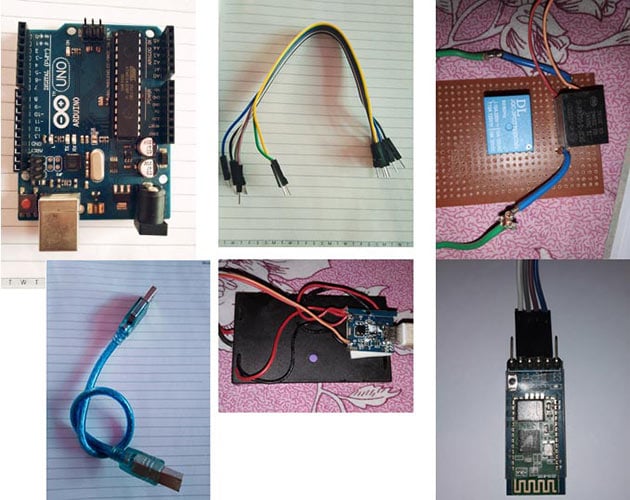
Project Used Hardware
Arduino-Uno,
HC-05 Bluetooth module,
6 volts relay,
Jumper wires,
USB-A type cable,
Blank PCB board,
9 watts LED,
Table-Fan,
Copper wires,
self-made Power-bank,
self-made extension cord
Project Used Software
Arduino IDE
Project Hardware Software Selection
Here Arduino micro-controller board is used as it is portable and easy to use and the cost is not high. There are various types of Arduino boards like Arduino Uno, Arduino Mega, Arduino Nano. It can be used for wireless communication. HC-05 Bluetooth module is used here as a receiver. Relay is used as a switch. The most interesting thing is one can use voice to control electrical appliances. Programming in Arduino is very easy.
Circuit Diagram

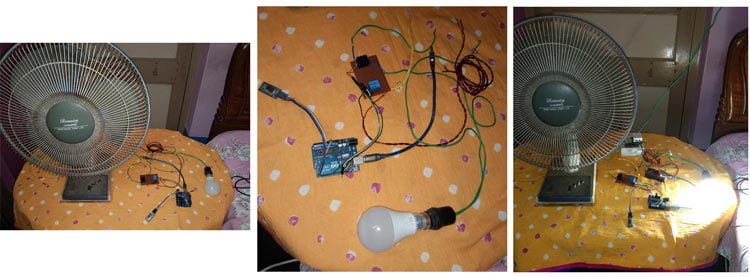
Connect Arduino pin Rx to Bluetooth pin Tx and also vice versa. Here Pin 13 is used to operate Fan and pin 8 is used to operate the light. 5 volt supply is given to the HC-05 Bluetooth module. These are the important connections that one should keep in mind.
Complete Project Code
void setup() {

  // put your setup code here, to run once:

  Serial.begin(9600); // to start the serial monitor

  pinMode(13,OUTPUT); // pin 13 is given for the Fan(I am using a table fan of my house)

  pinMode(8,OUTPUT); // pin 8 is given for the Light(I am using LED 9 watt bulb)

}

void loop() {

  // put your main code here, to run repeatedly:

  if(Serial.available()>0)

  {

    String data = Serial.readString(); // to read the input command as a string

    Serial.println(data); // to see the command in serial monitor

    if(data == "switch on fan")

    {

      digitalWrite(13,HIGH);  // to switch on the fan

    }

    if(data == "switch off fan")

    {

      digitalWrite(13,LOW);  // to switch off the fan

    }

    if(data == "switch on light")

    {

      digitalWrite(8,HIGH); // to switch on the light

    }

    if(data == "switch off light")

    {

      digitalWrite(8,LOW); // to switch off the light

    }

  }

  delay(50); // giving delay

}
