
ESP32 series microcontrollers are low-cost, low-power system-on-chip microcontrollers that come with integrated Wi-Fi and dual-mode Bluetooth. The ESP32 series comes with Tensilica Xtensa LX6 microprocessor in both (dual-core and single-core) variations, and it has inbuilt antenna switches, RF balun, power amplifier, low-noise receive amplifier, filters, and power management modules.
Previously we built many IoT based projects including weather station using DHT11, webservers, which not only includes Raspberry Pi, ESP8266 and Arduino but also have a lot of applications with popular Wi-Fi module ESP32. Today we will build an ESP32 based webserver to display the temperature and humidity values from the DHT11 sensor. ESP32 board will read the temperature and humidity data from the DHT11 sensor and display it on the Webpage. Here the IFTTT is also used to send the Email notifications when the temperature goes beyond a particular limit.
Components Required
- ESP-32 Devkit V1
- DHT11 Sensor Module
- Jumper Wires
Circuit Diagram
The circuit diagram for interfacing DHT11 temperature and humidity sensor with ESP32 is given below.

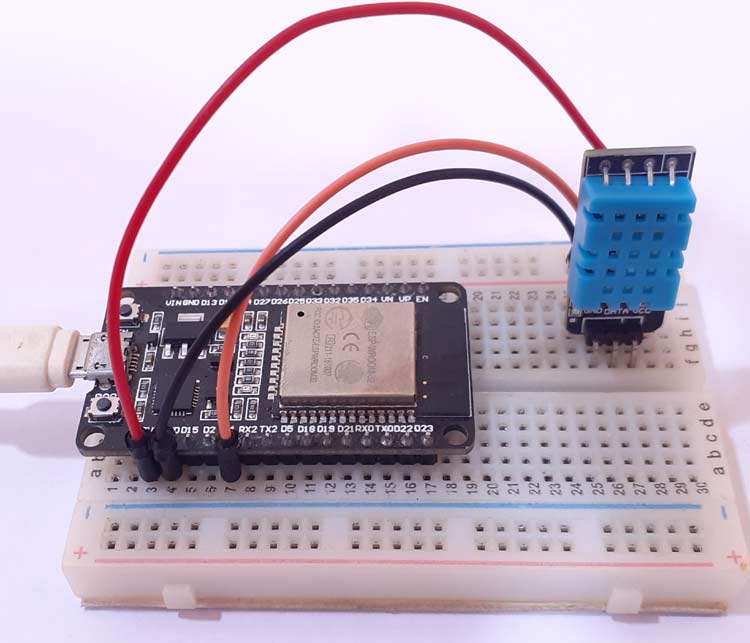
Interfacing the DHT11 sensor with ESP32 is very simple as it has only three pins. Connect the VCC and GND pin of the sensor to the 3.3 V and GND pin of ESP32. Then connect the Data pin of the sensor to the D2 pin of ESP32. After making the connections my hardware looks like this:
IFTTT Setup for Temperature and Humidity Measurement
IFTTT is a free web-based service that allows users to create chains of simple conditional statements, called “recipes”, which are triggered based on changes to other web services such as Gmail, Facebook, Instagram, and Pinterest. IFTTT is an abbreviation of “If This Then That”.
In this project, IFTTT is used to send an Email whenever the temperature or humidity goes beyond a predefined limit. We previously used IFTTT in many IoT based projects to send emails or SMS on particular events like on excessive electricity consumption, on high pulse rate, on intruder entry, etc.
First login to IFTTT with your credentials or Sign Up if you don’t have an account on it.
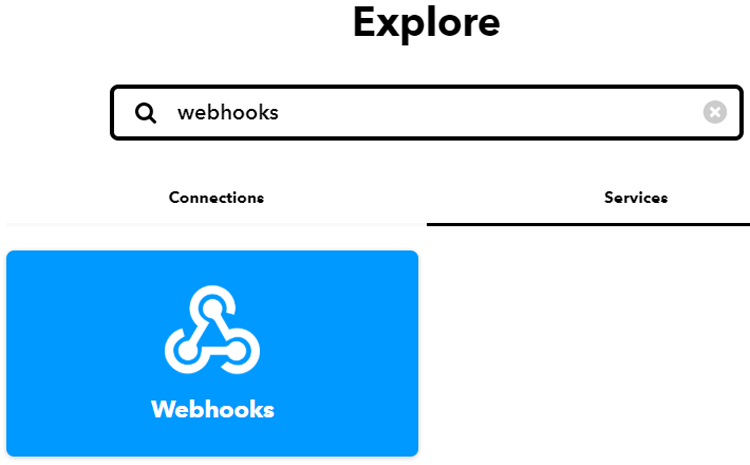
Now search for ‘Webhooks’ and click on the Webhooks in Services section.
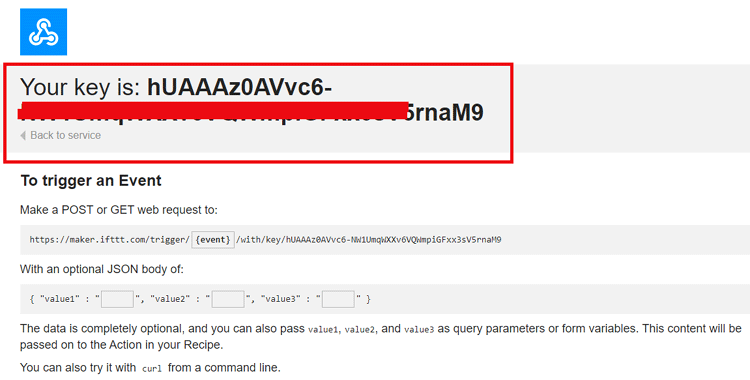
Now, in the Webhooks window, click on ‘Documentation’ in the upper right corner to get the private key.
Copy this key. It will be used in the program.
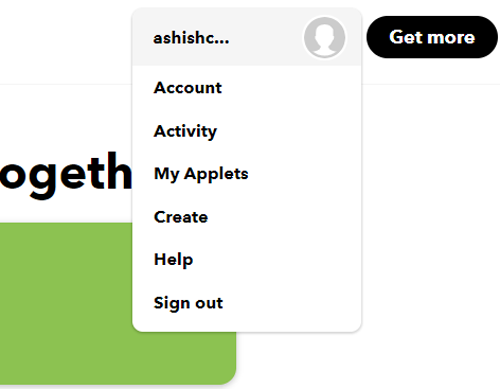
After getting the private key, now we will create an applet using Webhooks and Email services. To create an applet click on your profile and then click on ‘Create.’
Now in the next window, click on the ‘This’ icon.

Now search for Webhooks in the search section and click on ‘Webhooks.’

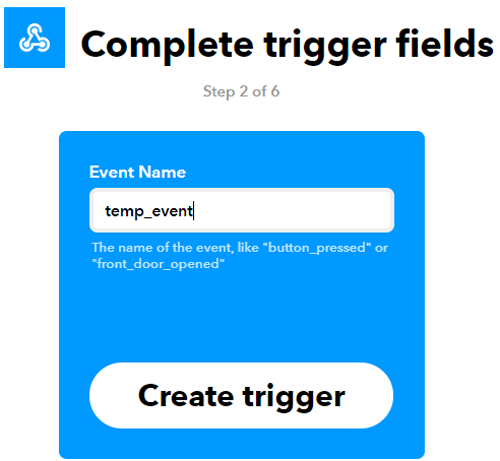
Now choose ‘Receive a Web Request’ trigger and in the next window, enter the event name as temp_event and then click on create a trigger.
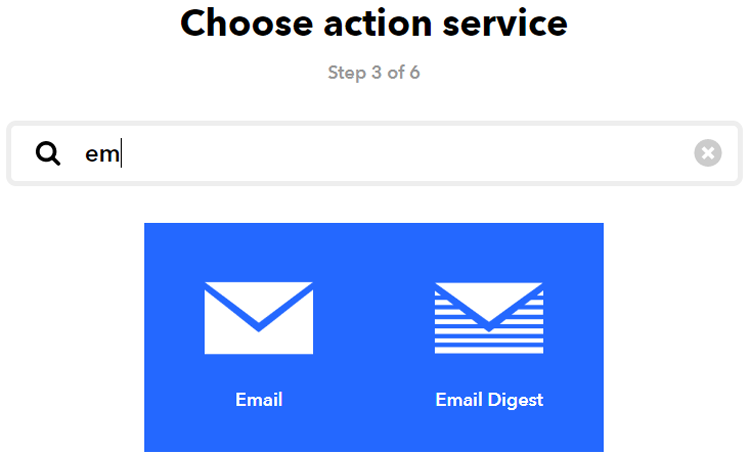
After this, click on ‘Then That’ and then click on Email.
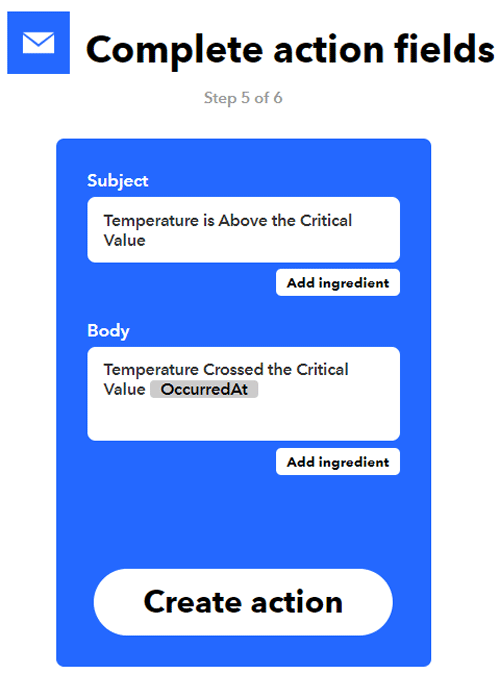
Now in email, click on ‘send me an email’ and enter the email subject and body and then click on create action.
In the last step click on ‘Finish’ to complete the Applet setup.
Code Explanation
Here we will use Arduino IDE to program ESP32 board, for this download and install the ESP32 board file in Arduino IDE. Learn more about Programming ESP32 Board with Arduino IDE by following the link.
Complete code for this ESP32 DHT11 project is given at the end of the project. Here we are explaining some important part of the program.
So, as usual, start the code by including all the required libraries. For this project, we need three libraries WiFi, DHT (for DHT sensor), and Wire (for I2C).
#include <WiFi.h>
#include <Wire.h>
#include "DHT.h
Then define the type of DHT and the pin to which sensor is connected.
#define DHTTYPE DHT11 // DHT 11
uint8_t DHTPin = D2;
DHT dht(DHTPin, DHTTYPE);
Then, make instances for Wi-Fi name, Wi-Fi password, IFTTT hostname, and private key.
const char* ssid = "Wi-Fi Name";
const char* password = "Password";
const char *host = "maker.ifttt.com";
const char *privateKey = "Private key";
After that, to access the WiFiServer function, we declare an object of the WifiServer library. As 80 is the default port for HTTP.
WiFiServer server(80);
Inside the Void setup() function, initialize the baud rate, DHT sensor using begin() function, and then connect the module with the Wi-Fi using the Wi-Fi username and password. Once the ESP32 is connected to the Wi-Fi, it will print the ESP32 IP address.
Serial.begin(115200);
pinMode(DHTPin, INPUT);
dht.begin();
Serial.print("Connecting to Wifi Network");
Serial.println(ssid);
WiFi.begin(ssid, password);
while (WiFi.status() != WL_CONNECTED) {
delay(500);
Serial.print(".");
}
Serial.println("");
Serial.println("Connected to WiFi.");
Serial.println("IP address of ESP32 is : ");
………………………………..
………………………………….
In the void loop() function, read the temperature and humidity data and store this data in different variables using DHTdht.read() function.
Temperature = dht.readTemperature();
Humidity = dht.readHumidity();
After that, design the web page using HTML and print the script using client.println() function.
WiFiClient client = server.available();
if (client)
{
Serial.println("Web Client connected ");
String request = client.readStringUntil('\r');
client.println("HTTP/1.1 200 OK");
client.println("Content-Type: text/html");
client.println("Connection: close");  // the connection will be closed after completion of the response
client.println("Refresh: 10");  // update the page after 10 sec
client.println();
Here CSS is used to style the text and background. You can change the CSS code to change the look and feel of the webpage according to you.
client.println("<style>html { font-family: Cairo; display: block; margin: 0px auto; text-align: center;color: #333333; background-color: ##f3ffee;}");
client.println("body{margin-top: 50px;}");
client.println("h1 {margin: 50px auto 30px; font-size: 50px;  text-align: center;}");
client.println(".side_adjust{display: inline-block;vertical-align: middle;position: relative;}");
client.println(".text1{font-weight: 180; padding-left: 15px; font-size: 50px; width: 170px; text-align: left; color: #3498db;}");
………….
………….
In HTML code, <div> tags are used to display both the parameters i.e. Temperature and Humidity.
client.println("<div class=\"side_adjust text1\">Humidity:</div>");
client.println("<div class=\"side_adjust data1\">");
client.print(Humidity);
client.println("<div class=\"side_adjust text1\">%</div>");
client.println("</div>");
client.println("<div class=\"data\">");
client.println("<div class=\"side_adjust text2\">Temperature:</div>");
client.println("<div class=\"side_adjust data2\">");
client.print(Temperature);
client.println("<div class=\"side_adjust text2\">*C</div>");
………..
………..
After that, if a condition is used to trigger the event. So whenever the temperature goes past 20 it will send a trigger to IFTTT.
if ( Temperature >= 20) {
        send_event("temp_event");
        }
Testing the ESP32 Interfacing with DHT11
Now Connect the ESP32 with the laptop and choose the board and port correctly and then click on the Upload button.
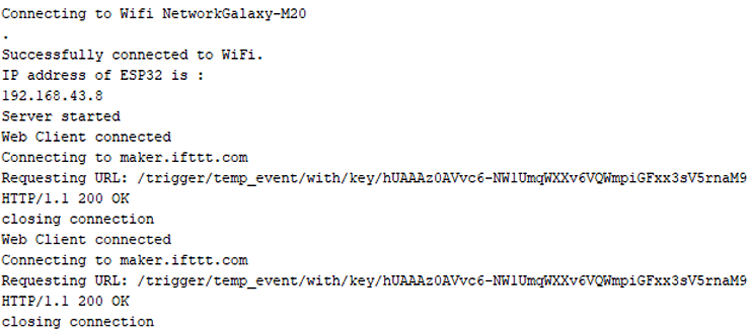
Make sure your laptop and ESP32 are connected to the same Wi-Fi network. After uploading the code, open the serial monitor change the baud rate to 115200. After this your serial monitor should look like this:
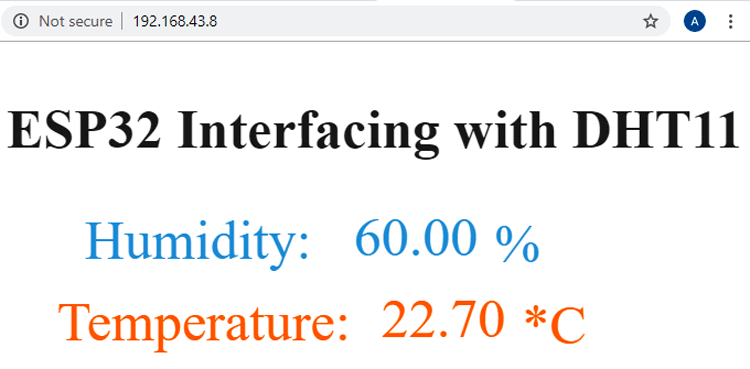
Now to access the webpage, copy the ESP32 IP address and paste it in the browser. The web page will look like this:
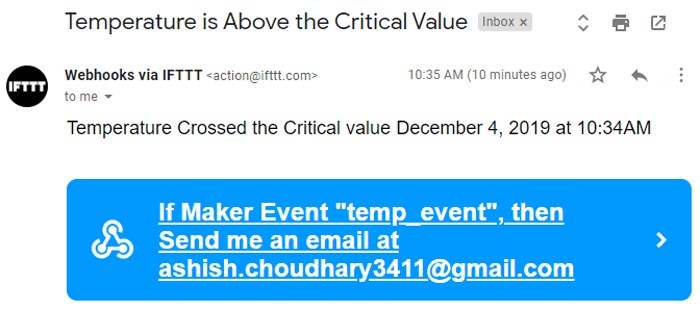
Now, whenever the temperature values go past 20 it will trigger the IFTTT event to send an email to notify that the temperature has crossed the critical values.
This is how a DHT11 sensor can be interfaced with ESP32 to build an IoT based Temperature and Humidity measurement system.
Complete code with a demonstration Video is given below.
Complete Project Code
#include <WiFi.h>
#include <Wire.h>
#include "DHT.h"
// Uncomment one of the lines below for whatever DHT sensor type you're using!
#define DHTTYPE DHT11 // DHT 11
//DHT Sensor;
uint8_t DHTPin = D2;
DHT dht(DHTPin, DHTTYPE);
float Temperature;
float Humidity;
void send_event(const char *event);
const char* ssid = "Wi-Fi Name";
const char* password = "Password";
const char *host = "maker.ifttt.com";
const char *privateKey = "Private Key";  Enter the privte key that you copied from IFTTT Webhooks
WiFiServer server(80);
String header;
void setup() {
Serial.begin(115200);
pinMode(DHTPin, INPUT);
dht.begin();
Serial.print("Connecting to Wifi Network");
Serial.println(ssid);
WiFi.begin(ssid, password);
while (WiFi.status() != WL_CONNECTED) {
delay(500);
Serial.print(".");
}
Serial.println("");
Serial.println("Successfully connected to WiFi.");
Serial.println("IP address of ESP32 is : ");
Serial.println(WiFi.localIP());
server.begin();
Serial.println("Server started");
}
void loop()
{
Temperature = dht.readTemperature();
Humidity = dht.readHumidity();
WiFiClient client = server.available();
if (client)
{
Serial.println("Web Client connected ");
String request = client.readStringUntil('\r');
client.println("HTTP/1.1 200 OK");
client.println("Content-Type: text/html");
client.println("Connection: close");  // the connection will be closed after completion of the response
client.println("Refresh: 10");  // update the page after 10 sec
client.println();
client.println("<!DOCTYPE HTML>");
client.println("<html>");
client.println("<style>html { font-family: Cairo; display: block; margin: 0px auto; text-align: center;color: #333333; background-color: ##f3ffee;}");
client.println("body{margin-top: 50px;}");
client.println("h1 {margin: 50px auto 30px; font-size: 50px;  text-align: center;}");
client.println(".side_adjust{display: inline-block;vertical-align: middle;position: relative;}");
client.println(".text1{font-weight: 180; padding-left: 15px; font-size: 50px; width: 170px; text-align: left; color: #3498db;}");
client.println(".data1{font-weight: 180; padding-left: 70px; font-size: 50px;color: #3498db;}");
client.println(".text2{font-weight: 180;padding-left: 15px; font-size: 50px; width: 170px; text-align: left; color: #ff6600;}");
client.println(".data2{font-weight: 180; padding-left: 120px; font-size: 50px;color: #ff6600;}");
client.println(".data{padding: 10px;}");
client.println("</style>");
client.println("</head>");
client.println("<body>");
client.println("<div id=\"webpage\">");
client.println("<h1>ESP32 Interfacing with DHT11</h1>");
client.println("<div class=\"data\">");
client.println("<div class=\"side_adjust text1\">Humidity:</div>");
client.println("<div class=\"side_adjust data1\">");
client.print(Humidity);
client.println("<div class=\"side_adjust text1\">%</div>");
client.println("</div>");
client.println("<div class=\"data\">");
client.println("<div class=\"side_adjust text2\">Temperature:</div>");
client.println("<div class=\"side_adjust data2\">");
client.print(Temperature);
client.println("<div class=\"side_adjust text2\">*C</div>");
client.println("</div>");
client.println("</div>");
client.println("</body>");
client.println("</html>");
 delay(4000);
  if ( Temperature >= 20) {
        send_event("temp_event");
        }
}
}
void send_event(const char *event)
{
  Serial.print("Connecting to ");
  Serial.println(host);
  // Use WiFiClient class to create TCP connections
  WiFiClient client;
  const int httpPort = 80;
  if (!client.connect(host, httpPort)) {
    Serial.println("Connection failed");
    return;
  }
  // We now create a URI for the request
  String url = "/trigger/";
  url += event;
  url += "/with/key/";
  url += privateKey;
  Serial.print("Requesting URL: ");
  Serial.println(url);
  // This will send the request to the server
  client.print(String("GET ") + url + " HTTP/1.1\r\n" +
               "Host: " + host + "\r\n" +
               "Connection: close\r\n\r\n");
  while(client.connected())
  {
    if(client.available())
    {
      String line = client.readStringUntil('\r');
      Serial.print(line);
    } else {
      // No data yet, wait a bit
      delay(50);
    };
  }
  Serial.println();
  Serial.println("closing connection");
  client.stop();
}

I have an error in arduino ide "invalid conversion from 'const char*' to 'char*'" shows in this line WiFi.begin(ssid, password);
Can you help me with this? Thanks