
In 2012, Raspberry Pi Foundation introduced us to a single board computer i.e. Raspberry Pi, which was mainly promoted for teaching the basics of computer science to kids and 9 years later, a microcontroller board, Raspberry Pi Pico was introduced. Raspberry Pi Pico comes with the Raspberry Pi Foundation's own silicon chip RP2040. It is a low-cost microcontroller, priced at $4, which is around ₹300 in Indian currency. Because it has a Dual-Core ARM processor along with GPIO & Digital/Analog peripherals, we can easily create micro to small scale embedded applications. In this tutorial of Raspberry Pi Pico series, we will learn “How to Program a Raspberry Pi Pico using C/C++ SDK”.
A Brief Introduction to the Raspberry Pi Pico
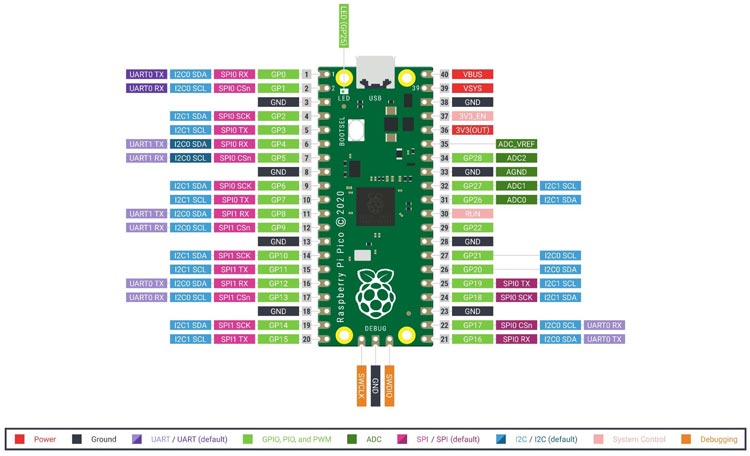
Raspberry Pi Pico comes with a Dual-Core ARM Cortex M0+ processor, which can run up to 133MHz. It has 264KB of SRAM and 2MB of onboard flash storage, but we can extend up to 16MB of off-chip Flash memory via a dedicated Quad-SPI bus. We get a total 26 of multi-functional GPIOs that support 3.3v digital I/O with 3 of them also being analog inputs. Raspberry Pi Pico also supports highly flexible power supply architecture, like micro-USB, external supplies or batteries. The most important thing is that we don't need any programmer to program a Raspberry Pi Pico because it works on “Drag-and-Drop” programming using mass storage over USB.

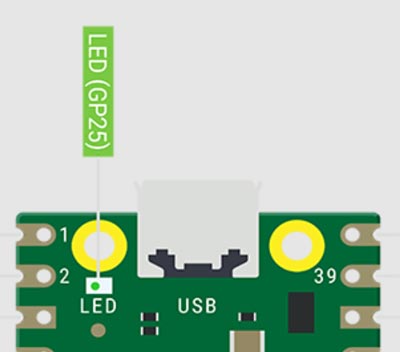
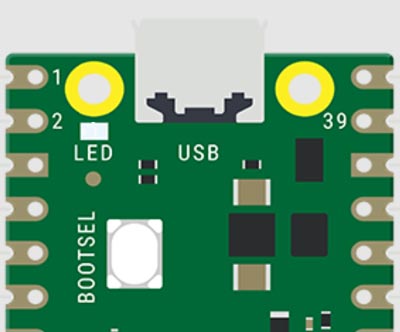
As we see in the image above, Raspberry Pi Pico has 40 pinouts and 26 of them are multi-functional GPIOs. It also has an onboard LED which is connected with the GPIO25. The most disappointing thing is that Raspberry Pi Pico has no hardware reset button on board, but the board has a RUN pin which acts as a reset pin when we short the pin with the Ground.
Setting-Up the C/C++ SDK for Raspberry Pi Pico on Linux Based System
Once we understand the hardware, we need a setup C/C++ software development environment to develop applications. For setting up a C/C++ SDK, I’m using Ubuntu 20.04 LTS.
Raspberry Pi Foundation provides a setup script for Linux and Raspberry Pi OS, which automatically creates and installs prerequisites for C/C++ SDK and Visual Studio Code cross-platform IDE. To download the C/C++ SDK setup script we need to call down the below commands.
mkdir ~/raspberry-pi-pico
cd ~/raspberry-pi-pico
wget https://raw.githubusercontent.com/raspberrypi/pico-setup/master/pico_setup.sh
chmod +x pico_setup.sh
./pico_setup.sh
Note: On my system, Ubuntu 20.04 LTS - 64Bit, I was facing an issue where the setup script downloads and installs the Visual Studio Code IDE. So, I blocked the VSCode IDE download portion and I download and Installed the IDE separately depending on my OS
Just like the setup script, we can also install the prerequisite, SDK and IDE one by one using below mentioned commands.
Install the Prerequisites
sudo apt update
sudo apt install git cmake gcc-arm-none-eabi gcc g++ libstdc++-arm-none-eabi-newlib
sudo apt install automake autoconf build-essential texinfo libtool libftdi-dev libusb-1.0-0-dev

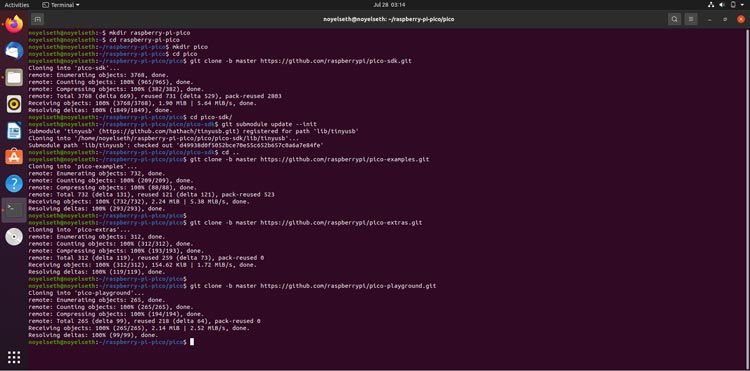
Download Pico C/C++ SDK Repository and Update SDK’s Environment Paths
mkdir ~/raspberry-pi-pico
cd ~/raspberry-pi-pico
mkdir pico
cd pico
git clone -b master https://github.com/raspberrypi/pico-sdk.git
cd pico-sdk
git submodule update --init
cd ..
git clone -b master https://github.com/raspberrypi/pico-examples.git
git clone -b master https://github.com/raspberrypi/pico-extras.git
git clone -b master https://github.com/raspberrypi/pico-playground.git
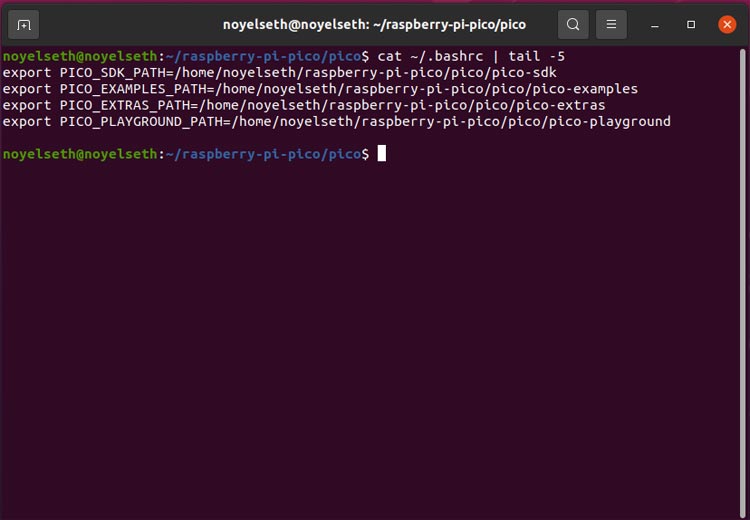
After downloading the SDK and example repository, it’s time to update the Environment variable for each repository’s path with “PICO_SDK_PATH”, “PICO_EXAMPLES_PATH”, “PICO_EXTRAS_PATH”, “PICO_PLAYGROUND_PATH” into the .bashrc for future use. Also, users can update the environment variable when he/she works on Raspberry Pi Pico.
export PICO_SDK_PATH=/home/<user-name>/raspberry-pi-pico/pico/pico-sdk
export PICO_EXAMPLES_PATH=/home/<user-name>/raspberry-pi-pico/pico/pico-examples
export PICO_EXTRAS_PATH=/home/<user-name>/raspberry-pi-pico/pico/pico-extras
export PICO_PLAYGROUND_PATH=/home/<user-name>/raspberry-pi-pico/pico/pico-playground

Download and Setup Picotool and Picoprobe
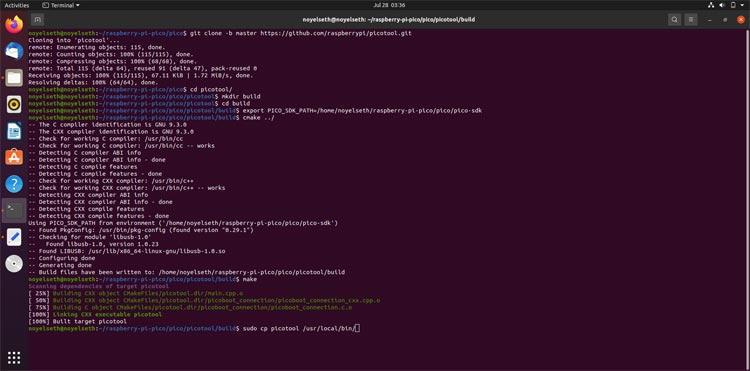
We need to download and install the Picotool to retrieve the embed information from the Raspberry Pi Pico’s binaries.
cd ~/raspberry-pi-pico/pico
git clone -b master https://github.com/raspberrypi/picotool.git
cd picotool
mkdir build
cd build
export PICO_SDK_PATH=/home/<user-name>/raspberry-pi-pico/pico/pico-sdk
cmake ../
make
sudo cp picotool /usr/local/bin/
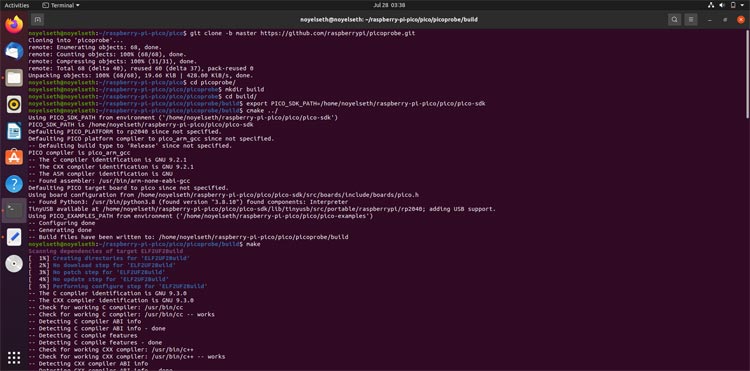
After installing the Picotool, it’s time to download and install the Picobrobe. With the help of Picoprobe firmware, we can use a Raspberry Pi Pico as a programmer/debugger device for another Raspberry Pi Pico.
cd ~/raspberry-pi-pico/pico
git clone -b master https://github.com/raspberrypi/picoprobe.git
cd picoprobe
mkdir build
cd build
export PICO_SDK_PATH=/home/<user-name>/raspberry-pi-pico/pico/pico-sdk
cmake ../
make
Download and Setup Compiler OpenOCD (for debug support)
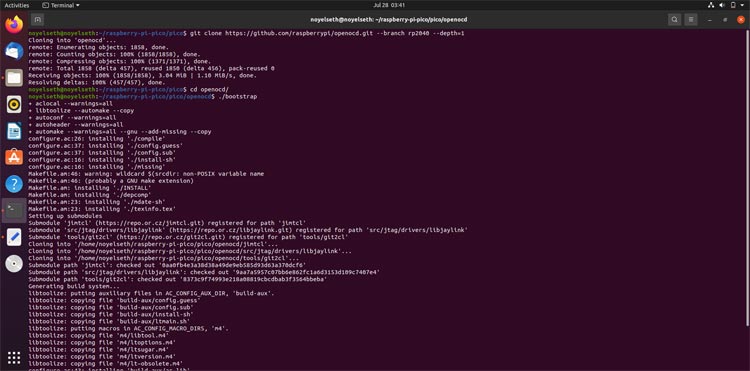
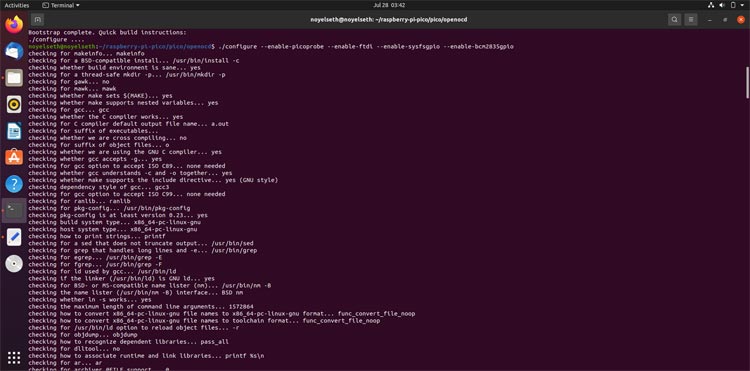
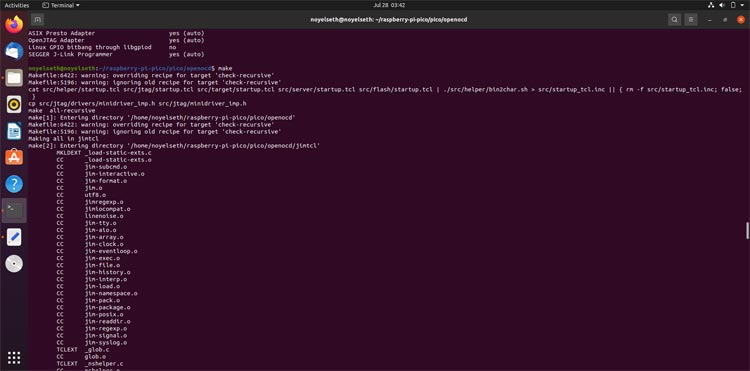
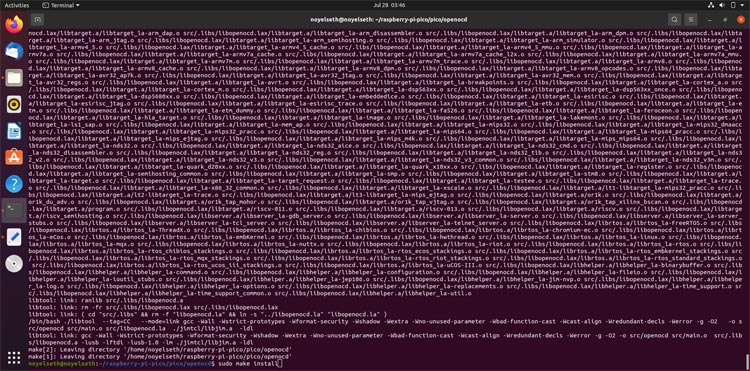
Now, it’s time to download and set up the OpenOCD for debugging the Raspberry Pi Pico.
cd ~/raspberry-pi-pico/pico git clone https://github.com/raspberrypi/openocd.git --branch rp2040 --depth=1 cd openocd ./bootstrap ./configure --enable-picoprobe --enable-ftdi --enable-sysfsgpio --enable-bcm2835gpio make sudo make install
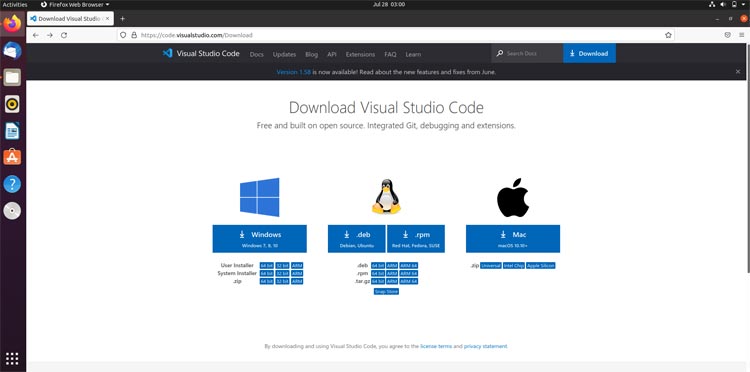
Download and Install Visual Studio Code IDE
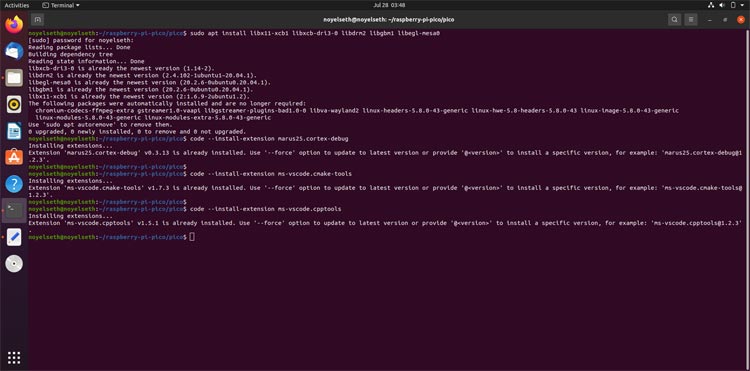
After downloading and setting up all the SDK and debugger software, now we are going to install the cross-compiler IDE Visual Studio Code for easy and quick development. I already mentioned I’m using Ubuntu 20.04LTS - 64 bit, so, I downloaded the code_1.xx.xx_amd64.deb file from Visual Studio official website and installed the VSCode IDE. Once the VSCode IDE installation is done, we need to install some extensions for the IDE, so we can debug the Raspberry Pi Pico from the VSCode IDE.
cd ~/raspberry-pi-pico/pico
sudo apt install libx11-xcb1 libxcb-dri3-0 libdrm2 libgbm1 libegl-mesa0
code --install-extension marus25.cortex-debug
code --install-extension ms-vscode.cmake-tools
code --install-extension ms-vscode.cpptools
Setup and Compile the First Project [Blink-Led]
Now that everything is ready, let’s try compiling our first project i.e., blinking Raspberry Pi Pico led using C to check if the IDE, Compiler, and Library are all working the way they should. You can also check the video at the bottom of the page for detailed instructions.
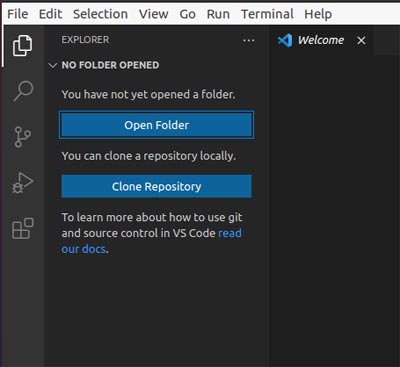
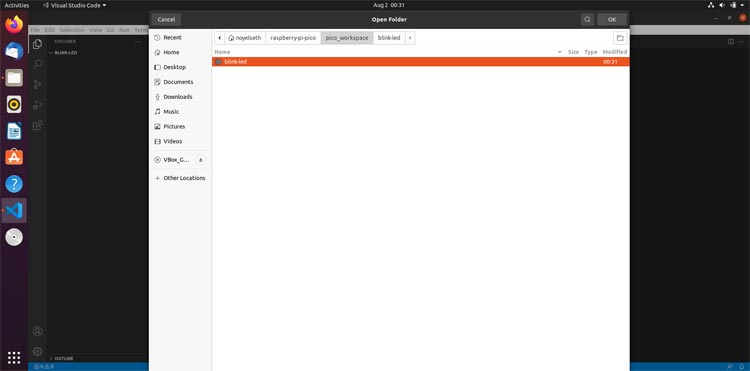
Now, create a “pico_workspace” inside the ~/raspberry-pi-pico/ folder and open the VisualStudio Code. Then click on the Top-left “Explorer” tap or press Ctrl+Shift+E and then click on “Open Folder” under the explorer tab. In the Open Folder window, navigate to ~/raspberry-pi-pico/pico_workspace and create a folder with the name “blink-led” and click on the OK button.
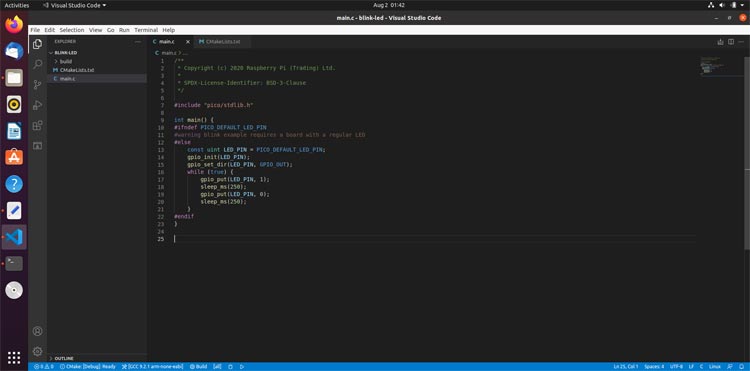
After creating and importing the blink-led project folder, now create a file by selecting the option from the menu-bar “File->New File or Ctrl+N” and then press Ctrl+S to save as “main.c”. After saving the file, write the led blinking code into “main.c”.
/**
 * Copyright (c) 2020 Raspberry Pi (Trading) Ltd.
 *
 * SPDX-License-Identifier: BSD-3-Clause
 */
#include "pico/stdlib.h"
int main() {
#ifndef PICO_DEFAULT_LED_PIN
#warning blink example requires a board with a regular LED
#else
    const uint LED_PIN = PICO_DEFAULT_LED_PIN;
    gpio_init(LED_PIN);
    gpio_set_dir(LED_PIN, GPIO_OUT);
    while (true) {
        gpio_put(LED_PIN, 1);
        sleep_ms(250);
        gpio_put(LED_PIN, 0);
        sleep_ms(250);
    }
#endif
}
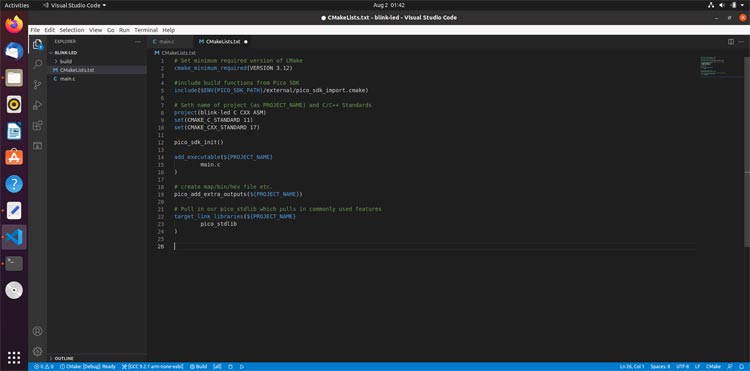
The C/C++ SDK of Raspberry Pi Pico comes with CMake build automation tool. So, after creating the .C file for the project we need to create “CMakeLists.txt”. The CMakeLists.txt contains the set instructions describing the project sources files and targets(executable, libraries).
# Set minimum required version of CMake
cmake_minimum_required(VERSION 3.12)
#include build functions from Pico SDK
include($ENV{PICO_SDK_PATH}/external/pico_sdk_import.cmake)
# Set name of project (as PROJECT_NAME) and C/C++ Standards
project(blink-led C CXX ASM)
set(CMAKE_C_STANDARD 11)
set(CMAKE_CXX_STANDARD 17)
# Creates a pico-sdk subdirectory in our project for the libraries
pico_sdk_init()
# point out the CMake, where to find the executable source file
add_executable(${PROJECT_NAME}
        main.c
)
# create map/bin/hex/uf2 files.
pico_add_extra_outputs(${PROJECT_NAME})
# Pull in our pico_stdlib which pulls in commonly used features (gpio, timer-delay etc)
target_link_libraries(${PROJECT_NAME}
            pico_stdlib
)
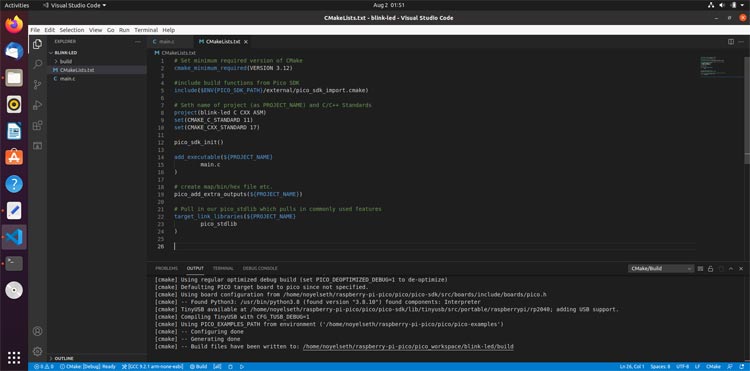
Now, restart the Visual Studio Code for setting the Cmake Extension setup automatically for the blink-led project. After restart, you can see the CMake build log into the output window at the bottom.
[cmake] -- Configuring done
[cmake] -- Generating done
[cmake] -- Build files have been written to: /home/<user-name>/raspberry-pi-pico/pico_workspace/blink-led/build
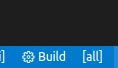
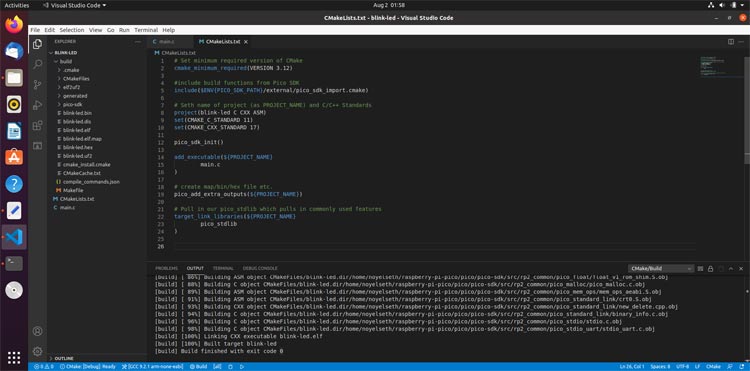
And then click on the Build icon at the bottom of the status bar to Build the blink-led project and create the .uf2 file. The build process’s output will show on the Output Log window. After the successful build, the build status also shows in the output window.
[build] [100%] Linking CXX executable blink-led.elf
[build] [100%] Built target blink-led
[build] Build finished with exit code 0
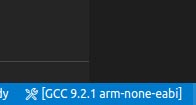
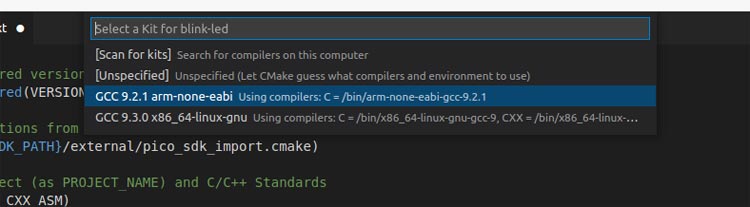
Note: Make sure, you select the right cross-compile toolchain “GCC x.x.x arm-none-eabi”. If the toolchain isn’t correct, then click on the Wrench+ScrewDriver icon at the bottom status bar and select the correct toolchain from the list as shown in the image.
Uploading the Code into Raspberry Pi Pico
Now, after setting up everything for programming the Pi Pico, it’s time to upload the code. As we already know, we don't need any programmer to program the Raspberry Pi Pico. The raspberry pi pico program with the drag and drop process. For this drag & drop process, we need to plug the USB with pico while the onboard BOOTSEL button is pressed and held until the Pico gets plugged with the system and then release the BOOTSEL button.
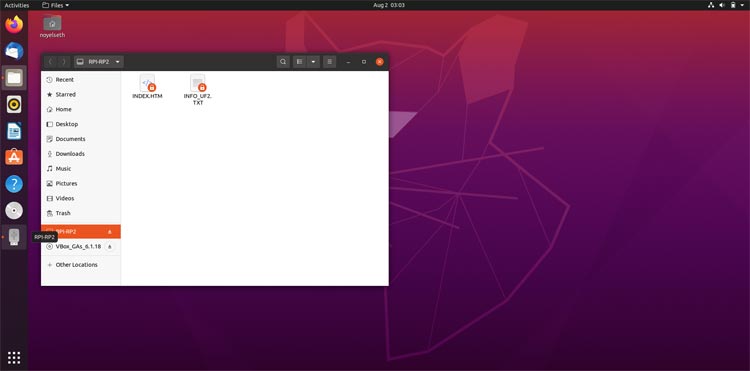
An onboard BOOTSEL button is used to select the Raspberry Pi Pico to enter into the Bootloader Mass-storage system mode, for uploading the new program/firmware. After the Raspberry Pi Pico enters into the bootloader mode, a Mass-storage is mounted with the name of RPI-RP2. Now click on the mounted drive RPI-RP2, and open it.
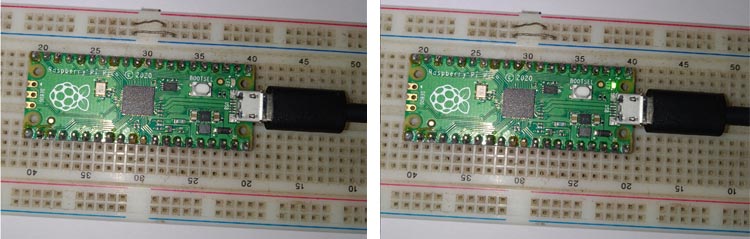
Now, it's time to upload the newly built blink-led program into the Raspberry Pi Pico. When we build the blink-led, a UF2 binary file is created into the ~/raspberry-pi-pico/pico_workspace/blink-led/build folder. After mounting the Raspberry Pi Pico, we need to copy the blink-led.uf2 into the mounted RPI-RP2 drive and the Raspberry Pi Pico will automatically reboot itself and should start the onboard led blink.
That’s all about for programming the Raspberry Pi Pico using C/C++ SDK. All these steps are also explained in the video attached below. If you have any questions regarding the project, you can ask them in comment section or use our forum to start a discussion on it.
Complete Project Code
/**
 * Copyright (c) 2020 Raspberry Pi (Trading) Ltd.
 *
 * SPDX-License-Identifier: BSD-3-Clause
*/
#include "pico/stdlib.h"
int main() {
#ifndef PICO_DEFAULT_LED_PIN
#warning blink example requires a board with a regular LED
#else
    const uint LED_PIN = PICO_DEFAULT_LED_PIN;
    gpio_init(LED_PIN);
    gpio_set_dir(LED_PIN, GPIO_OUT);
    while (true) {
        gpio_put(LED_PIN, 1);
        sleep_ms(250);
        gpio_put(LED_PIN, 0);
        sleep_ms(250);
    }
#endif
}Comments
On Ubuntu 18.04 LTS these…
On Ubuntu 18.04 LTS these errors:
...
-- Could NOT find PkgConfig (missing: PKG_CONFIG_EXECUTABLE)
-- Could NOT find LIBUSB (missing: LIBUSB_INCLUDE_DIR)
...
are resolved by issuing this command from terminal:
sudo apt install pkg-config libusb-1.0-0 libusb-1.0-0-dev libusb-dev libusb-1.0-doc -y
I have the following error…
I have the following error when trying to compile picoprobe. I followed the manual installation steps, not the one with the shell script.
---@gvc-mint21:~/---/---/pico/picoprobe/build$ cmake ../
PICO_SDK_PATH is /home/---/---/---/pico/pico-sdk
PICO platform is rp2040.
CMake Error at FreeRTOS_Kernel_import.cmake:57 (message):
Directory '/home/---/---/---/pico/picoprobe/freertos' does not
contain an RP2040 port here: portable/ThirdParty/GCC/RP2040
Call Stack (most recent call first):
CMakeLists.txt:6 (include)
Any idea what I'm missing?
What I'm missing, I know…
What I'm missing, I know... but the real question is why the directory freertos is completely empty? Is there a mistake in the download sequences?

Jan 12 2022.
Unsuccessful attempt to set up for Ubuntu 20.04.
pico_setup.sh failed with an error part way through (same error message as below using the step-by-step procedure shown in this page.)
"picotool cannot be built because libUSB is not found"
libUSB was installed successfully per the step-by-step procedure.
#
I did the manual steps and encountered the point of failure:
~/Desktop/rpi-pico-circuitdigest/pico/picotool/build$ cmake ../
-- The C compiler identification is GNU 9.3.0
-- The CXX compiler identification is GNU 9.3.0
-- Check for working C compiler: /usr/bin/cc
-- Check for working C compiler: /usr/bin/cc -- works
-- Detecting C compiler ABI info
-- Detecting C compiler ABI info - done
-- Detecting C compile features
-- Detecting C compile features - done
-- Check for working CXX compiler: /usr/bin/c++
-- Check for working CXX compiler: /usr/bin/c++ -- works
-- Detecting CXX compiler ABI info
-- Detecting CXX compiler ABI info - done
-- Detecting CXX compile features
-- Detecting CXX compile features - done
Using PICO_SDK_PATH from environment ('/home/username/Desktop/rpi-pico-circuitdigest/pico/pico-sdk')
-- Could NOT find PkgConfig (missing: PKG_CONFIG_EXECUTABLE)
-- Could NOT find LIBUSB (missing: LIBUSB_INCLUDE_DIR)
CMake Error at CMakeLists.txt:34 (message):
picotool cannot be built because libUSB is not found
-- Configuring incomplete, errors occurred!
See also "/home/username/Desktop/rpi-pico-circuitdigest/pico/picotool/build/CMakeFiles/CMakeOutput.log".
~/Desktop/rpi-pico-circuitdigest/pico/picotool/build$