
There are several ways to program AVR microcontrollers. We are programming it with USBASP v2.0 serial programmer. For demonstration we will use ATmega16 Microcontroller and Atmel Studio. We will test the programmer with a blink sketch.
Below are the steps to burn the code into Atmega ICs using USBASP JTAG and Atmel Studio:
- Installing USBASP driver.
- Downloading and Setting up Atmel Studio.
- Setting up External Toolchain in Atmel Studio e.g. WinAVR
- Setting up Atmega16 with oscillator and one LED.
- Building and Uploading Sketch into Atmega16
We will discuss every step in detail. The first step will be installing USBASP driver in Windows10. The same method can also be used to install on other Windows Version.
Step 1: Installing USBASP Driver in Windows 10:
While using JTAG (USBASP), you may be required to install driver if it is not installed automatically. If you don’t install the driver then you won’t be able to find the port of USBASP in Atmel Studio. Download USBASP zip file from this link.
After downloading the driver follow the below steps.
1. Unzip the file downloaded and keep it in desktop (you can keep anywhere).
2. Connect USBASP v2.0 module to your computer. If you don’t know how the USBASP looks like then you can see the below picture.
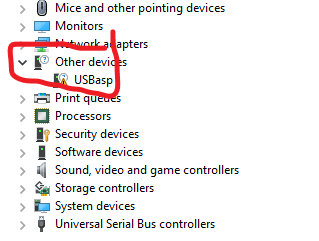
3. Open Device Manager.
4. Now you can locate your connected USBASP Programmer.
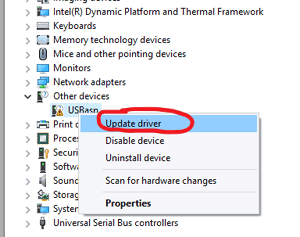
5. Right click on the “USBasp” and choose “Update Driver”.
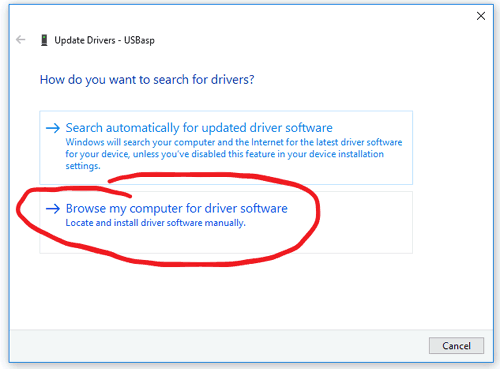
6. Select “Browse my computer for driver software”.
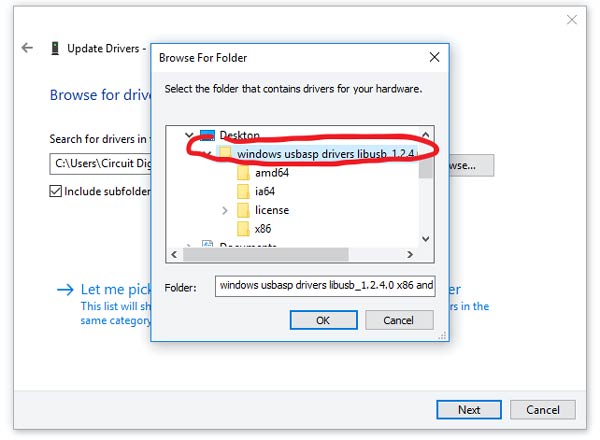
7. Now find or browse the Unzipped USBASP Driver Parent folder and select Open.
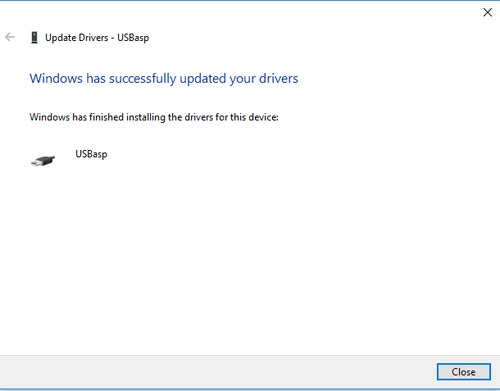
8. If it is successfully installed then you will see message like below and you don’t need to follow the further instructions.
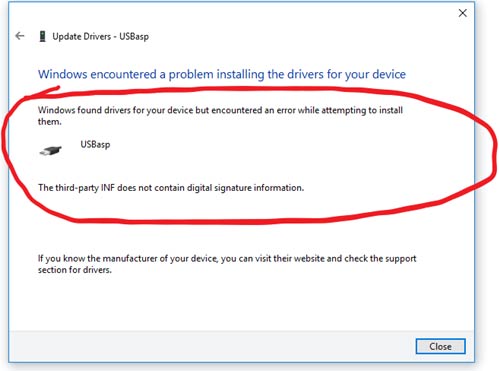
9. If you get the following error as below then you have to Disable Driver Signature Enforcement.
To disable the driver signature follow the below steps:
1. To disable the driver signature, Hold the shift key and while holding the shift key restart your computer.
2. Click on Restart in start bar while still holding the shift key.
3. Now your computer restarts but don’t leave the shift key until you see the “Advanced Options” in blue screen.
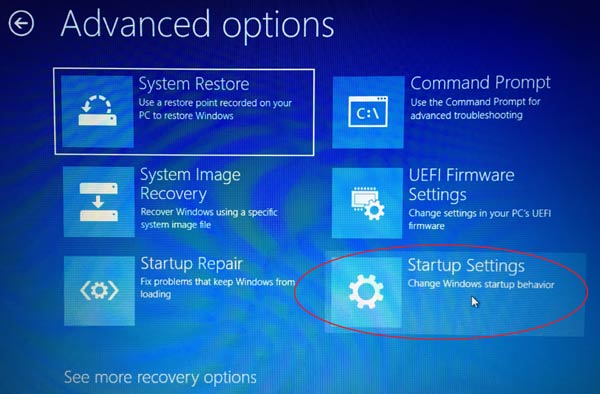
4. Leave the Shift key and Click on “Startup Settings”.
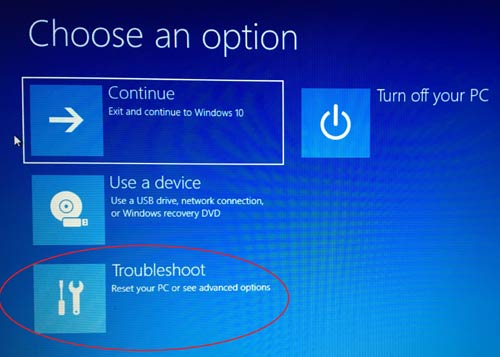
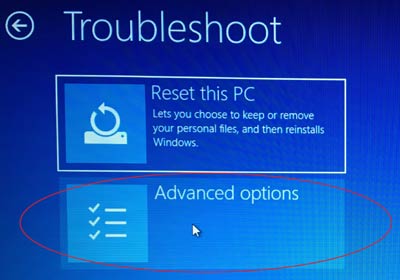
5. Click on “Troubleshoot”
6. Select “Advanced Options”.
7. When you select the Advanced Option, next scree will show and there would be several options and a “Restart” button will be on bottom right side.
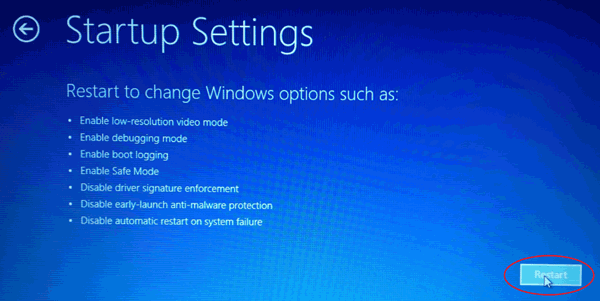
8. Click on the “Restart” button.
9. Wait for windows to start again. After reboot you can see many options.
10. Now this is the final step to disable driver signature. In many options in the list, the 7th option is “Disable Driver Signature Enforcement”.
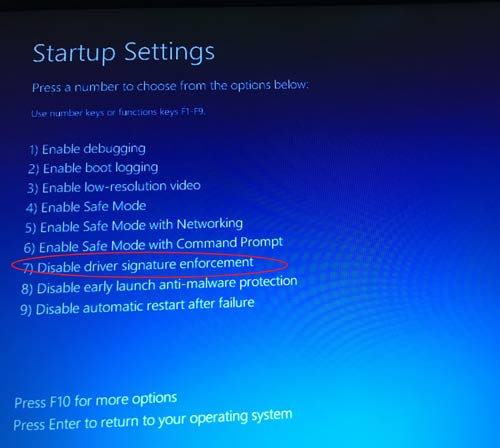
11. To select this option you will need to press the number 7 button on your keyboard. Don’t get confused with F7 button. You simply need to press Number 7 on your computer.
12. After selecting the 7th option your PC will restart. And you have successfully disabled the driver signature.
13. Now simply follow the steps 1-8 above and the USBASP driver will successfully be installed.
Now we have completed the 1st step of Programming the Atmega16. The second step involves setting up Atmel Studio 7.0 for uploading the sketch.
Step 2: Downloading and Setting up Atmel Studio:
Follow the Steps below:
1. Download the Atmel Studio 7.0
2. Also you will need to download “ WinAVR” as the external tool chain to upload the sketch using USBASP. To download use this link.
Now you will need to create a “Blink” project in Atmel Studio 7.0. To do so follow steps.
3. Connect the USBASP v2.0 to your USB port and let it be connected for all the time till you are working on it.
4. Open Atmel Studio.
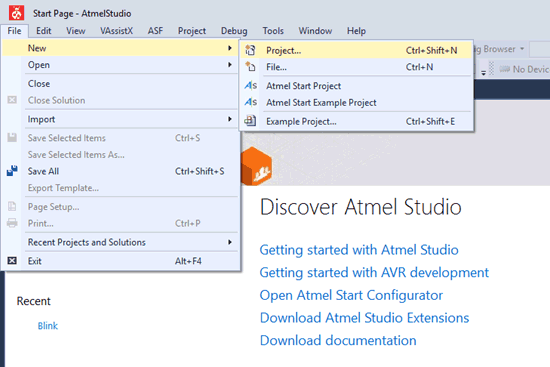
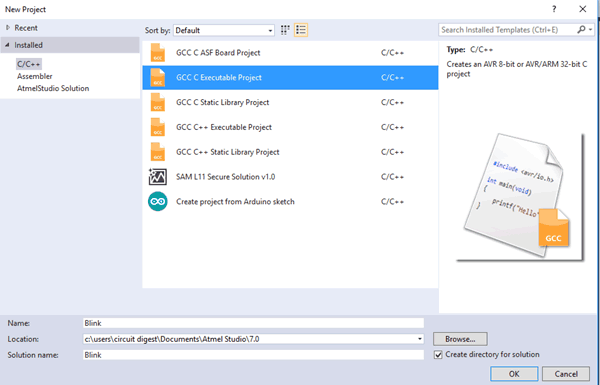
5. Go to “File” and click on “New” and choose “project”.
6. Now Name your project, select project location and choose the compiler as “GCC C Executable Project”. Click on “Ok” and proceed.
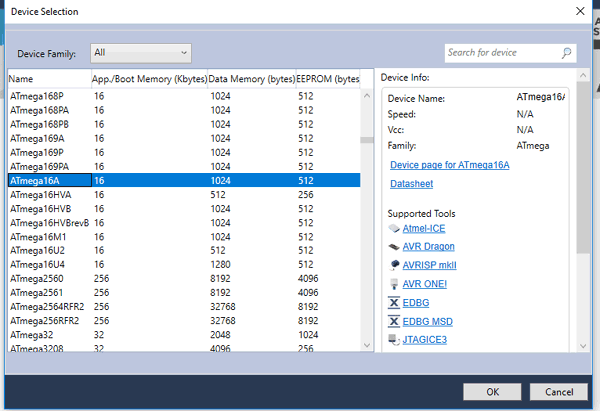
7. Now you will be prompted to choose your microcontroller device. Choose your device in our case its Atmega16A. Select and click on “Ok”. You can also program other Atmega ICs like Atmega8, Atmega32 etc using the same USBASP AVR programmer.
8. Now your main.c file is created where you can write your code. But hold on and follow little more instructions to finish.
After creating your project, the final step would be of creating the external toolchain.
Step 3: Setting up External Toolchain WinAVR in Atmel Studio
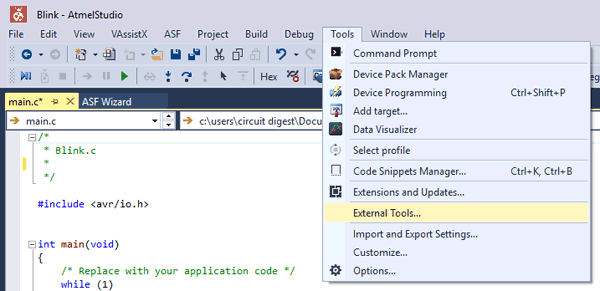
1. Go to “Tools” and choose “External Tools”.
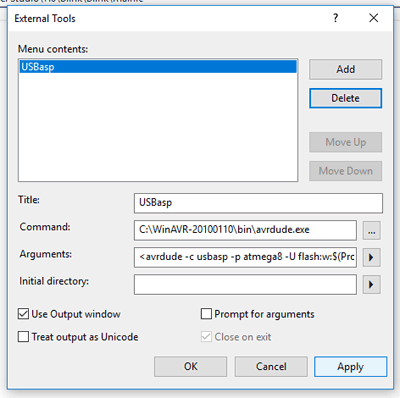
2. You will be prompted with a window where you will need to add your toolchain Name.
3. On “Title”, enter your toolchain name. It can be anything you wish to name it. In my case I chose “USBasp”. Check “Use Output Window” and uncheck “Prompt for arguments” as shown in the snapshot below.
4. Now Enter “Command”. This will be your “avrdude.exe” path. You will get this in the WinAvr installed path. Just find “WinAVR-20100110” in your “C” drive or where your WinAvr is installed.
5. Enter the Arguments. This is the most important step as this argument will be used to pass the specific argument to do defined tasks. Since I am using external toolchain so the argument used is as below,
<avrdude -c usbasp -p atmega8 -U flash:w:$(ProjectDir)Debug\$(TargetName).hex:i>
6. You can find more arguments in this link.
7. Enter above argument in argument section. Leave “Initial directory” as it is.
8. After filling all the details just “Apply” and click on “Ok”.
You have successfully created external toolchain to upload sketch. After creating toolchain we will test by uploading the “blink.c” program. You can find the main.c file at the end of tutorial. Now copy the the main.c in Atmel studio.
Step 4: Setting up Atmega16 with oscillator and one LED
Connect the crystal oscillator and LED to Atmega16. Circuit Diagram to Blink LED with Atmega16 programmed with Atmega USB programmer is given below:


Also you will need to connect the microcontroller and USBASP as mentioned in below circuit:

Step5: Building and Uploading Sketch into Atmega16
1. Save the main.c file.
2. Connect one LED in the PORTA0 pin of Atmega16 as in the picture above.
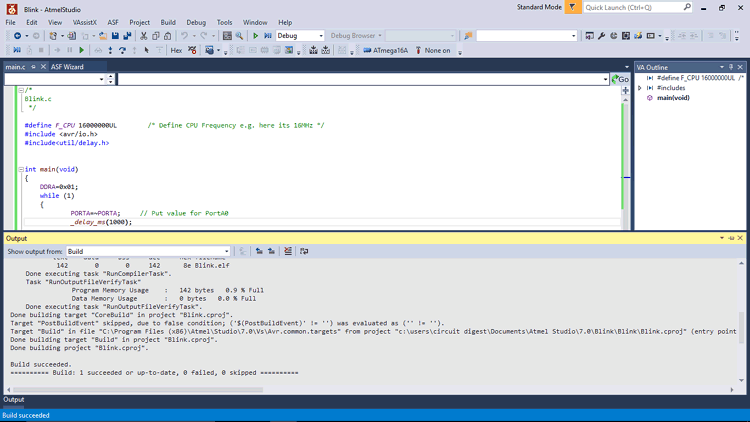
3. Go to “Build” and then choose “Build Blink”.
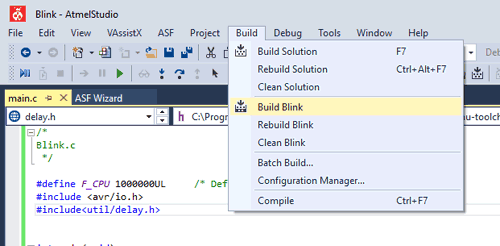
4. If program is correct then you won’t find any errors and you will get the message as below.
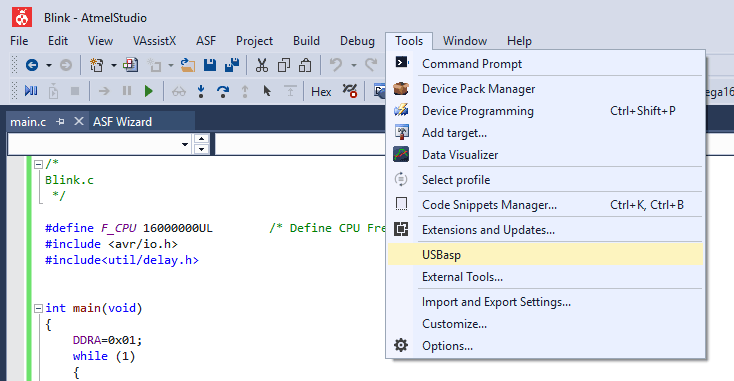
5. Now go to “Tools” and select the created external toolchain. In my case it is “USBasp”. Click on it.
6. If you see the successful message as below then you have successfully uploaded the sketch. If you get any error then just check if you followed all steps a carefully and also check your wiring of USBASP and Atmega16.
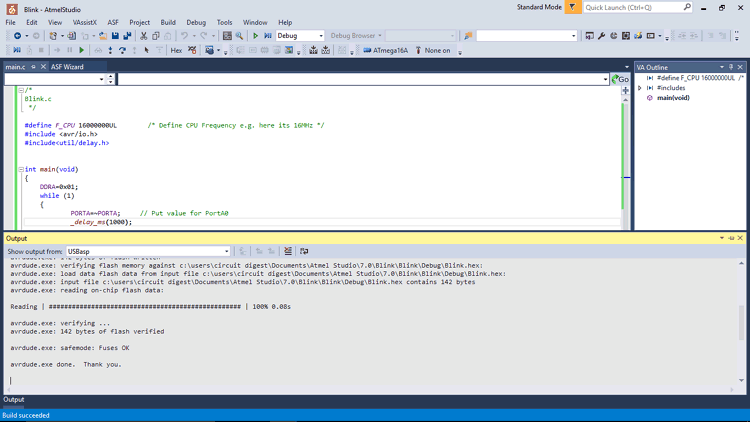
7. Now you can see the LED starts blinking. And you have successfully uploaded the blink program using the USBASP v2.0 and Atmel Studio 7.0. You can use this method and can upload different other sketch using USBASB.
Complete Project Code
/*
Blink.c
*/
#define F_CPU 1000000UL  /* Define CPU Frequency e.g. here its 16MHz */
#include <avr/io.h>
#include<util/delay.h>
int main(void)
{
DDRA=0x01;
    while (1)
    {
   PORTA=~PORTA;     // Put value for PortA0
   _delay_ms(500);
    }
}

Can anyone please help me? I am getting this error:
avrdude.exe: error: programm enable: target doesn't answer. 1
avrdude.exe: initialization failed, rc=-1
avrdude.exe: AVR device initialized and ready to accept instructions
avrdude.exe: Device signature = 0x000000
avrdude.exe: Yikes! Invalid device signature.
avrdude.exe: Expected signature for ATMEGA16 is 1E 94 03
avrdude.exe: NOTE: FLASH memory has been specified, an erase cycle will be performed
To disable this feature, specify the -D option.
avrdude.exe done. Thank you.
My everdude command is:
avrdude -c usbasp -p m16 -P usb -F -B5 -U flash:w:"$(OutDir)Debug\$(TargetName).hex"
I'm using 16Mhz crystal oscillator and 22pF capacitors.