

A few years back, if someone were to tell me a watch could not only tell time but can also measure the heart rate and track calories, I would be blown away by it. Today more than a million people, including me own a wearable fitness tracker and it is forecasted that the market for wearable devices would reach $57,653 millions by 2022. From smart glasses to Diabetes monitoring devices to asset trackers the wearable industry is trying a variety of products to capture the market. So, if you have a wearable product idea and is looking for a way to validate and test it, then you might be lucky because in this article we will review the SensorTile.Box (STEVAL-MKSBOX1V1) from STMicroelectronics which can help you too easily and quickly validate your wireless IoT and wearable device ideas. If you prefer videos over reading, you can scroll to the bottom of this page to find our Sensor Tile Box Review Video.
Sensor Tile Box – Hardware Overview
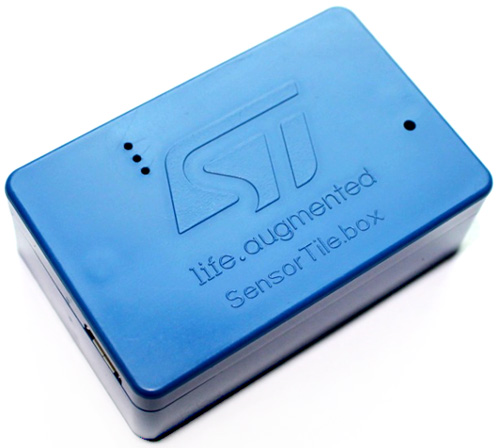
The SesnorTile Box here is packed in with a lot of sensors and a Bluetooth module that readily communicates with a Smartphone application allowing you to build your custom apps as required by your application. The complete development board comes inside this blue box and we also have an additional mounting case if we ever need it.
This evolution board has pretty much everything you would need to build your wearable and wireless IoT applications. It has an Ultra-Low-Power ARM Cortex M4 Microcontroller, Bluetooth 4.2 wireless module for BLE communication, a Temperature sensor, 6-axis Inertial Measurement Unit, two 3-Axis accelerometers, one is an ultra-low-power MEMS sensor and other is a high-resolution sensor with low noise. Then we have a Magnetic sensor, a pressure sensor, an audio sensor i.e. a microphone and a Humidity sensor. On top of this, the module also has its own RTC module, a lithium polymer battery and a SD card inside this blue box to help you start prototyping out of the box. The information of sensors in SensorTile box, with their name and features, are listed in the table below.
| Part Name | Part Number | Features |
| Microcontroller | STM32L4R9 |
|
| Bluetooth v4.2 | SPBTLE-1S |
|
| Temperature Sensor | STTS751 |
|
| 6-Axis IMU Sensor | LM6DSOX |
|
| 3-Axis Accelerometer | LIS2DW12 |
|
| 3-Axis Accelerometer | LIS3DHH |
|
| Magnetic Sensor | LIS2MDL |
|
| Pressure Sensor | LIS2MDL |
|
| Audio Sensor | MP23ABS1 |
|
| Humidity Sensor | HTS221 |
|
Taking a closer look at the box, we can notice that it has a micro-USB port for charging and communication purposes and three LEDs which are BLUE, RED and GREEN. Now let’s unscrew this box and take a look at what is inside.
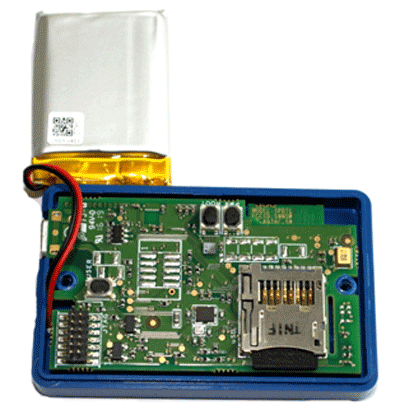
As told earlier you will find a lithium polymer battery and our development module. Under the battery, we have our SD card slot with an 8GB card kingstane card inside it. And then we have three push buttons here, a power button, a boot button, and a user-configurable button. Then we also have pinouts of JTAG here. Then if we pop the board out and turn in around.
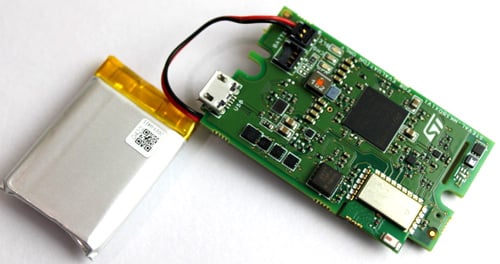
We can find our ARM cortex Microcontroller, Bluetooth Module and all the other sensors that I mentioned earlier. Now by default, your Lipo battery would have not been connected to your module. So you have to connect your battery terminals to this slot here. When that is done pack your module back into the blue box and we are all set.
Sensor Tile Box – Software Overview
Getting started with this board is really easy. We have three options here. The first two options are by using the “ST BLE sensor” Smartphone application developed by STMicroelectronics which can be downloaded for both Android and Apple phones. It has many pre-recorded applications that you can launch on a single click to see how your sensors respond.

The app also has an Expert mode that allows you to create your own custom applications and launch it directly from your phone. The third option is to go fully pro by connecting the board to an STM32 programmer and programming it using the open development environment. For review, purpose lets install the “ST BLE sensor” application on my mobile phone and check what we can do with it.
Getting started with Sensor Tile Box
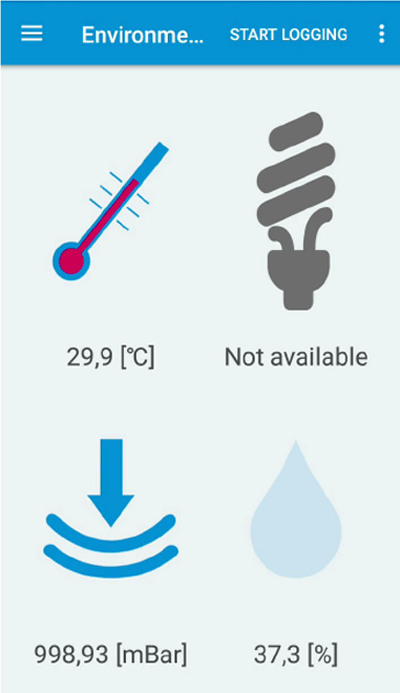
When you power the sensor tile box for the first time you might notice the red LED blinking to indicate the battery is charging. While that is happening lets download and launch the “ST BLE Sensor” application on our mobile phone, then click on “Connect to a device” and you should find our tilebox there. Click on it and wait till your board is connected. You will also notice the blue LED flashing every 3 seconds to indicate an active Bluetooth connection. Once connected your example app should already read and display Temperature, humidity and pressure values from our sensortile box
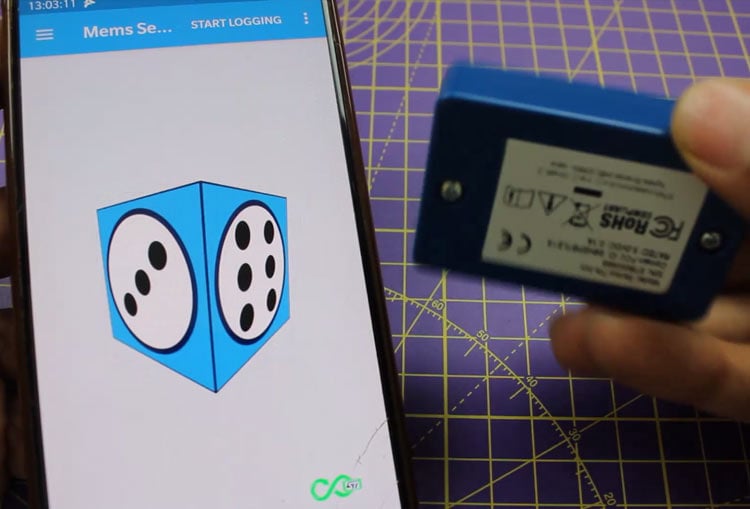
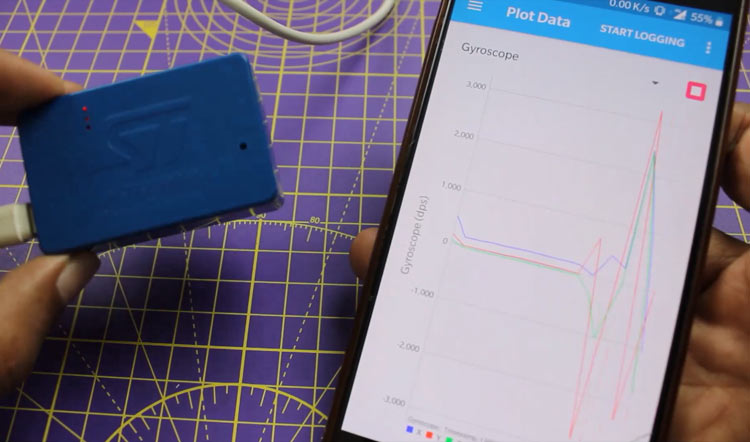
This is just one example program and the application has a lot more for us. To try a different app Just get back to the main screen and click on “create new app”. Here you will find all the example apps for your sensor tile box, let’s try the sensor fusion application for this review purpose. Clinking on the example app will give you a brief description of the app and you just have to click on the “play” button to upload the code to your sensor tile box. Then connect to your box again and your new application will launch.
Fun right!! After you are done playing with all the example applications you can also create your own application for SensotTile box. To do that, scroll to the bottom of your example programs and click on “expert view”. Then select “new app” and select the sensors required for your application. Then choose the type of functions and select how you want to output your data. Save the app and use the play button to deploy your new application. Like that we have already built our first test app.
Once you are done testing your ideas, you can easily start building your actual application with the STM32 Development Environment by making use of the available function packs.
With this, I am concluding my review on the Sensor Tile evolution board. Overall I think this module will be very useful to quickly test and prototype your wearable device ideas. Let me know your thoughts on this board in the comment section and also suggest me an idea if you would like me to try with this box.

Hello. I've been playing with this Sensor Tile Box for a while now and it is an interesting piece of equipment. My original battery lost its ability to fully charge but the batteries are very easy to source. The battery connectors to the board can be found at any electronics distributor once you find the EZmate2P and 3P part numbers on the schematic. One issue I can't seem to resolve is the thing apparently goes to sleep and under some unknown condition (to me, at least) it won't wake up unless both the battery and the USB power are disconnected, wait a while, then reconnect. Unfortunately, the board needs to be removed from the case to do this. Only got the firmware to upgrade from the phone app one time but using the STLink_v2 and cable to the mini header works fast and problem free. I think it's particular about which phone is used for the upgrades.