
DIY Music players are fun to build, and we previously built a few music players using Arduino and a dedicated MP3 module. Now we are using ESP32 to build an interesting audio player, in which you can sound effects by just connecting an extra speaker to ESP32. Here we will use LM386 and a speaker with ESP32 to play music files. The audio output may not be loud but this application shows the ability of the ESP32 board to play audio files.
Components Required
- ESP32
- LM386 Amplifier Module
- 8 ohm Speaker
- Jumper Wires
Circuit Diagram
Circuit Diagram for ESP32 Music Player is given below-

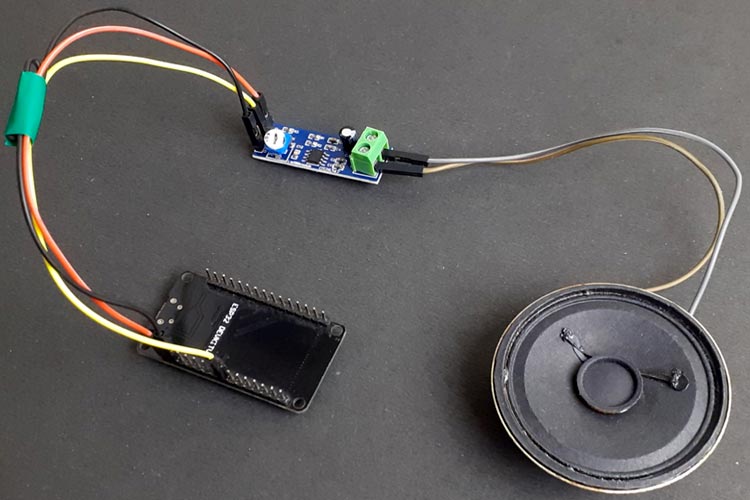
To play sound on ESP32, we need a speaker. The speaker is connected through the LM386 Audio Amplifier module. Vcc and GND pins of the Amplifier Module are connected to VIN and GND of ESP32 while IN pin of the Amplifier module is connected to GPIO 25 pin of ESP32. GPIO 25 is one of the 2 DAC (Digital to Analog Converter) pins.
This is how the complete setup for ESP32 Music Player will look:
LM386 is an audio amplifier IC, you can learn more about LM386 by following the link.
Getting Ready with Audio Files
To play audio sounds on the ESP32 board, we need audio files in .wav format because ESP32 can play an audio file in .wav format only.
So the first step will be getting the file that you want to play on ESP32. After that, download and install the Audacity Audio Editor App. This app will be used to change the file type, Sample Rate, and other properties.
Once the installation is complete, open the Audacity app and then go to file > Open and select the audio file to edit.
The first thing that needed to be changed is the sampling rate. For playing an audio file on ESP32, a sampling rate of 8000 to 16000 will be good as ESP32 doesn’t have much memory. So change the Project Rate to 16000.

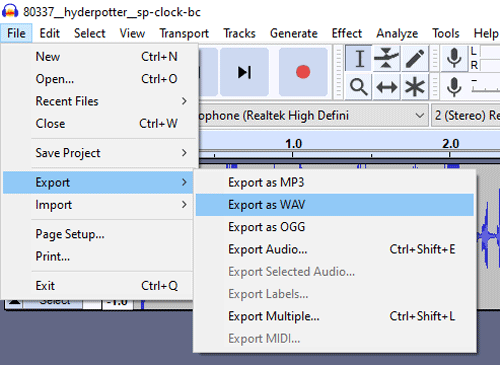
After that, navigate to File > Export > Export as WAV to save the audio file in .wav format.
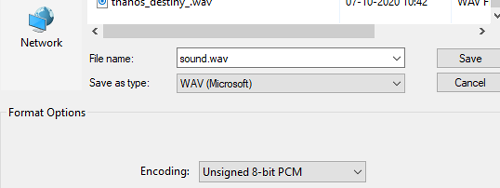
Now in the next window, select WAV (Microsoft) as file type and Unsigned 8-bit PCM as an Encoding format and then click on Save.
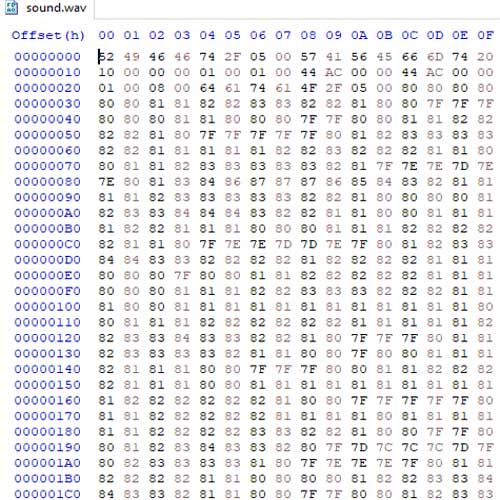
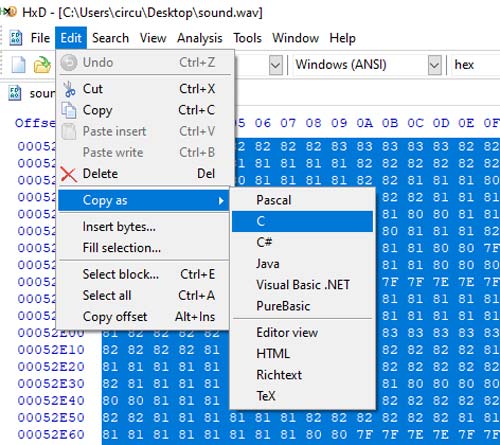
Now we need a Hex Editor app to generate Hex codes for the audio file. So download and install the Hex Editor (HxD) from the given link. After that, open the app, then go to File > open and open the .wav file. This will generate the Hex code for the .wav file.
Then use ctrl+A to select the complete code and then go to Edit > Copy as > C to copy the code in C Language format.
Then paste this code into Arduino IDE.
Code Explanation
The complete code for Contactless ESP32 Audio Player is given at the end of the page. Here we are explaining some important parts of code. In this program, we are going to use the XT DAC Audio library from XTronical. The XT DAC Audio library can be downloaded from here.
So as usual, start the code by including all the required libraries. SoundData.h file contains the Hex code for the .Wav file that is to be played.
#include "SoundData.h"
#include "XT_DAC_Audio.h"
In the next line, create an object of type XT_Wav_Class that is used by the DAC audio class passing .wav data as a parameter. DacAudio, the main player class object in which 25 is the DAC pin number where the amplifier pin is connected.
XT_Wav_Class Sound(sample);
XT_DAC_Audio_Class DacAudio(25,0);
Inside the setup() function, initialize the Serial Monitor at a baud rate of 115200 for debugging purposes.
void setup() {
  Serial.begin(115200);
Inside the loop() function, fill the sound buffer with data and check if the sound is playing or not, if not, play the sound in the loop.
void loop() {
  DacAudio.FillBuffer();
  if(Sound.Playing==false)
    DacAudio.Play(&Sound);
  Serial.println(DemoCounter++);
}
Testing the ESP32 Audio Player
Once the code is ready, connect the speaker to GPIO 25 of ESP32 through LM386 or any other amplifier module. Now connect the ESP32 to Laptop and upload the code. Once the code is uploaded, ESP32 starts playing the Audio. Sound quality can be changed using the potentiometer of the Amplifier module.
Hope you enjoyed the project. A working video and complete code are given below, SoundData.h header file can be downloaded from here. If you have any doubts, leave them in the comment section.
Complete Project Code
#include "SoundData.h"
#include "XT_DAC_Audio.h"
XT_Wav_Class Sound(sample);
XT_DAC_Audio_Class DacAudio(25,0);
uint32_t DemoCounter=0;
void setup() {
  Serial.begin(115200);
}
void loop() {
  DacAudio.FillBuffer();
  if(Sound.Playing==false)
    DacAudio.Play(&Sound);
  Serial.println(DemoCounter++);
}
I followed the instructions and upload the sketch to esp32, all I got is statics on the speaker. Any idea why?