

Face Recognition is getting increasingly popular and most of us are already using it without even realizing it. Be it a simple Facebook Tag suggestion or Snapchat Filter or an advanced airport security surveillance, Face Recognition has already worked its magic in it. China has started using Face Recognition in schools to monitor student’s attendance and behaviors. Retail Stores have started using Face Recognition to categorize their customers and isolate people with history of fraud. With a lot more changes underway, there is no doubt that this technology would be seen everywhere in the near future.
In this tutorial we will learn how we can build our own Face Recognition system using the OpenCV Library on Raspberry Pi. The advantage of installing this system on portable Raspberry Pi is that you can install it anywhere to work it as surveillance system. Like all Face Recognition systems, the tutorial will involve two python scripts, one is a Trainer program which will analyze a set of photos of a particular person and create a dataset (YML File). The second program is the Recognizer program which detects a face and then uses this YML file to recognize the face and mention the person name. Both the programs that we will discuss here are for Raspberry Pi (Linux), but will also work on Windows Computers with very slight changes. We already have series of Tutorials for beginners for getting started with OpenCV, you can check all the OpenCV tutorials here.
Pre-requisites
As told earlier we will be using the OpenCV Library to detect and recognize faces. So make sure you to install OpenCV Library on Pi before proceeding with this tutorial. Also Power your Pi with a 2A adapter and connect it to a display monitor via HDMI cable since we will not be able to get the video output through SSH.
Also I am not going to explain how exactly OpenCV works,if you are interested in learning Image processing then check out this OpenCV basics and advanced Image processing tutorials. You can also learn about contours, Blob Detection etc in this Image Segmentation tutorial.
How Face Recognition Works with OpenCV
Before we start, it is important to understand that Face Detection and Face Recognition are two different things. In Face Detection only the Face of a person is detected the software will have no Idea who that Person is. In Face Recognition the software will not only detect the face but will also recognize the person. Now, it should be clear that we need to perform Face Detection before performing Face Recognition. It would not be possible for me to explain how exactly OpenCV detects a face or any other object for that matter. So, if you are curious to know that you can follow this Object Detection tutorial.
A video feed from a webcam is nothing more than a long sequence of still images being updated one after the other. And each of these images is just a collection of pixels of different values put together in its respective position. So how can a program detect a face from these pixels and further recognize the person in it? There are a lot of algorithms behind it and trying to explain them is beyond the scope of this article, but since we are using the OpenCV library it very simple to perform face Recognition without getting deeper into the concepts
Face Detection using Cascade Classifiers in OpenCV
Only if we are able to detect a face we will able to recognize it or remember it. To detect an object such as face OpenCV uses something called Classifiers. These Classifiers are pre-trained set of data (XML File) which can be used to detect a particular object in our case a face. You can learn more about Face Detection Classifiers here. Apart from detecting Face, Classifiers can detect other objects like nose, eyes, Vehicle License Plate, Smile etc. The list of Case Classifiers can be downloaded from the ZIP file below
Classifiers for Object detection in Python
Alternatively OpenCV also allows you to create your own Classifier which can be used to detect any other object in an Image by Training your Cascade Classifier. In this tutorial we will use a classifier called “haarcascade_frontalface_default.xml” which will detect the face from front position. We will see more on how to use Classifiers in the Programming section.
Installing the Required Packages
Make sure pip is installed and then proceed with installing the following packages.
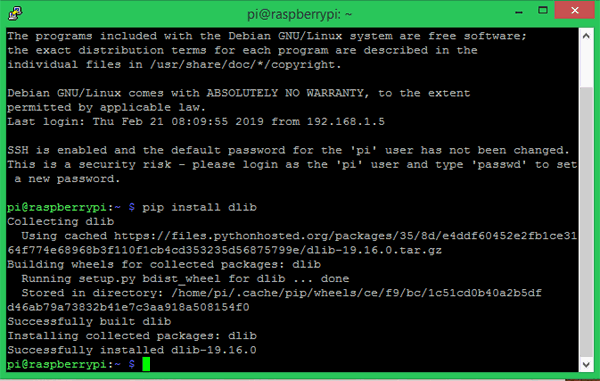
Install dlib: Dlib is a toolkit for real world Machine Learning and data analysis applications. To install dlib, just enter the following command in the terminal
Pip install dlib
This should install dlib and when successful you will get a screen like this.
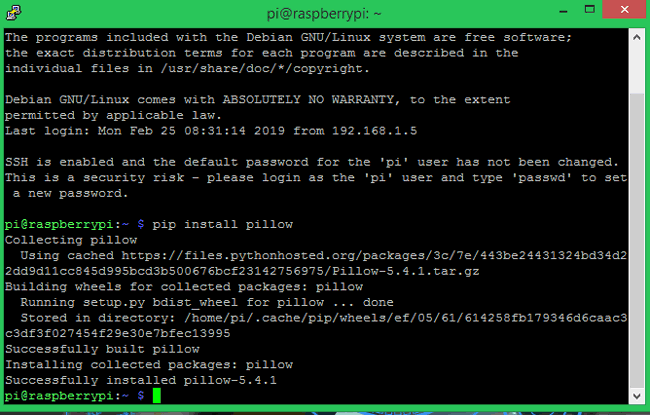
Install pillow: Pillow also known as PIL stands for Python Imaging Library which is used to open, manipulate and save images in different format. To install PIL use the following command
Pip install pillow
Once installed you will get a success message as shown below
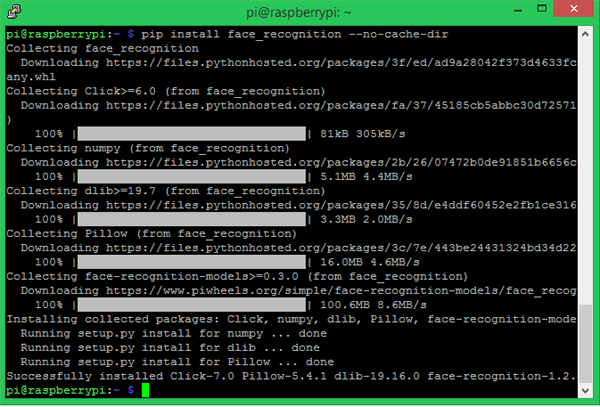
Install face_recognition: The face_recognition library for python is considered to be simplest library to recognize and manipulate faces. We will be using this library to train and recognize faces. To install this library follow the command
Pip install face_recognition –no –cache-dir
When installed successfully you should see a screen like shown below. The library is heavy and most people will face memory exceeding problems hence I have used the “—no –cache-dir” code to install the library without saving the cache files.
Face Recognition Project Folder
Our Project folder will consist of two python program called the Face_Trainner.py and Face_Recog.py. A folder called Face_Images which consist sample images of the persons who has to be recognized. A Classifier file called “haarcascade_frontalface_default.xml” which is used to detect faces. And finally a trainer file called “face-trainner.yml” which will be generated using the Face_Trainner.py program based on the Images present inside the Face_Images Folder. All the files in my project folder are shown below

You can download the same from here.

Setting up Face_Images directory with sample faces
The Face_Images directory shown above should have sub-directories with the name of the person who should be recognized and few sample pictures of them inside it. For the sake of this tutorial I have tried to recognize myself (Aswinth) and Elon Musk. So I have created only two sub-directories with pictures like show below.
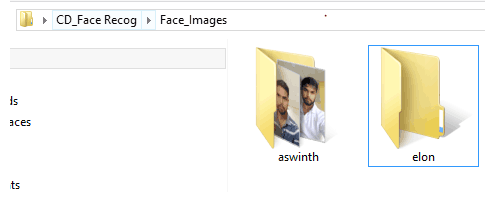
You have to rename the folder with the name of the person whom you are recognizing and also replace the photos with that person. A minimum of 5 photos for each person seems to work well. But, the more the number of persons the slow the program will be.
Face Trainer Program
Let’s take a look at the Face_Traineer.py program. The objective of the program is to open all the Images in the Face_Images directory and search for faces. Once the face is detected it crops the face and converts it to grayscale and then to a numpy array we then finally use the face_recognition library that we installed earlier to train and save it as a file called face-trainner.yml. The data in this file can later be used to recognize the faces. The complete Trainer program is given at the end, here will explain the most important lines.
We begin the program by importing the required modules. The cv2 module is used for Image Processing, the numpy is used to convert images to mathematical equivalents, os module is used to navigate through directories and PIL is used to handle images.
import cv2 #For Image processing
import numpy as np #For converting Images to Numerical array
import os #To handle directories
from PIL import Image #Pillow lib for handling images
Next we have to use the haarcascade_frontalface_default.xml classifier to detect the faces in images. Make sure you have placed this xml file in your project folder else you will face an error. Then we use the recognizer variable to create a Local Binary Pattern Histogram (LBPH) Face Recognizer.
face_cascade = cv2.CascadeClassifier('haarcascade_frontalface_default.xml')
recognizer = cv2.createLBPHFaceRecognizer()
Then we have to get into the Face_Images Directory to access the images inside it. This directory should be placed inside your current working directory (CWD). The following line is used to get into the folder which is placed in the CWD.
Face_Images = os.path.join(os.getcwd(), "Face_Images") #Tell the program where we have saved the face images
We then use for loops to get into each sub-directory of the directory Face_Images and open any files that end with jpeg, jpg or png. The path of each image is stored in a variable called path and the folder name (which will be person’s name) in which the images are placed are stored in a variable called person_name.
for root, dirs, files in os.walk(Face_Images): #go to the face image directory
for file in files: #check every directory in it

if file.endswith("jpeg") or file.endswith("jpg") or file.endswith("png"): #for image files ending with jpeg,jpg or png
path = os.path.join(root, file)
person_name = os.path.basename(root)
If the name of the person has changed we increment a variable called Face_ID, this will help us in having different Face_ID for different person which we will later use to identify the name of the person.
if pev_person_name!=person_name: #Check if the name of person has changed
Face_ID=Face_ID+1 #If yes increment the ID count
pev_person_name = person_name
As we know it is lot easier for OpenCV to work with grayscale images than with colored images since the BGR values can be ignored. So to reduce the values in the image we convert it to grayscale and then also resize image to 550 so that all images stay uniform. Make sure the face in the image is in the middle else the face will be cropped out. Finally convert all these images to numpy array to get a mathematical value for the images. And then use the cascade classifier to detect the faces in the images and store the result in a variable called faces.
Gery_Image = Image.open(path).convert("L") # convert the image to greysclae using Pillow
Crop_Image = Gery_Image.resize( (550,550) , Image.ANTIALIAS) #Crop the Grey Image to 550*550 (Make sure your face is in the center in all image)
Final_Image = np.array(Crop_Image, "uint8")
faces = face_cascade.detectMultiScale(Final_Image, scaleFactor=1.5, minNeighbors=5) #Detect The face in all sample image
Once the face has been detected we will crop that area and consider it as our Region of Interest (ROI). The ROI region will be used to train the face recognizer. We have to append every ROI face within a variable called x_train. Then we provide this ROI values along with the Face ID value to the recognizer which will provide us the training data. The data thus obtained will be saved
for (x,y,w,h) in faces:
roi = Final_Image[y:y+h, x:x+w] #crop the Region of Interest (ROI)
x_train.append(roi)
y_ID.append(Face_ID)

recognizer.train(x_train, np.array(y_ID)) #Create a Matrix of Training data
recognizer.save("face-trainner.yml") #Save the matrix as YML file
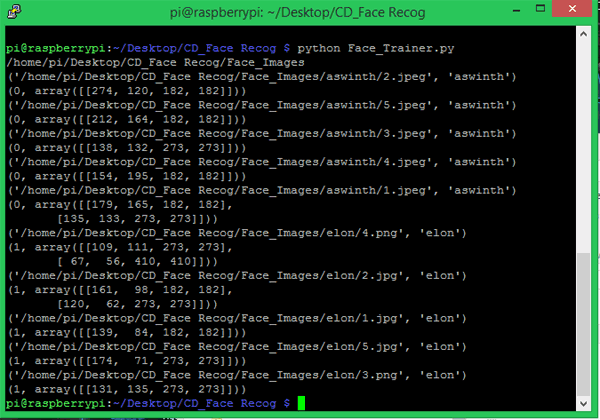
When you compile this program you will find that the face-trainner.yml file gets updated every time. So make sure to compile this program whenever you make any changes to the photos in the Face_Images directory. When compiled you will get the Face ID, path name, person name, and numpy array printed like shown below for debugging purpose.
Face Recognizing Program
Now that we have our trained data ready, we can use it to recognize faces now. In the Face Recognizer program we will get a live video feed from a USB webcam and then convert it to image. Then we have to use our face detection technique to detect for faces in those photos and then compare it with all the Face ID that we have created earlier. If we find a match we can then box the face and write the name of the person who has been recognized. The complete program is again given at the end, the explanation for the same is as follows.
The program shares a lot of similarity with the trainer program, so import the same modules that we used earlier and also use the classifier since we need to perform face detection again.
import cv2 #For Image processing
import numpy as np #For converting Images to Numerical array
import os #To handle directories
from PIL import Image #Pillow lib for handling images
face_cascade = cv2.CascadeClassifier('haarcascade_frontalface_default.xml')
recognizer = cv2.createLBPHFaceRecognizer()
Next in the variable labels, you have to write the name of the persons that were mentioned in the folder. Make sure you follow the same order. In my case it is my name “Aswinth” and “Elon”.
labels = ["Aswinth", "Elon Musk"]
We then have to load the face-trainner.yml file into our program since we will have to use the data from that file to recognize faces.
recognizer.load("face-trainner.yml")
The video feed is obtained from the USB webcam. If you have more than one camera connected replace 0 with 1 to access the secondary camera.
cap = cv2.VideoCapture(0) #Get vidoe feed from the Camera
Next, we break the video into frames (Images) and convert it into grayscale and then detect the faces in the image. Once the faces have been detected we have to crop that area just like we did earlier and save it separately as roi_gray.
ret, img = cap.read() # Break video into frames
gray  = cv2.cvtColor(img, cv2.COLOR_BGR2GRAY) #convert Video frame to Greyscale
faces = face_cascade.detectMultiScale(gray, scaleFactor=1.5, minNeighbors=5) #Recog. faces
for (x, y, w, h) in faces:
roi_gray = gray[y:y+h, x:x+w] #Convert Face to greyscale

id_, conf = recognizer.predict(roi_gray) #recognize the Face
The variable conf tells us how confident the software is recognizing the face. If the confidence level is greater than 80, we get the name of the person using the ID number using the below line of code. Then draw a box around the face of the person and write the name of the person on top of the box.
if conf>=80:
        font = cv2.FONT_HERSHEY_SIMPLEX #Font style for the name
        name = labels[id_] #Get the name from the List using ID number
        cv2.putText(img, name, (x,y), font, 1, (0,0,255), 2)
cv2.rectangle(img,(x,y),(x+w,y+h),(0,255,0),2)
Finally we have to display the video feed that we just analyzed and then break the feed when a wait key (here q) is pressed.
cv2.imshow('Preview',img) #Display the Video
if cv2.waitKey(20) & 0xFF == ord('q'):
   break
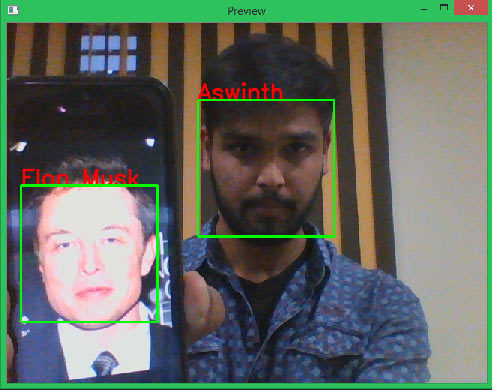
Make sure the Pi is connected to a monitor through HDMI when this program is executed. Run the program and you will find a window popping up with name preview and your video feed in it. If a face is recognized in the video feed you will find a box around it and if your program could recognize the face it will also display the name of the person. We have trained our program to recognize myself and Elon Musk and you can see both getting recognized in the below snap shot.
Once noticeable problem is that the frame rate is very slow. I am getting like one frame for every 3 seconds. The same program when executed on my laptop (with slight changes) gave me very impressive results. Also do not expect it to be very accurate, our trainer data is very simple so the program will not be very reliable. You can check how to use Deep learning to train your dataset to improve accuracy. There are ways to increase FPS (Frame per second) but let us leave that for another tutorial.
Hope you understood the article and were able to implement your own face recognition system. The complete working is shown in the video below. If you have faced any problem, feel free to post them on the comment section below or use the forums for other technical queries.
Complete Project Code
Real Time Face Recognition Program
#Program to Detect the Face and Recognise the Person based on the data from face-trainner.yml

import cv2 #For Image processing
import numpy as np #For converting Images to Numerical array
import os #To handle directories
from PIL import Image #Pillow lib for handling images

labels = ["Aswinth", "Elon Musk"]

face_cascade = cv2.CascadeClassifier('haarcascade_frontalface_default.xml')
recognizer = cv2.createLBPHFaceRecognizer()
recognizer.load("face-trainner.yml")

cap = cv2.VideoCapture(0) #Get vidoe feed from the Camera

while(True):

    ret, img = cap.read() # Break video into frames
    gray  = cv2.cvtColor(img, cv2.COLOR_BGR2GRAY) #convert Video frame to Greyscale
    faces = face_cascade.detectMultiScale(gray, scaleFactor=1.5, minNeighbors=5) #Recog. faces
    for (x, y, w, h) in faces:
    roi_gray = gray[y:y+h, x:x+w] #Convert Face to greyscale

    id_, conf = recognizer.predict(roi_gray) #recognize the Face

    if conf>=80:
    font = cv2.FONT_HERSHEY_SIMPLEX #Font style for the name
    name = labels[id_] #Get the name from the List using ID number
    cv2.putText(img, name, (x,y), font, 1, (0,0,255), 2)

    cv2.rectangle(img,(x,y),(x+w,y+h),(0,255,0),2)

    cv2.imshow('Preview',img) #Display the Video
    if cv2.waitKey(20) & 0xFF == ord('q'):
    break

# When everything done, release the capture
cap.release()
cv2.destroyAllWindows()

Face Detection Trainer Program
#Program to train with the faces and create a YAML file

import cv2 #For Image processing
import numpy as np #For converting Images to Numerical array
import os #To handle directories
from PIL import Image #Pillow lib for handling images

face_cascade = cv2.CascadeClassifier('haarcascade_frontalface_default.xml')
recognizer = cv2.createLBPHFaceRecognizer()

Face_ID = -1
pev_person_name = ""
y_ID = []
x_train = []

Face_Images = os.path.join(os.getcwd(), "Face_Images") #Tell the program where we have saved the face images
print (Face_Images)

for root, dirs, files in os.walk(Face_Images): #go to the face image directory
for file in files: #check every directory in it
if file.endswith("jpeg") or file.endswith("jpg") or file.endswith("png"): #for image files ending with jpeg,jpg or png
path = os.path.join(root, file)
person_name = os.path.basename(root)
print(path, person_name)


if pev_person_name!=person_name: #Check if the name of person has changed
Face_ID=Face_ID+1 #If yes increment the ID count
pev_person_name = person_name


Gery_Image = Image.open(path).convert("L") # convert the image to greysclae using Pillow
Crop_Image = Gery_Image.resize( (550,550) , Image.ANTIALIAS) #Crop the Grey Image to 550*550 (Make sure your face is in the center in all image)
Final_Image = np.array(Crop_Image, "uint8")
#print(Numpy_Image)
faces = face_cascade.detectMultiScale(Final_Image, scaleFactor=1.5, minNeighbors=5) #Detect The face in all sample image
print (Face_ID,faces)

for (x,y,w,h) in faces:
roi = Final_Image[y:y+h, x:x+w] #crop the Region of Interest (ROI)
x_train.append(roi)
y_ID.append(Face_ID)

recognizer.train(x_train, np.array(y_ID)) #Create a Matrix of Training data
recognizer.save("face-trainner.yml") #Save the matrix as YML file
Comments
What is your image folder name and image name?
I'm having the same issues it says that empty face training data. I copied the name of the original image so i didnt have to change it at the code but once i started the system it start to hang and close immediately. It cannot process my image eventhough I have change my image to jpg fromm jpeg because the original image is in jpg. It shows 0% when processing my image
When I train the face data the array showws (0,0,0) it shows no data... so how caan i fix this
python Face_Trainer.py
Traceback (most recent call last):
File "Face_Trainer.py", line 9, in <module>
recognizer = cv2.createLBPHFaceRecognizer()
AttributeError: 'module' object has no attribute 'createLBPHFaceRecognizer'
I had same problem did you solved it ?
I also have the same problem. Did you already solve it? If you did solve it, please tell me how to fix this. TQ
try using this method:
first add this to command or terminal:
python -m pip install --user opencv-contrib-python
then use this line in your code instead of "recognizer":
recognizer=cv2.face.LBPHFaceRecognizer_create() And then you will be face with another problem:)
which you can solve it by changing the:
recognizer.load("face-trainner.yml")
to:
recognizer.read("face-trainner.yml")
hey when i used the command to on my terminal it said "
ERROR: Could not find a version that satisfies the requirement opencv-contrib-python (from versions: none)
ERROR: No matching distribution found for opencv-contrib-python
"
Traceback (most recent call last):
File "Face_Trainer.py", line 9, in <module>
recognizer = cv2.createLBPHFaceRecognizer()
AttributeError: 'module' object has no attribute 'createLBPHFaceRecognizer'
PLEASE HELP ME SOLVE THIS
Traceback (most recent call last):
File "/home/pi/.local/lib/python3.7/site-packages/cv2/__init__.py", line 3, in <module>
from .cv2 import *
ModuleNotFoundError: No module named 'thonny.plugins.cpython.cv2'
import importlib
from .cv2 import *
from .data import * //////This line error
# wildcard import above does not import "private" variables like __version__
# this makes them available
globals().update(importlib.import_module('cv2.cv2').__dict__)

I am getting an error that says empty training data. How can I fix this?
I have 20 images in one of the folders and 12 in the other.