
With a boom in IoT field many companies started to design their operating systems exclusively for IoT applications. Microsoft is one of the companies who already released Windows 10 IoT core and it is quiet popular among the hobbyists and industries. So, in this tutorial we will see how to install Windows 10 IoT core in Raspberry Pi and will run a demo application.
What is Windows 10 IoT core and how it is different from Windows 10?
Windows 10 IoT core is the smallest version of Windows 10 designed to help you build IoT connected things. This lets you build fun projects like an old-school radio or some experiments that run on the international space station or professional devices such as gateways and factory line controllers for cars.
The journey begins with a prototype board, all you need is a board (Raspberry Pi), an SD card and power with no extra monitor or keyboard. Windows 10 IoT core can be downloaded and installed for the IoT dashboard running on your computer or laptop, which we will learn later in this article. After installation of Windows 10 IoT core OS just power on the Raspberry pi board and your board will automatically connect to your network and then to your Windows PC. You can write custom application in Visual Studio and when you are ready, your code will be pushed down to the board and can be debugged remotely.
Windows 10 IoT has a vibrant community with lots of sample code and projects so you can learn how to work with the hardware to bring your prototype to life. Windows 10 IoT core is industry grade and robust. Being a version of Windows 10 it has enterprise proven security and it is easy to scale. It provides instant Azure connectivity using your own custom hardware or you can choose from hundreds of standard Market boards and can develop your own custom IoT solution whether you just want to build something for fun or looking to build a commercial product.
Hardware Requirements
- Raspberry Pi 2 or above
- 8GB or larger
- SD card reader
- HDMI cable
- 5V 2A microUSB power supply
- HDMI Monitor
- Mouse and (Optional) USB keyboard
Installing Windows 10 IoT Core on Raspberry Pi
1. First, you have to download Windows 10 IoT core dashboard in your laptop or PC. We will flash the core in the SD card with the help of this dashboard. You can download the setup for the Dashboard from the link. After downloading the setup, install it in your laptop. It will take few minutes to finish installing.
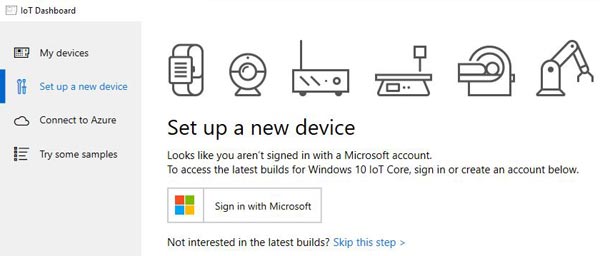
2. Now, we have to setup our device. Open the Dashboard and Click on Set up a new device from the left panel of the Dashboard. If you have a Microsoft account then sign in to it, else click on Skip this step.
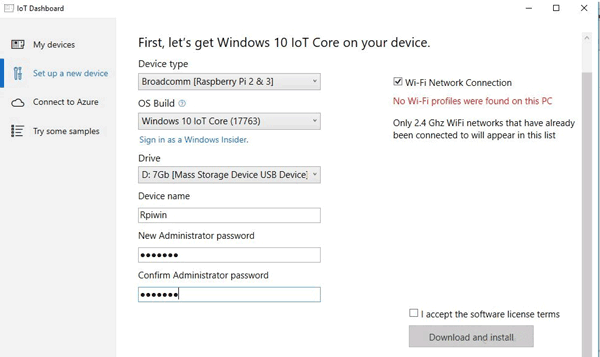
3. Put the SD card in the card reader and plug it in your laptop. Choose the Device type as Broadcomm, OS build as Windows 10 Iot core. Then choose the SD card drive, give a device name and fill the password that you want, as shown in the below snapshot.
Now, hit the Download and install button. It will take time to download depending on your internet speed.
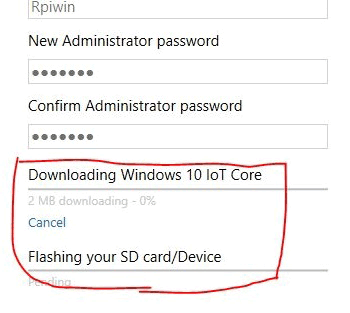
After clicking on Download and install button, you will see below Progress bar for Downloading and Flashing:
4. After flashing is finished. Remove the SD card from your PC and put it into your Raspberry Pi board. Connect the Raspberry pi with Monitor using HDMI cable and power it on. It will take few minutes to setup the windows. Follow the instructions displays on the monitor.
5. Now, you will see the Windows 10 IoT Core device home page. As shown below. You can find some important informations on this page like IP address of the Pi, connected devices, etc.

There are four menu tabs at the left of the panel: Device info, Command line, Browser, and Tutorials. In addition, there is a Settings menu at bottom left corner. You can explore all these tabs for more information.
This one time setup using monitor is finished. Now, you can control your Raspberry pi using IoT dashboard in your laptop.
Connect with Raspberry Pi using IoT Dashboard on Computer
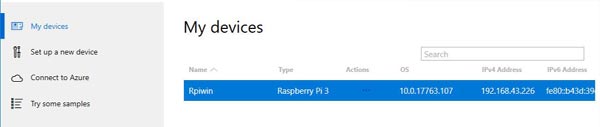
1. Open the IoT dashboard on your laptop and click on My devices. You will see your device here in the list. Make sure you shared the same Wi-Fi network with your laptop and Raspberry pi.
If your device is not in the list then restart the Raspberry pi and check the My devices list.
2. Double click on the listed device and then click on Open windows device portal in browser.
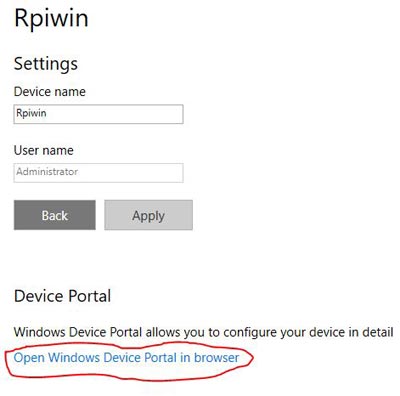
3. A tab will open in your web browser asking for the credentials of your Raspberry pi. Fill the Username as Administrator and password that you have filled initially in the setup.
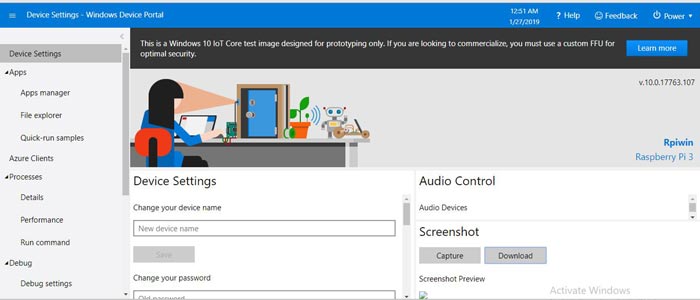
You will see something like this and can access all the functionalities of your raspberry pi from left panel of the page.
4. Now, we will see a demo application by running a built-in example code. Click on Quick-run samples under the Apps option. You will see four example code here, as shown below.
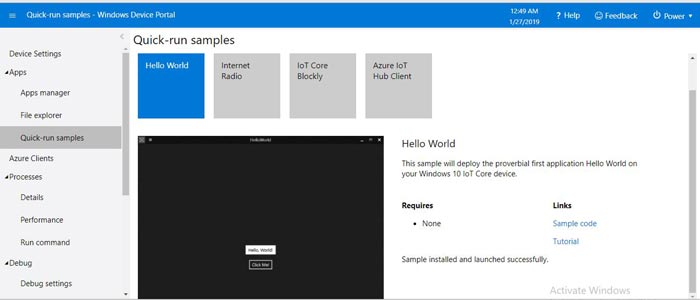
5. For this tutorial, we will deploy the Hello world example in the Pi. Click on Hello world and then click on Deploy and run. After few seconds, a window will appear on the monitor screen, as shown below.

You can explore other examples and can write your own IoT Application too. To know how to build applications for the Windows 10 IoT core, follow the link.
Also check the demonstration video given below.
Comments
After partetion did you
After partetion did you farmat the card completly? Makesure there are no more partetion. May be try with different Pi, Also what version of Pi are you using?
Pi2 seems to be trouble some for this purpose

I have tried following the above instructions at least 10 times. After the SD card is flashed, I get message saying the "G drive needs to be formatted. Proceed?" On some attempts, I have ignored this, on other attempts I have proceeded with this format. It appears that this process creates several partitions on the SD drive, which I believe may be the root cause of my problems. Regardless whether I format the G drive (after it is prompted), I get the same end result when I plug the card into my Raspberry Pi: nothing but an RGB color screen appears when I try to boot up my Raspberry Pi. What do I need to do to fix this so that it works as stated above?