
In this tutorial, we will learn about ESP-12 Wi-Fi module and how to program it using Arduino IDE. Then we will write a program to blink an LED with ESP8266-12.
What is ESP8266 and NodeMCU?
Most people call ESP8266 as a WIFI module, but it is actually a microcontroller. ESP8266 is the name of the microcontroller developed by Espressif Systems which is a company based out of shanghai. This microcontroller has the ability to perform WIFI related activities hence it is widely used as a WIFI module.
There are many types of ESP8266 module available ranging from ESP8266-01 to ESP8266-12. The one that we are using in the tutorial is the ESP8266-12. We already covered ESP8266-01 in our previous article. However all the ESP modules have only one type of ESP processor, what differs is only the type of breakout bard used. The breakout board of ESP8266-01 will have only 2 GPIO pins whereas ESP-12 has 16 GPIO Pins.
Many equipments around us cannot be connected to internet on its own. So, this chip enables these equipment to connect with internet and make them IoT devices. Now, you can easily open your doors for IoT Projects with the help of this module. This low cost, small size module could do wonders and is really simple and easy to use, provided we follow the right steps.
Now, Coming to What is NodeMCU??
NodeMCU is a Firmware on ESP8266. It is ESP-12 and it is basically a System on Chip (SoC).It has Lua based firmware which is used to develop IoT based applications.
It is easy to work on this inexpensive SoC and make our device smart. It has analog and digital pins, which we can use to interface our sensors and can get the data over internet.
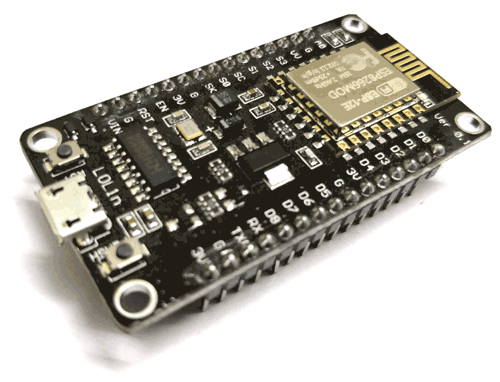
NodeMCU ESP-12:
PIN Configuration:
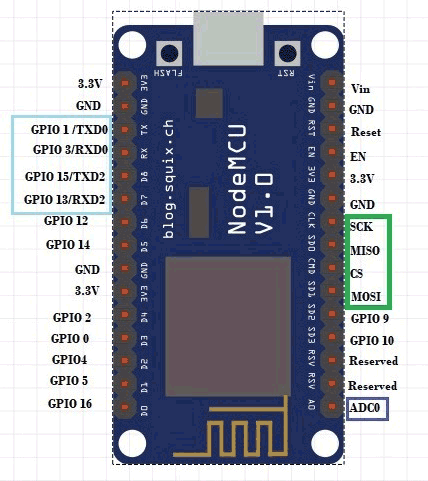
Pin Description:
GPIO Pins: NodeMCU has 16 GPIO pins as shown in above diagram which can be used to control other peripheral devices like sensors, LEDs, switches etc. These pins can also be used as PWM pins.
ADC (Analog to Digital Converter) Pin: It has one ADC channel and can be accessed through pin A0.
SPI Pins: There are 4 pins (SCK, MISO, MOSI etc) available for SPI communication as shown in green rectangle in diagram.
I2C Pins: It has I2C functionality support but due to internal use of these pins, you have to find which pin is I2C.
UART Pins: It has two UART interfaces. Since, RXD0 and TXD0 is used to upload codes to board, we cannot use them while programming this module. We can use RXD1 and TXD1 anytime.
The complete specification of this module is given below in the table:
|
Operating Voltage |
5V |
|
Flash Memory |
4Mb |
|
Processor |
L106 32-bit |
|
Processor speed |
80-160MHz |
|
RAM |
32K + 80K |
|
GPIOs |
16 |
|
ADC |
1, 10-bit |
This tutorial aims to introduce you to NodeMCU ESP8266-12 module and help you get started with it. Also, we will see how to program this module using Arduino IDE and we will run a couple of test programs also.
Why NodeMCU ESP-12 over ESP-01??
The ESP-01 is the first Wi-Fi module of ESP8266 family. This little board has only 2 GPIOs, but this doesn’t mean that its performance is not up to the mark. It can also work standalone and control 1-2 devices. It runs on 3.3v.

You can check our all ESP8266 projects here.
The NodeMCU has the ESP-12 into a feature-filled little dev board. The NodeMCU has all the ESP-12 pins, it also includes a micro USB connector with onboard programmer IC, voltage regulator, reset and program buttons and LEDs. It also has breadboard compatible headers coming out of it.
If you want to learn about ESP8266 family, NodeMCU is the best choice to start with.
Programming the NodeMCU using Arduino IDE:
Let us Set up the Arduino IDE for ESP8266-12 module and program it to blink a LED light.
Step 1: If you do not have an Arduino IDE download it and install it from here. (make sure the Arduino Version is 1.6.5 or above)
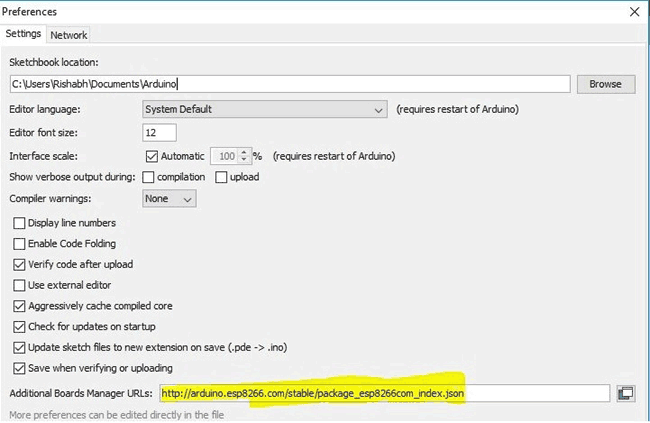
Step 2: Go to File -> Preferences to open the below dialog box. In the “Additional Board managers URL” paste the below link as shown in the image. Then press OK
http://arduino.esp8266.com/stable/package_esp8266com_index.json
Step 3: Now, go to Tool -> Boards -> Board Managers. Search for ESP8266 by esp8266 community and click on install as shown in the below image
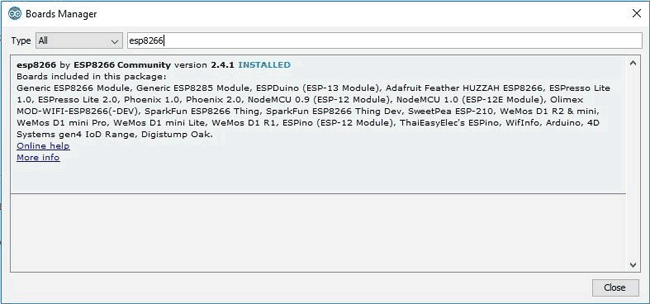
Your installation will take some time, once completed we can proceed to our next step.
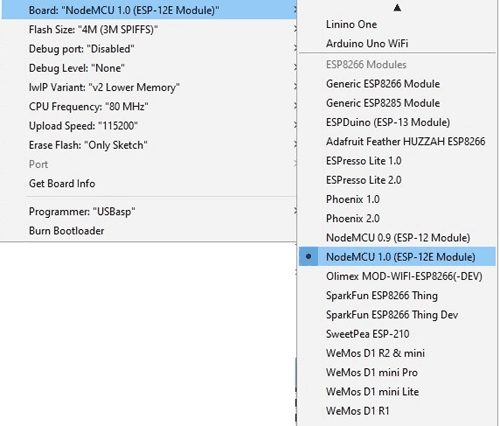
Step 4: Now, go to Tools -> Boards -> NodeMCU. You should see the below screen.
Let’s get onboard .!

Blink LED with NodeMCU ESP-12:
Below is the circuit diagram to connect LED with NodeMCU ESP-12:

We don’t need any programmer to program our board. We just need a USB cable and here we go.
Now, we upload blink program using Arduino IDE to NodeMCU. Pin D0 has inbuilt LED, so we can use LED_BUILTIN function to take output on D0 or we can use any other GPIO by specifying D1, D2 etc.
Complete code is given below, just connect the NodeMCU with USB cable and hit upload button.
Complete Project Code
void setup() {

  pinMode(D0, OUTPUT);
void loop() {

  digitalWrite(D0, LOW);   // Turn the LED on (Note that LOW is the voltage level

                                    // but actually the LED is on; this is because

                                    // it is active low on the ESP-01)

  delay(1000);                      // Wait for a second

  digitalWrite(D0, HIGH);  // Turn the LED off by making the voltage HIGH

  delay(2000);                      // Wait for two seconds (to demonstrate the active low LED)

}
Comments
esp-12 blink a LED
you forgot the closing curly bracket on setup, and had to hand copy the URL to put in preferences. Other than that, the program works fine.

You forgot closing bracket following setup.